![]()
Do you need to change the size of your uploaded logo in the Storefront theme?
If it is too big or too small, then read on.
In this post, I am going to walk you through how to change the logo of the Storefront theme.
It is worth mentioning that logos reveal your site identity.
WooCommerce Storefront Logo Size
In the past, cowboys branded cattle to mark ownership.
This means that your logo should do the same thing and represent your entire brand. Apart from your online shop, you can imprint your logo on your products and business card.
The size of your logo matters a lot as a logo with a good size can pique the curiosity of your potential customers, prompting them to at least look, and hopefully purchase your products.
A perfectly designed logo distinguishes you from the competition. From time to time, you may decide to redesign the logo of your store and perhaps update their look or reflect some other corporate change. At times, size is not put into consideration and you may have to constantly resize the image each time you redesign the logo.
Fortunately, you can use CSS to change the size of your logo. First, you need to know how you can add a logo to your site.
Steps to add a Logo to the Storefront Theme
Here are the simple steps that you need to follow:
- Log in to access the WordPress dashboard.
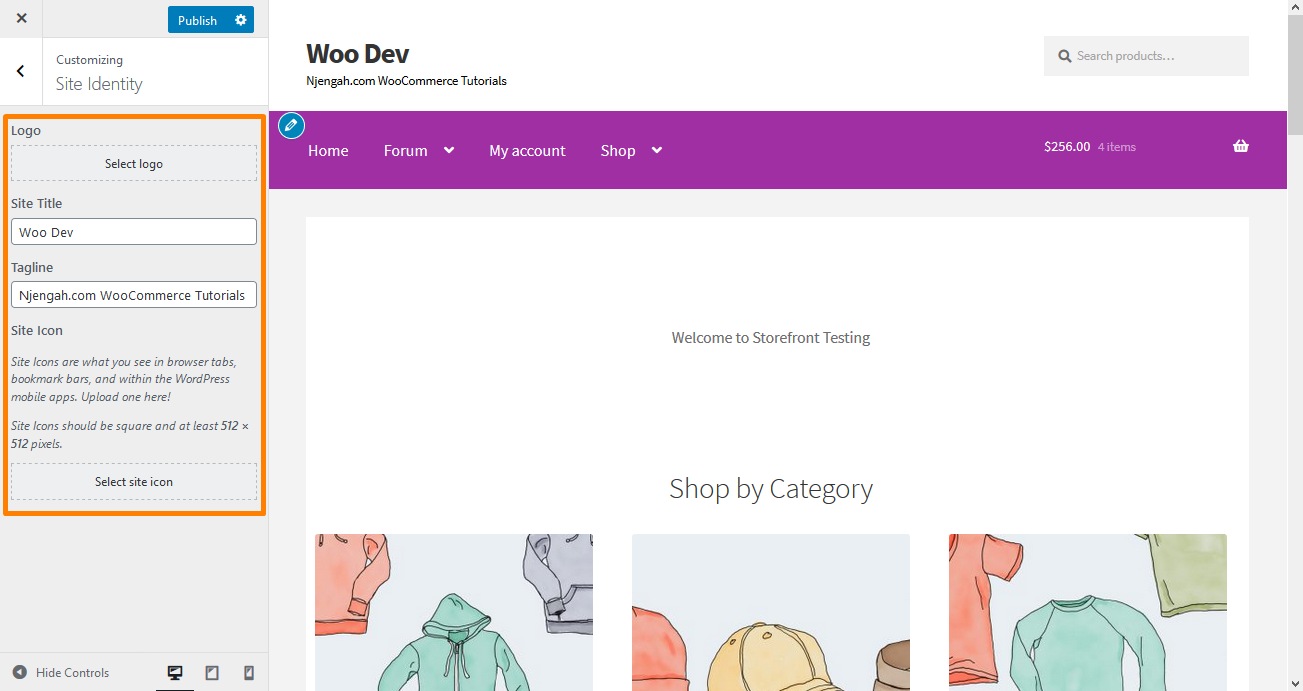
- Under the appearance, menu click on the Appearance > Customize menu to open the customizer.
- You will see that the customizer has a tabular menu on the left side. Here, you will see a list of the various options available for customization.
- Click on the site identity option. This will display more options that include adding the current logo, site title, tagline, and site icon.
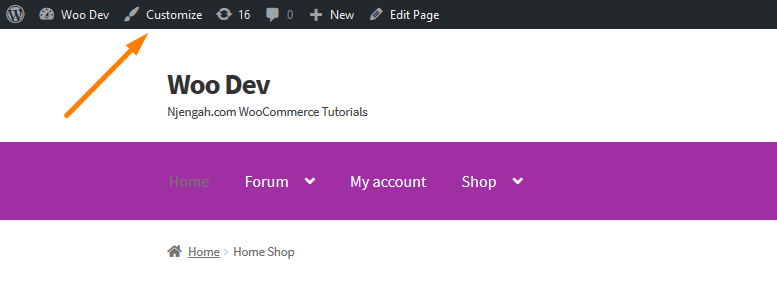
- Additionally, you can access the same menu from the WordPress admin top bar as shown below:
- Now you can use the ‘Select logo’ button to upload the header background image on the storefront header.
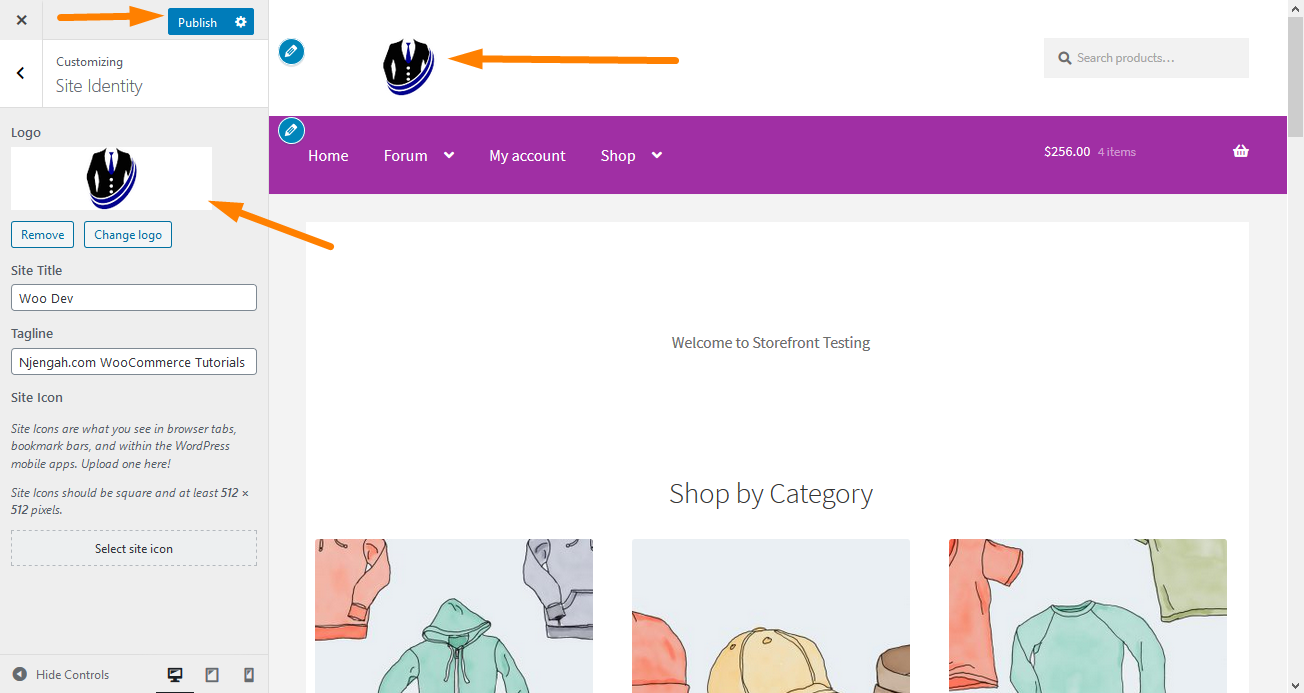
- Click on Publish.
Steps to Resize the Logo of the Storefront Theme Using CSS
- Inspect the element
Right-click anywhere in your browser and you will see something like ‘Inspect’ or ‘Inspect Element’.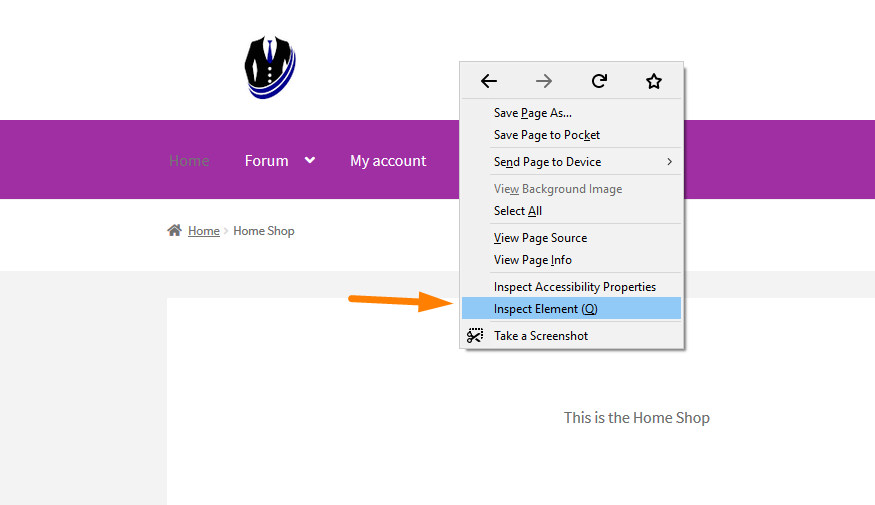
- Click the element highlighter and take note of the logo element
After clicking on that, this will bring up the console containing the various elements of the page on the left and the settings for those elements on the right.
Hover your mouse over the logo and take note of the text that pops up. This is the CSS class that we need to target to change the size of the logo.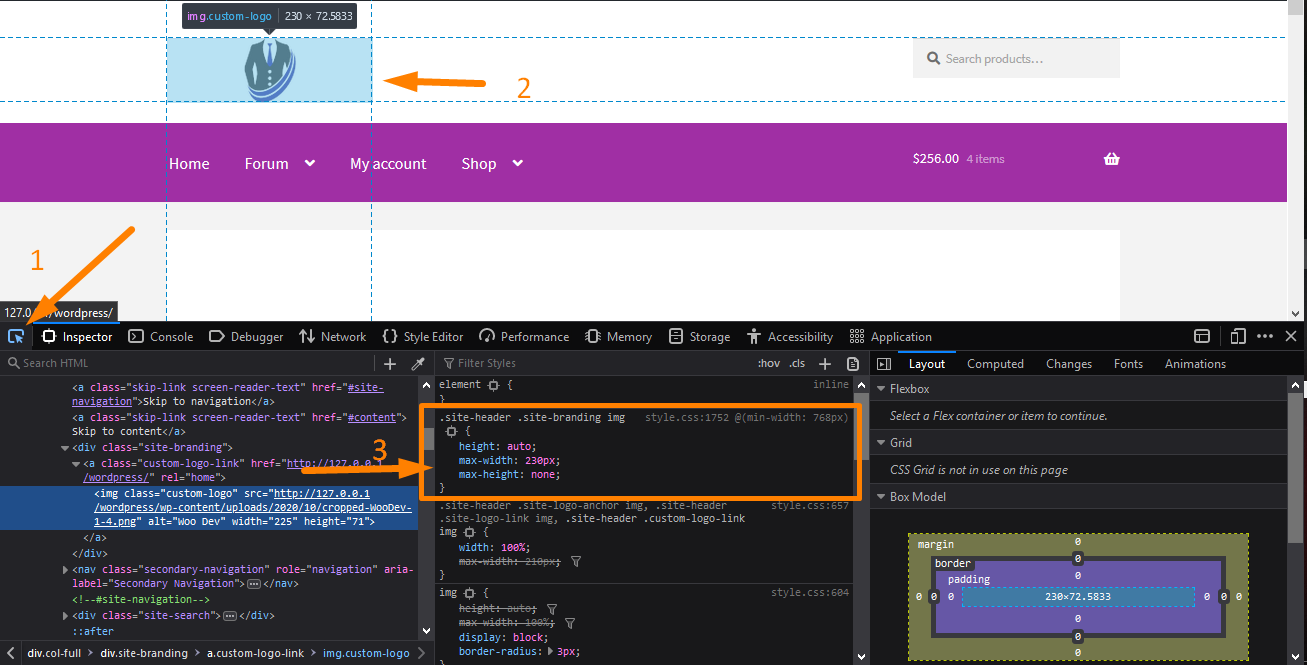
- Adding the rule
The remaining part is to copy/paste into the “Additional CSS” section of your Storefront theme customization interface. To do this:
- Log into your WordPress site and access the Dashboard as the admin user.
- From the Dashboard menu, click on Appearance Menu > Customize.
- Navigate down to Additional CSS in the left sidebar that appears.
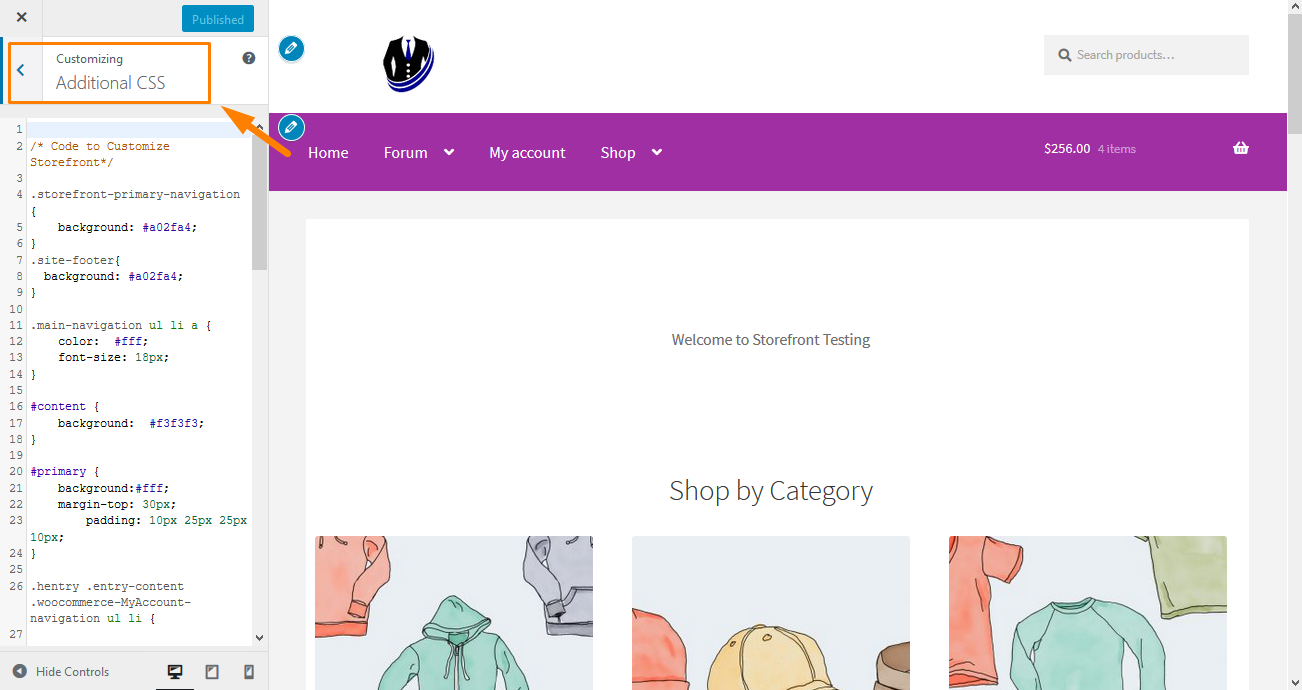
- Add the CSS rule as shown below:
.site-header .site-branding img{

            max-height: 40px !important;

}
- Once you’ve added the code, you should see the logo change size. You can adjust the max-height value to get the desired size of your logo.
Conclusion
In this post, I have highlighted adding a logo to your Storefront theme to represent your entire brand.
Additionally, I have shown you how you can add a logo to your site.
The size of your logo matters a lot and I have shown you some simple steps to change the size of the logo using CSS code.
This is because the Storefront theme does not have the settings to change the logo size in the theme customizer.

Joe is an experienced full-stack web developer with a decade of industry experience in the LAMP & MERN stacks, WordPress, WooCommerce, and JavaScript – (diverse portfolio). He has a passion for creating elegant and user-friendly solutions and thrives in collaborative environments. In his spare time, he enjoys exploring new tech trends, tinkering with new tools, and contributing to open-source projects. You can hire me here for your next project.
Similar Articles
- How to Change WooCommerce Storefront Featured Image Size
- 80+ Tricks to Customize Storefront WooCommerce Theme: The Ultimate Storefront Theme Customization Guide
- How to Upload Theme to WordPress Step-by-Step Guide
- How to Count Items Added to Cart WooCommerce Cart Count Code
- How to Add Storefront Theme Header Background Image
- How to Change Proceed To Checkout Text In WooCommerce
- How to Hide Best Sellers WooCommerce Storefront Frontpage
- How to Change the Size of Mobile Menu Button Storefront Theme
- How to Change WooCommerce Storefront Footer Height
- How to Adjust WooCommerce Storefront Height of Header
- How to Change Menu Color WooCommerce Storefront
- How to Change Main Menu Font Size Storefront Theme
- How to Remove Header WooCommerce Storefront Theme
- How to Change WooCommerce Email Footer Text
- How to Set up WooCommerce Storefront Footer Widgets
- How to Change Button Color Storefront Theme
- How to Remove Page Title WooCommerce Storefront Theme