 The footer of any site refers to the bottom section of a web page in the web design terminology. Here, you can add information like copyright notices, links to the privacy policy, credits, etc. Moreover, it may also contain code and scripts that the theme developer would want to include on the page but after loading the rest of the page content.
A footer usually appears on all pages throughout your site. Additionally, this area may also include your contact information and links to pages such as an affiliate page, a sponsor’s page, an advertising page, or even the contact page.
In the Storefront theme, development, the footer area of a website is usually defined in the template file footer.php. Additionally, the footer area contains a widgetized area with multiple columns that you can use to add WordPress widgets.
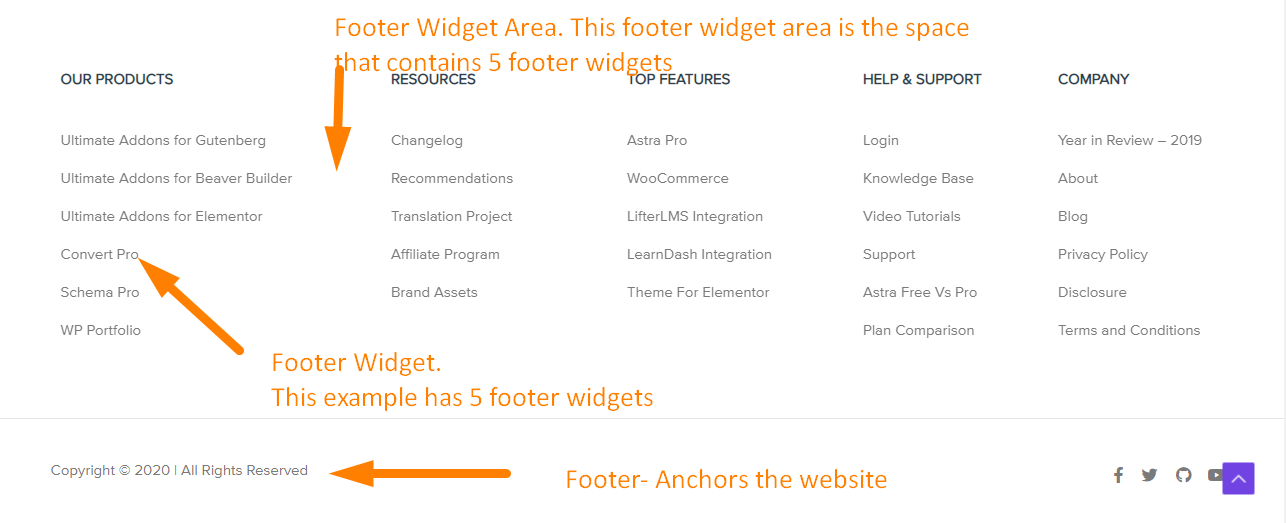
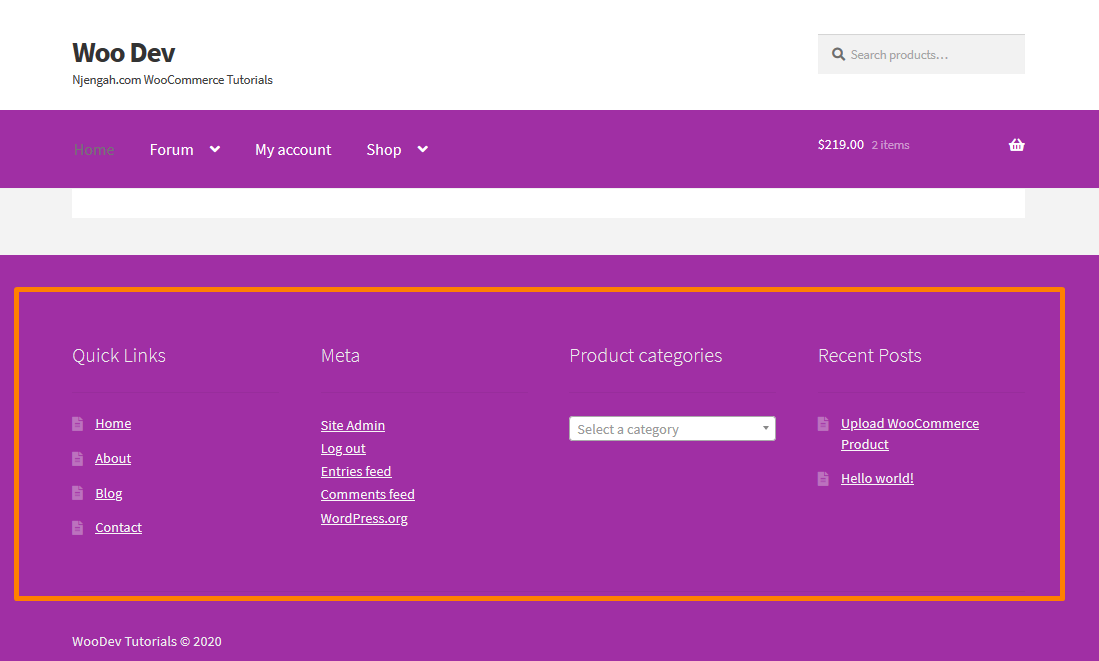
The number of widgets in a footer widget area is determined by the design of the theme. The Storefront theme has four widget areas. They are all of the same sizes, but they do not have to be the same size in width or height. Here is a perfect example :
What Should Go in a Footer Widget in the Storefront Theme?
Footer widgets in the Storefront theme are popular because they provide an opportunity to add more value to visitors, provide another way visitors can access your most important content, and an opportunity to add keyword-rich internal links to your key conversion pages. However, everyone is stumped when trying to figure out what to put in them!
Here are some examples:
- Recent blog posts
- Promo and link to speaking page
- Short testimonial and link to the testimonials page
- Social media icons/links
- Promo and link to services page
- Upcoming event promo and link to the event page
- Short bio and link to about page
- Contact information (if not in your footer)
- Legal jargon and links to legal pages (if not in your footer)
- Menu of links to sales pages
However, it is worth mentioning that you should not make your footer too big. Creating a footer with too much content can make it to be longer than even some pages, which is not professional. The footer should only contain important content as it is on every page of the site. Moreover, it should have the lowest visual priority of the page.
How to Add a Footer in the Footer Widget Area of the Storefront Theme
It is very easy to add a footer widget and you should just follow these simple steps:
- Log into your WordPress site and access the Dashboard as the admin user.
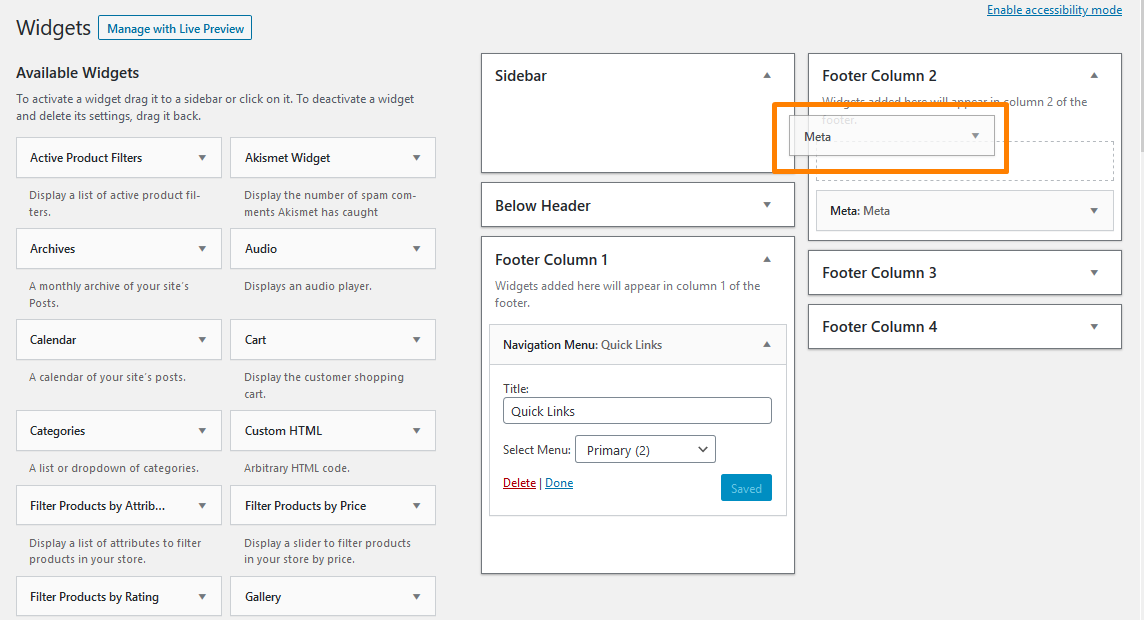
- From the Dashboard menu, click on Appearance > Widgets. Here you will see the available widgets on the left and the widget areas to the right.
- To activate a widget, simply drag it to the footer or click on it. If you want to deactivate a widget and delete its settings, drag it back:
- Add the details of the widget like the title. Here is an example:
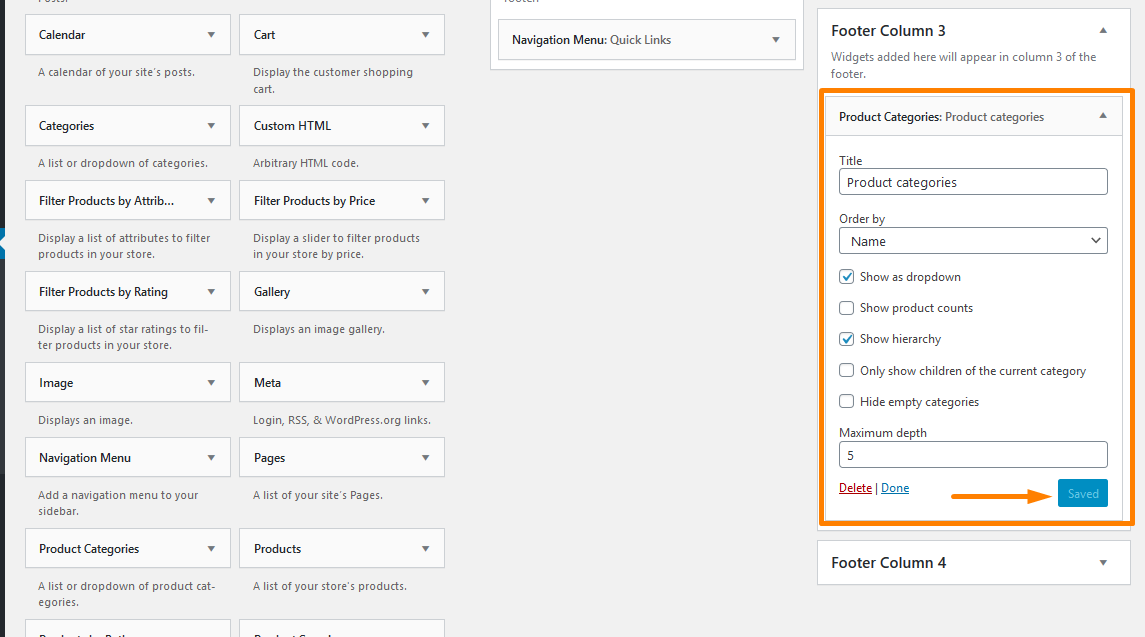
- Remember to click on save once you are done.
- This is the Outcome:
- You can now add some CSS styling to make it look good.
Conclusion
In this post, I have highlighted what the footer entails. The Storefront theme allows you to add widgets in the footer widget area and I have shown you how you can add one in the footer widget area. Additionally, I have highlighted what should go in a footer widget like recent blog posts or social media icons. However, do not make your footer too big!
Similar Articles
- How to Add Extra Field in WooCommerce Checkout Form
- How to Redirect User If Not Logged in WordPress » Page Redirect
- How to Get Payment Methods in WooCommerce » Code Example
- How to Add Woocommerce Product from Front end
- How to Add a Trust or Secure Logo on WooCommerce Checkout Page
- How to Change Proceed To Checkout Text In WooCommerce
- How to Remove Hash # from WordPress URLs with Simple Trick
- How to Change Menu Color WooCommerce Storefront
- How to Add Pagination in WordPress Post Split into Multiple Pages
- How to Add a Sidebar to Storefront WooCommerce
- What is WooCommerce Storefront Theme ? [Answered]
- How to Edit Sidebar In WordPress
- How to Create Multiple Widgets in WordPress Using For & Foreach Loops
- How to Change Size of Site Title WooCommerce Storefront Theme
- How to Change WooCommerce Storefront Footer Height