A footer for any site usually refers to the bottom section of a web page in the web design terminology.
This section contains information like copyright notices, links to the privacy policy, credits, etc.
Moreover, it may also contain code and scripts that the theme developer would want to include on the page after loading the rest of the page content.
Change WooCommerce Storefront Footer Height
In the Storefront theme, development, the footer area of a website is usually defined in the template file footer.php.
Additionally, the footer area contains a widgetized area with multiple columns that you can use to add WordPress widgets.
The footer generally stays the same across the entire website. This means that the elements in the footer are usually items that are relevant to the site as a whole and not specific to any single section.
However, with the development of HTML5, the concept of a “footer” and a “header” has f been expanded. HTML5 semantically marks up pages and this means that the “footer” element can now be used not just for the web page as a whole, but even within the various sections of the webpage. This also means that there are some webpages, which have numerous “headers” and “footers”.
In this brief tutorial, I am going to show you how you can make height changes to the footer of your Storefront theme.
However, you need to master the techniques of intervening in the right section, to adjust the right elements.
Nevertheless, in this tutorial, I will guide you on how to choose the correct element and how you can use the console to add new rules and experiment with them before making the changes permanent.
Steps to Change the Height of the Footer in the Storefront Theme
Here are the simple steps that you should follow:
- Identify the Element you need to Change
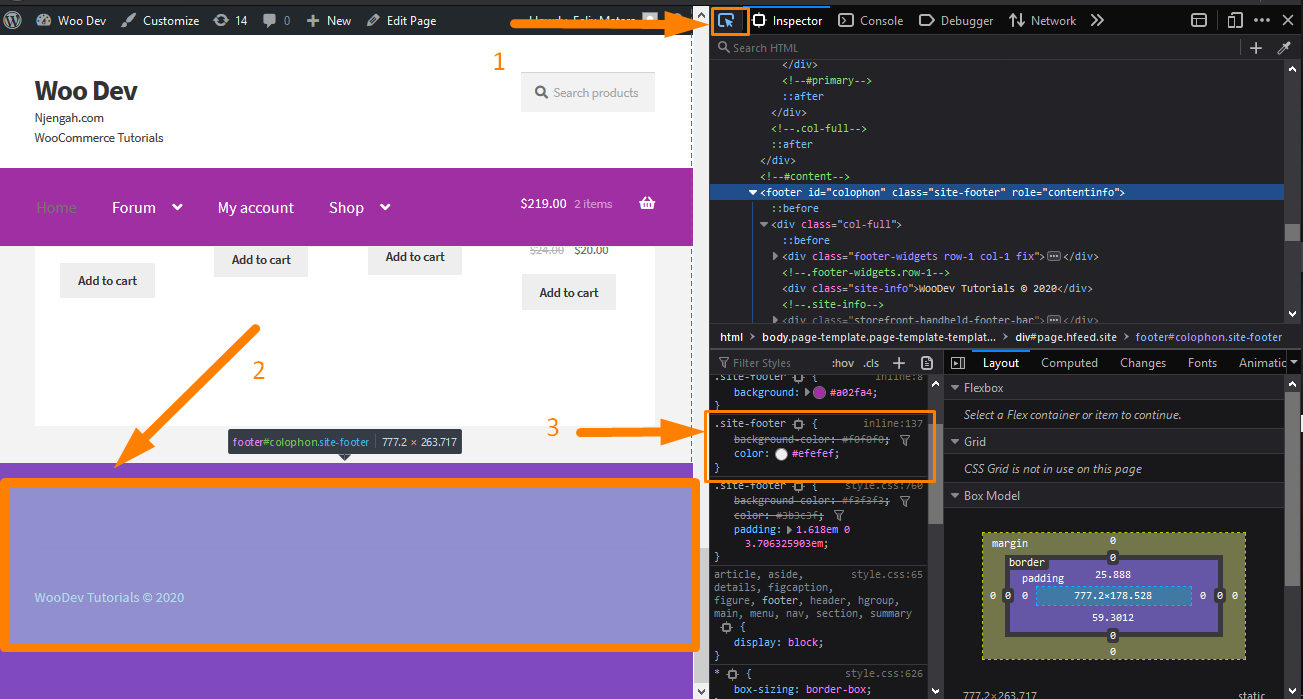
Simply right-click on the area you want to change in a browser like Chrome or Firefox and click “Inspect Element” like this:
After clicking on that, this will bring up the console containing the various elements of the page on the left and the settings for those elements on the right.
Now you need to find the element that targets the footer and we can add a new rule.
To select the element, click on the element picker as shown in the screenshot. Then point the cursor to the menu element to check the styling.
- Choose your Desired Height
Now that the hard work is done, the next step is to enter your CSS rule. You need to enter something like “padding”, press tab, and type in the size you want.
Type it for the top and bottom padding.
I have changed the top and bottom padding, and you can see the changes in your browser. You can experiment to get your desired height.
Now that you are satisfied with your changes, it is time to make them permanent.
- Extracting the New Rule
You need to extract the rule by right-clicking it (on Firefox) like this and selecting “Copy Rule”: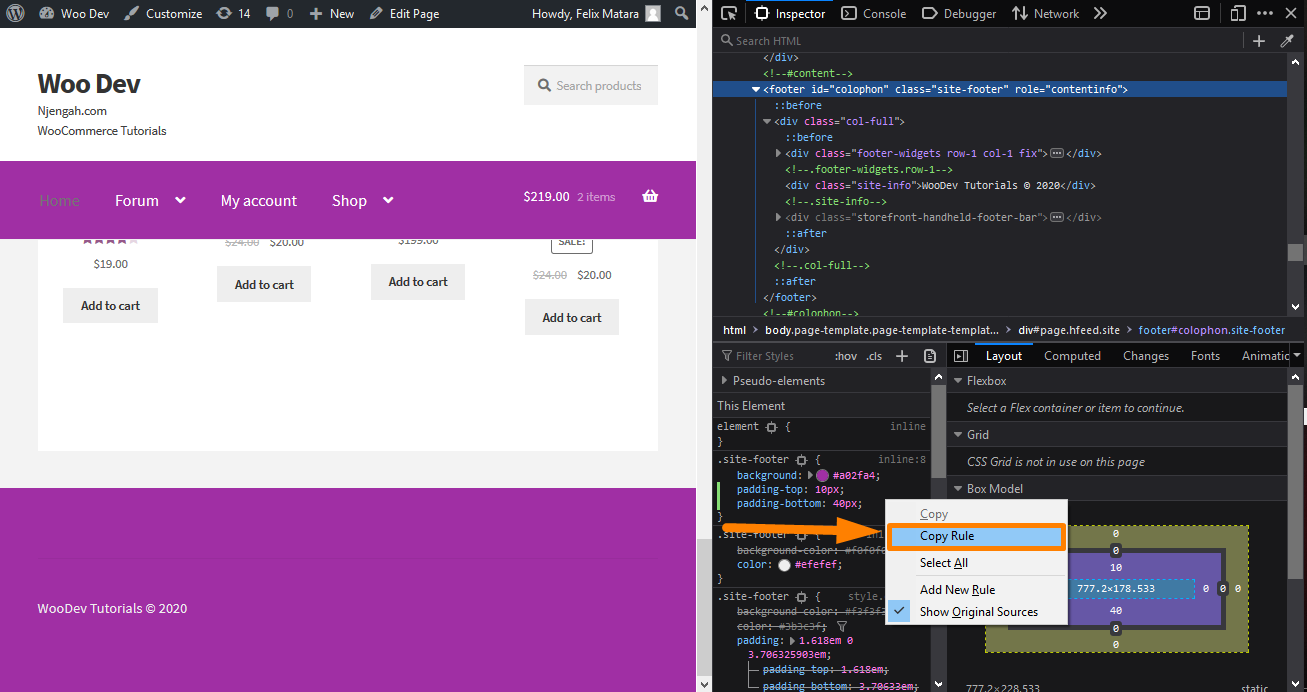
However, if you are using Chrome, you can just select the entire rule with your mouse and copy the text. Paste it into an editor and delete all the existing rules except for the new one you just added if there are any.
- Adding the Rule
The remaining part is to copy/paste into the “Additional CSS” section of your Storefront theme customization interface. To do this:
- Log into your WordPress site and access the Dashboard as the admin user.
- From the Dashboard menu, click on Appearance Menu > Customize.
- Navigate down to Additional CSS in the left sidebar that appears.
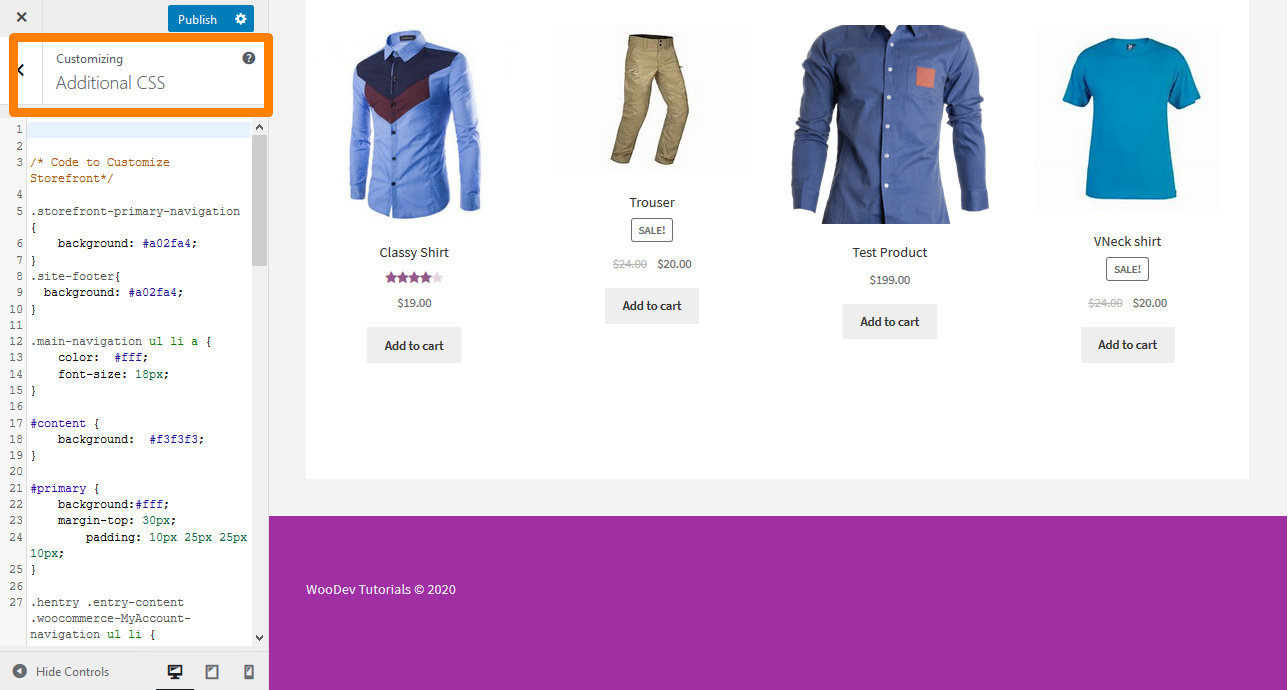
- Add the CSS rule as shown below:
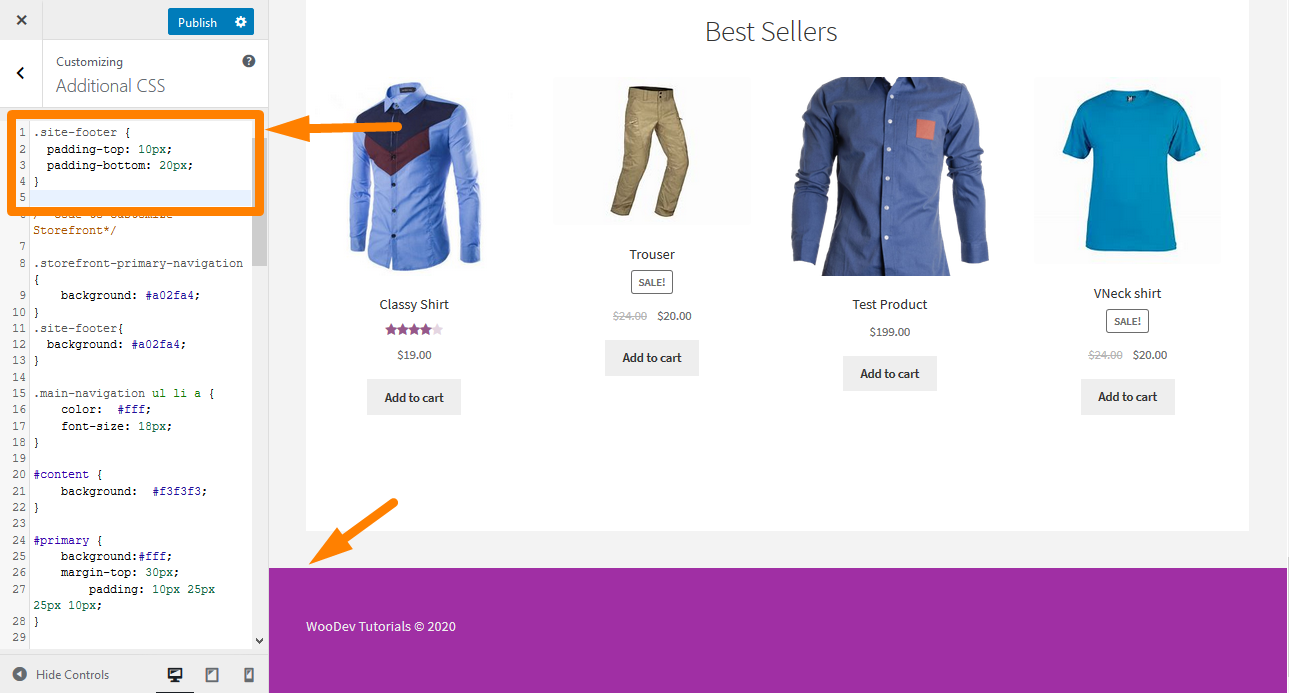
- If you are satisfied with the changes, click on Publish.
Conclusion
In this brief tutorial, I have shown you how you can change the height of the footer in the Storefront theme.
Additionally, I have highlighted the footer area of a website is usually defined in the template file footer.php.
The site footer stays the same across the entire website.
This means that you have to choose the best height so that all the elements are visible.
The trick is to find the right element and the right rule to change. Once that is done, you can add the rule in the console, copy it, and add it in the Additional CSS section.

Joe is an experienced full-stack web developer with a decade of industry experience in the LAMP & MERN stacks, WordPress, WooCommerce, and JavaScript – (diverse portfolio). He has a passion for creating elegant and user-friendly solutions and thrives in collaborative environments. In his spare time, he enjoys exploring new tech trends, tinkering with new tools, and contributing to open-source projects. You can hire me here for your next project.
Similar Articles
- How to Remove Bullets from Unordered List in WordPress
- How to Adjust WooCommerce Storefront Height of Header
- How to Make Divi Mobile Menu Scrollable Quick Fix Solution
- How to Remove Storefront Footer Text & Links Using a Plugin
- How to Remove Built with Storefront & Woocommerce Footer Link with 4 Simple Options
- How to Change WooCommerce Email Footer Text
- How to Change the Size of Cart Icon In WooCommerce Storefront Theme
- How to Change Size of Mobile Menu Button Storefront Theme
- 80+ Tricks to Customize Storefront WooCommerce Theme: The Ultimate Storefront Theme Customization Guide
- How to Change the Size of Site Title WooCommerce Storefront Theme