 Looking for a way to customize your WooCommerce storefront theme? This article has different 80+ tricks that you can use to customize your WooCommerce Storefront theme. WooCommerce Storefront theme customization should be easy after reading this guide.
The WooCommerce Storefront is a simple and powerful theme that is free. This theme provides you with great control over your store in terms of product presentation and user access. It is free and offers you a plethora of customization options through child themes.
If you like this Storefront customization guide you may also like this ultimate WooCommerce customization guide – 100+ Tips, Tricks & Snippets Ultimate WooCommerce Hide Guide
Before we learn all the tricks to customize the WooCommerce Storefront theme, let us first know the basics. Additionally, there will be a detailed guide on how to install and configure the WooCommerce Storefront Theme.
Storefront WooCommerce Theme
Do you have a WooCommerce project? If yes, then Storefront is the best eCommerce theme that is built to work elegantly with WooCommerce.
This theme was developed by WooCommerce Core developers, with a clean and minimal design that is open for any kind of customization.
This theme has a responsive design that will work on any device. Here are some of the amazing features that you will get from downloading this theme:
-
- Elegant design.
- Responsive layout.
- SEO friendly markup.
- Custom page templates.
- Free.
- GPL licensed.
- Translation ready for other languages.
How to Install and Configure WooCommerce Storefront Theme
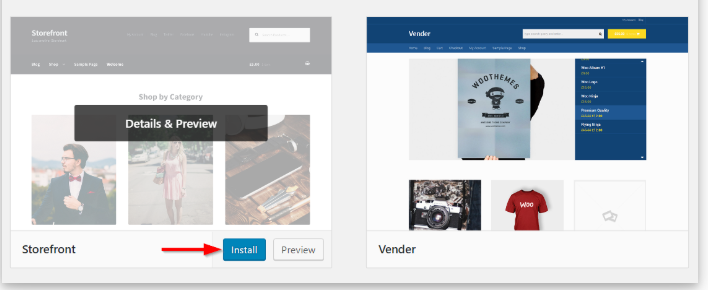
Downloading the Storefront theme is just like installing any other plugin for your WordPress site. First, you need to go to Appearance, Themes, and finally Add New. On the search field, type ‘storefront’ and then click on the install button.
Once installed, you can activate the theme using the Activate button.
Additionally, you can visit wordpress.org to download the latest version of Storefront. You can then upload the extracted folder to the themes directory on your server via FTP. After that, you need to activate the theme by going to Appearance, then Themes.
Page Templates
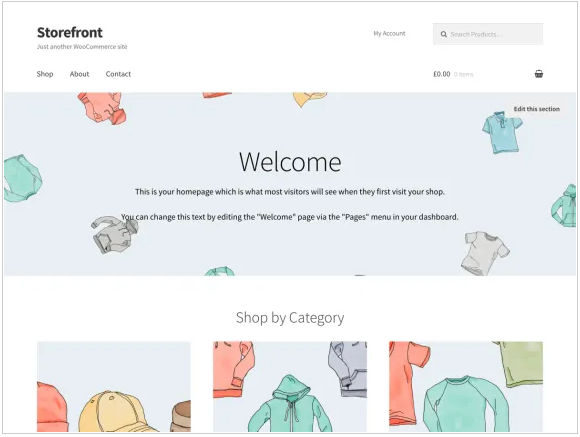
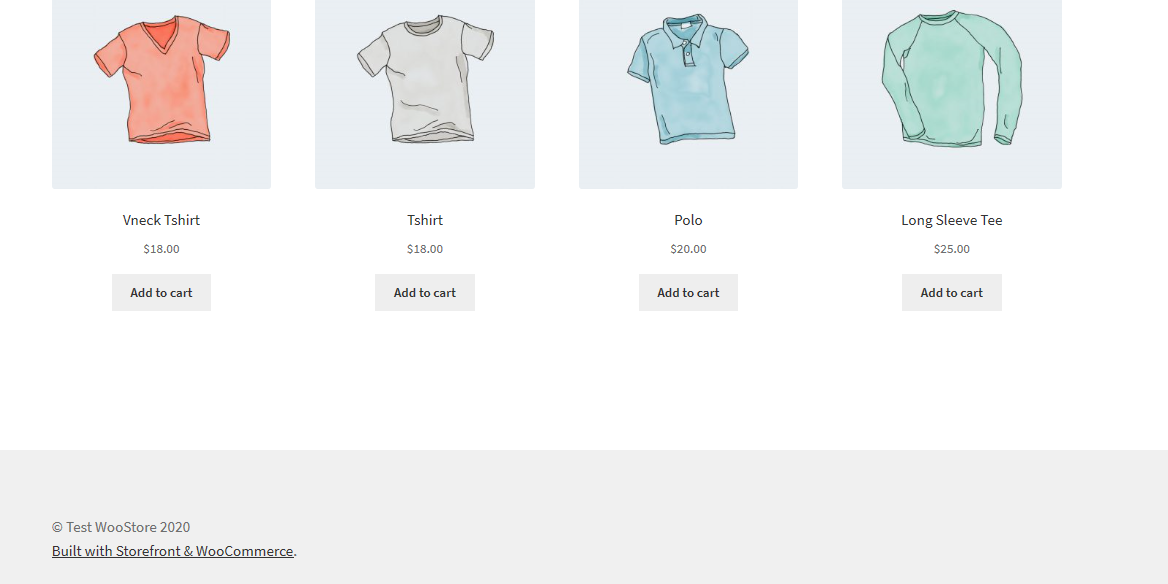
Storefront automatically creates two additional page templates, in addition to the default WooCommerce pages. They are Homepage and Full width.
Homepage Template.
The Homepage template offers you a great way to display all your products, giving you an overview of products and product categories. Visitors of your store will first land on this page when entering your store.
Setting it up is a breeze as you just have to create a new page and add some content to display. Then, you will have to select the ‘Homepage’ from the templates drop-down in the Page Attributes meta box.
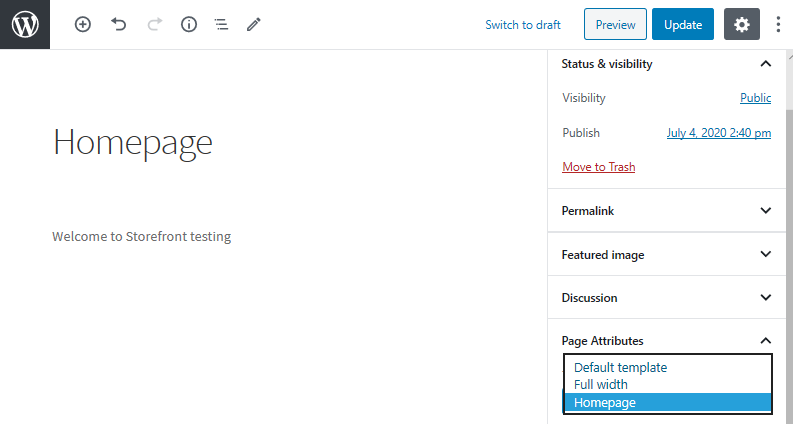
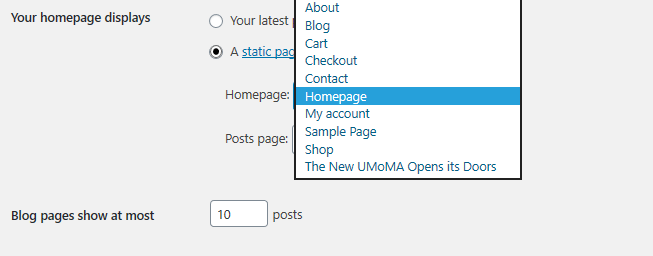
After publishing this page, you can set it as a homepage by navigating to the Settings then Reading.
You will then check ‘A static page’ and then select the created homepage from the ‘Front page’ dropdown. After you save the changes, they will automatically be reflected on the front-end.
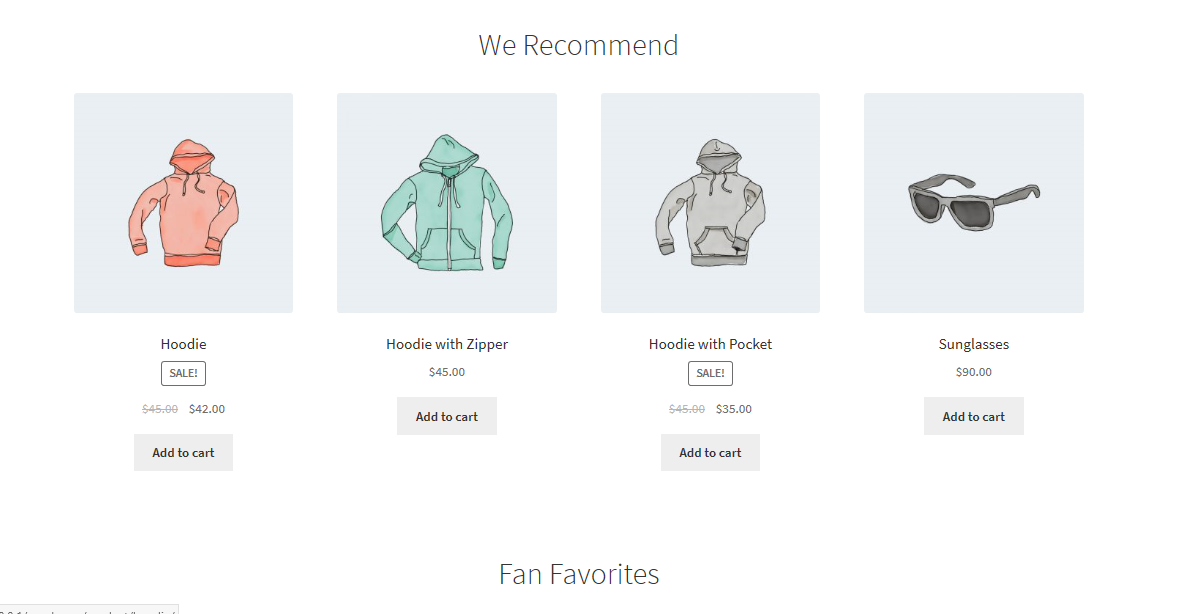
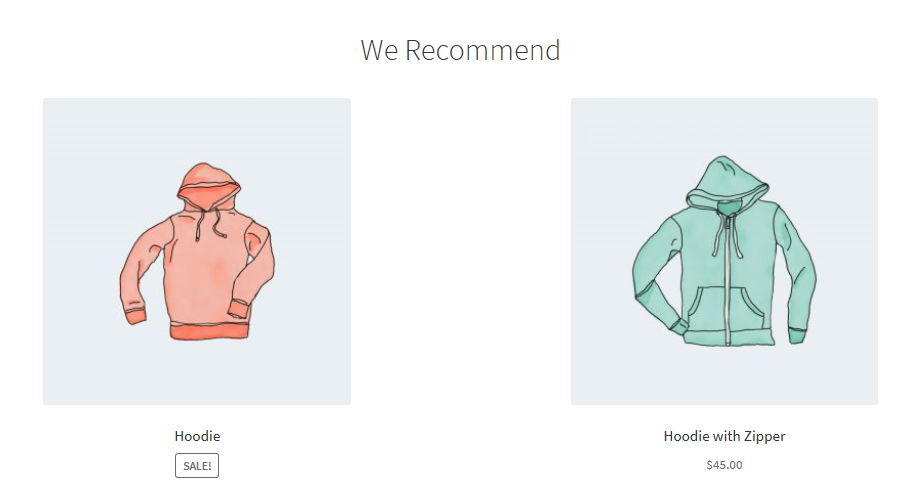
Once the configuration is done, your Homepage should have multiple sections.
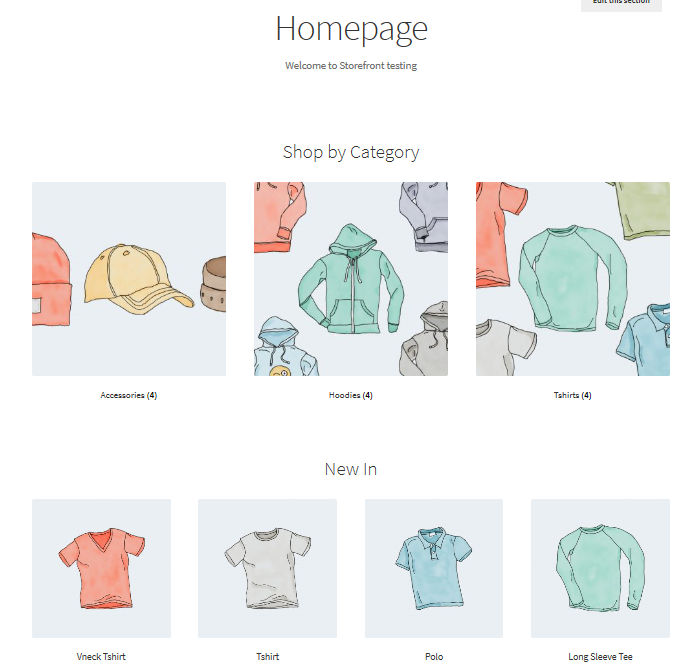
Different clusters are displayed such as recommended products, fan favorites, products on sale, and best sellers. The way that these elements display is the same as the order in the back-end.
Additionally, you can use the drag and drop feature to make modifications by clicking on products then, categories.
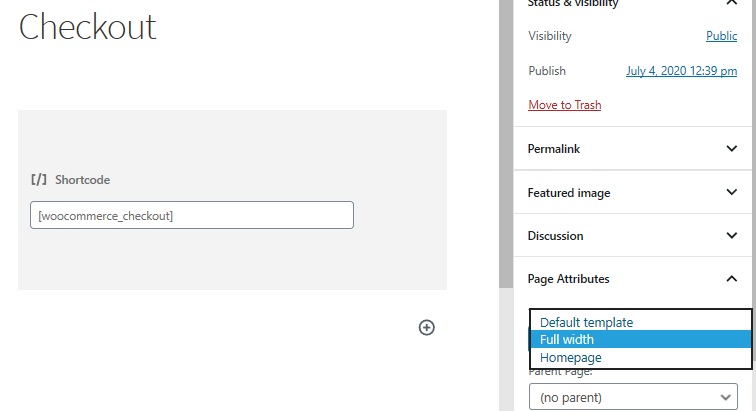
Full Width on cart and checkout
Full Width is the other template that spans through the entire page without sidebars, which is a recommended option for your cart and checkout pages. This can be done by going to the cart and checkout pages and select ‘Full Width’ from the drop-down on the Page Attributes section.
Configuring menus
The storefront has a default organization of menu locations that are primary and secondary. The primary menu is displayed just below the site logo. WooCommerce displays all your pages as a ‘primary menu’ if you have not set a specific primary menu.
The secondary menu is just beside the logo, nest to the search box. However, this secondary menu will only appear if you assign a menu.

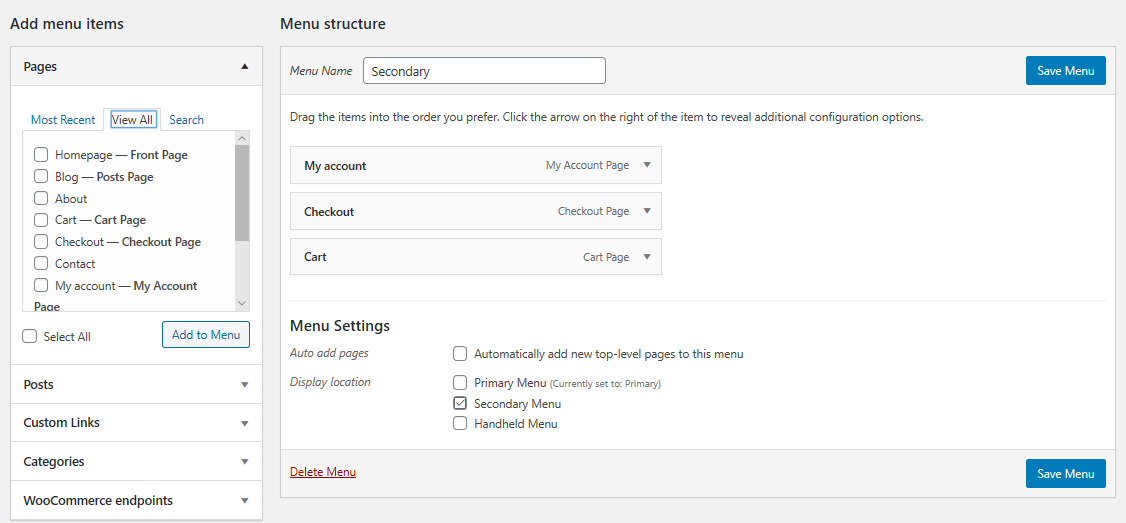
Creating a new menu and adding pages
This can be done by navigating to Appearance then Menus in the admin panel. On the left side, you will see a title called ‘pages’. Click on the View All button to get a list of all the pages that you have published.
Tick the pages you want then click Add to Menu. It is very easy to customize the menu order by simply dragging and dropping the pages.
Placing Widgets
The Storefront Theme gives you three different areas for placing widgets on your website. Header widgets can be placed above the content, just below the header of your site. Sidebar widgets are placed on the side based on the layout that you choose. Additionally, you can place footer widgets based on your choice of the four widgets available.
So now that you know about the basics of installing and configuring the WooCommerce Storefront theme, let us have a look at the different tricks that you can perform to customize this theme.
1. Creating a child theme
Before we can dig into the complex tricks on customizing your WooCommerce storefront, let us first create a child theme for our Storefront theme. Child themes are small themes that are dependent on the parent theme. They override the style sheets and custom functions of the parent theme thereby creating changes on different sections of your pages.
Why should we create a child theme? This is because the core of Storefront is constantly updated and this will pose a risk to all your customization efforts. This means that you can upgrade Storefront safely, without losing our custom work.
The best way to create a child theme is to download the Child Theme Configurator plugin and activate it. Follow the wizard to create your first child theme.
2. Add a logo to your store
This can be done by using the Theme Customizer found on your dashboard under Themes then Customize. Select the ‘site identity’ option to add a logo by uploading a picture. The recommended size for any Storefront theme is 470px by 110px. You will then save the changes by clicking on ‘Publish’.
3. Customize header size
Here we will use the Theme Customizer again, but we will write some CSS code in the ‘Additional CSS’ section.
Add the following code:
* Masthead */
#masthead.site-header {
   height: 155px!important;
   margin-bottom:0px
}
/* Mobile CSS for Masthead */
@media only screen and (max-width: 320px) {
   #masthead.site-header {
   height: 80px!important;
   margin-bottom:0px;
}
}
/* Masthead menu */
.storefront-primary-navigation a, .cart-contents a {
   margin:0 0 0 0;
}
.main-navigation ul {
   padding:0 0 10px 4px!important;
}
.main-navigation li {
   height:38px!important;}
/* Mobile CSS for Masthead menu */
@media only screen and (max-width: 320px) {
.main-navigation ul {
   background:#D6DDE4!important;
}
}
/* Header area */
.site-header {
padding-top:0.5em;
}
.site-header .custom-logo-link img, .site-header .site-logo-anchor img, .site-header .site-logo-link img {
margin-bottom: -45px;
}
Here is the result:

4. Remove the search bar from the theme’s header
Add this code to the ‘Additional CSS’ section.
.site-header .widget_product_search
display: none;
}
Here is the result:

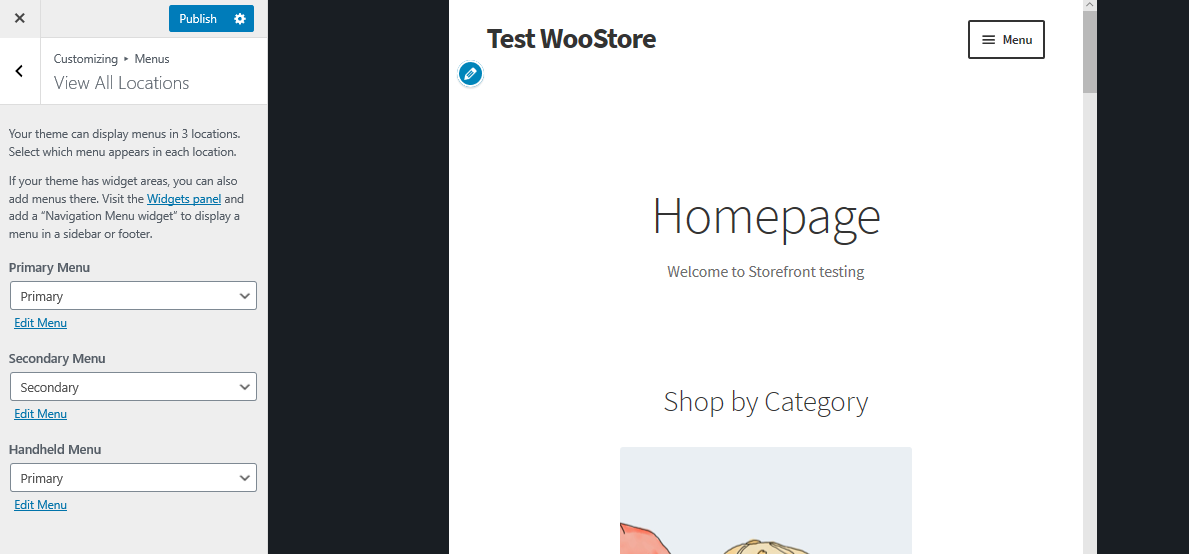
5. Create a separate Dropdown menu for mobile devices
Storefront is built to be highly responsive, adjusting nicely to all screen sizes. If you have multiple menus, it is important to direct your visitors’ attention to specific places in the website. Using the WordPress Customizer, you can add the following code snippet to do just that.
Go to Appearance, then Customize and then select the ‘Menus’ option were we can create our custom menu design by selecting ‘Handheld Menu’ for small screens.
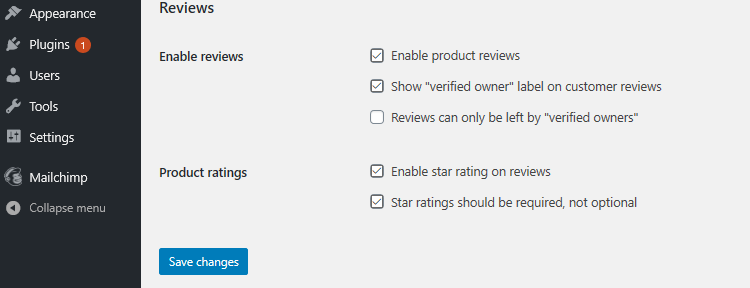
6. Turn off customer reviews
By default, WooCommerce and storefront have a standard functionality for reviews. This very nice integration lets you know what your visitors think about your products.
However, customer reviews may not apply to all kinds of eCommerce stores. To turn off the customer reviews, navigate to WooCommerce settings and go to the ‘Products’ tab. At the bottom of the page, you will find ‘reviews’ section where you can update the reviews as desired.
7. Remove product categories images from homepage
WooCommerce allows you to display products as well as product categories with their images on the homepage. However, if you prefer categories to be displayed as text-only, you need to add this line to you child theme’s functions.php file. Simply add it to the end of the function.php file.
remove_action( 'woocommerce_before_subcategory_title', 'woocommerce_subcategory_thumbnail', 10 );
Here is the result:

8. Change the header menu color
The Customizer allows us to customize the header with the colors that you want. This can be done by navigating to Customize then Header and pick the color that you want.
However, this option colors the entire header region including the search bar, login section, and the logo. To get a different background to the header menu by simply adding the following code snippet to the Additional CSS panel.
.storefront-primary-navigation,
.main-navigation ul.menu ul.sub-menu{
background-color:#f0f0f0;
}
Here is the result:

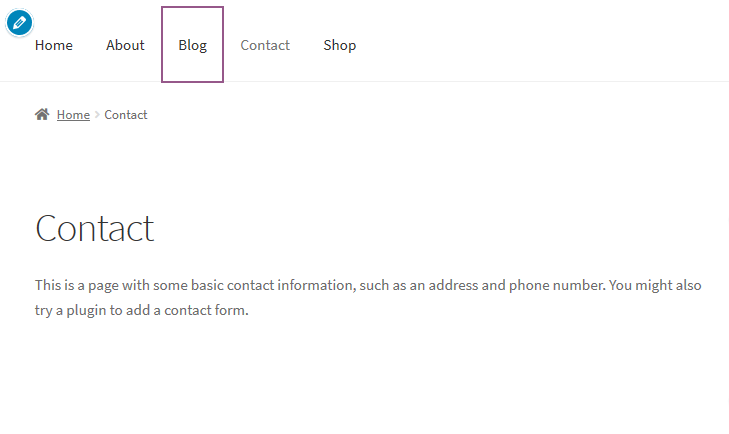
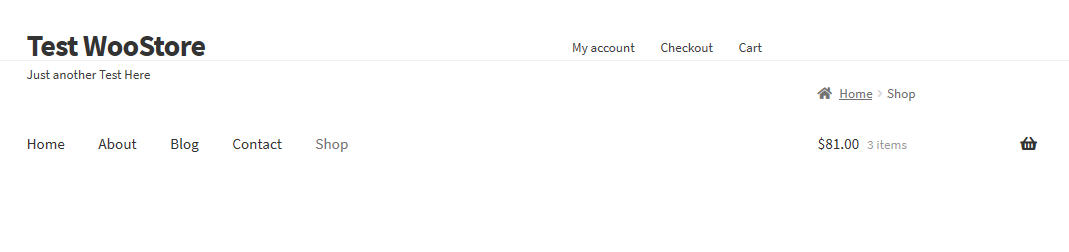
9. Hide primary navigation bar
Storefront Theme by default displays all the pages as a menu. If you want to hide the primary navigation bar, deleting the menu is not enough. Simply navigate to Customize then Additional CSS section and add the following lines:
.storefront-primary-navigation {
display: none;
}
Here is the result:

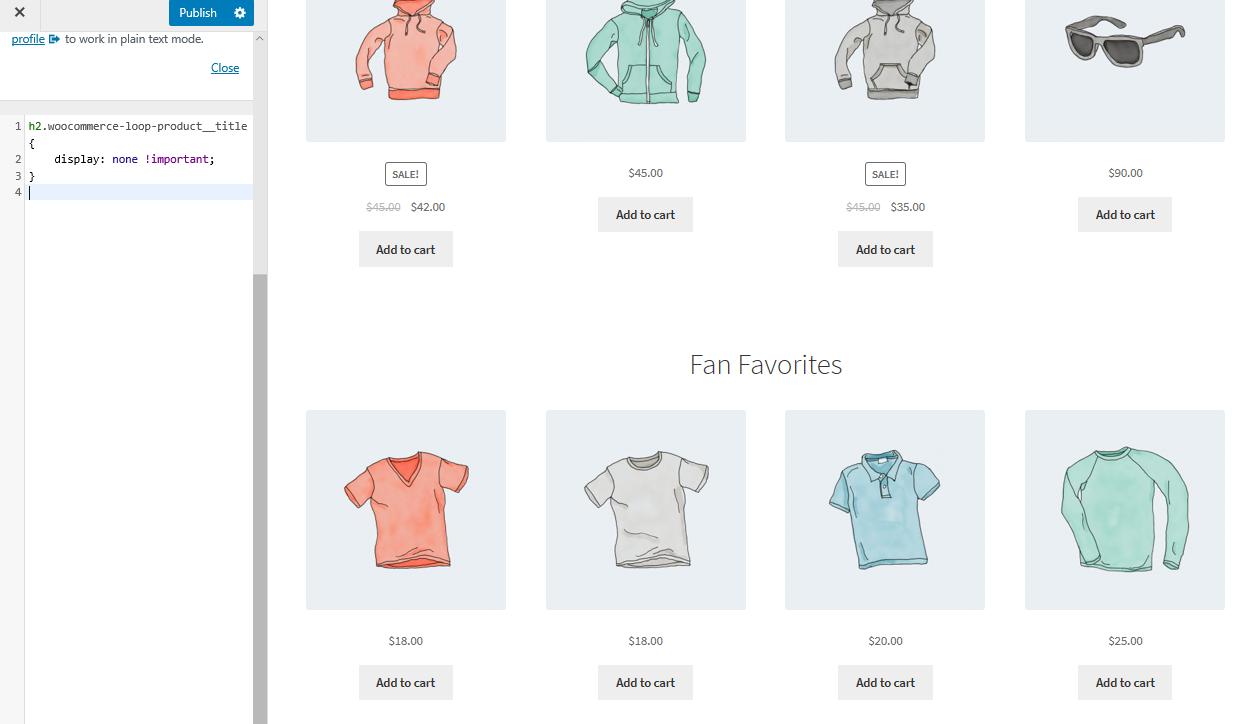
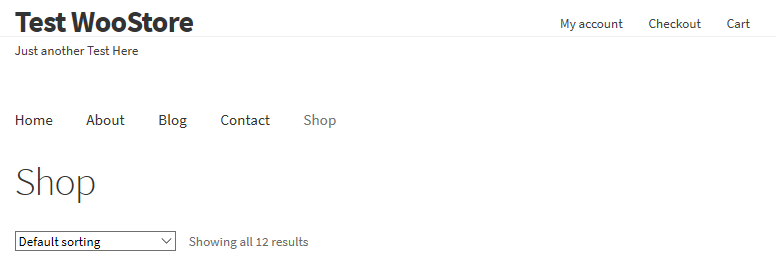
10. Hide products title in the shop page
To hide products title in the shop page, simply navigate to Customize then Additional CSS section and add the following lines:
h2.woocommerce-loop-product__title {
display: none !important;
}
Here is the result:
11. Remove blank space from the header
Simply navigate to Customize then Additional CSS section and add the following lines:
.site-branding {
margin-bottom: 0px;
}
Here is the result:

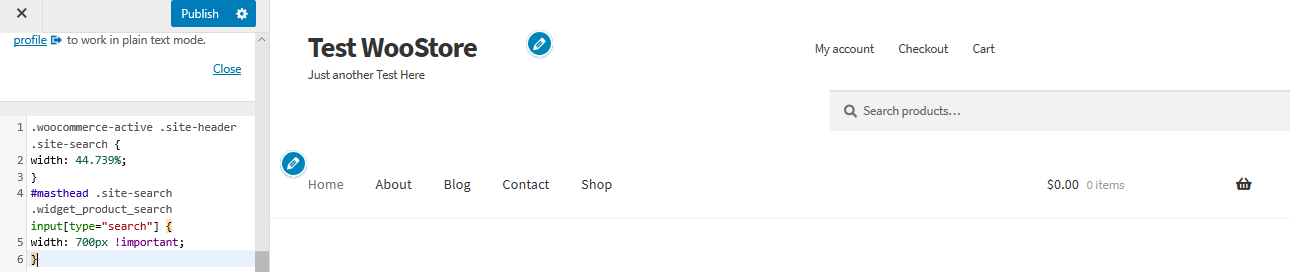
12. Increase the width of the search bar
What would you do if you want to extend the width of the search bar? Using the Additional CSS section, add the following lines:
.woocommerce-active .site-header .site-search {
width: 44.739%;
}
#masthead .site-search .widget_product_search input[type="search"] {
width: 700px !important;
}
Here is the result:
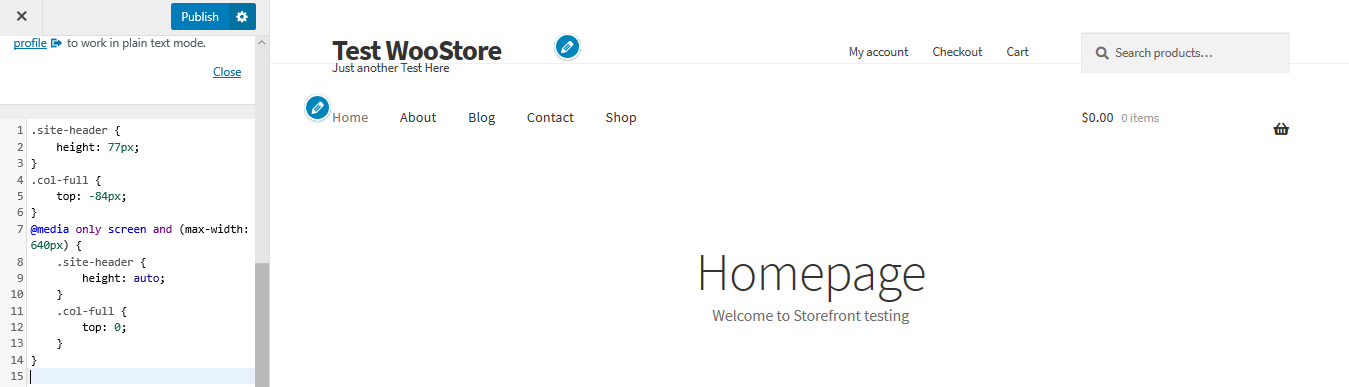
13. Remove space between header and menu
Simply navigate to Customize then Additional CSS section and add the following lines:
.site-header {
height: 77px;
}
.col-full {
top: -84px;
}
@media only screen and (max-width: 640px) {
.site-header {
height: auto;
}
.col-full {
top: 0;
}
}
Here is the result:
14. Adding extra text to WooCommerce Registration Page
Adding a message in a registration page is important, as we may want to add a Thank you or offer discount vouchers for new registrants. To archive this, simply add a function in the child theme’s function.php file.
add_action( 'bp_signup_profile_fields', function() {
// Start editing below.
?>
<p class="notice-check-inbox">
Please remember to check your emails and confirm registration for a
<strong>10% discount voucher</strong>!
</p>
<?php
// End editing.
} );
15. Remove breadcrumbs in Storefront theme
On the top of pages in most website, breadcrumbs are added to allow for easy navigation. They are found on the top of each page, showing the category to which the page or product belongs.

Breadcrumbs are an amazing tool for Search Engine Optimization, but if you want to remove them simply add the following code to the child theme’s functions.php file:
add_filter( 'woocommerce_get_breadcrumb', '__return_false' );
Here is the result:
16. Change the URL link in the logo
WordPress themes in general, link the sites homepage in the logo. This function is standard for most websites, and users expect that they will be able to go back to the homepage every time they click on the logo.
What if the homepage is on a different location? This means that you have to configure the URL, if we want a custom link. To change this, we need to add the following code to the child theme’s functions.php file:
add_action( 'storefront_header' , 'custom_storefront_header', 1 );
function custom_storefront_header () {
remove_action( 'storefront_header' , 'storefront_site_branding', 20 );
add_action( 'storefront_header' , 'custom_site_branding', 20 );
function custom_site_branding() {
// HERE set the link of your logo or site title
$link = home_url( '/my-custom-link/' );
?>
<div class="site-branding">
<?php
if ( function_exists( 'the_custom_logo' ) && has_custom_logo() ) {
$custom_logo_id = get_theme_mod( 'custom_logo' );
if ( $custom_logo_id ) {
$custom_logo_attr = array('class' => 'custom-logo', 'itemprop' => 'logo' );
$image_alt = get_post_meta( $custom_logo_id, '_wp_attachment_image_alt', true );
if ( empty( $image_alt ) ) {
$custom_logo_attr['alt'] = get_bloginfo( 'name', 'display' );
}
$logo = sprintf( '<a href="%1$s" class="custom-logo-link" rel="home" itemprop="url">%2$s</a>',
esc_url( $link ),
wp_get_attachment_image( $custom_logo_id, 'full', false, $custom_logo_attr )
);
}
elseif ( is_customize_preview() ) {
$logo = sprintf( '<a href="%1$s" class="custom-logo-link" style="display:none;"><img class="custom-logo"/></a>', esc_url( $link ) );
}
$html = is_front_page() ? '<h1 class="logo">' . $logo . '</h1>' : $logo;
} elseif ( function_exists( 'jetpack_has_site_logo' ) && jetpack_has_site_logo() ) {
$logo   = site_logo()->logo;
$logo_id = get_theme_mod( 'custom_logo' );
$logo_id = $logo_id ? $logo_id : $logo['id'];
$size   = site_logo()->theme_size();
$html   = sprintf( '<a href="%1$s" class="site-logo-link" rel="home" itemprop="url">%2$s</a>',
esc_url( $link ),
wp_get_attachment_image( $logo_id, $size, false, array(
'class'     => 'site-logo attachment-' . $size,
'data-size' => $size,
'itemprop' => 'logo'
) )
);
$html = apply_filters( 'jetpack_the_site_logo', $html, $logo, $size );
} else {
$tag = is_front_page() ? 'h1' : 'div';

$html = '<' . esc_attr( $tag ) . ' class="beta site-title"><a href="' . esc_url( $link ) . '" rel="home">' . esc_html( get_bloginfo( 'name' ) ) . '</a></' . esc_attr( $tag ) .'>';

if ( '' !== get_bloginfo( 'description' ) ) {
$html .= '<p class="site-description">' . esc_html( get_bloginfo( 'description', 'display' ) ) . '</p>';
}
}
echo $html;
?>
</div>
<?php
}
}
The custom link goes on line 7 ‘( ‘/my-custom-link/’ );’ , where you will add your custom link by replacing it with “my-custom-link”.
17. Completely remove categories from the store page
This feature simple removes the categories. You need to add the following lines to the functions.php file:
function storefront_child_reorder_homepage_contant() {
remove_action('homepage', 'storefront_product_categories', 20 );
}
add_action('init', 'storefront_child_reorder_homepage_contant');
Here is the result:
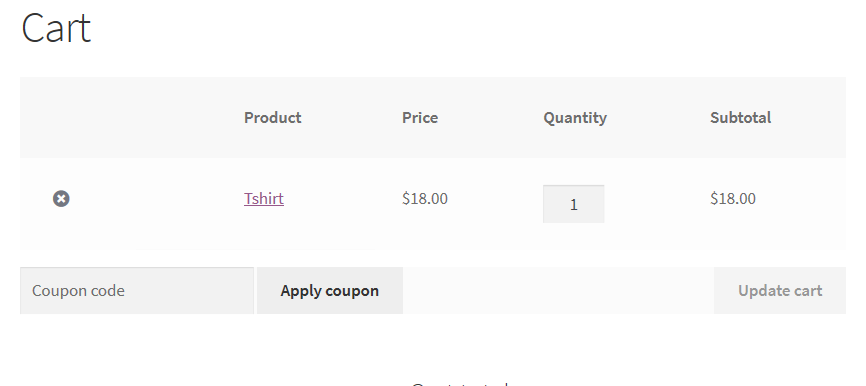
18. Remove product image from cart and mini-cart
To do this, simply add the following code to your child theme’s functions.php file:
add_filter( 'woocommerce_cart_item_thumbnail', '__return_false' );
Here is the result:
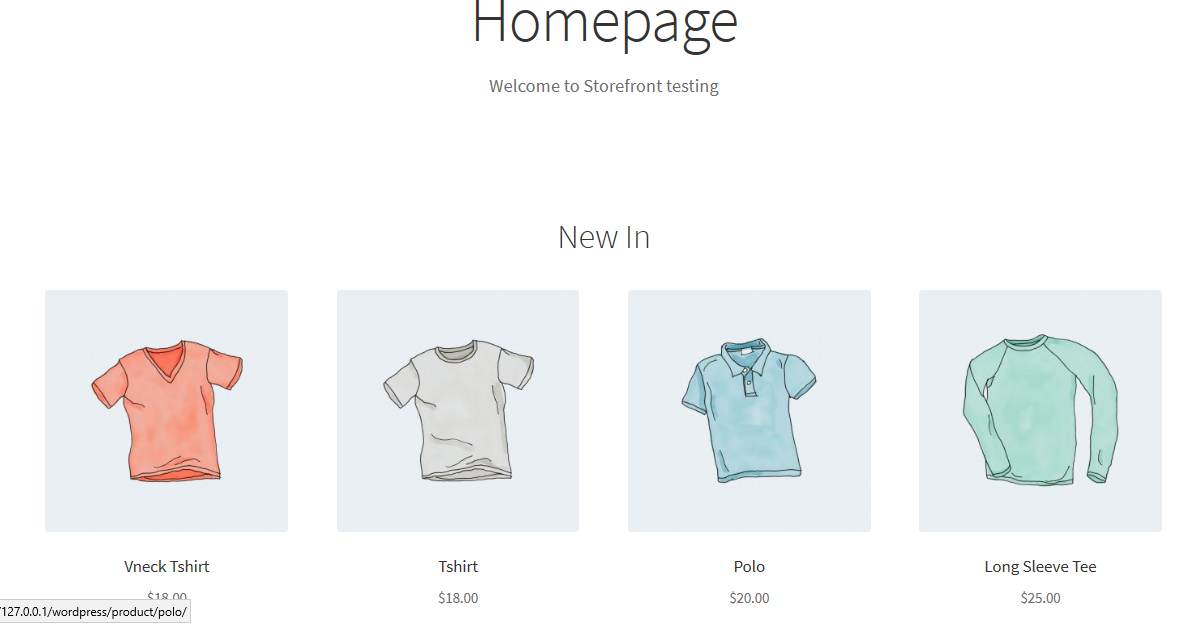
19. Recent products from our the shop’s page
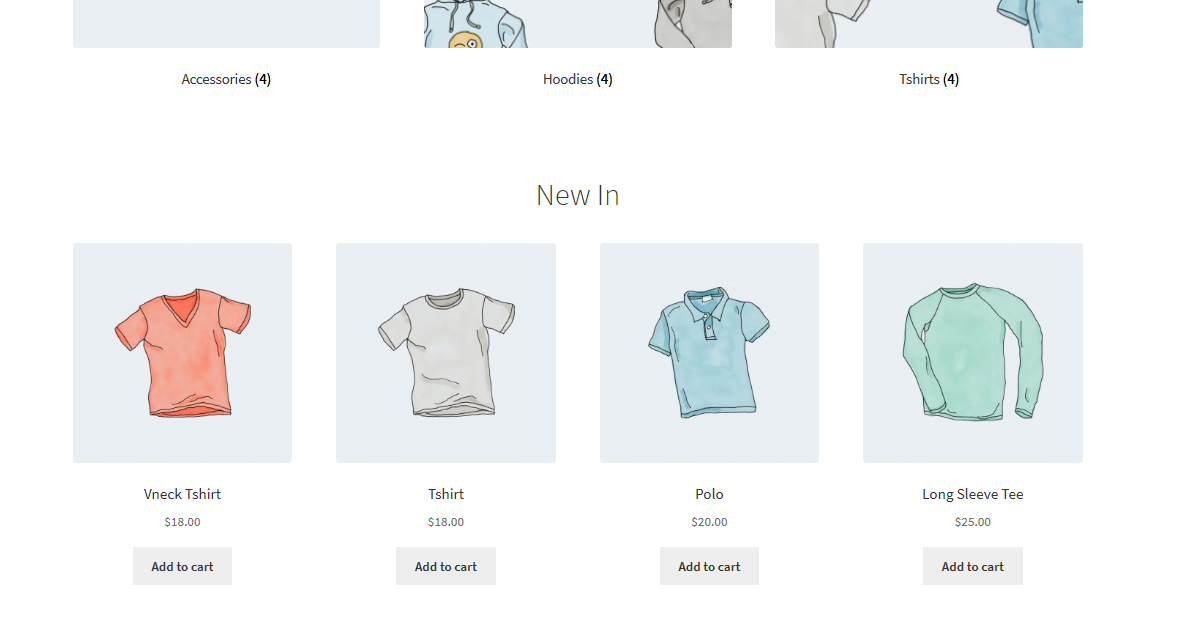
When you add a new product, it is added to the ‘New in’ section on the front page. This is the default setting in the Storefront theme. However, if you constantly add products to your list, they might clutter up the shop page. You may also want to display additional information in this section.
To remove this section, simply add the following code to the child theme’s function.php file.
function storefront_child_reorder_homepage_contant() {
remove_action('homepage', 'storefront_recent_products', 30 );
}
add_action('init', 'storefront_child_reorder_homepage_contant');
Here is the result:
20. Remove best-selling products from store page
To some, this might not be a desirable feature. To remove the best-selling section, simply add the following code to the child theme’s function.php file.
function storefront_child_reorder_homepage_contant() {
remove_action('homepage', 'storefront_best_selling_products', 70 );
}
add_action('init', 'storefront_child_reorder_homepage_contant');
Here is the outcome:
21. Remove featured products
In the same way, you might want to disable the featured products section. This can be done by adding the following code snippet to the child theme’s functions.php file:
function storefront_child_reorder_homepage_contant() {
remove_action('homepage', 'storefront_featured_products', 40 );
}
add_action('init', 'storefront_child_reorder_homepage_contant');
Here is the result:
22. Integrate a sticky “Add to cart” button
It is important to provide important information about your products like the description, image gallery, and additional information. Ultimately, this might result in a long page.
However, if you want to ease the process of adding a product to the cart without forcing the customer to scroll back up to the top of the page to add the product to the cart, you can add a sticky “Add to cart” button on the top of the screen.
This can be done by the use of a plugin called Sticky add to cart for WooCommerce. Simply install it and activate it, to enjoy sticky “Add to cart” buttons on all your product pages.
Here is the result:
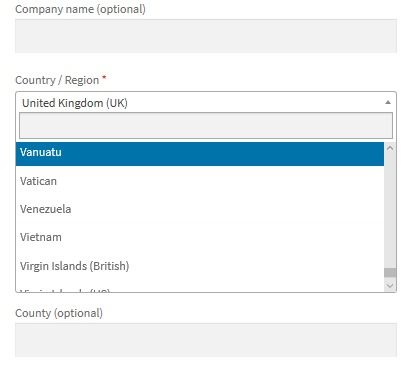
23. Add a dropdown list of cities on Checkout page
When you add a dropdown list of cities on the checkout page, it will help our customers to fill their personal details quickly. This will enable you to only make the available cities where you can ship your products.
Simply add the following code to the child theme’s functions.php file:
add_filter( 'woocommerce_default_address_fields', 'override_checkout_city_fields', 10, 1 );
function override_checkout_city_fields($fields) {
// Define here in the array your desired cities (Here an example of cities)
$option_cities = array(
'' => __( 'Select your city' ),
'a' => 'a',

);

$fields['city']['type'] = 'select';
$fields['city']['options'] = $option_cities;

return $fields;
}
If you have a look at the fifth line of the code, you can define our list of cities. The first part of the code ‘a’ => is the city’s ID, which cannot include spaces or empty characters. Simply write the name of the city exactly the way you want it to appear.
Here is the result:
24. Hide the product quantity plus and minus buttons from product page
In order for you to hide the text field with the plus and minus buttons to increase or decrease product quantity, all you need to do is add the following CSS code in the Additional CSS section:
.quantity {
display: none !important;
}
Here is the outcome:
25. Hide “Add to cart” button on product page
To do this, simply navigate to Customize then Additional CSS section and add the following lines:
.single_add_to_cart_button {
display: none !important;
}
Here is the result:
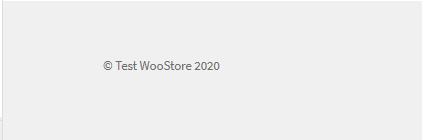
26. Remove Storefront theme credit from footer
By default, WooCommerce Storefront theme adds a theme credit to the footer. You may want a footer with a personal touch. To remove the theme credit, simply add the following function in the child theme’s functions.php file:
add_action( 'init', 'custom_remove_footer_credit', 10 );
function custom_remove_footer_credit () {
remove_action( 'storefront_footer', 'storefront_credit', 20 );
add_action( 'storefront_footer', 'custom_storefront_credit', 20 );
}
function custom_storefront_credit() {
?>
<div class="site-info">
© <?php echo get_bloginfo( 'name' ) . ' ' . get_the_date( 'Y' ); ?>
</div><!-- .site-info -->
<?php
}
Here is the result:
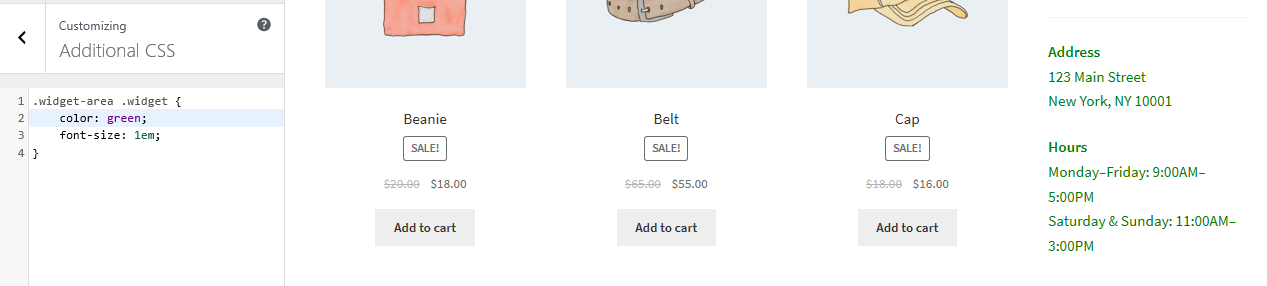
27. Change storefront widget section color and font size
There is no direct way to change font color or size for the page widgets by using the customizer. You can easily change this by adding the following lines of CSS code. To do this, simply navigate to Customize then Additional CSS section and add the following lines:
.widget-area .widget {
color: green;
font-size: 1em;
}
Here is the result:
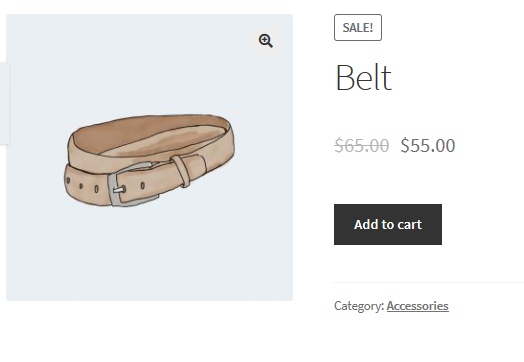
28. Show Storefront “Sale” badge on product image
The default version of the WooCommerce Storefront theme allows you to define a sale or a discounted price for a certain product. However, if you want to add the Sale badge on thr product image, simply navigate to Customize then Additional CSS section and add the following lines:
ul.products li.product .onsale {
position: absolute;
top: 137px;
right: 62px;
}
Here is the result:
![]()
29. Change the color of the “Sale” badge
To change the color of the Sale badge, simply navigate to Customize then Additional CSS section and add the following lines:
.onsale {
background-color: #FFFFFF;
border-color: green;
color: green;
}
Here is the result:
![]()
30. Change quantity “plus-minus” box color
This can be done by changing the background color of the quantity plus and minus buttons. To do this, simply navigate to Customize then Additional CSS section and add the following lines:
.quantity .qty {
color: #000;
background-color: #f5df72;
}
Here is the result:
31. How to change the background color of the Storefront header
The WordPress Customizer allows us to change the background color of Storefront theme’s header. To do this, simply navigate to Customize then Header section:
32. Change the background color of the minicart on the header
When changing the color of the header, the minicart dropdown inherits this color. However, you can change this by using the following CSS rules for added visibility. Simply navigate to Customize then Additional CSS section and add the following lines:
.
woocommerce.widget_shopping_cart {
background: white;
border-radius: 12px;
}
Here is the result:
33. Add Image in Storefront Footer Using CSS below Copyright
If you want to add your own logo, accepted payments, or partner badge below the copyright text, simply navigate to Layers, Customize, and then click on Footer.
Click on Customization to expand the panel and click on Select Image in the background.
Select the image you want and add it.
Select No Repeat and Bottom, or position it manually as desired.
Navigate back to the Customizer and click on CSS to expand the panel. However, you should ensure that the percentages are according to your specifications. Then add the following lines:
.site-info:after {
content: '';
background-image: url(add your own URL);
display: block;
width: 100px;
height: 100px;
margin: 0 auto;
}
34. How to remove gap in footer
Simply navigate to Customize then Additional CSS section and add the following line:
.footer-widgets { padding-top: 0; }
Here is the result:

35. How to remove the header but keep the menu
Simply navigate to Customize then Additional CSS section and add the following lines:
#masthead > .col-full,
#masthead .site-header-cart {
display: none;
}
36. How to remove the underline from Hyperlinks
By default, the Storefront theme underlines links, and if you want to remove them, simply navigate to Customize then Additional CSS section and add the following lines:
a {
text-decoration: none !important;
}
Here is the result:
37. How to remove featured images on Posts on WooCommerce Storefront theme
Simply add the following line to the child theme’s function.php file:
remove_action( 'storefront_post_content_before', 'storefront_post_thumbnail', 10 );
38. How to change the color of the Horizontal lines on the Storefront homepage
Simply add the following code to your child theme’s custom.css file:
.page-template-template-homepage .hentry .entry-header,
.page-template-template-homepage .hentry,
.page-template-template-homepage .storefront-product-section {
border-color: red;
}
39. How to customise the Storefront WooCommerce on sale badge
Simply add the following code to your Additional CSS section:
.onsale {
background-color: #FFFFFF;
border-color: #FF0000;
color: #FF0000;
}
Here is the result:
![]()
40. How to the change the size of the logo, secondary navigation and search bar
To change them all at once, simply add the following code to your Additional CSS section:
@media screen and (min-width: 768px) {
/* LOGO */
.site-header .site-branding, .site-header .site-logo-anchor, .site-header .site-logo-link { width: 30% !important; /* Use px values if you want, eg. 350px */ }

/* SECONDARY NAVIGATION */
.site-header .secondary-navigation { width: 40% !important; /* Use px values if you want, eg. 350px */ }

/* SEARCH BAR */
.site-header .site-search { width: 30% !important; /* Use px values if you want, eg. 350px */ }
41. How to remove the sidebar on WooCommerce product pages to go full width
Simply add the following code to the child theme’s functions.php file:
add_action( 'get_header', 'remove_storefront_sidebar' );
if ( is_product() ) {
remove_action( 'storefront_sidebar', 'storefront_get_sidebar', 10 );
}
}
Add this line to your Additional CSS section:
body.woocommerce #primary { width: 100%; }
Here is the result:
42. How to add an image or icon in the menu items.
To do this, simply install and activate the Menu Image, Icons made easy plugin and add your icons as desired. Simply add the desired dimensions to different menu fields.
Here is a visual description:
![]()
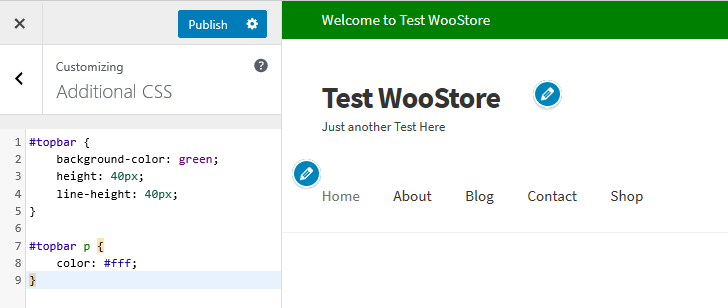
43. How to add a top bar to Storefront
This can be done to add cool things like social icons or a welcome message. To add this, simply add the following lines of code to the child theme’s function.php file:
/**
* Adds a top bar to Storefront, before the header.
*/
function storefront_add_topbar() {
?>
<div id="topbar">
<div class="col-full">
<p>Welcome to Test WooStore</p>
</div>
</div>
<?php
}
add_action( 'storefront_before_header', 'storefront_add_topbar' );
Then add this CSS in the Additional CSS section on your customizer:
#topbar {
background-color: #1F1F20;
height: 40px;
line-height: 40px;
}

#topbar p {
color: #fff;
}
Here is the result:
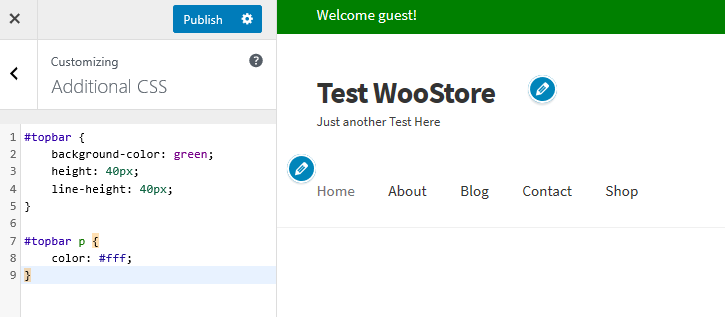
44. How to add a custom message to your top bar
This is another way to add a custom message at the top bar. Simply add the following lines of code to the child theme’s function.php file:
/**
* Adds a top bar to Storefront, before the header.
*/
function storefront_add_topbar() {
global $current_user;
get_currentuserinfo();

if ( ! empty( $current_user->user_firstname ) ) {
$user = $current_user->user_firstname;
} else {
$user = __( 'guest', 'storefront-child' );
}

?>
<div id="topbar">
<div class="col-full">
<p>Welcome <?php echo $user ?>!</p>
</div>
</div>
<?php
}
add_action( 'storefront_before_header', 'storefront_add_topbar' );
45. How to make Meta Slider full width with Storefront
Meta Sliders are very popular in many WordPress sites. Add this bit of code to stretch the slider to be full width. Add it to the child theme’s stretch the slider to be full width:
add_action( 'init', 'child_theme_init' );
function child_theme_init() {
add_action( 'storefront_before_content', 'woa_add_full_slider', 5 );
}
function woa_add_full_slider() { ?>
<div id="slider">
<?php echo do_shortcode("[metaslider id=388 percentwidth=100]"); ?>
</div>
<?php
}
However, you can use a plugin to do this and a good example is the WooSlider plugin.
46. How to add extra Google Fonts to Storefront
This is very easy and you simply need to download and activate the Easy Google Fonts plugin. More than 300,000 users in the WordPress Community trust this good font plugin.
47. How to remove the search bar from the header
This is an alternative way to remove the search bar from the header, by pasting the following code to the child theme’s function.php file:
add_action( 'init', 'jk_remove_storefront_header_search' );
function jk_remove_storefront_header_search() {
remove_action( 'storefront_header', 'storefront_product_search',         40 );
}
Here is the result:
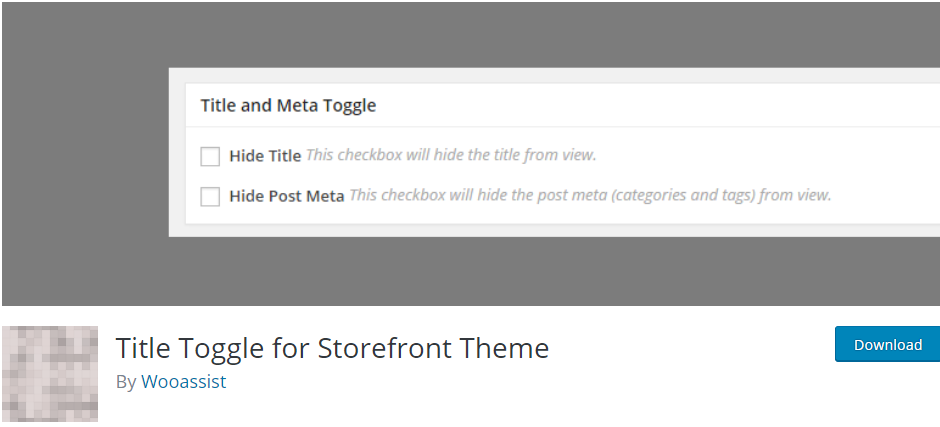
48. How to hide the Page Titles in Storefront
If you want to hide the page titles, you need to install and activate the Title Toggle for Storefront Theme plugin that is available in the wordpress.org community. More than 10,000 users trust this plugin.
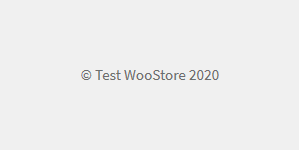
49. How to remove ‘designed by WooThemes’ in Storefront footer
This is an alternative solution to this problem as the one discussed earlier. You need to add this code to the child theme’s function.php file:
add_action( 'init', 'custom_remove_footer_credit', 10 );
function custom_remove_footer_credit () {
remove_action( 'storefront_footer', 'storefront_credit', 20 );
add_action( 'storefront_footer', 'custom_storefront_credit', 20 );
}
function custom_storefront_credit() {
?>
<div class="site-info">
© <?php echo get_bloginfo( 'name' ) . ' ' . get_the_date( 'Y' ); ?>
</div><!-- .site-info -->
<?php
}
Here is the result:
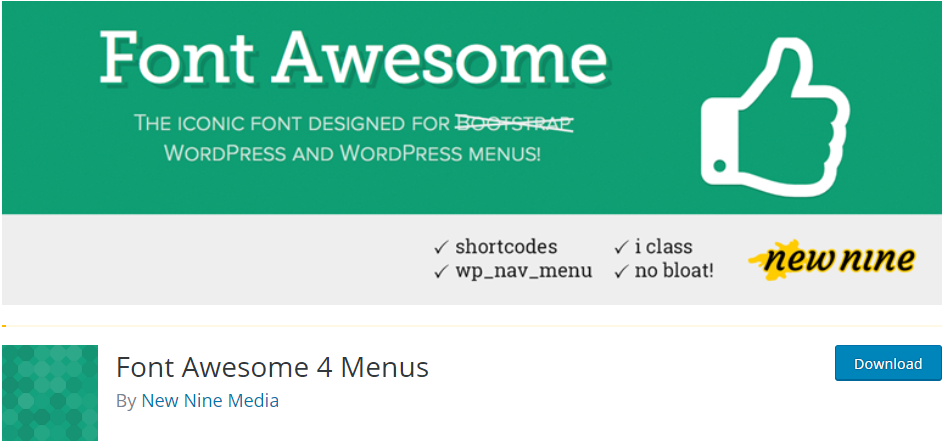
50. How to add Font Awesome icons to your Storefront menu
This can be done by the use of the Font Awesome 4 Menus plugin that is available in the wordpress.org community. More than 50,000 users trust this plugin.
51. How to rename ‘Navigation’ in mobile view on Storefront
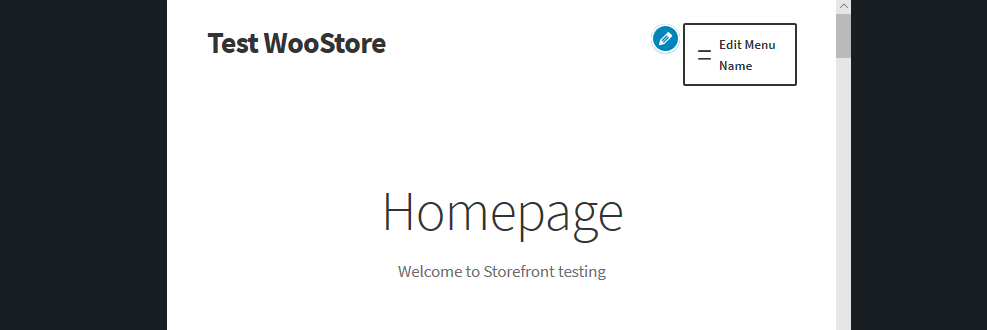
To do this, simply add this code to to the child theme’s function.php file:
function storefront_primary_navigation() {
?>
<nav id="site-navigation" class="main-navigation" role="navigation">
<button class="menu-toggle"><?php _e( 'Edit Menu Name', 'storefront' ); ?></button>
<?php wp_nav_menu( array( 'theme_location' => 'primary' ) ); ?>
</nav><!-- #site-navigation -->
<?php
}
Here is the result:
52. How to add a customer avatar in Storefront ‘My Account page’
This can be done by simply adding the following lines of code to the child theme’s function.php file:
/**
* Print the customer avatar in My Account page, after the welcome message
*/
function storefront_myaccount_customer_avatar() {
$current_user = wp_get_current_user();

echo '<div class="myaccount_avatar">' . get_avatar( $current_user->user_email, 72, '', $current_user->display_name ) . '</div>';
}
add_action( 'woocommerce_before_my_account', 'storefront_myaccount_customer_avatar', 5 );
Then add the following CSS command rules in the Additional CSS section:
.myaccount_avatar {
border-right: 1px solid rgba(0, 0, 0, 0.1);
float: left;
padding-right: 10px;
width: 83px;
}

.myaccount_user {
border-left: 3px solid #787E87;
float: right;
padding-left: 10px;
width: 88%;
}
Here is the result:
![]()
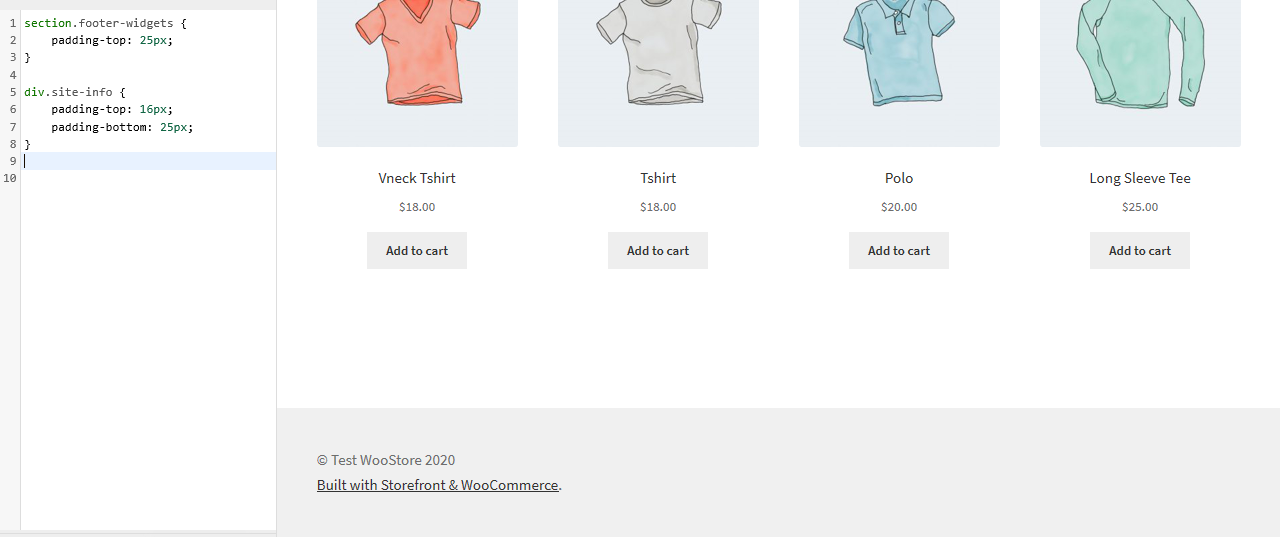
53. How to change the WooCommerce Storefront Footer Height
It is very easy to change the WooCommerce Storefront footer height by adding the following CSS code in the Additional CSS section:
section.footer-widgets {
padding-top: 25px;
}

div.site-info {
padding-top: 16px;
padding-bottom: 25px;
}
Here is the result:
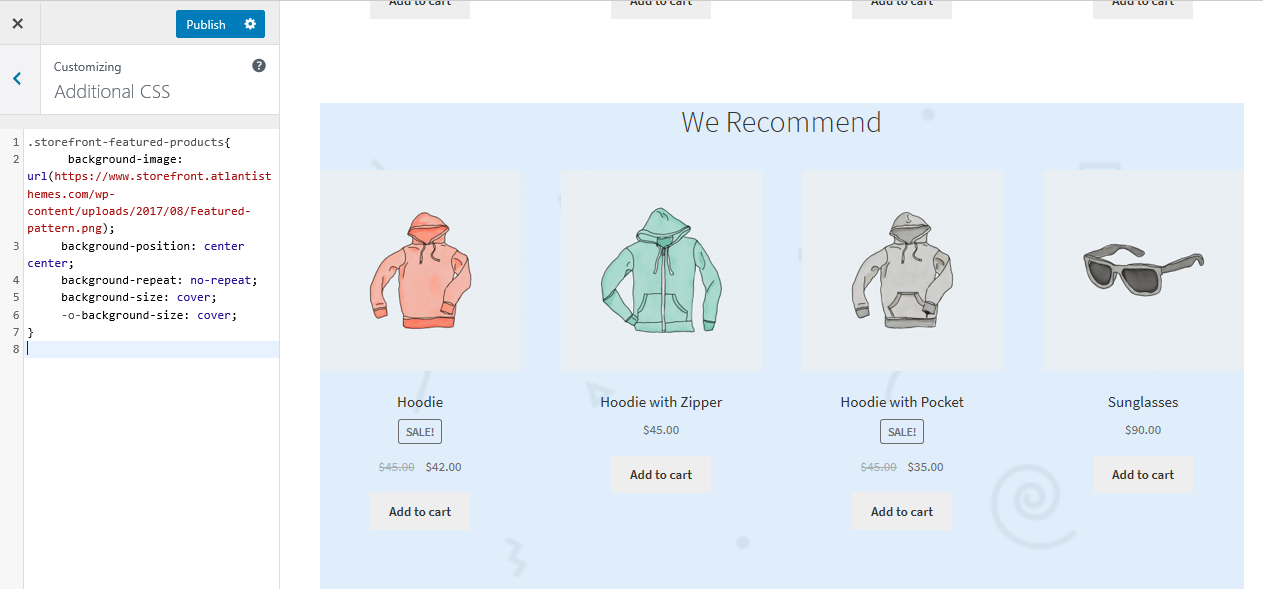
54. Adding Background Image to Storefront a particular Homepage Section
The default Storefront theme has six sections namely, product categories, recent products, featured products, popular products, on sale products and best-selling products. Simply add the following code to the Additional CSS section:
.storefront-featured-products{
background-image: url(Add your URL here);
background-position: center center;
background-repeat: no-repeat;
background-size: cover;
-o-background-size: cover;
}
Here is the result:
55. Adding Background Color to Storefront Homepage Sections
To do this you need to first identify the section you want to add color. This can easily be done by adding the following code to the Additional CSS section:
.storefront-featured-products{
background-color:#FFEB3B;
}
Here is the result:

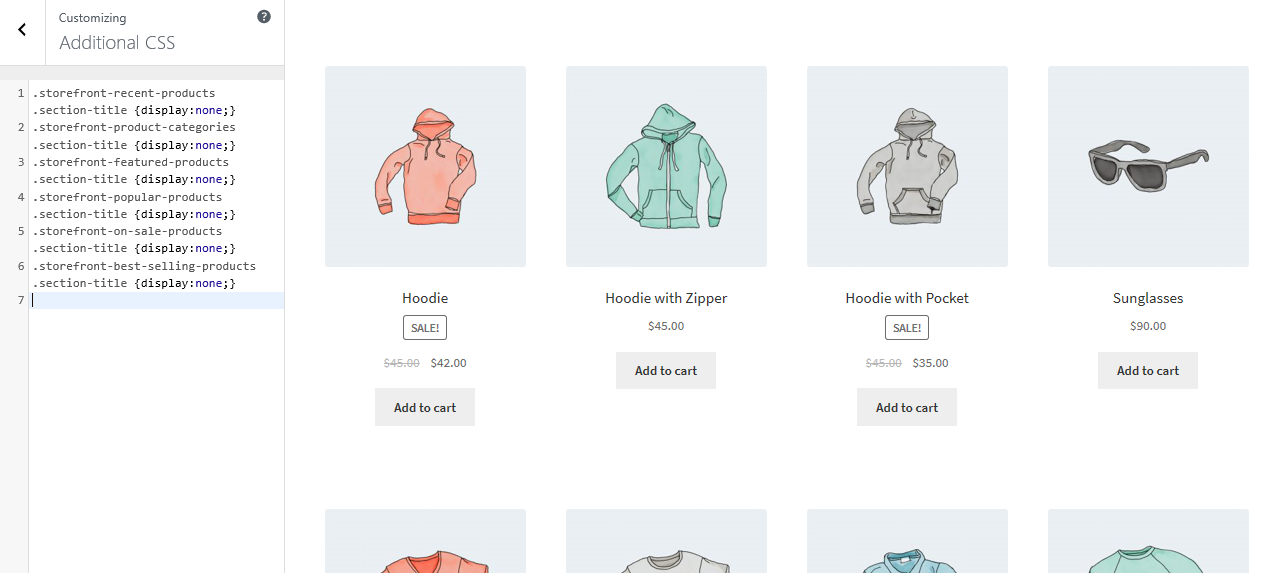
56. How to Remove or hide the Homepage Section Title
To do this you need to first identify the section you want to remove or hide. This can be done by adding the following code to the Additional CSS section:
.storefront-recent-products .section-title {display:none;}
.storefront-product-categories .section-title {display:none;}
.storefront-featured-products .section-title {display:none;}
.storefront-popular-products .section-title {display:none;}
.storefront-on-sale-products .section-title {display:none;}
.storefront-best-selling-products .section-title {display:none;}
Here is the result:
57. How to Change the Homepage Section Title
To do this you need to first identify the section you want to remove the title. This list will help you to identify the storefront homepage section filters:
- storefront_product_categories_args
- storefront_recent_products_args
- storefront_featured_products_args
- storefront_popular_products_args
- storefront_on_sale_products_args
- storefront_best_selling_products_args
Add the following code in the child theme’s function.php file:
add_filter( 'storefront_featured_products_args', 'custom_storefront_product_featured_title');

// Frontpage Featured Products Title
function custom_storefront_product_featured_title( $args ) {
$args['title'] = __( 'New Featured Products Title Here', 'storefront' );
return $args;
}
Here is the result:

58. How to Increase Homepage Section Product per Page
Simply add the following lines of code to the child theme’s function.php file.
add_filter('storefront_featured_products_shortcode_args','custom_storefront_featured_product_per_page' );
// Featured Featured Products per page
function custom_storefront_featured_product_per_page( $args ) {
$args['per_page'] = 10;
return $args;
}
59. How to Increase Homepage Section Product Column Grid or Column
Simply add the following lines of code to the child theme’s function.php file.
add_filter('storefront_featured_products_shortcode_args','custom_storefront_featured_product_per_row' );

// Featured Featured Products column
function custom_storefront_featured_product_per_row( $args ) {
$args['columns'] = 2;
return $args;
}
Here is the result:
60. How to Display More Categories on Homepage
Simply add the following lines of code to the child theme’s function.php file.
add_filter('storefront_product_categories_shortcode_args','custom_storefront_category_per_page' );

// Category Products
function custom_storefront_category_per_page( $args ) {
$args['number'] = 10;
return $args;
}
61. How to Add a Description below Homepage Section Title
Simply add this code to the child theme’s function.php file:
add_action('storefront_homepage_after_featured_products_title', 'custom_storefront_product_featured_description');

function custom_storefront_product_featured_description(){ ?>
<p class="element-title--sub">
<?php echo "Section description here";?>
</p>
<?php }
62. How to remove top rated products section from Storefront Homepage
There are two was to do this. One is installing plugin that will help you to remove this section. You can have a look at the Homepage Control plugin.
However, you can simply remove the section using hooks. This is done by simply adding the following line to the child theme’s function.php file:
remove_action( 'homepage', 'storefront_popular_products', 50 );
Additionally, you can remove it by adding the following code in the Additional CSS section:
.storefront-popular-products .section-title {display:none;}
63. How to Change Top Rated Products Section Title
Simply add this code to the child theme’s function.php file:
add_filter( 'storefront_popular_products_args', 'custom_storefront_product_popular_title');
// Frontpage Featured Products Title
function custom_storefront_product_popular_title( $args ) {
$args['title'] = __( 'Top Products', 'storefront' );
return $args;
}
64. How to Display More Products on Top Rated Section
The default for Storefront displays 4 products in the Top Rated Section. In this example, we will increase it to 15 products. Simply add this code to the child theme’s function.php file:
add_filter('storefront_popular_products_shortcode_args','custom_storefront_top_product_per_page' );

// Featured Featured Products per page
function custom_storefront_top_product_per_page( $args ) {
$args['per_page'] = 12;
return $args;
}
65. How to Remove On Sale Products Section from Storefront Homepage
There are two was to do this. One is installing plugin that will help you to remove this section. You can have a look at the Homepage Control plugin.
However, you can simply remove the section using hooks. This is done by simply adding the following line to the child theme’s function.php file:
remove_action( 'homepage', 'storefront_on_sale_products', 60 );
66. How to Change Background Color of On Sale Products
This can be done by adding the following code to the Additional CSS section:
.storefront-on-sale-products{
background-color:#FFEB3B;
}
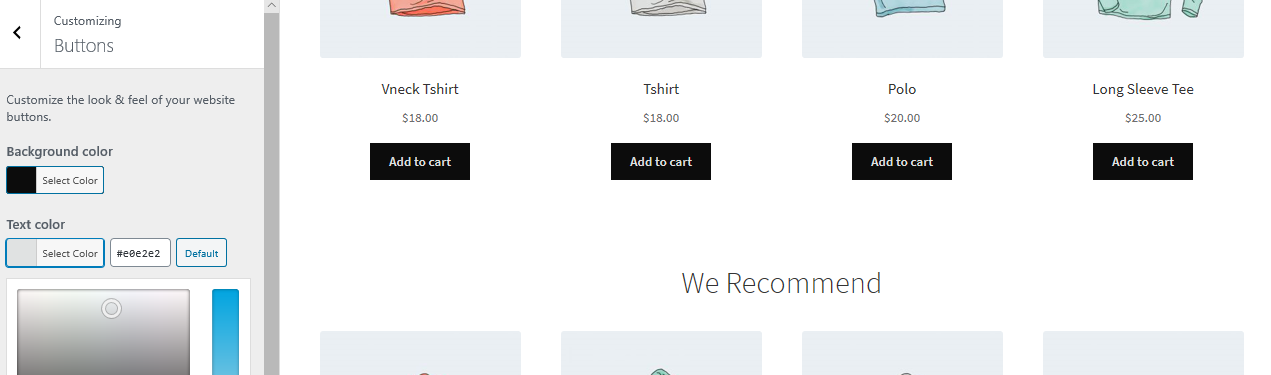
67. How to customize buttons
Buttons can be modified by using the Customizer. Navigate to Appearance, then Customize. Click on Buttons then style it to your specifications.
Here is an example:
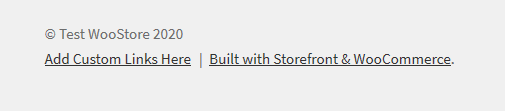
68. How to add Storefront custom footer links
Using this code, you will be able to add custom footer links and you can style them as desired. Simply add these lines of code to the child theme’s function.php file:
add_filter( 'storefront_credit_links_output', function( $default_links ) {
$output = [
sprintf(
'<a href="%s">%s</a>', get_home_url(), 'Add Custom Links Here'

),

$default_links
];
return implode(
' <span role="separator" aria-hidden="true"></span> ', $output
);
} );
Here is the result:
69. Storefront show blog excerpt on archives
If you are running a blog on your WooCommerce Storefront theme, then this code will be able to display the blog excerpt instead of full content on blog post archives. Simply add these lines of code to the child theme’s function.php file:
add_action( 'init', function() {
remove_action( 'storefront_loop_post', 'storefront_post_content', 30 );
add_action( 'storefront_loop_post', function() {
echo '<div class="entry-content" itemprop="articleBody">';
if( has_post_thumbnail() ) {
the_post_thumbnail( 'large', [ 'itemprop' => 'image' ] );
}
the_excerpt();
echo '</div>';
}, 30 );
} );
70. How to add a custom Metaviewport Tag
Simply add these lines of code to the child theme’s function.php file:
add_filter( 'wpex_meta_viewport', function() {
return '<meta name="viewport" content="width=device-width, initial-scale=1, maximum-scale=1" />';
} );
71. How to remove recommended plugins notice
Plugin notices might be a bother to some and it is very easy to remove it. Simply add these lines of code to the child theme’s function.php file:
// Remove certain plugins
function my_recommended_plugins( $plugins ) {
// Remove notice to install WooCommerce
unset( $plugins['woocommerce'] );
// Return plugins
return $plugins;
}
add_filter( 'wpex_recommended_plugins', 'my_recommended_plugins' );
// Remove all plugins
// THIS IS NOT RECOMMENDED IF YOU ARE USING SOME OF THE PLUGINS SINCE THE NOTICE IS IS ALSO USED TO LET YOU KNOW OF UPDATES
add_filter( 'wpex_recommended_plugins', '__return_empty_array' );
72. How to conditionally show or hide the footer callout
Simply add these lines of code to the child theme’s function.php file:
function my_callout_visibility( $bool ) {
// Hide on the front page
if ( is_front_page() ) {
$bool = false;
}
// Return boolean
return $bool;
}
add_filter( 'wpex_callout_enabled', 'my_callout_visibility', 20 );
73. How to remove theme Meta generator
This is used for support so that you are notified on what version of the theme you are using. It has no issue being there but if you want to remove it here is how.
Simply add these lines of code to the child theme’s function.php file:
add_action( 'init', function() {
remove_action( 'wp_head', 'wpex_theme_meta_generator', 1 );
}, 10 )
74. How to automatically add space under header for pages without a title
Whenever you disable the main Page Title for any page, there is no space left under the header. This code snippet will help you to add the spacing so that you can insert a slider, image, or other content flush with the top. Simply add the following code to the Additional CSS section:
body.page-header-disabled #main {
padding-top: 30px;
}
75. How to hide scroll to top button on mobile
Simply add the following code to the Additional CSS section:
@media only screen and (max-width: 959px) {
#site-scroll-top { display: none !important; }
}
76. How to move header & footer outside of the “boxed” layout
Simply add these lines of code to the child theme’s function.php file:
function myprefix_move_header_footer_out_of_boxed_layout() {
// Remove header/footer
remove_action( 'wpex_hook_wrap_top', 'wpex_header' );
remove_action( 'wpex_hook_wrap_bottom', 'wpex_footer' );
// Re-add header/footer
add_action( 'wpex_outer_wrap_before', 'wpex_header', 9999 );
add_action( 'wpex_outer_wrap_after', 'wpex_footer' );
}
add_action( 'init', 'myprefix_move_header_footer_out_of_boxed_layout' );
77. How to add more column choices to grid modules
Simply add these lines of code to the child theme’s function.php file:
// This function will add the column selections you will then have to add your custom CSS
// for the actual column. Example '.span_1_of_8{ width: 12.5%; }'
function myprefix_grid_columns( $columns ) {
$columns['8'] = '8';
$columns['9'] = '9';
$columns['10'] = '10'; // add as many as you want
return $columns;
}
add_filter( 'wpex_grid_columns', 'myprefix_grid_columns' );
78. How to add secondary custom menu under header
Simply add these lines of code to the child theme’s function.php file:
function add_custom_menu_above_main_content() { ?>
<div class="my-nav-wrapper clr">
<div class="container clr"> <!-- .center the navbar content -->
<?php
// Solution 1 add the navbar shortcode
echo do_shortcode( '[vcex_navbar menu="60"]' ); // change the menu ID
// Solution 2 using WP menu see
// @ https://codex.wordpress.org/Function_Reference/wp_nav_menu for args
$args = array();
wp_nav_menu( $args );
// Solution 3 use a menu plugin such as uberMenu
do_shortcode( '[menu_shortcode_here]' ); ?>
</div>
</div>
<?php }
add_action( 'wpex_hook_header_after', 'add_custom_menu_above_main_content' );
79. How to remove title from page header & leave breadcrumbs only
Simply add these lines of code to the child theme’s function.php file:
// Remove title from page header area
add_action( 'init', function() {
remove_action( 'wpex_hook_page_header_inner', 'wpex_page_header_title' );
remove_action( 'wpex_hook_page_header_content', 'wpex_page_header_title' ); // Total v5+
} );
80. Action References
These are all the available add_action() functions used on the Storefront theme. It attaches a function to a hook as defined by do_action
General
Here are some of the general Action functions:
storefront_before_site – Executed after opening <body> tag
storefront_before_content – Executed before opening <div id="content"> tag
storefront_content_top – Executed after opening <div id="content"> tag
Header
storefront_before_header – Executed after <div id="page"> tag
storefront_header – Executed inside <div class="col-full"> of the <header id="masthead"> tag
Homepage
storefront_homepage – Executed inside <div class="col-full"> of the homepage content section
Product categories
storefront_homepage_before_product_categories – Executed before the <section class="storefront-product-categories"> homepage section storefront_homepage_after_product_categories_title` – Executed after the <h2 class="section-title"> product categories section title storefront_homepage_after_product_categories – Executed after the <section class="storefront-product-categories"> homepage section
Recent products
storefront_homepage_before_recent_products – Executed before the <section class="storefront-recent-products"> homepage section storefront_homepage_after_recent_products_title – Executed after the <h2 class="section-title"> recent products section title storefront_homepage_after_recent_products – Executed after the <section class="storefront-recent-products"> homepage section
Featured products
storefront_homepage_before_featured_products – Executed before the <section class="storefront-featured-products">
homepage section storefront_homepage_after_featured_products_title – Executed after the <h2 class="section-title">
featured products section title storefront_homepage_after_featured_products – Executed after the <section class="storefront-featured-products"> homepage section
Popular products
storefront_homepage_before_popular_products – Executed before the <section class="storefront-popular-products"> homepage section storefront_homepage_after_popular_products_title – Executed after the <h2 class="section-title"> popular products section title storefront_homepage_after_popular_products – Executed after the <section class="storefront-popular-products"> homepage section
On sale products
storefront_homepage_before_on_sale_products – Executed before the <section class="storefront-on-sale-products"> homepage section storefront_homepage_after_on_sale_products_title – Executed after the <h2 class="section-title"> on-sale products section title storefront_homepage_after_on_sale_products – Executed after the <section class="storefront-on-sale-products"> homepage section
Best-selling products
storefront_homepage_before_best_selling_products – Executed before the <section class="storefront-best-selling-products"> homepage section
storefront_homepage_after_best_selling_products_title – Executed after the <h2 class="section-title"> best-selling products section title
storefront_homepage_after_best_selling_products – Executed after the <section class="storefront-best-selling-products"> homepage section
Blog archive page
storefront_loop_before – Executed before all posts on blog archive
storefront_loop_post – Executed before each post on blog archive
storefront_post_content_before – Executed before the content of each post on blog archive
storefront_post_content_after – Executed after the content of each post on blog archive
General page
storefront_page_before – Executed after the `<main id=”main”>` tag on single pages
storefront_page – Executed after the opening `<div id=”post-…”>` tag on single pages
storefront_page_after – Executed at the end of the `<div id=”post-…”>` tag on single pages
Single post
storefront_single_post_before – Executed after the opening <main id="main"> tag on single blog posts
storefront_single_post_top – Executed after the opening <div id="post-..."> tag on single posts
storefront_single_post – Executed immediately after storefront_single_post_top hook to show post content
storefront_single_post_bottom – Executed before the closing <div id="post-..."> tag on single posts
storefront_single_post_after – Executed before the closing <main id="main"> tag on single blog posts
Sidebar
storefront_sidebar – Executed on all pages containing a sidebar, provided widgets are present
Footer
storefront_before_footer – Executed before <footer id="colophon"> tag
storefront_footer – Executed before closing <footer id="colophon"> tag
storefront_after_footer – Executed after closing <footer id="colophon"> tag
Filters reference guide
This section lists some of the most commonly used filters that are available within the Storefront theme.
Comments
File: comments.php
storefront_comment_form_args – filter the comment reply title HTML before and after
Storefront template functions
File: /inc/storefront-template-functions.php
Navigation menu
storefront_menu_toggle_text – filter the responsive menu toggle text
Homepage
Product categories
storefront_product_categories_args – filter the homepage product category arguments
storefront_product_categories_shortcode_args – filter the homepage product category shortcode arguments
Recent products
storefront_recent_products_args – filter the homepage recent products arguments
storefront_recent_products_shortcode_args – filter the homepage recent products shortcode arguments
Featured products
storefront_featured_products_args – filter the homepage featured products arguments.
storefront_featured_products_shortcode_args – filter the homepage featured products shortcode arguments.
Popular products
storefront_popular_products_args – filter the homepage popular products arguments.
storefront_popular_products_shortcode_args – filter the homepage popular products shortcode arguments.
On sale products
storefront_on_sale_products_args – filter the homepage on sale products arguments.
storefront_on_sale_products_shortcode_args – filter the homepage on sale products shortcode arguments
Best-selling products
storefront_best_selling_products_args – filter the homepage best selling products arguments
storefront_best_selling_products_shortcode_args – filter the homepage best selling products shortcode arguments
Single post
storefront_single_post_posted_on_html – filter the single posted on details
Footer
storefront_footer_widget_rows – filter number of footer widget rows (default: 1)
storefront_footer_widget_columns – filter number of footer widget columns (default: 4)
storefront_copyright_text – filter the footer copyright text
storefront_credit_link – filter the footer credit link
Storefront functions
File: /inc/storefront-functions.php
storefront_header_styles – filter the header styles
storefront_homepage_content_styles – filter the homepage content styles
Storefront classes
File: /inc/class-storefront.php
storefront_custom_background_args – filter the default background arguments
storefront_default_background_color – filter the default site background color
storefront_sidebar_args – filter the default sidebar arguments
storefront_google_font_families – filter default Google Font families
storefront_navigation_markup_template – filter the output markup of the navigation.
WooCommerce template functions
File: /woocommerce/storefront-woocommerce-template-functions.php
storefront_upsells_columns – filter the upsell columns (default: 3)
storefront_loop_columns – filter the default product loop display (default: 3)
storefront_handheld_footer_bar_links – filter handheld footer bar links
WooCommerce classes
File: /woocommerce/class-storefront-woocommerce.php
storefront_related_products_args – filter related products arguments
storefront_product_thumbnail_columns – filter product thumbnail columns (default: 4)
storefront_products_per_page – filter products per page on product categories.
Conclusion
If you want to customize storefront theme, these tips shared on this comprehensive Storefront customization guide should be the best place to start. This also offers you the code snippets that you can quickly add the Storefront child theme and get the results instantly. Its my hope that you find this Storefront customization guide useful.

Joe is an experienced full-stack web developer with a decade of industry experience in the LAMP & MERN stacks, WordPress, WooCommerce, and JavaScript – (diverse portfolio). He has a passion for creating elegant and user-friendly solutions and thrives in collaborative environments. In his spare time, he enjoys exploring new tech trends, tinkering with new tools, and contributing to open-source projects. You can hire me here for your next project.
Similar Articles
- How to Remove Built with Storefront & Woocommerce Footer Link with 4 Simple Options
- How to Remove Storefront Footer Text & Links Using a Plugin
- Styling WordPress Menu Items Separately WordPress Menu CSS Classes
- How to Make Divi Mobile Menu Scrollable Quick Fix Solution
- How to Create Number Pagination in WordPress Without Using Plugin
- 100+ Tips, Tricks & Snippets Ultimate WooCommerce Hide Guide
Comments are closed.