 The Storefront theme is highly recommended when you want to start your WooCommerce. This is because this theme can be customized and it seamlessly integrates with the WooCommerce plugin. However, how can you change the color of the Add to Cart button in WooCommerce?
If you are using the Storefront theme, it is easy to do this, as all you need to do is to click a few buttons in the WordPress customizer. Additionally, I will show you how you can change the color using a bit of CSS.
Storefront Theme Change Button Color
The Storefront theme is a free theme that already has all of the controls you will want to customize the button to your heart’s desire.
Moreover, it streamlines a clean design, maximizes versatile layouts, and still manages to hold on to that boldness that WooThemes is well known for. For a free theme, the features contained in it are rather excellent.
With all that said, let us look as to how you can change the button color in your Storefront theme.
Steps to Change the Button Color Using the Customizer
- Log into your WordPress site and access the Dashboard as the admin user.
- After that, go to Appearance > Customize and load the customizer.
- In the customizer click on Buttons > Alternate button background color and set your color.

- Click on publish if you are satisfied with the changes.
Steps to Change the Button Color Using CSS
In this section, I will change the button color using CSS. Here you will learn a bit of CSS. The code snippet should be placed in your theme’s style.css file. Additionally, you can add it to the Additional CSS section. If you use this method, you do not have a plugin to maintain and you do not have to get the CSS styles out of the database.
To style the add to cart button on the single product page, we need to identify the class that we need to style. Simply right-click on the area you want to change in a browser like Chrome or Firefox and click “Inspect Element”
After clicking on that, this will bring up the console containing the various elements of the page on the left and the settings for those elements on the right. Now you need to find the element responsible for the add to cart button on the single product page.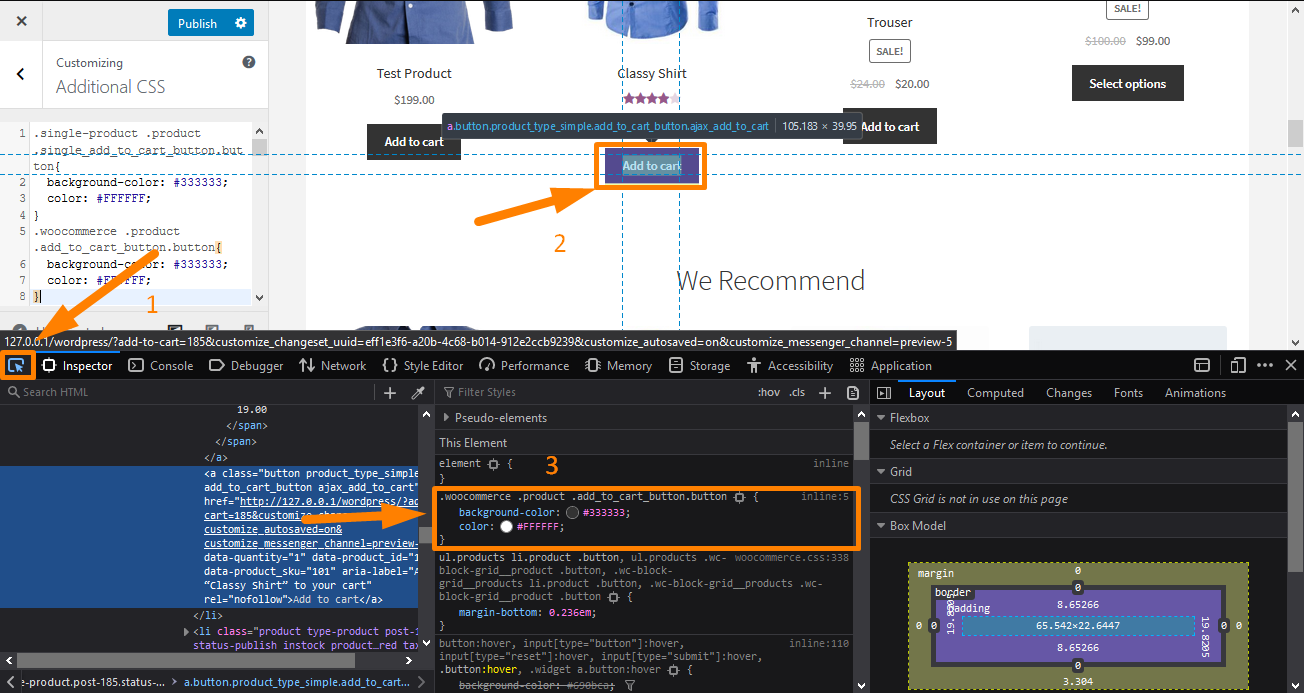
You need to do the same procedure to the add to cart button on the shop page. This means that we have to style the single_add_to_cart_button class and the add_to_cart_button class.
After identifying the CSS classes, follow these steps:
- Log into your WordPress site and access the Dashboard as the admin user.
- From the Dashboard menu, click on Appearance Menu > Customize.
- Navigate down to Additional CSS in the left sidebar that appears.
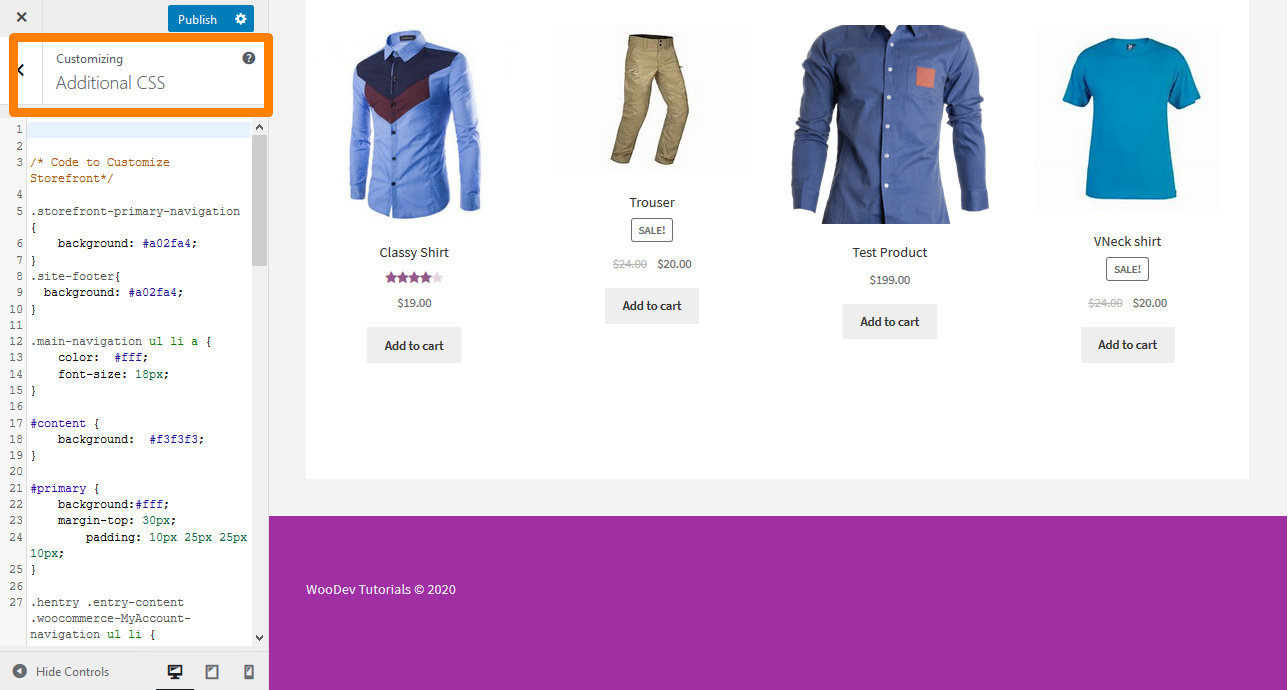
- Add the CSS rule as shown below:
.single-product .product .single_add_to_cart_button.button{

            background-color: #333333;

            color: #FFFFFF;

}

.woocommerce .product .add_to_cart_button.button{

            background-color: #333333;

            color: #FFFFFF;

}
This will be the outcome: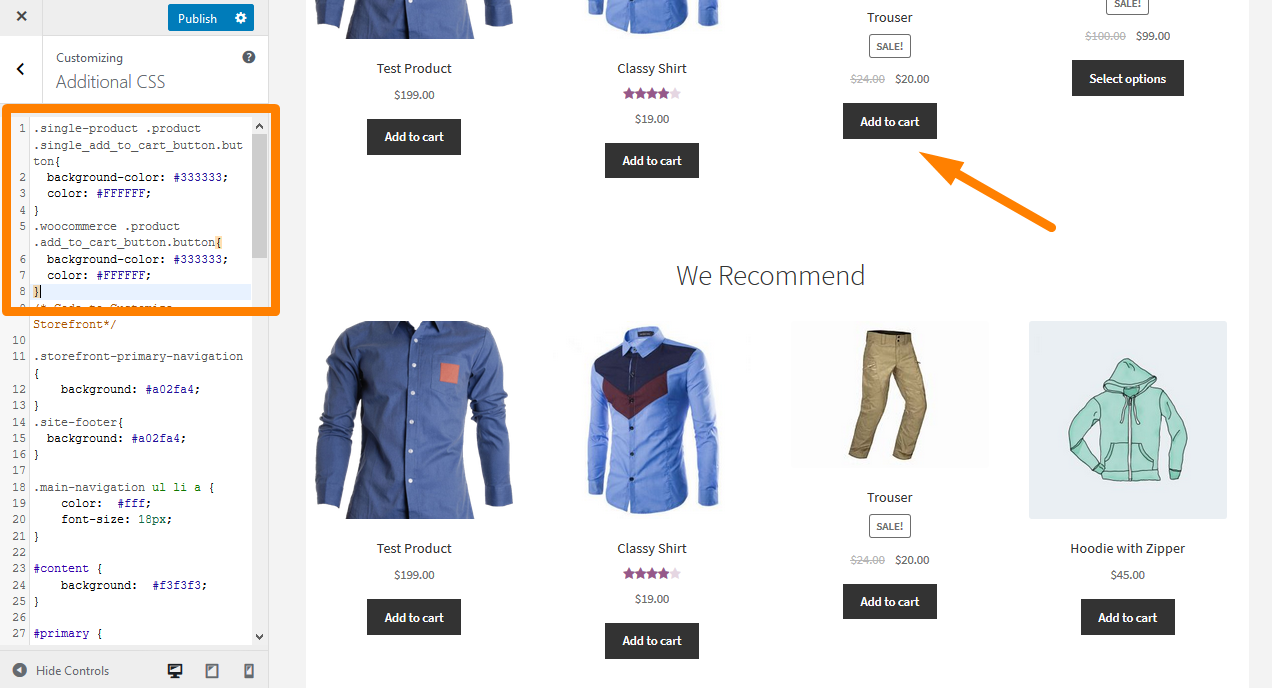
- Click on publish once you are satisfied with the changes.
Conclusion
In this post, I have highlighted that the Storefront is WooTheme’s free theme designed specifically for WooCommerce. If you want to customize the color of the buttons in the Storefront theme, I have shared two different methods that you can use to achieve this. In the first solution, I have used the WordPress customizer, to customize all the buttons on your theme. The second method involves the use of CSS styling. However, the trick is just to identify the class that we need to style.
Similar Articles
- How to Rename Order Status Messages in WooCommerce
- How to Add Extra Field in WooCommerce Checkout Form
- How to Add Categories to WooCommerce Products
- How to Remove Breadcrumbs WooCommerce Storefront
- How to Change Add to Cart Button Text In WooCommerce Shop Page
- How to Remove Related Products in WooCommerce in 3 Easy Options
- How to Change Add to Cart Text WooCommerce Guide with Examples
- How to Disable Reviews WooCommerce Storefront Theme
- How to Hide Out of Stock Variations in WooCommerce
- How to Change Font Size WooCommerce Storefront Theme
- How to Display Featured Products on Storefront Homepage
- How to Remove Search Box Storefront Theme
- How to Remove Cart from Storefront Theme Header
- How to Change Products per Page WooCommerce Storefront Theme
- How to Add Product After Storefront Setup [Beginner Guide]
- How to Use WooCommerce Product Attributes Step by Step [Complete Guide]
- How to Remove Category from Product Page WooCommerce In 2 Easy Options
- How to Hide All Products From Shop Page in WooCommerce
- How to Replace Add to Cart Button With Link WooCommerce
- How to Hide Add to Cart Button in WooCommerce