 The Storefront theme is great, but it comes with some hard-coded features which you can customize if the need arises. One of them is the height of the header. In this brief tutorial, I am going to show you how you can adjust the height of the header in your WooCommerce store.
WooCommerce Storefront Adjust Height of Header
The Header contains links to the important pages and it acts as a navigation tool for users to navigate through your site. Therefore, the header needs to be of an appropriate size, not too small or too large. This will enhance the user experience in your store.
Additionally, you might want to adjust the size to make a positive impression on your visitors. This means you need to refine the header element because this is the first thing that they see when they land on your site. Many WooCommerce tutorials show you how you can customize your WooCommerce store, however, few of them are solely focused on adjusting the height of this important element.
The header of your WooCommerce store appears on every page and post as shown below: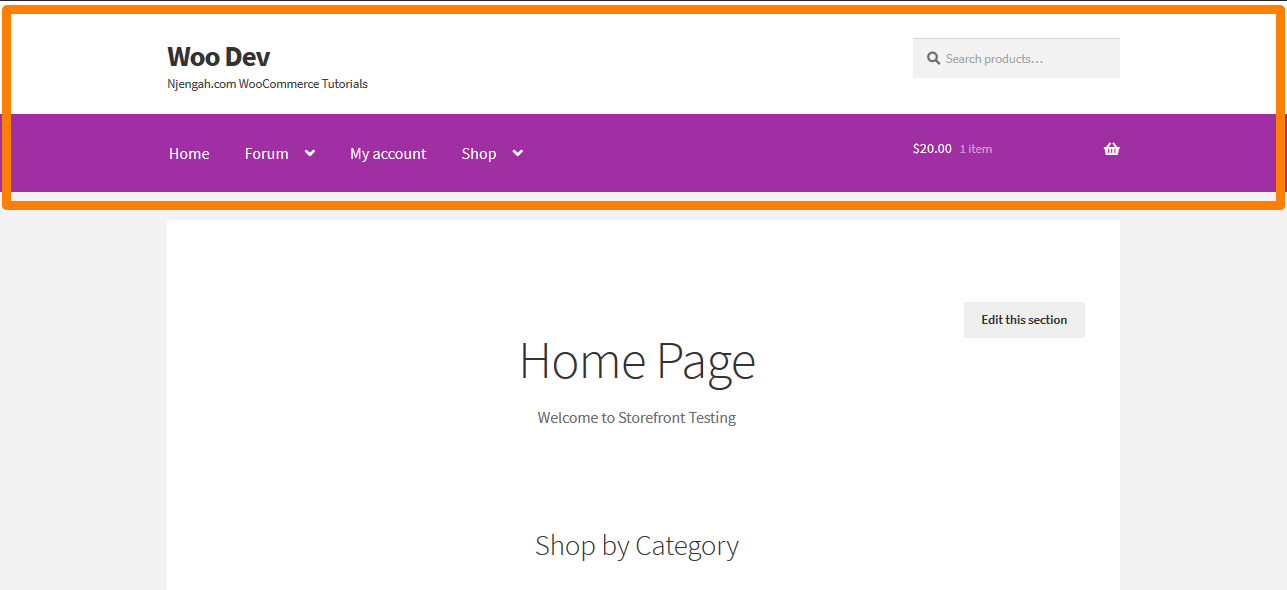
This means that the header is an extremely important element. Now let us customize it by following these simple steps:
Steps to Adjust the Header Size Using CS
- Log into your WordPress site and access the Dashboard as the admin user.
- From the Dashboard menu, click on Appearance Menu > Customize.
- Once the customization panel opens, click on Additional CSS.
- On the left sidebar, you will see where you can add custom CSS styling.
- Add the following CSS code:
/* Masthead */

#masthead.site-header {

    height: 155px!important;

    margin-bottom:0px

}

/* Mobile CSS for Masthead */

@media only screen and (max-width: 320px) {

    #masthead.site-header {

    height: 80px!important;

    margin-bottom:0px;

}

}

/* Masthead menu */

.storefront-primary-navigation a, .cart-contents a {

    margin:0 0 0 0;

}

.main-navigation ul {

    padding:0 0 10px 4px!important;

}

.main-navigation li {

    height:38px!important;}

/* Mobile CSS for Masthead menu */

@media only screen and (max-width: 320px) {

.main-navigation ul {

    background:#D6DDE4!important;

}

}

/* Header area */

.site-header {

padding-top:0.5em;

}
.site-header .custom-logo-link img, .site-header .site-logo-anchor img, .site-header .site-logo-link img {

margin-bottom: -45px;

}
- On the right you can preview the changes that you have made:
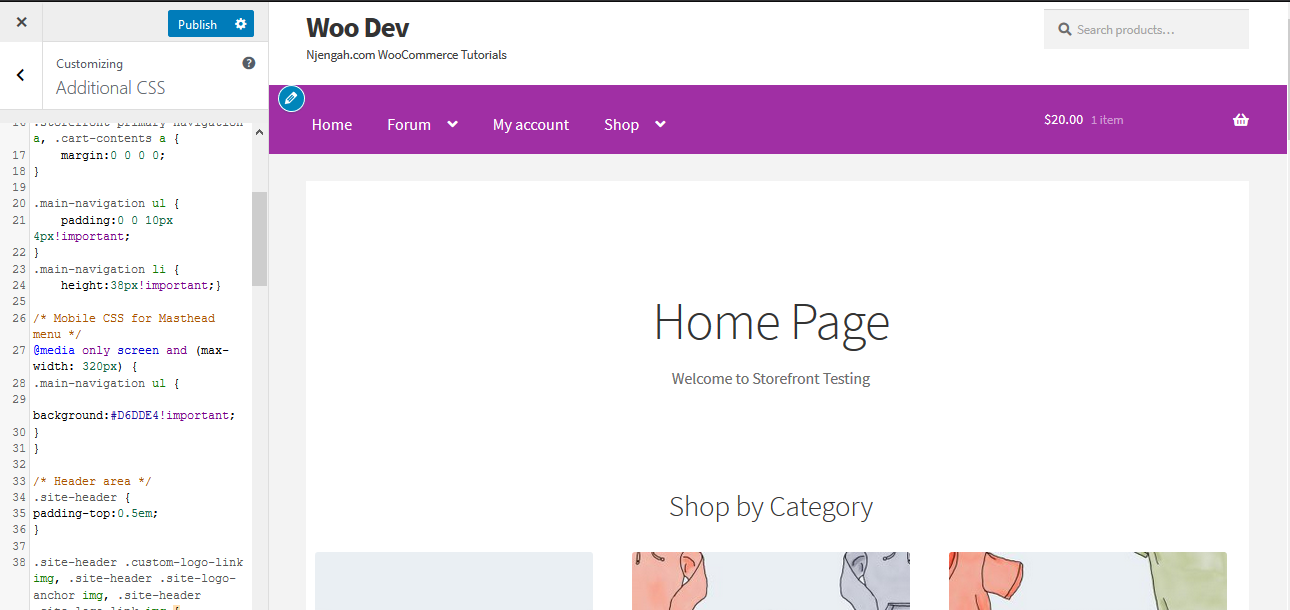
From this screenshot, you can see that the header size has been adjusted to a smaller size.
- Once you have gotten the desired changes, you can click publish so that the changes can reflect.
Conclusion
In this post, I have highlighted how the header is an extremely important element. This is because the header of your WooCommerce store appears on every page and post and visitors who come to your site see it first. You might want to adjust the header size to create a good first impression. This creates some sense of professionalism and users can trust your online store.
Moreover, I have added a custom CSS code that any store owner can use on their WooCommerce store. It is simple to add it, as you just need to copy and paste it in the Additional CSS section as indicated in the tutorial. Additionally, you can further tweak the code if you want to increase the size or reduce the size again.
Similar Reviews
- 80+ Tricks to Customize Storefront WooCommerce Theme : The Ultimate Storefront Theme Customization Guide
- How to Edit Header in Storefront WooCommerce Theme
- How to Add Product After Storefront Setup [Beginner Guide]
- How to Auto Approve Orders in WooCommerce
- How to Redirect WooCommerce Users After Registration by Roles
- How to Add Woocommerce Product from Frontend
- How to Hide Cart Subtotal In WooCommerce or Remove Subtotal Row
- How to Set Custom Related Products In WooCommerce
- How to Remove Bullets from Unordered List in WordPress
- How to Create My Account Page In WooCommerce
- How to Add Custom WooCommerce Payment Icons Checkout Page
- How to Resize WooCommerce Product Images
Comments are closed.