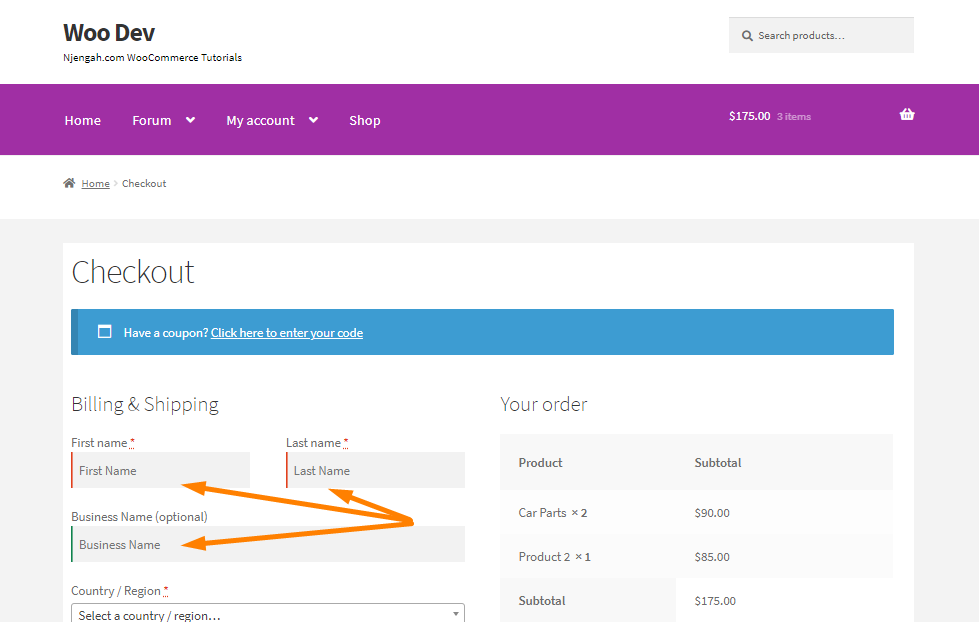
 The WooCommerce checkout page needs to be customized, as it is the most important step in the customer’s journey. It is the last chance to convince shoppers to make a purchase. There are a variety of factors that impact abandoned carts, like the shipping costs and payment options. However, the checkout page plays a role. If customers are confused when filling the fields, they will not be able to complete the checkout process.
WooCommerce Checkout Field Placeholder
One way to solve this problem is to add placeholder texts or labels in the fields. Users will not have a hard time filling in the fields, making it easier for customers to complete the checkout.
You can make several tweaks on the WooCommerce Checkout page. WooCommerce provides nearly endless flexibility for every experience level. If you are comfortable editing code, you can customize with code snippets, as you will see in this tutorial.
Steps to Change the Input Labels and Placeholders
Here are the steps you need to follow:
- Log into your WordPress site and access the dashboard as the admin user
- From the dashboard menu, click on the Appearance Menu > Theme Editor Menu. When the theme editor page is opened, look for the theme functions file with the extension functions.php. Open this functions file to add the function to change the input labels and placeholders. You can customize it to fit your needs.
- Add the following code in the functions.php file:
add_filter('woocommerce_checkout_fields', 'njengah_override_checkout_fields');

function njengah_override_checkout_fields($fields)

 {

 unset($fields['billing']['billing_address_2']);

 $fields['billing']['billing_company']['placeholder'] = 'Business Name';

 $fields['billing']['billing_company']['label'] = 'Business Name';

 $fields['billing']['billing_first_name']['placeholder'] = 'First Name';

 $fields['shipping']['shipping_first_name']['placeholder'] = 'First Name';

 $fields['shipping']['shipping_last_name']['placeholder'] = 'Last Name';

 $fields['shipping']['shipping_company']['placeholder'] = 'Company Name';

 $fields['billing']['billing_last_name']['placeholder'] = 'Last Name';

 $fields['billing']['billing_email']['placeholder'] = 'Email Address ';

 $fields['billing']['billing_phone']['placeholder'] = 'Phone ';

 return $fields;

 }
Conclusion
In this post, you have seen how it is easy to change the labels and placeholders on input field labels on the checkout page. If you prefer a little more structure, there are a variety of extensions and plugins for editing checkout fields.
Similar Articles
- How to Hide Update Cart Button WooCommerce Cart Page
- How to Create WooCommerce Conditional Checkout Fields
- How to Setup WooCommerce Storefront Blog
- How to Hide Prices From Google In WooCommerce
- How to Hide Tax On Checkout If Field Value Exists WooCommerce
- How to Change Quantity In Checkout WooCommerce
- How to Change WooCommerce Storefront Featured Image Size
- How to Add Select Field to Checkout WooCommerce
- How to Change WooCommerce Checkout Error Messages
- How to Add Hidden Field on WooCommerce Checkout Page
- How to Add WooCommerce Invoice Checkout Page
- How to Edit Required WooCommerce Checkout Fields
- How to Refresh Checkout Page WooCommerce
- How to Hide Storefront Mobile Cart Icon In WooCommerce
- How to Change WooCommerce Storefront Layout
- How to Simplify Checkout Free Items Storefront Theme
- How to Get Current Product Category Name in WooCommerce
- How to Set Up WooCommerce Terms and Conditions Checkout
- How to Remove Checkout Button WooCommerce

