Do you want to accept invoice payments in your WooCommerce store? If yes, you are in the right place.
In this post, you will learn how you can accept invoices on the checkout page.
WooCommerce Invoice Checkout
Instant digital payment methods like PayPal and Stripe cannot accept all types of transactions.
When it comes to wholesale B2B transactions, customers will prefer a time gap between the delivery of goods and payment. Invoice payment provides this facility for customers.
Therefore, if you are in such a business, enabling your WooCommerce store to accept invoice payments will benefit your online store’s growth. It is very easy to accept invoice payments, as you will see in this brief tutorial.
Steps to Enable Invoice Payment on Your WooCommerce Checkout Page
Here are the steps you need to follow to achieve this functionality:
- Log into your WordPress site and access the dashboard as the admin user
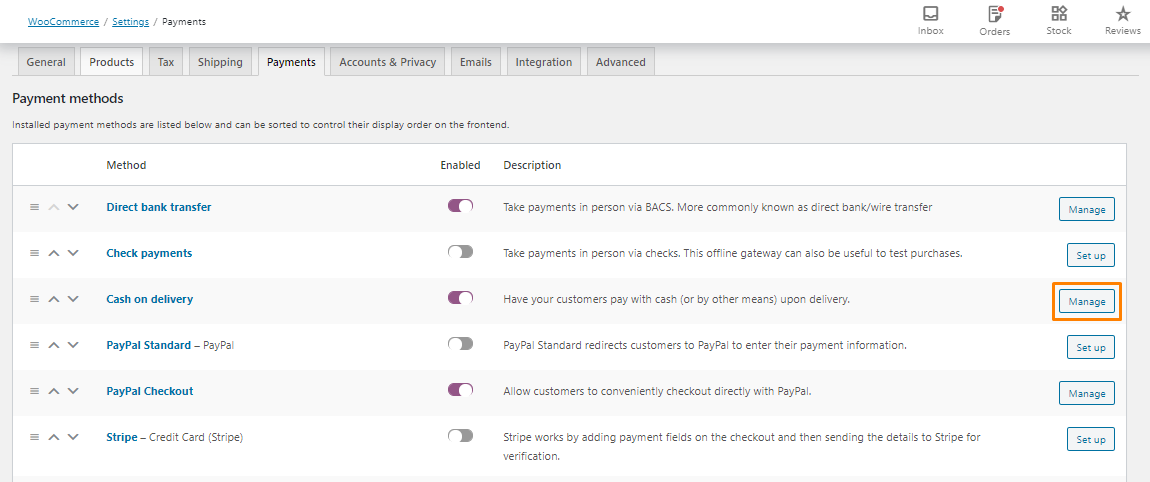
- Navigate to WooCommerce > Settings.
- Click on the Payments tab.
- On the Cash on delivery method, click on Manage, as shown below:
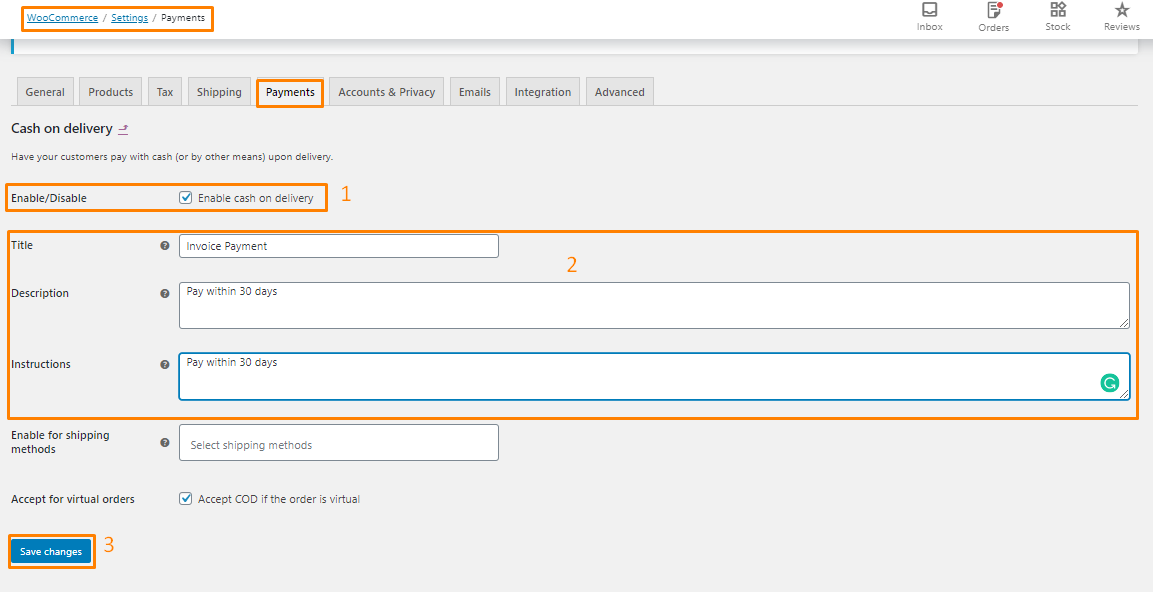
- Enable the checkbox and change the title to Invoice payment, then provide a suitable description and instruction, as shown:
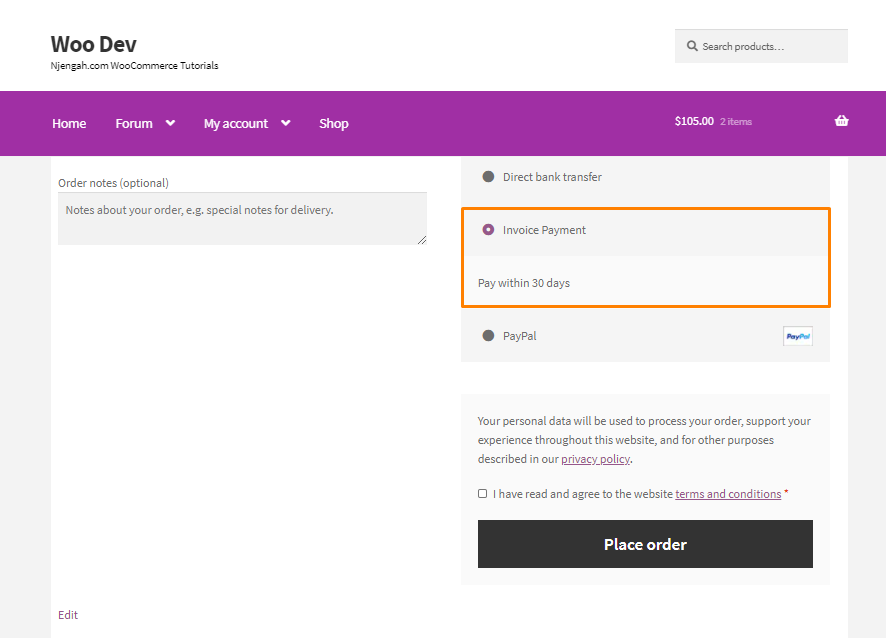
Now customers in your store can be able to make payments via invoice.
Generating Invoice
The next step would be creating an invoice to send to customers for payment.
The invoice should contain the list of goods purchased, the purchase bill, and the payment date. Webtoffee’s PDF Invoice & Packing slip Plugin for WooCommerce provides you with the simplest way to generate an invoice of your choice for your store.
Conclusion
In summary, you have learned how to enable invoice payments on your WooCommerce checkout page.
The success of an online store has a lot to do with providing convenient payment options for customers. This gives a huge relief for customers. Keeping your customers satisfied will help you increase sales in your store.

Joe is an experienced full-stack web developer with a decade of industry experience in the LAMP & MERN stacks, WordPress, WooCommerce, and JavaScript – (diverse portfolio). He has a passion for creating elegant and user-friendly solutions and thrives in collaborative environments. In his spare time, he enjoys exploring new tech trends, tinkering with new tools, and contributing to open-source projects. You can hire me here for your next project.
Similar Articles
- How to Add WooCommerce Storefront Banner
- How to Add Extra Field in WooCommerce Checkout Form
- How to Simplify Checkout Free Items Storefront Theme
- How to Hide the Weight of Product in WooCommerce
- How to Hide Prices From Google In WooCommerce
- How to Hide Order Status In WooCommerce
- How to Send to Mpesa WooCommerce Payment for Free
- How to Set Up WooCommerce Terms and Conditions Checkout
- How to Add Select Field to Checkout WooCommerce
- How to Remove the Checkout Button WooCommerce
- How to Change WooCommerce Checkout Labels
- How to Refresh Checkout Page WooCommerce
- How to Add WooCommerce Storefront Sitemap
- How to Remove Additional Information Checkout Page WooCommerce
- How to Move Hamburger Menu WooCommerce Storefront
- How to Add WooCommerce Checkout Email Validation
- How to Hide, Change or Remove WooCommerce On Sale Badge
- How to Change Quantity In Checkout WooCommerce
- How to Hide WooCommerce Update Notifications