Do you want to add a custom select box on the checkout page? If yes, you are in the right place.
WooCommerce Add Select Field to Checkout
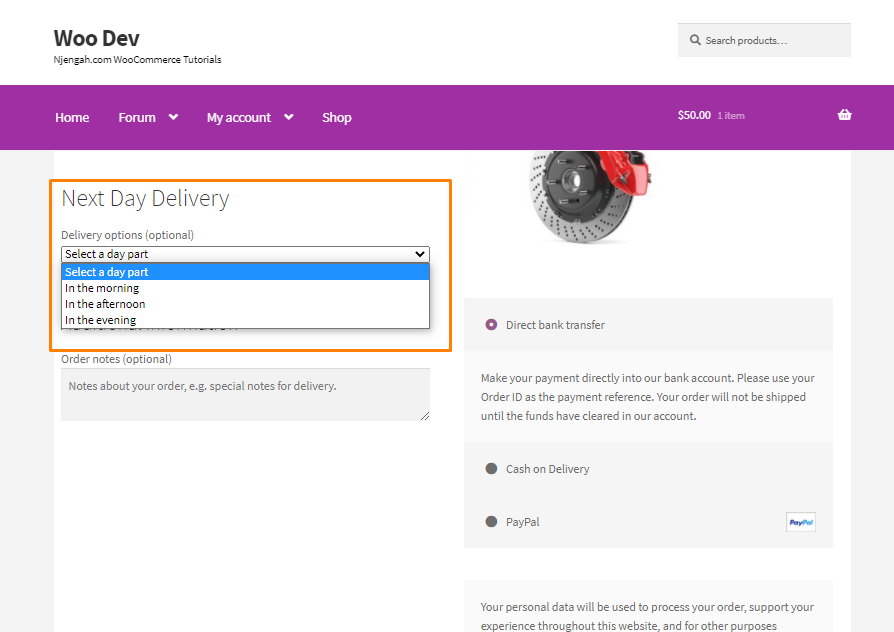
This post describes the process of adding a WooCommerce custom select box to your checkout page.
Additionally, we will ensure that the data is stored correctly in the database. You will also learn how to add the information from the select box on the order details page and order emails.
Please add the code snippets in the functions.php file. I recommend using a child theme so that your changes are not lost during an upgrade.
1. Add the Custom Select Field to the WooCommerce Checkout Page
The first step is to create a custom field by adding the code snippet below to your theme functions.php.
However, the most important setting is the type, which is set to the value ‘select’. Another important setting is the options array with four options displayed as options in the select box.
The first option is used as a placeholder. You can change the placeholder’s text as long as you leave the value ‘blank’ in place.
Here is the code snippet:
//* Add select field to the checkout page

add_action('woocommerce_before_order_notes', 'njengah_add_select_checkout_field');

function njengah_add_select_checkout_field( $checkout ) {

            echo '<h2>'.__('Next Day Delivery').'</h2>';

            woocommerce_form_field( 'daypart', array(

                'type'          => 'select',

                'class'         => array( 'njengah-drop' ),

                'label'         => __( 'Delivery options' ),

                'options'       => array(

                         'blank'             => __( 'Select a day part', 'njengah' ),

                    'morning' => __( 'In the morning', 'njengah' ),

                    'afternoon'           => __( 'In the afternoon', 'njengah' ),

                    'evening' => __( 'In the evening', 'njengah' )

                )

 ),

            $checkout->get_value( 'daypart' ));

}
2. Process the Checkout and Set Error Message
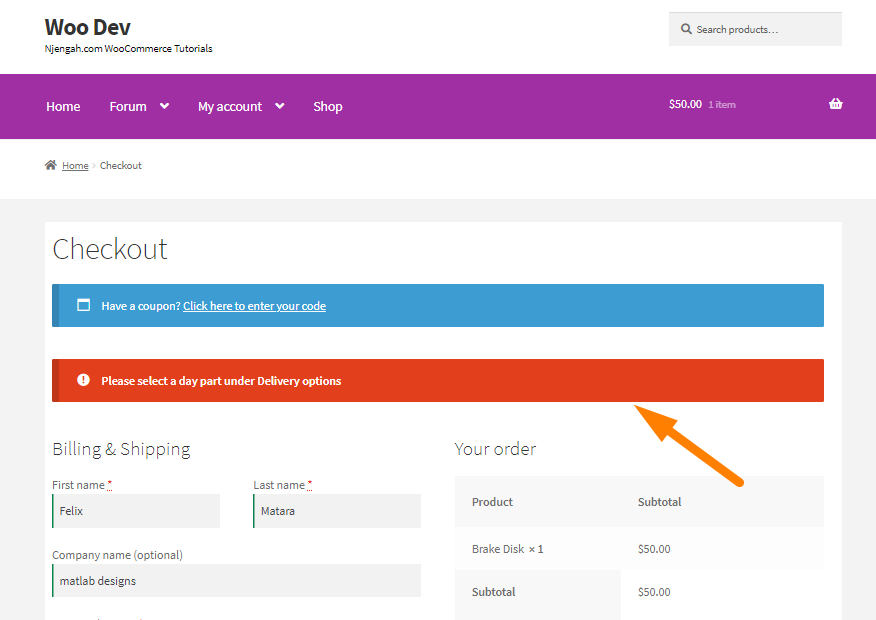
Add the snippet below to your functions.php. If the customer didn’t select anything, an error message is displayed.
//* Process the checkout

add_action('woocommerce_checkout_process', 'njengah_select_checkout_field_process');

function njengah_select_checkout_field_process() {

global $woocommerce;

// Check if set, if its not set add an error.

if ($_POST['daypart'] == "blank")

wc_add_notice( '<strong>Please select a day part under Delivery options</strong>', 'error' );

}
3. Update the Order Meta with the Field Value
To achieve this, add this snippet to your functions.php as well:
//* Update the order meta with field value

add_action('woocommerce_checkout_update_order_meta', 'njengah_select_checkout_field_update_order_meta');

function njengah_select_checkout_field_update_order_meta( $order_id ) {

if ($_POST['daypart']) update_post_meta( $order_id, 'daypart', esc_attr($_POST['daypart']));

}
4. Display Field Value on the WooCommerce Order Edition Page and Emails
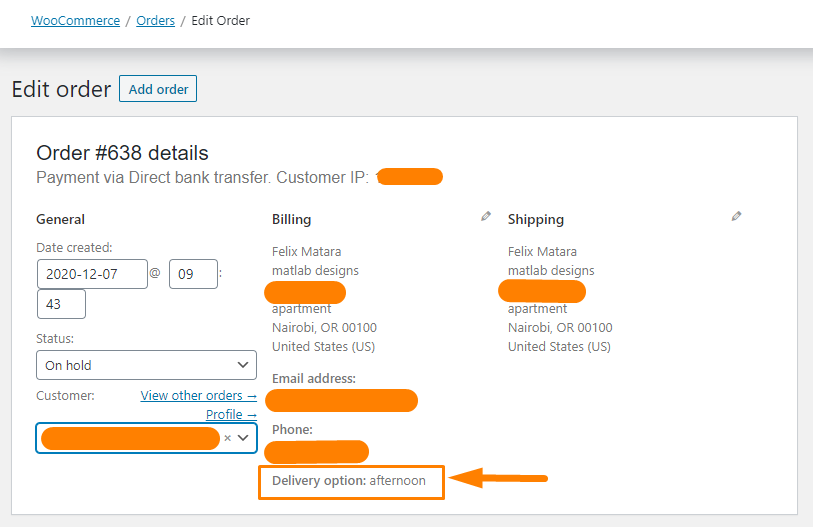
The next step is to add a snippet that adds the selected value on the WooCommerce order page. The function will also add the selected value to the WooCommerce email message.
//* Display field value on the order edition page

add_action( 'woocommerce_admin_order_data_after_billing_address', 'njengah_select_checkout_field_display_admin_order_meta', 10, 1 );

function njengah_select_checkout_field_display_admin_order_meta($order){

echo '<p><strong>'.__('Delivery option').':</strong> ' . get_post_meta( $order->id, 'daypart', true ) . '</p>';

}

//* Add selection field value to emails

add_filter('woocommerce_email_order_meta_keys', 'njengah_select_order_meta_keys');

function njengah_select_order_meta_keys( $keys ) {

$keys['Daypart:'] = 'daypart';

return $keys;

}
Conclusion
That is all you need to do to add a custom select box to your WooCommerce checkout page.
With some tweaks, you can easily create your selection or change the select field to an input field if you prefer. If you are not familiar with editing code, please consult a qualified WordPress developer so that you do not break your site.

Joe is an experienced full-stack web developer with a decade of industry experience in the LAMP & MERN stacks, WordPress, WooCommerce, and JavaScript – (diverse portfolio). He has a passion for creating elegant and user-friendly solutions and thrives in collaborative environments. In his spare time, he enjoys exploring new tech trends, tinkering with new tools, and contributing to open-source projects. You can hire me here for your next project.
Similar Articles
- How to Check If Plugin is Active In WordPress [ 3 WAYS ]
- How to Remove Cart Page WooCommerce Storefront Theme
- How to Count Items Added to Cart WooCommerce Cart Count Code
- How to Add WooCommerce Storefront Sitemap
- How to Hide Company Name Field WooCommerce Checkout Page
- How to Send to Mpesa WooCommerce Payment for Free
- How to Set up WooCommerce Storefront Footer Widgets
- How to Add Extra Field in WooCommerce Checkout Form
- How to Set Up WooCommerce Terms and Conditions Checkout
- How to Remove Additional Information Checkout Page WooCommerce
- How to Remove the Checkout Button WooCommerce
- How to Change WooCommerce Checkout Labels
- How to Add WooCommerce Checkout Email Validation
- How to Hide WooCommerce Products from Search Results
- How to Add Text Before the Price in WooCommerce » Add Text Before Price
- How to Change Quantity In Checkout WooCommerce
- How to Select All Except Last Child In CSS » CSS Not Last Child Example
- How to Hide Prices From Google In WooCommerce
- How to Move Hamburger Menu WooCommerce Storefront


