 The checkout page has some fields that gather information from customers. The checkout fields are generated outside the checkout template. Therefore, it can be a bit difficult finding them.
WooCommerce Edit Required Fields in the Checkout Page
At the top of the billing form template, we will use the $checkout global: @global WC_Checkout $checkout. This means that we need the WC_Checkout class to find where these fields are being generated instead, making our work easier.
The checkout class defines the checkout fields for billing and shipping, and it pulls them from WC()->countries->get_address_fields. Therefore, we have to go down one more level, to /includes/class-wc-countries.php.
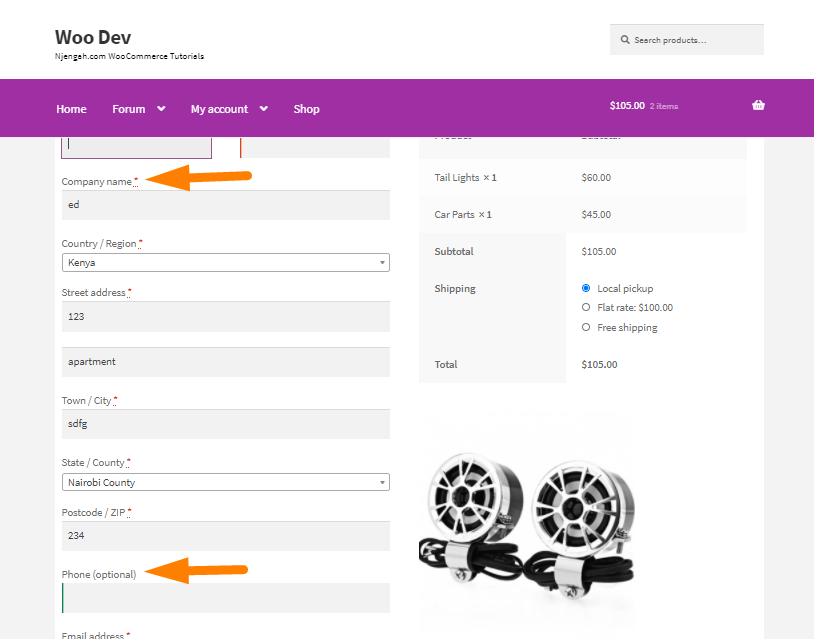
In this tutorial, I will illustrate how you can change the company field to be required, and the phone field not required.
Steps to Edit Required Fields in the Checkout Page
The first thing is to find the “company” field. It is generated by get_default_address_fields and can be modified by the woocommerce_default_address_fields filter, which passes in all of these fields.
Additionally, the get_address_fields will generate the email and phone fields, as these are specific to billing addresses.
Here are the steps you need to follow to change the company field to be required and the phone field not required:
- Log into your WordPress site and access the dashboard as the admin user
- From the dashboard menu, click on the Appearance Menu > Theme Editor Menu. When the theme editor page is opened, look for the theme functions file with the extension functions.php. Open this functions file to
- Add the function to change the company field to be required, and the phone field not required:
-
//make the company field to be required

function njengah_require_wc_company_field( $fields ) {

$fields['company']['required'] = true;

return $fields;

}

add_filter( 'woocommerce_default_address_fields', 'njengah_require_wc_company_field' );

//change “required” from true to false for the billing phone field

function njengah_unrequire_wc_phone_field( $fields ) {

$fields['billing_phone']['required'] = false;

return $fields;

}

add_filter( 'woocommerce_billing_fields', 'njengah_unrequire_wc_phone_field' );
This is the outcome:
Conclusion
In summary, you have learned how to edit the company field and the phone field in the WooCommerce Checkout.
The woocommerce_billing_fields passes in the country field as an optional argument. Therefore, you can use it to require phone numbers from certain countries conditionally.
Remember to place the code snippet at the bottom of your child theme’s functions.php file. Using a child theme will ensure that your changes are not lost during an upgrade.
Similar Articles
- How to Change Proceed To Checkout Text In WooCommerce
- 23 Best WooCommerce Plugins for Checkout Page Customization
- How to Add WooCommerce Checkout Email Validation
- How to Remove Additional Information Checkout Page WooCommerce
- How to Remove Cart Page WooCommerce Storefront Theme
- How to Change Quantity In Checkout WooCommerce
- How to Add Extra Field in WooCommerce Checkout Form
- How to Simplify Checkout Free Items Storefront Theme
- How to Remove Checkout Button WooCommerce
- How to Hide Tax On Checkout If Field Value Exists WooCommerce
- How to Change WooCommerce Checkout Labels
- How to Make WooCommerce Order Comments Required
- How to Change WooCommerce Checkout Error Messages
- How to Count Items Added to Cart WooCommerce Cart Count Code
- How to Create My Account Page In WooCommerce
- How to Put WooCommerce Cart and Checkout on One Page
- How to Customize Storefront Checkout Page