
Are you running a WooCommerce Multivendor store and you are looking for a way to add Woocommerce products from the front end?
In this brief tutorial, I will share with you a solution to this problem.
A WooCommerce Multivendor store allows you to host products from other people, however, one of the biggest concerns is that there must be a product submission process that is in the front end.
Users can still use the backend to submit products, but a front-end solution will be more effective.
However, why do you need them to do it in the front?
Benefits of Adding Woocommerce Product from Frontend
- The vendors in your WooCommerce store might find the backend area too complicated. This is because the backend contains additional features, some of which need tech-savvy people to handle. A good solution would be to simply use a submission form to upload product details.
- The shop manager role allows product vendors to access the backend settings, but as a WooCommerce store owner, you might want to restrict a few features for different users. This brings the need for a front-end solution with limited fields.
- Using the front end will help you display the fields that you need for your website. This means that the users will not see the same product fields every time.
- Another benefit you will gain from using the front end is that you or your users cannot customize any backend features. Therefore, you must use a frontend solution to edit the product fields according to your business requirement.
- It is a cheaper solution that is super simple and helps you to avoid the extra expense and clutter, and just avail the frontend posting.
These are just some of the benefits that you will gain from using the front end.
Apart from that, another crucial factor that you need to consider is that the backend of the WordPress website stores almost all the information about your WooCommerce.
This poses a security risk and you as the store owner would feel insecure about sharing the administrative data with your vendors.
Additionally, it is best to let vendors focus on what do they best, and just worry about product sourcing and sales.
On the other hand, the control of the technical aspects will remain with the online store owner or the developer.
Add Woocommerce Products from Frontend
With all that said, I am sure that by now you know why you need a frontend submission form for products in the frontend
Prerequisites to Add WooCommerce Product from Frontend:
- WordPress
- WP User Frontend Plugin is installed and activated.
- WooCommerce Plugin is installed and activated.
WP User Frontend Plugin

For this tutorial, we are going to use this plugin. This is one of the best front-end posting plugins, which has powerful form-building capabilities with custom post types.
The custom taxonomy and meta key feature make it possible to use it as a frontend interface to post and manage products of your WooCommerce-powered site.
After you successfully install this plugin and WooCommerce, this plugin will automatically capture the taxonomy, meta, and post types from WooCommerce.
This implies that you can easily create forms to upload products if you do not want to use the default backend posting of WC.
Required Pages to Get Started
For you to be able to upload products, you need to have:
- Dashboard Page.
- Edit Page.
- Product Upload Form.
- Upload Page.
Now let us get to the most important part of this article. Follow the steps carefully and you will be able to do this in just a few minutes.
Steps to Create a Frontend Submission Using the WP User Frontend Plugin
First, we need to install the WP User Frontend plugin, and here are the steps that you need to follow:
- Log into your WordPress site and access the Dashboard as the admin user.
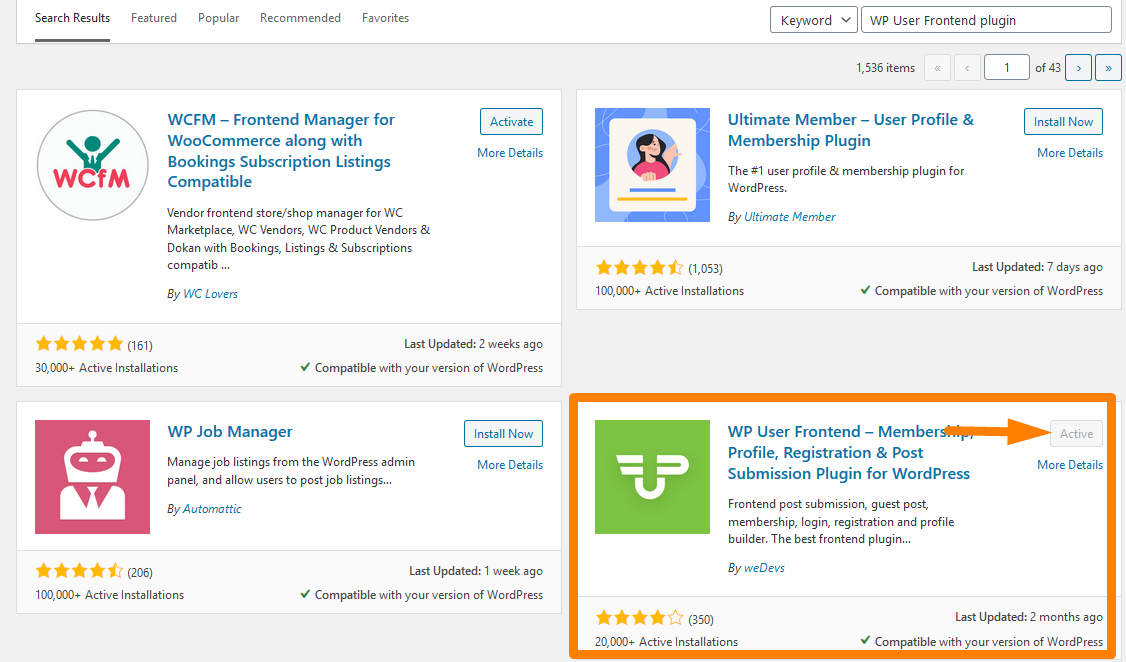
- To download it directly in the Admin Panel, simply navigate to Plugins > Add New.
- After that, you will need to do a keyword search for the plugin ‘WP User Frontend plugin’. You need to install and activate it as shown below:
- Then you need to create a Dashboard and Edit page. This plugin makes it easy to create these pages, as it is packed with many shortcodes. Navigate to the Dashboard of your WordPress site, then click on Pages > Add new page.
- Create two new pages named Dashboard and Edit and simply paste the shortcodes. Use [wpuf_dashboard post_type=”product”] for the Dashboard Page and [wpuf_edit] for the Edit Page. This is shown in the pictures below:
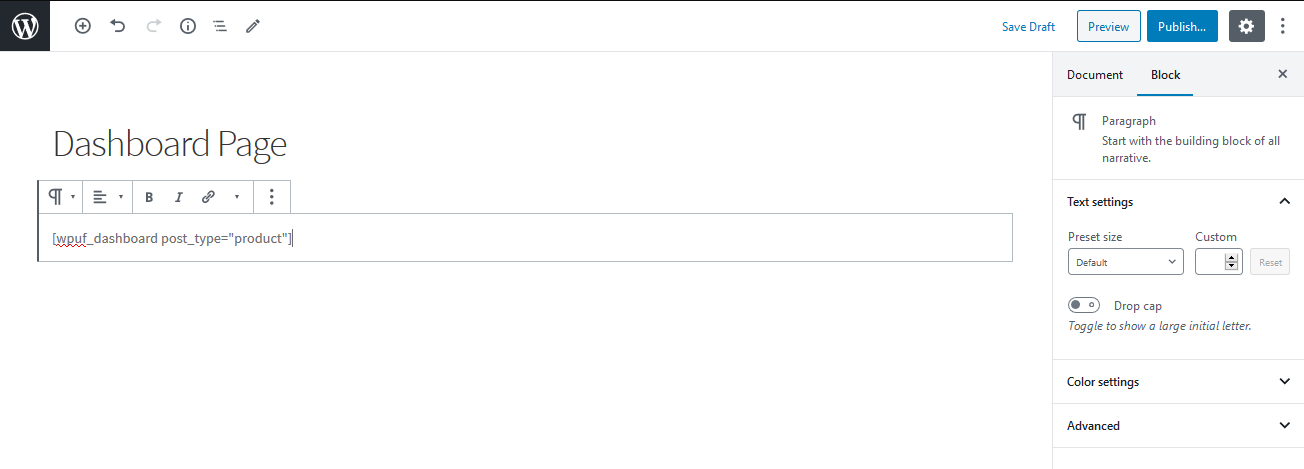
This will be the Outcome:
For the Edit Page: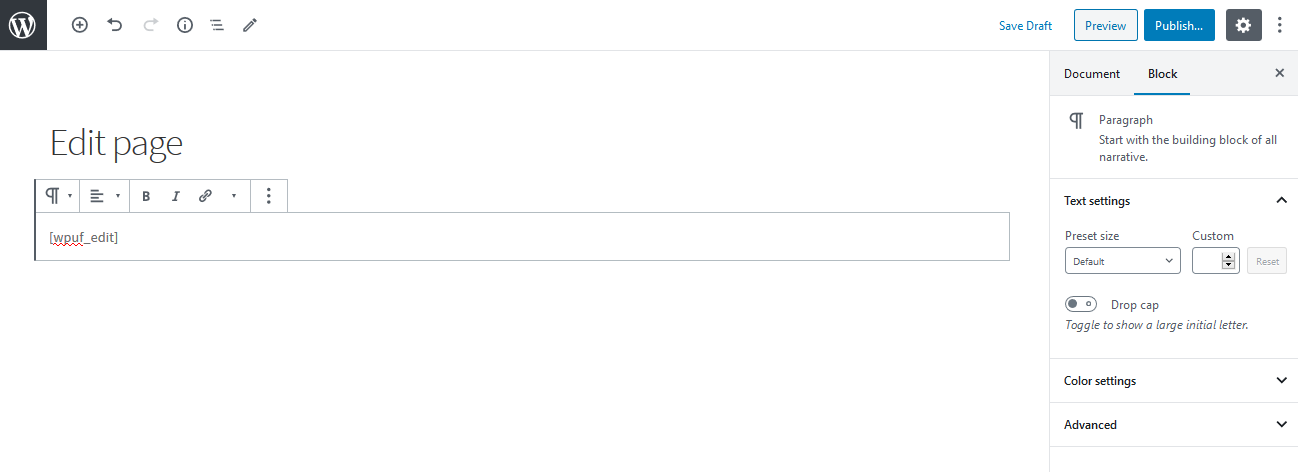
The outcome of this will be: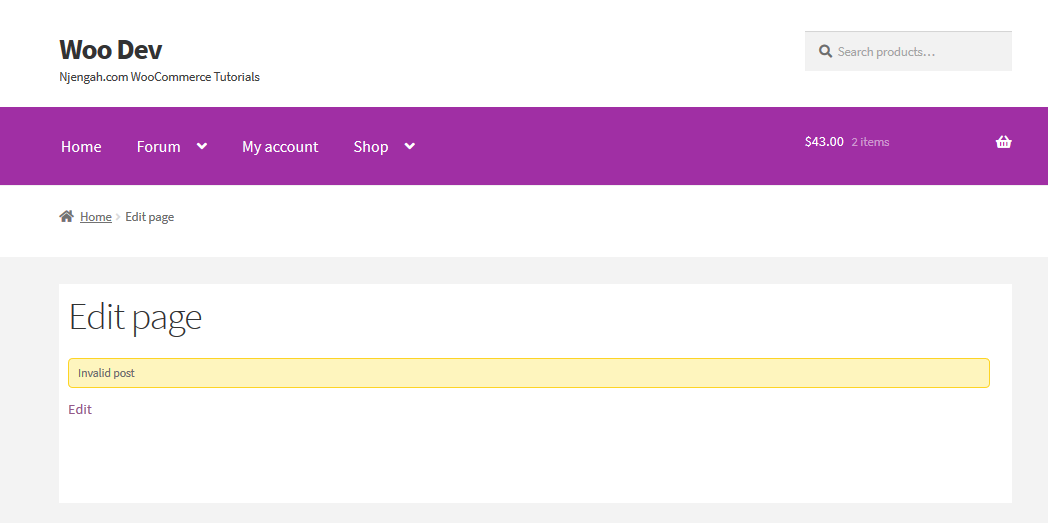
- Now we need to control the users in the front end. To do this, navigate to the Dashboard and click on WPUF > Settings > Frontend Posting You need to enable editing of products, by selecting the page where [wpuf_edit] is located from the drop-down menu as shown below:
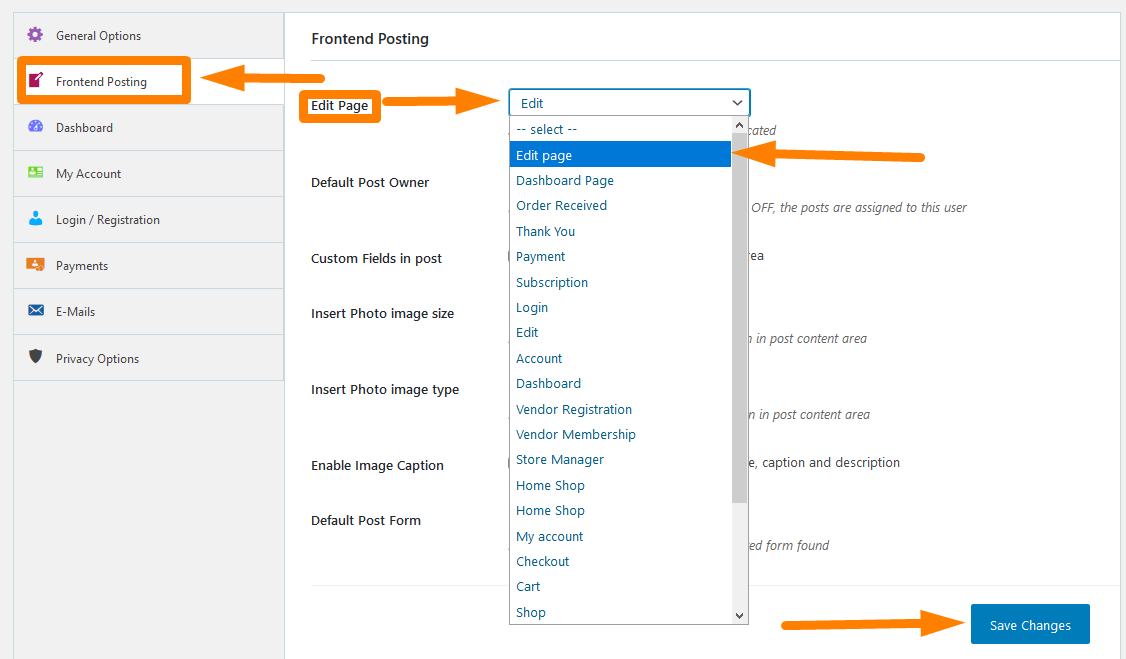
Remember to save all your changes after doing so.
- Then, you need to Dashboard Tab and change your user settings accordingly. This section will even allow you to let your users edit or remove a product or restrict it. This in turn allows you to have admin power over the website users, but you need to be careful to do it in such a way that it helps to eliminate error and makes the website responsive.
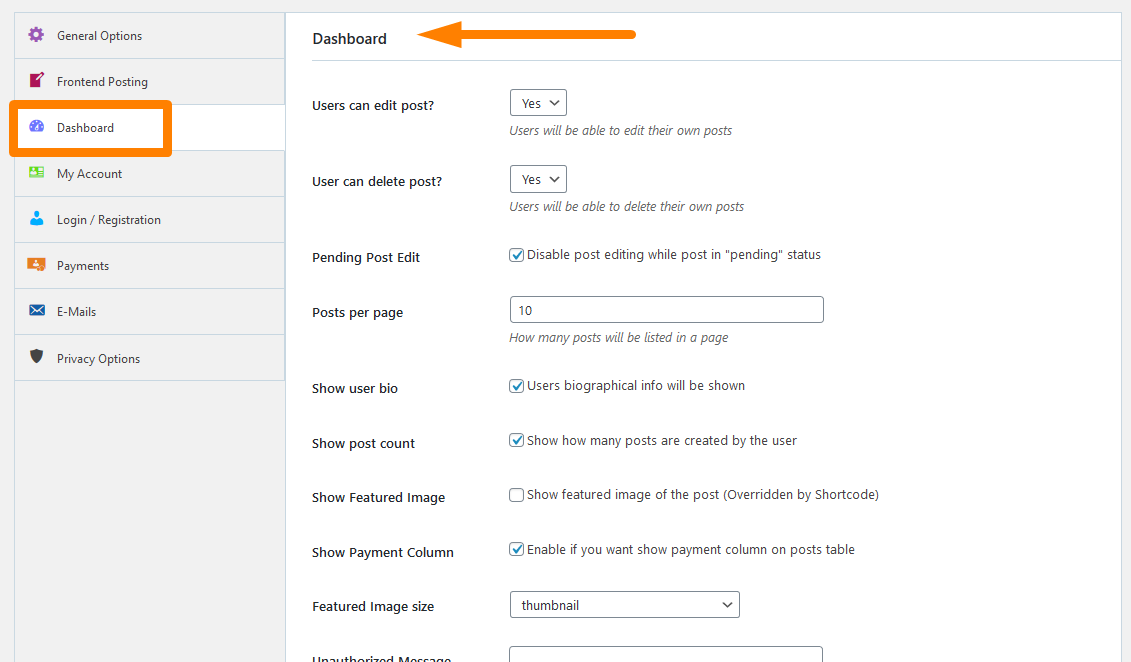 Remember to save the changes that you make.
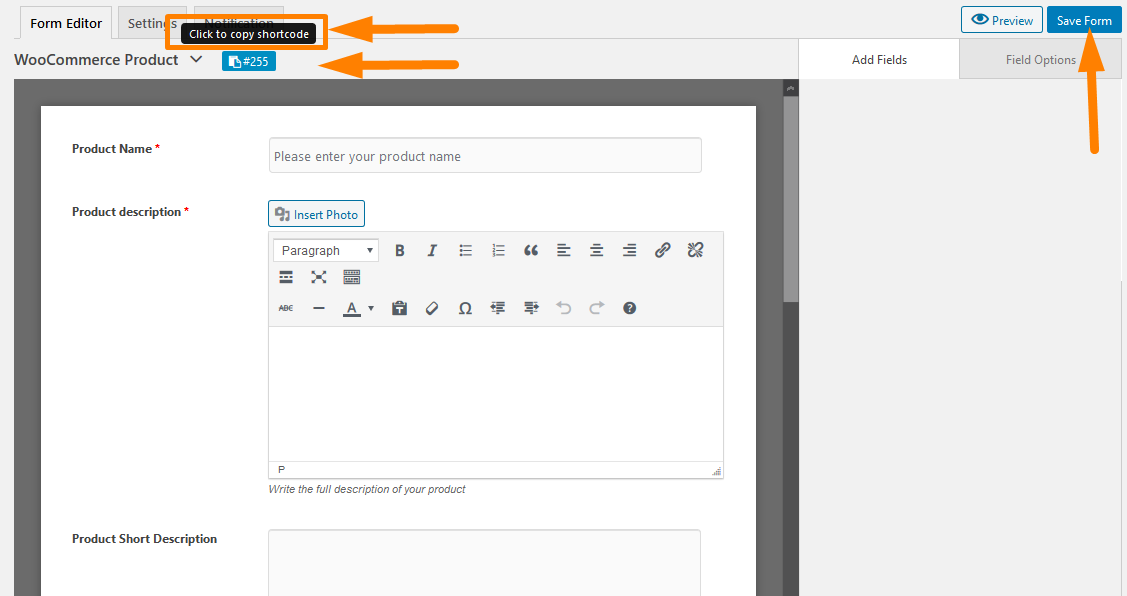
- Now we get into the most important section of this tutorial, where we need to create the Product Upload Form. To do this, click on WPUF > Post Form > Add Form.
- This will open some templates that you need to choose from. They will help you to create forms on the go. Click on the WooCommerce Product template and this will automatically create a WC product form with necessary fields, which you can edit or delete any field you want. Moreover, you can drag and drop any field from the right option bar to modify this form.
In this section, you can add custom fields and taxonomies like product_cat, product_tag, and product_shipping_class. Additionally, you can add various product type classes to help the users to bring variety to their offerings.
- After that, you need to copy the form shortcode by clicking on the form id and paste it to a new page that we are going to create, called Upload Page.
- This is the final section. We need to create a page for submitting a product from the front end. On the WordPress Dashboard, click on Pages > Add New page. Create a page called the Upload Page or another preferred name. Paste the shortcode as shown below:
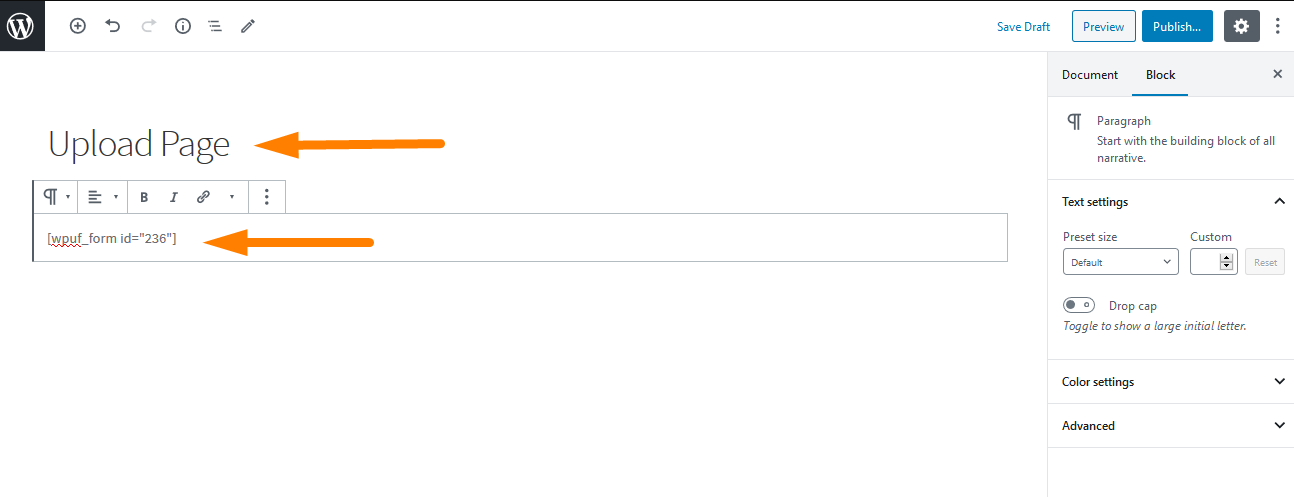
This will be the outcome in the front: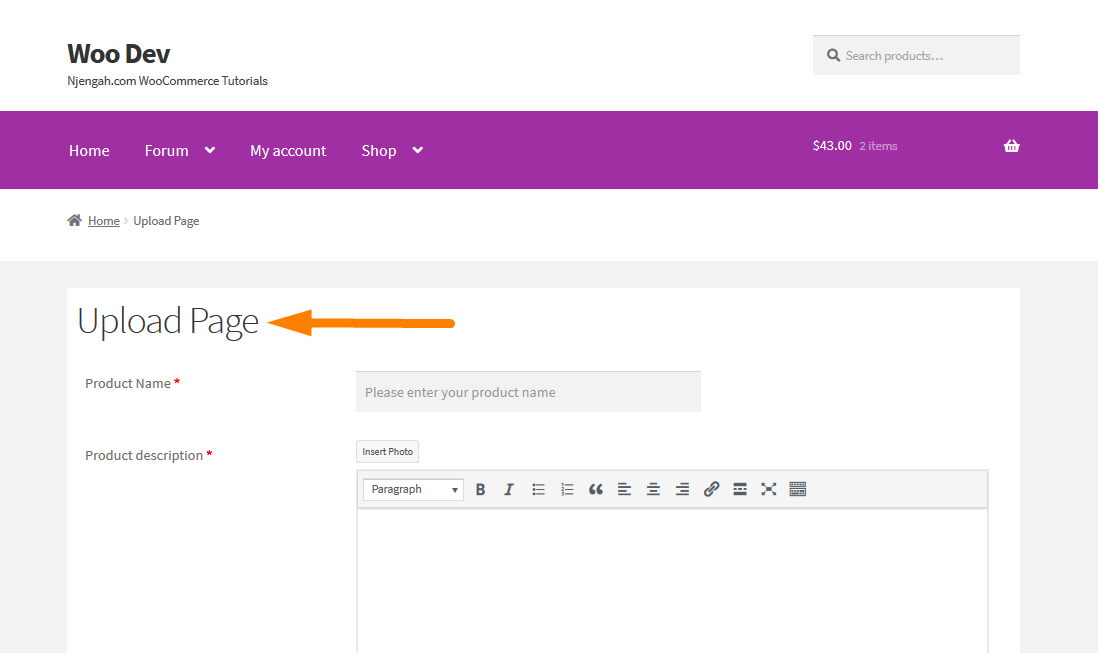
Remember to publish the Page on the front so that it will be live on your site. Now your WooCommerce store will be able to submit products in the front, making it very easy to retain the backend to the store owner or developer.
- To see if it works, let us add a test product, and see if it works:
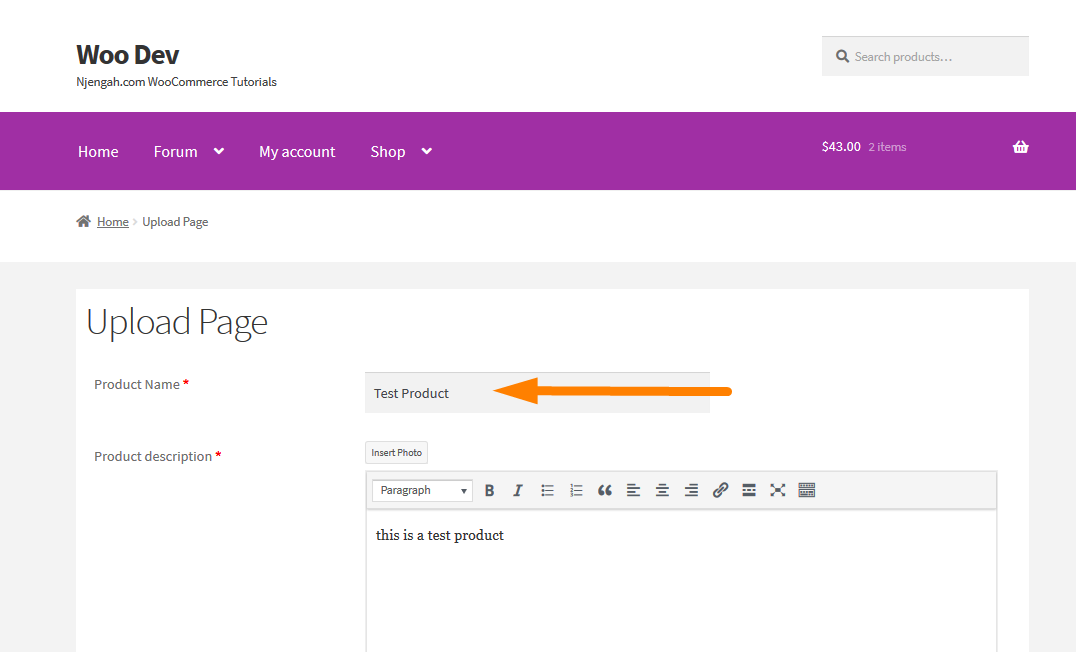
Here is the Outcome: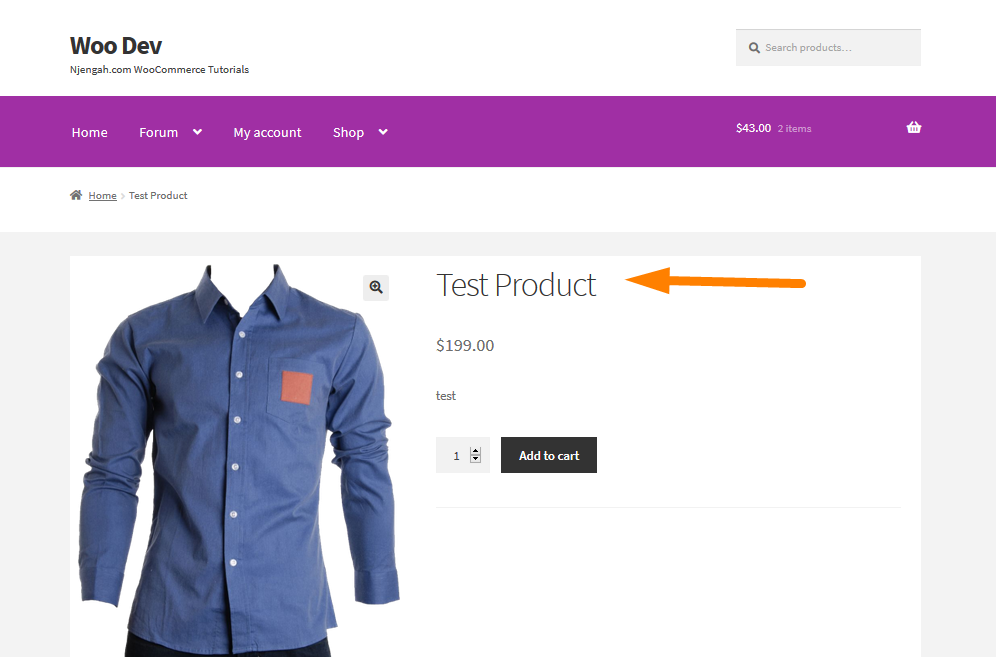
Conclusion
In this post, I have walked you through the entire process of creating a product submission form in the front end.
The WP User Frontend plugin made the process very simple with just a handful of clicks.
Additionally, you must create three pages, that is, the Dashboard Page, Edit Page, and Upload Page.
The shortcodes provided, make the task very simple, as you just have to paste them inside the pages.
Your WooCommerce multivendor store can now accept frontend product submissions without compromising on Security and Confidentiality.
I hope this post helped you to understand the benefits and why you need to add a front-end submission form in the frontend.

Joe is an experienced full-stack web developer with a decade of industry experience in the LAMP & MERN stacks, WordPress, WooCommerce, and JavaScript – (diverse portfolio). He has a passion for creating elegant and user-friendly solutions and thrives in collaborative environments. In his spare time, he enjoys exploring new tech trends, tinkering with new tools, and contributing to open-source projects. You can hire me here for your next project.
Similar Articles
- How to Get Order ID In Woocommerce
- How to Skip Cart and Redirect to Checkout Page WooCommerce
- How to Remove Zoom Effect on WooCommerce Product Image
- How To Quickly Find Your Product ID in WooCommerce
- How to Count Items Added to Cart WooCommerce Cart Count Code
- How to Sort WooCommerce Categories for Better User Experience
- What is WooCommerce Storefront Theme? [Answered]
- How to Get Payment Methods in WooCommerce » Code Example
- How to Hide a Product in WooCommerce or Hide Products by Category or Roles
- WooCommerce Logout PHP Snippet to Create Logout Button
- How to Add Description after Price in WooCommerce
- How to Resize WooCommerce Product Images
- How to Set Custom Related Products In WooCommerce
- Change Proceed To Checkout Text In WooCommerce
- How to Hide Cart Subtotal In WooCommerce or Remove Subtotal Row
- How to Add Text Before the Price in WooCommerce » Add Text Before Price
- How to Create WooCommerce Storefront Child Theme [Complete Guide
- How to Add Categories to WooCommerce Products
- How to Set Featured Products In WooCommerce
- How to Move Description Under Image in WooCommerce
- How to Remove Downloads Menu My Account Page WooCommerce
- How to Create WooCommerce Logout Page Shortcode
- How to Add Custom Shipping Method in WooCommerce
- 30+ Best WooCommerce Plugins for Your Store (Most are FREE)
- 30+ Best WordPress Inventory Management Plugins
- 25+ Best WooCommerce Plugins for Customer Feedback
Comments are closed.