 Are you looking for an easy way to add custom related products in WooCommerce? In this article, you will learn how to add specific related products and we will show you how to control the related products that show in this section of your product pages!
Custom Related Products in WooCommerce
Currently, there is a trend, which is greatly increasing, where many people are purchasing items online. This means that if you are running a WooCommerce store, you need to have attractive offers to your customers and a great way to do this is to add a related products section whenever a user opens a product page.
However, traditional marketing strategies still work, but when running an online store you need to focus on consumer behavior. This can help you craft your store accordingly. This means that you need to understand WooCommerce product categories, tags, and attributes that will help you in ranking your store in the Search Engine Results Page and show similar products in the WooCommerce store.
WooCommerce is one of the best store platforms that powers 42% of all eCommerce stores. The default version of WooCommerce allows you to have related products by category. However, it does not offer you an option to specify specific products to be related to other products. The following steps will guide you on how you can do this.
This means that whenever a visitor visits the details page of any product, he can see a few other related products as they all belong to the same category.
Steps to Set Specific Related Products in Your WooCommerce Store
- Log into your WordPress site and access the Dashboard as the admin user.
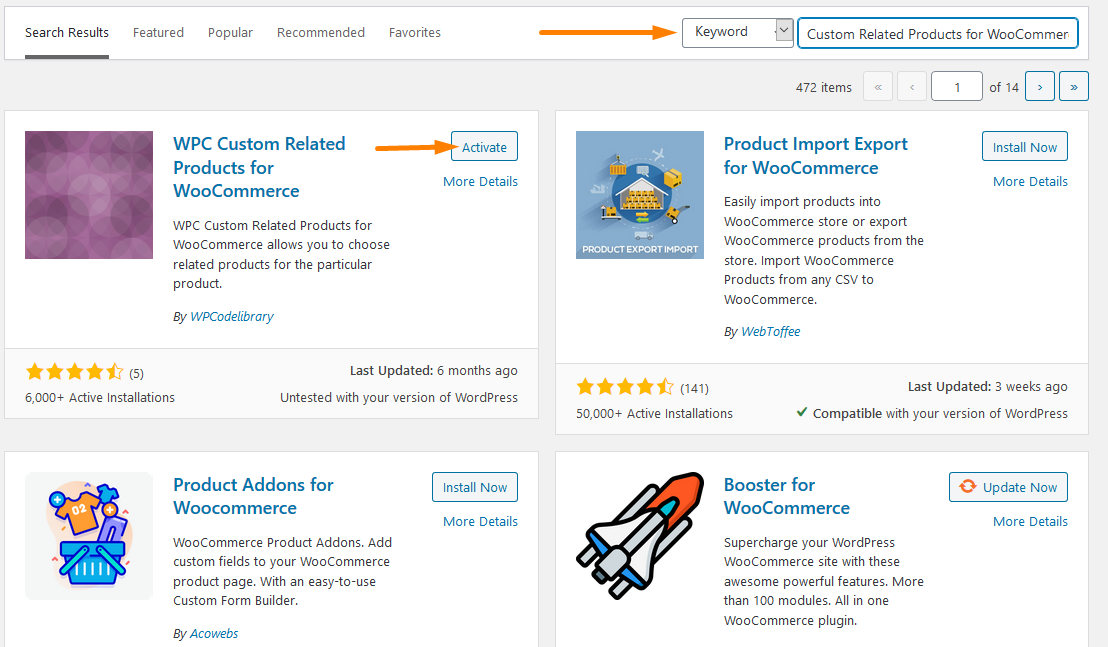
- From the Dashboard menu, click on Plugins > Add new. On the search bar, you need to do a keyword search of a plugin called ‘Custom Related Products for WooCommerce’. This is a free plugin that is available in the WordPress Community. You need to download it and activate it with just a few steps as shown in the image below:
- Once installed, Navigate to through the Dashboard > Products then on any product click on edit product section in the product data section. This will bring details about that product, but our main focus will be on the Product Section. Then go to Linked Products you will find ‘Custom Related Product‘ as shown in the image below:
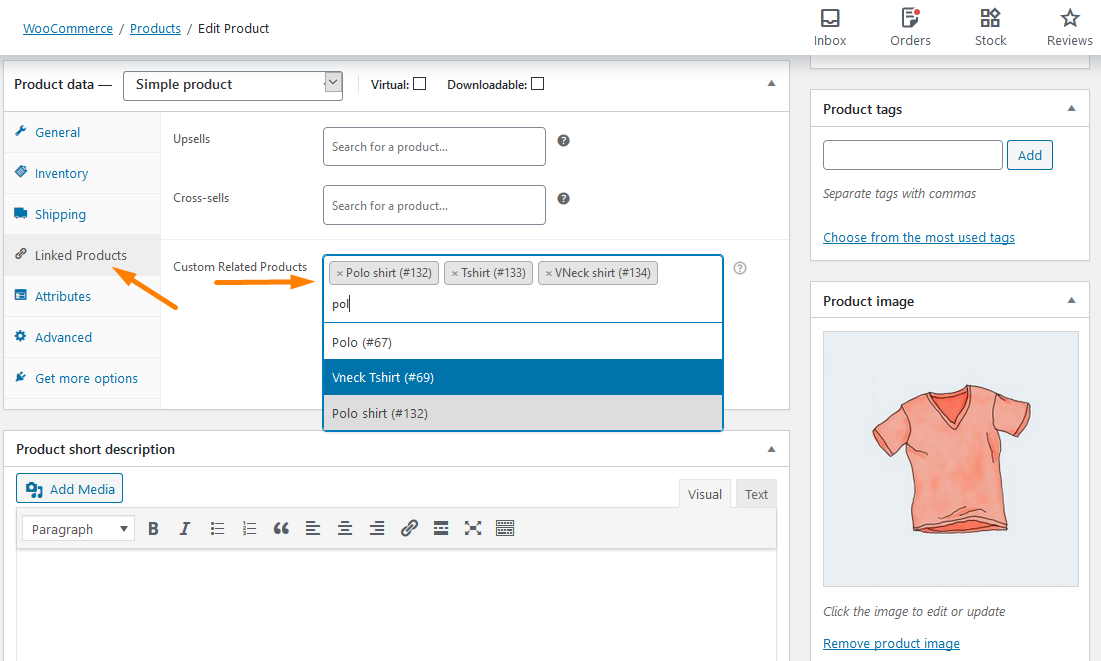
- Then you need to select products, which you want to set related products for that product in your shop items. After you type three letters in the text field, it will provide a drop-down to select the products you would like to show up.
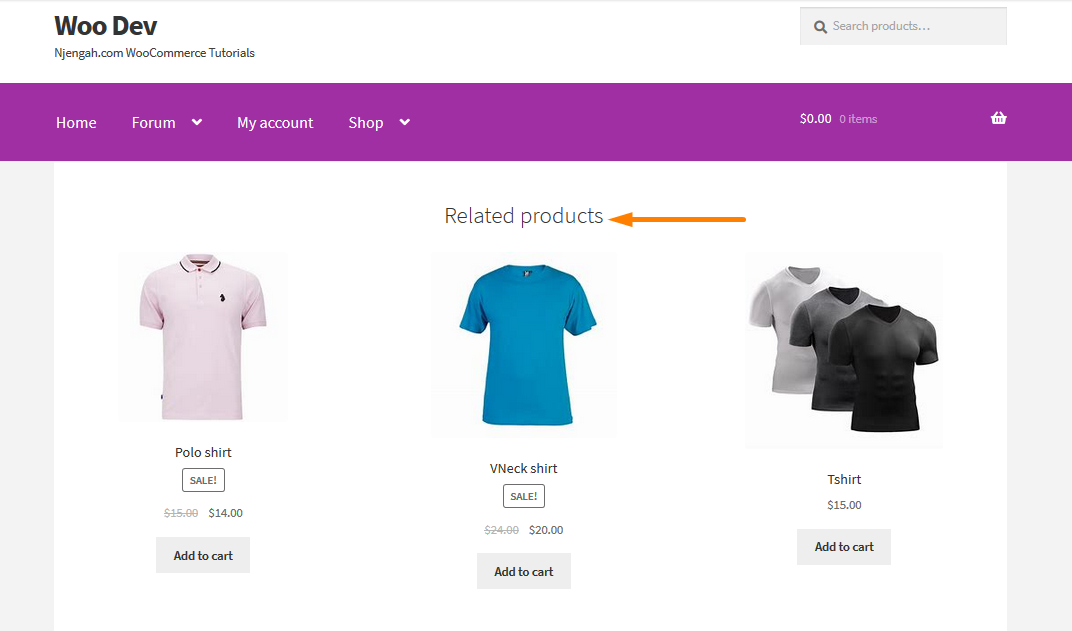
- After that, save or update the changes that you have made. It is just as simple as that. The outcome is shown below:
Conclusion
This article highlights how to add a custom related product on your WooCommerce Store. As we have earlier indicated, you need to download the Custom Related Products for WooCommerce Plugin that is available for free. There is no limit to add custom related products. The only limit may be the theme that you use. It may not show all the products as they may have a limit. However, this can be changed by increasing the number of relevant products to be displayed in your theme.
Similar Articles
- How to Add Description after Price in WooCommerce
- How to Remove Downloads Menu My Account Page WooCommerce
- How to Change Out Of Stock Text in WooCommerce
- How Add Text Before the Price in WooCommerce » Add Text Before Price
- How to Create WooCommerce Admin Notice for Plugin – WooCommerce Development
- How to Hide the WooCommerce Coupon Code Field
- How to Redirect a WordPress Page Without Plugins?
- How to Remove Has Been Added to Your Cart Message WooCommerce
- How to Skip Cart and Redirect to Checkout Page WooCommerce
- How to Add a Trust or Secure Logo on WooCommerce Checkout Page
- How to Change the WooCommerce ‘Added to Cart’ Notice
- How to Remove Related Products in WooCommerce in 3 Easy Options
- How to Resize WooCommerce Product Images
- How to Set Featured Products In WooCommerce
- How to Get Order ID In Woocommerce
- How to Add Categories to WooCommerce Products
- How to Change PayPal Icon On WooCommerce Checkout Page
- How to Create WordPress Custom User Roles
- 26 Best WooCommerce Plugins for Customer Feedback
- How to Display WooCommerce Products By Category
Comments are closed.