In this article, we will look at how you can create a WooCommerce Storefront child theme in just four simple steps.
Storefront WooCommerce theme is one of the main reasons that has made WooCommerce successful since it’s free and easy to use to create a unique store with minimal effort.
Additionally, Woocommerce has nearly infinite customization possibilities on offer, which is another huge factor contributing to WooCommerce’s success.
This means that when combined with the right theme, it will offer you a lot of design flexibility.
WooCommerce Storefront Child Theme
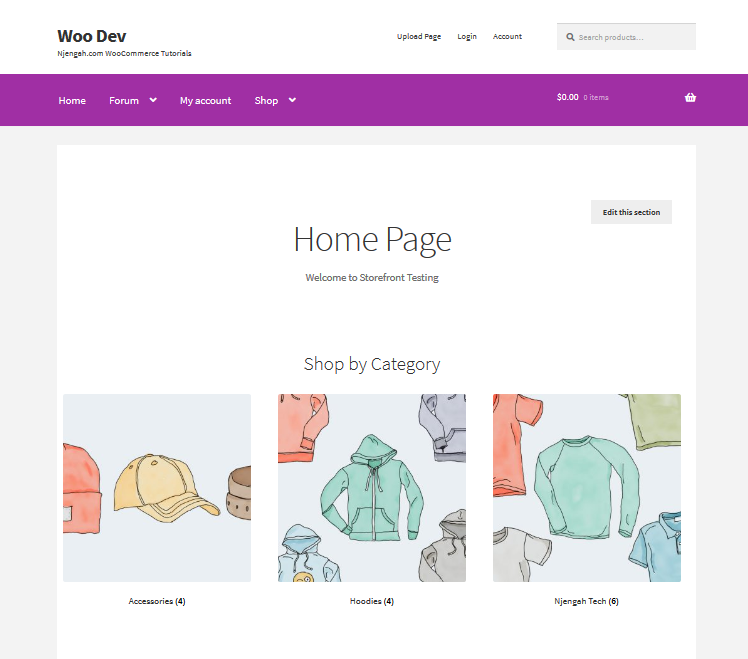
For a professional look, the Storefront theme is a great choice.
Now that your WooCommerce store is up and running, you may still want to customize the appearance of your store to match your exact vision.
After you install the WooCommerce storefront theme the next step you need to create the WooCommerce Storefront child theme that will enable you to make changes to your Storefront parent theme theme without editing the code of the parent theme directly.
This makes it easy to customize your store’s appearance and eliminates the potential risk to your theme and store, especially the risk of losing the customization you have added when the WooCommerce Storefront theme is updated.
Why Create WooCommerce Storefront Child Theme?
If you have dedicated a lot of time to reading WordPress, then you might have come across child themes before. In simple terms, the child theme is a copy of another theme, often referred to as the ‘parent theme’.
This means that you can make changes to the child theme and test them out, without editing the parent theme directly. Making changes to the child theme is important because altering the original theme can result in irreversible errors and even damage to your website.
Moreover, you might want to create a child theme because you want to use another theme as a basis. This will save you time and you do not have to build a new theme entirely from scratch.
Additionally, you might want to make some minor changes to a theme’s branding or overall aesthetic. Using a child theme opens up many possibilities depending on the time you are willing to devote to the ongoing project.
However, you can download several options from the official WooCommerce store, or other sites like ThemeForest, but none of the existing child themes on offer may match your needs. Additionally, you might want to create a unique look.
The Storefront child theme aims to deliver a store experience perfect for your niche.
It is also worth mentioning that the actual process of creating a child theme is the same for WooCommerce or a more general WordPress site. Despite this fact, you need to keep your store’s purpose in mind as you customize your child theme.
How to Create WooCommerce Storefront Child Theme
In this tutorial, we will create a theme that uses Storefront as its parent. You can use any theme as a base.
It is also important that you create a backup of your site before you proceed, as this will keep your store safe if something breaks during the development process.
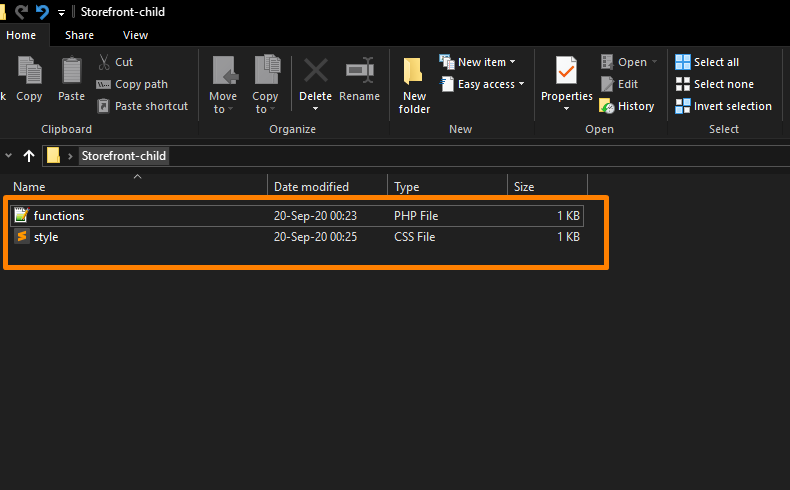
Additionally, it is also smart to use a staging environment for creating and tweaking your child’s theme. To create the child theme, we just need three things to start: the child theme directory, style.css file, and functions.php file.
Here are the steps you need to follow to create a WooCommerce Child Theme.
1. Creating the Theme Folder
This theme folder will house your stylesheet and function files. From an expert’s point of view, it is ideal to use the name of your parent theme as a folder name and append it with “-child”. In this tutorial, I named my directory “Storefront-child”. It is also important to check that your child theme’s directory name has no spaces to avoid possible errors.
2. Child Theme Stylesheet
After creating the folder, you need to create a stylesheet for the child theme.
The stylesheet needs to be set to inherit the styles from your parent theme.
To do this, you need to insert the following stylesheet header and replace them with relevant details.
It is also worth mentioning that the customizations done here will override parent theme styles.
/*

 Theme Name:   Storefront Child

 Theme URI:    http://sitename.com/storefront/

 Description:  Storefront Child Theme

 Author:       Your Name

 Author URI:   http://sitename.com

 Template:     storefront /*this is case sensitive*/

 Version:      1.0.0

 License:      GNU General Public License v2 or later

 License URI:  http://www.gnu.org/licenses/gpl-2.0.html

 Tags:         light, dark, full-width, responsive-layout, accessibility-ready

 Text Domain:  storefront-child

*/

/*Theme customisations start here*/
However, in this tutorial, I will not teach you how to use CSS, as it is impossible to cover in this article. You need to learn CSS or hire a developer to do the CSS tweaks on your website.
3. Child Theme Function
In the previous methods, they suggest that you use “@import” in your stylesheet to load your child theme. It is important to note that this is no longer considered a best practice. However, you just need to “enqueue” your parent theme’s stylesheet in your child theme’s functions.php file.
To make this possible you can use “wp_enqueue_scripts action” and use “wp_enqueue_style()”. It is also worth mentioning that the stylesheet for your child’s theme is usually loaded automatically.
You need to enqueue it well so that it is loaded and you need to make sure that the child stylesheet gets priority. To make things easier, I created the following code that sets ‘parent-style’ as a dependency so your child-theme stylesheet loads after it.
<?php

function theme_enqueue_styles() {

$parent_style = 'parent-style';

wp_enqueue_style( $parent_style, get_template_directory_uri() . '/style.css' ); wp_enqueue_style( 'child-style', get_stylesheet_directory_uri() . '/style.css', array( $parent_style ) ); } add_action( 'wp_enqueue_scripts', 'theme_enqueue_styles' );

?>
4. Activation
Now that the child theme folder is complete, you need to create a .zip file of your child theme folder, so that you can add it to your WordPress themes.
You can do this by using 7-zip or Winrar. It is also important to make sure that you have your style.css and functions.php inside your child theme folder.
Additionally, it is important to take note and keep records of other plugin settings before you activate your child theme. After that, you can upload this in your WordPress via Appearance > Add Themes.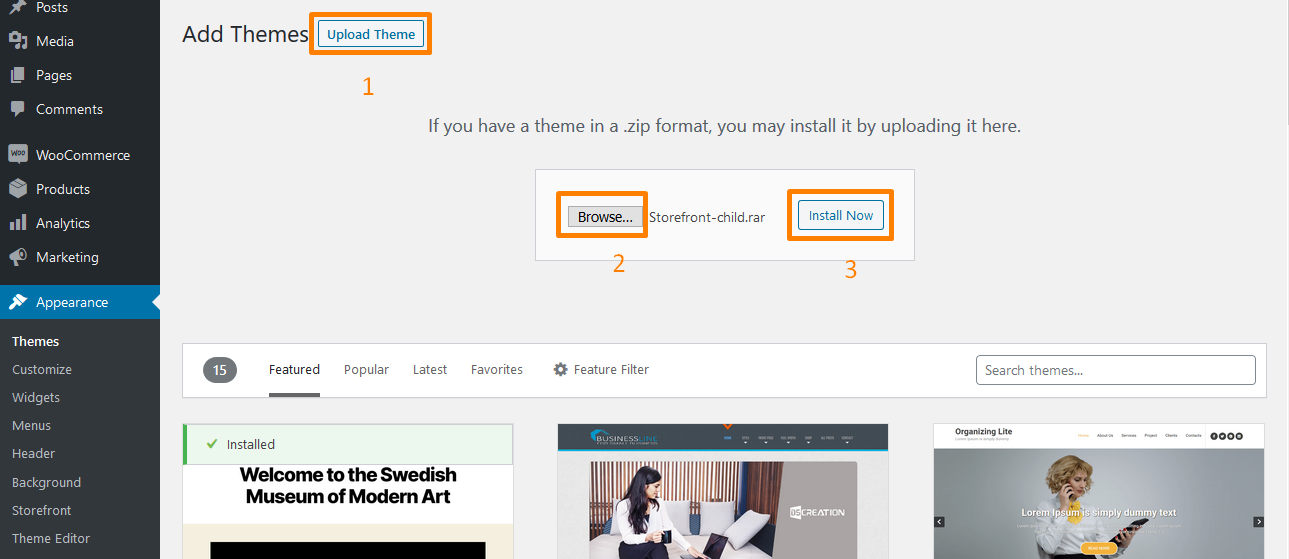
WordPress will install it just like any theme and once it is installed, you need to activate this by clicking on ‘Activate’ by going to Appearance > Themes as shown below: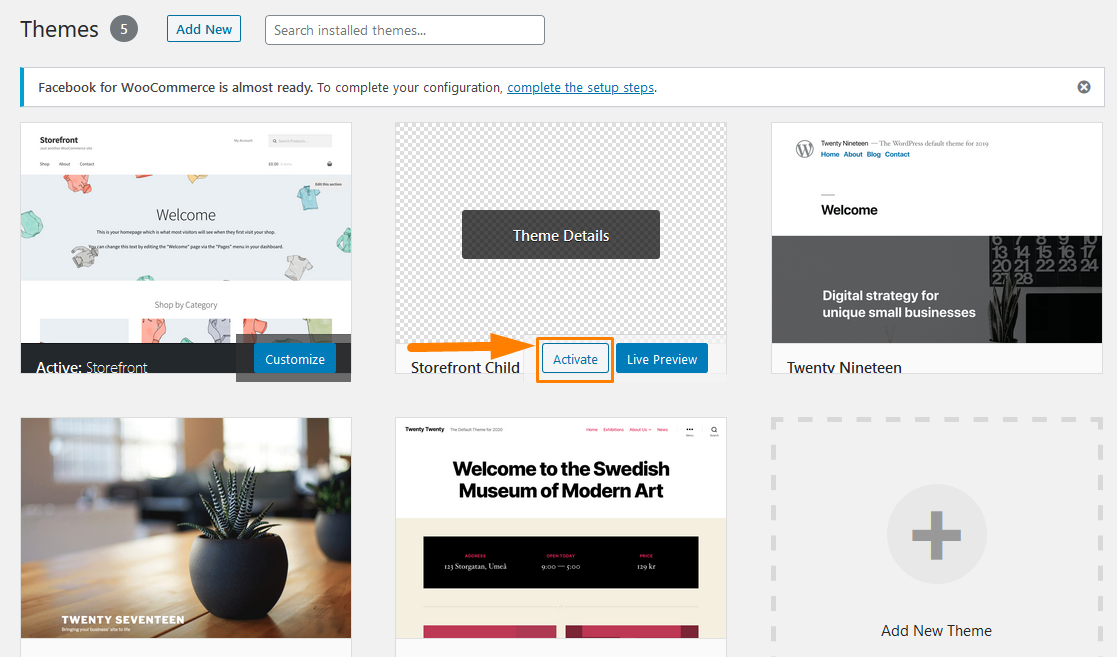
After activating it, it looks the same as the original theme. The child theme is pulling in the styles from your parent theme.
Then, you need to get creative and customize the appearance in the stylesheet.
Additionally, you can make changes to your theme’s template files, by copying the template file you want to alter, such as header.php, from your parent to your child’s theme folder.
Moreover, you will also need to make some changes to specify which function WordPress uses to reference the template files.
This means that you will use the get_stylesheet_directory(); function instead of get_template_directory() to reference your templates.
Conclusion
At this point, I am sure that you can create WooCommerce Storefront Child Theme.
I highly recommend that you brush up on your CSS to get the most out of your styling and check out our other guide on creating child themes for even more advice.
You can also purchase a child theme from a third-party provider, but you do not have to rely on the creativity of others.
This is because creating WooCommerce Storefront Child Theme is not as difficult as you might think.
Moreover, it gives you nearly total control over the look and functionality of your store.
Therefore, you need to create one as it is considered a best practice when doing development work on your WooCommerce site.
Additionally, directly modifying a theme runs the risk of losing the modifications during the update. The child theme will ensure that the modifications are preserved intact.

Joe is an experienced full-stack web developer with a decade of industry experience in the LAMP & MERN stacks, WordPress, WooCommerce, and JavaScript – (diverse portfolio). He has a passion for creating elegant and user-friendly solutions and thrives in collaborative environments. In his spare time, he enjoys exploring new tech trends, tinkering with new tools, and contributing to open-source projects. You can hire me here for your next project.
Similar Articles
- What is WooCommerce Storefront Theme? [Answered]
- 80+ Tricks to Customize Storefront WooCommerce Theme: The Ultimate Storefront Theme Customization Guide
- How to Add a Trust or Secure Logo on WooCommerce Checkout Page
- How to Redirect WooCommerce After Checkout: Redirect to Custom Thank You Page
- How to Create WooCommerce Admin Notice for Plugin – WooCommerce Development
- How to Create WordPress Database in PHPMyAdmin
- How to Create Multiple Widgets in WordPress Using For & Foreach Loops
- How to Create Shortcode for Plugin in WordPress
- How to Create MySQL Database WordPress via Command Line
- First 20 Steps for WordPress Complete Beginners to Get Started
- How to Display WooCommerce Products By Category
- WooCommerce Logout PHP Snippet to Create Logout Button
- How to Change Add to Cart Button Text On WooCommerce Shop Page
- How to Set Featured Products In WooCommerce
- How to Add Custom Shipping Method in WooCommerce
Comments are closed.