 Do you want to add a MailChimp Popup to your WordPress site? By the end of this brief post, you will be able to add a MailChimp popup to WordPress. We will explain each step in detail to help you implement the solution.
MailChimp is one of the best email marketing tools available on the market today. Many site owners often use MailChimp for their mailing list when they want their visitors to subscribe to their newsletter.
It is important to note that you can use a traditional signup form or a popup form. You can also choose the desired audience list if you link your MailChimp account.
How To Add MailChimp Popup To WordPress
Let us look at how you can add a MailChimp popup to WordPress.
Summary Steps
- Create a Form in MailChimp
- Connect Your Site to MailChimp
Steps to Add MailChimp Popup To WordPress
The subscriber popup form is very interactive because it displays on the top of your site. In this section, we will walk you through the steps you need to follow to add one.
Here are the steps you need to follow:
Step One: Create a Form in MailChimp
- The first step is to log in to your MailChimp account. If you do not have an account, you can create one easily.
- After that, create an audience (email list). They will be able to access the emails you send.
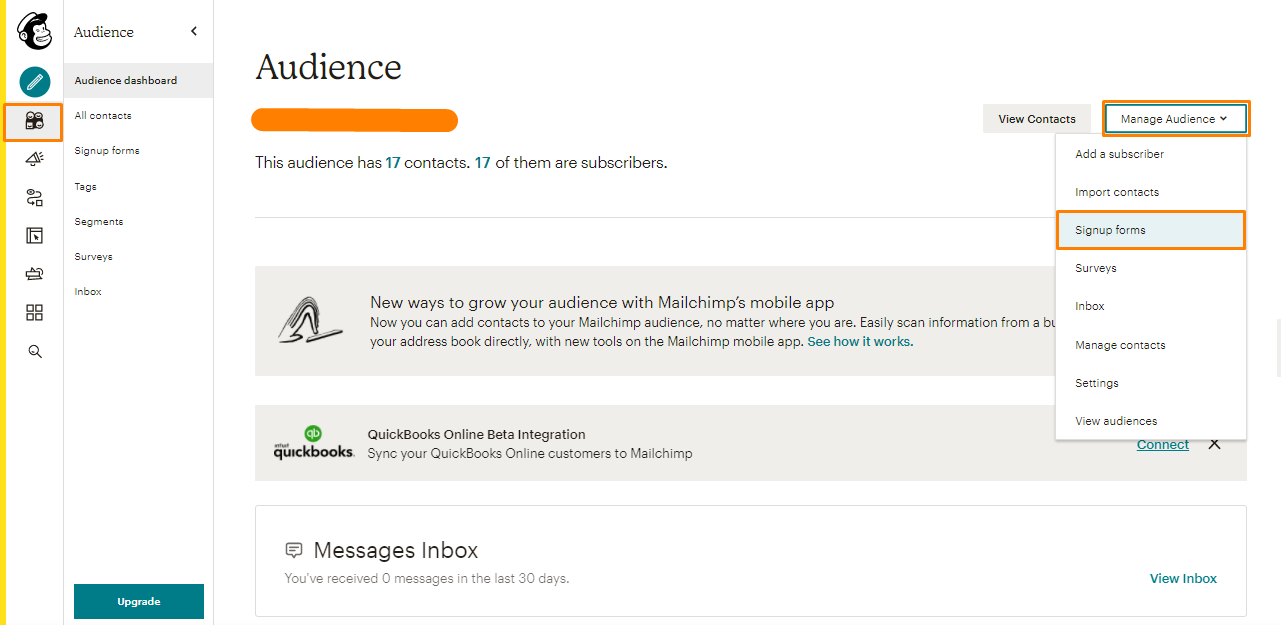
- If you have an existing audience, click on Manage Audience > Signup Forms, as shown below:
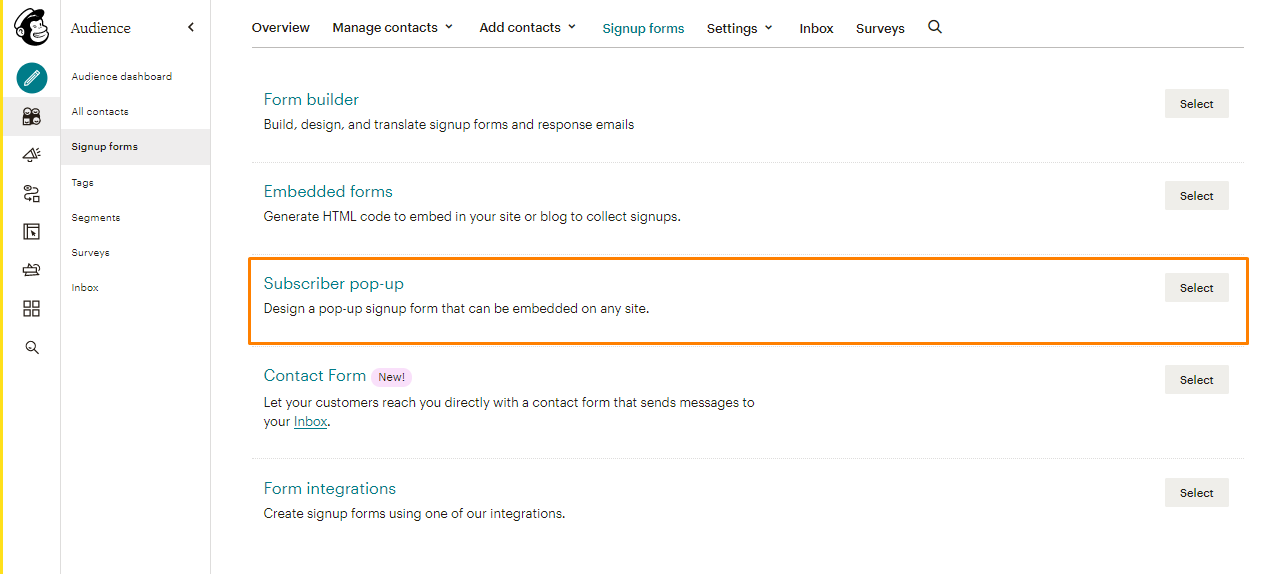
- On the next window, select Subscriber popup:
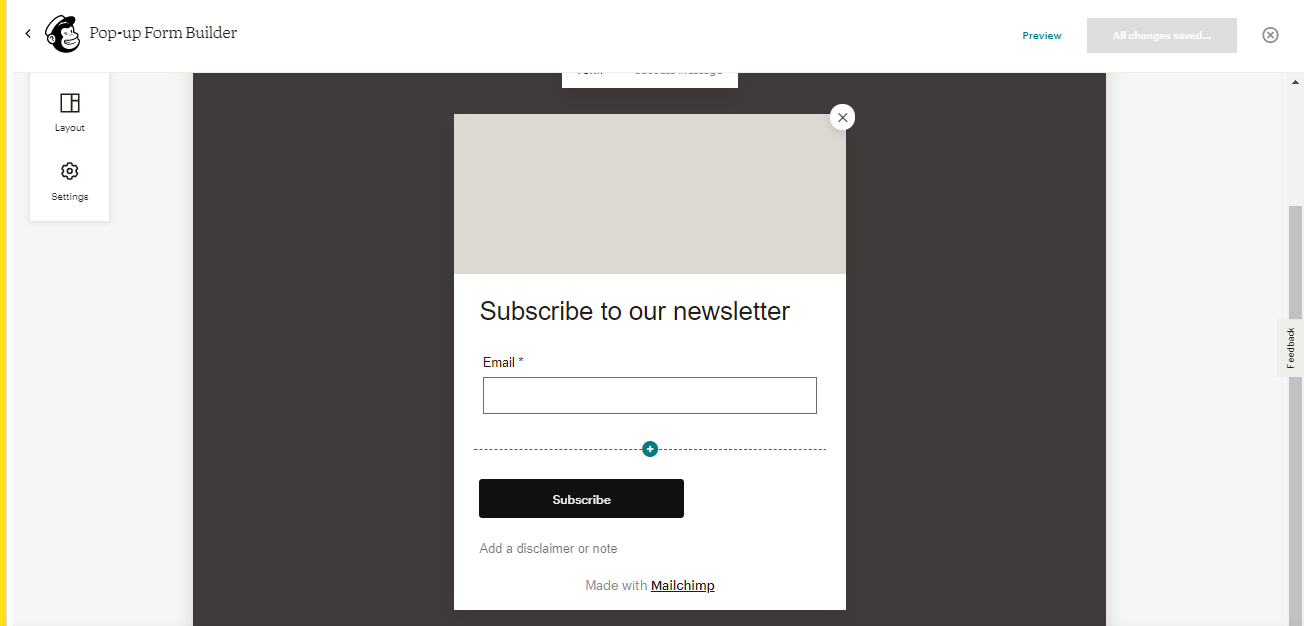
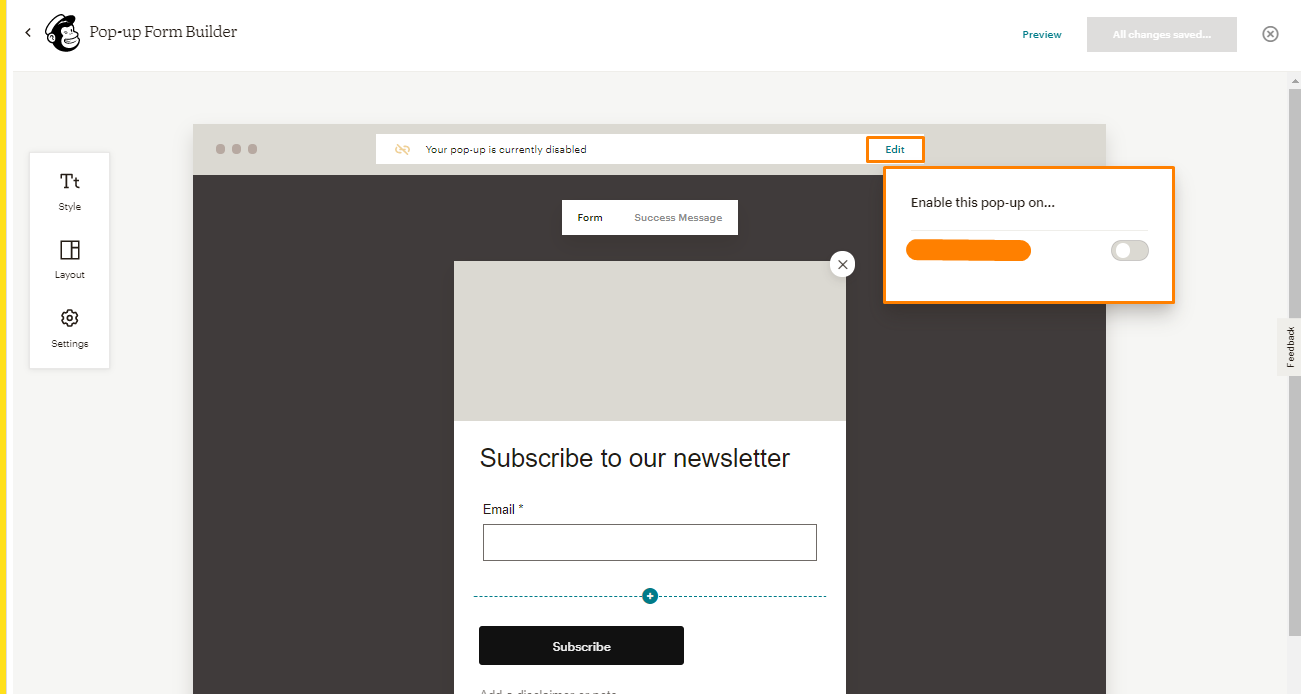
- The next step is to design and configure the form depending on your needs, using the popup builder:
- Once you are satisfied with the changes, remember to enable the popup. Your visitors will see the popup depending on your settings:
Step Two: Connect Your Site to MailChimp
If your site is not connected, you will not be able to publish the popup. Here are the steps you need to follow to connect your site to MailChimp:
- Click on the Connect Website button on the popup to display your popup on your site when building your form.
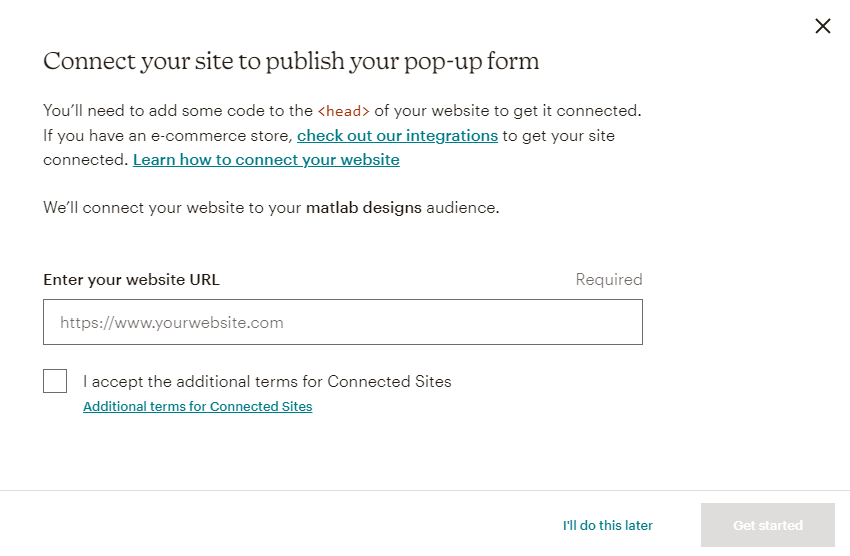
- The next step is to enter your site URL, accept the terms and conditions, and proceed next.
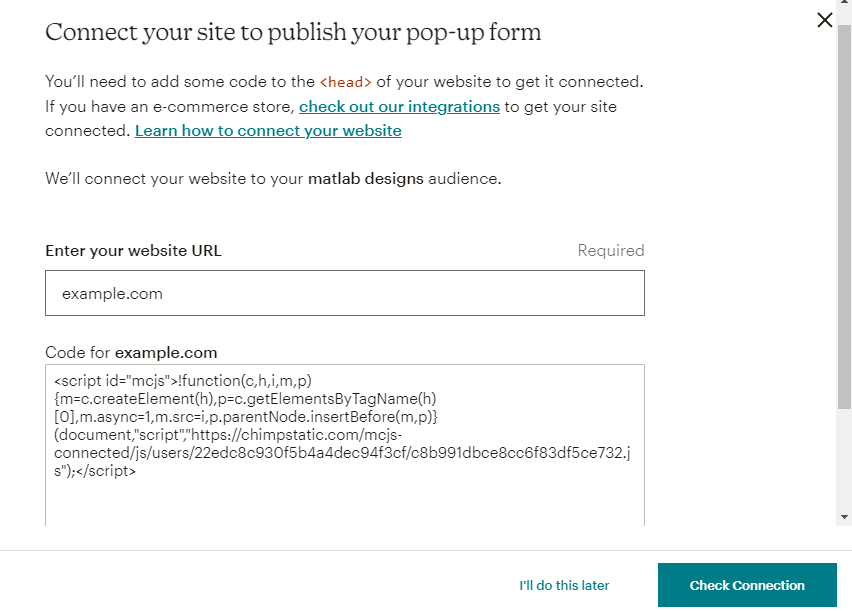
- Copy the code and paste it to the <head> of your website. However, if you are not comfortable with handling code, we recommend that you install and activate the Insert Headers & Footers
- Click on the Check Connection button to check the status of your connection. If you have added the code correctly, a success message will be displayed on the screen.
- Make sure to turn on the popup to make it visible on the front end of your site. However, in the visitor’s browser, a cookie is stored. This ensures that the popup is not displayed again.
Conclusion
In summary, we have shared the simple steps you need to follow if you want to display a popup to WordPress. It is worth mentioning that you can go back to MailChimp and make any necessary changes and they will be mirrored immediately. This means that you do not need to copy and paste the code again.
Similar Articles
- How to Add Fields in WooCommerce Registration Form
- How to Update WooCommerce Database
- Wix vs WordPress Complete Comparison » [Features, Pros & Cons]
- How to Add CAPTCHA WooCommerce Login
- How to Add Custom Background For WooCommerce
- 15+ Best WordPress Maintenance Services » WordPress Website Care
- WooCommerce Different Prices For Different Countries
- How to Backup WooCommerce Database
- How to Create My Account Page In WooCommerce
- How to Redirect On Refresh WordPress Page » Detect Page Refresh PHP
- How to Set Up WooCommerce Cart and Checkout on the Same Page
- How To Change Favicon In WordPress
- How to Create Popups in WordPress Without Installing a Plugin
- Top 30+ Best WordPress Form Plugins » Best WordPress Form Plugin
- How to Set Up WooCommerce Product Price Per Kg
- 40+ Best WordPress Contact Form Plugins for Easy Contact
- How to Duplicate a Product in WooCommerce
- How to Add Currency to WooCommerce [Custom Currency]
- How To Add Custom CSS To WordPress Page