 Are you looking for a way to add WooCommerce registration form fields? In this tutorial, I will show you how to add custom fields to WooCommerce registration form to ask customers for more information before registration on your WooCommerce store.
WooCommerce continues to be popular among most store owners because it is flexible to customization. You can use plugins or custom code to add more functionality.
How to Add Fields WooCommerce Registration Form
In this post, you will see how you can use custom PHP scripts to add WooCommerce Registration Form Fields. We recommend creating a child theme. This will ensure that your changes are not lost during an update.
Before we start, we need to sure that the WooCommerce registration forms are enabled on the account login page.
For this, go to WooCommerce > Settings > Accounts and check to Enable customer registration on the “My Account” page as shown below: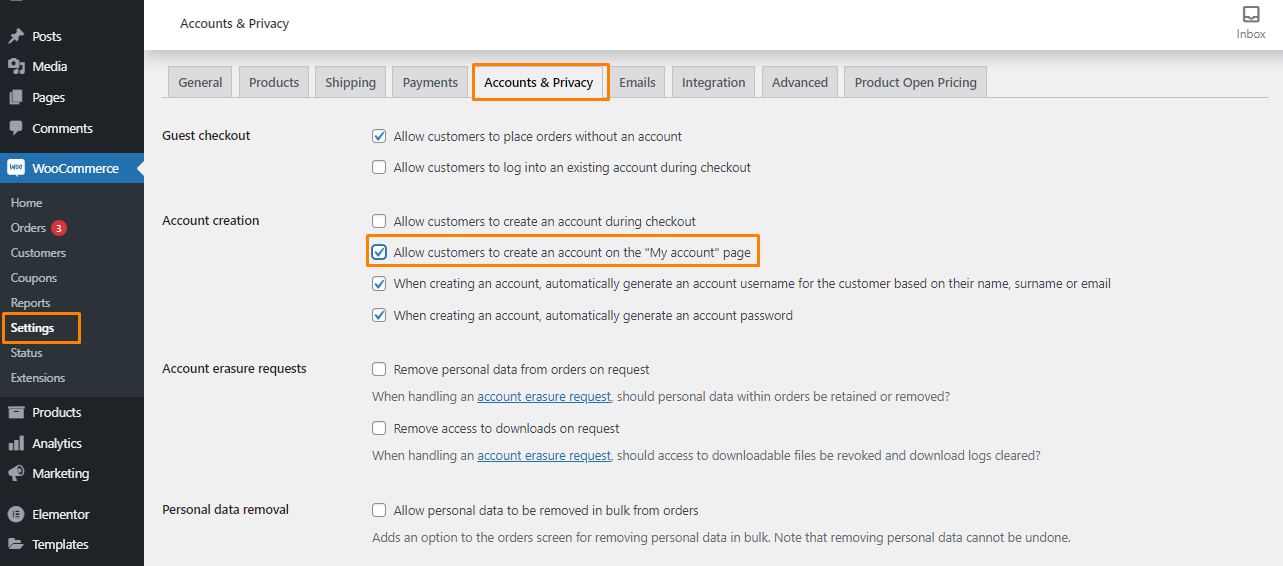
This will ensure that the WooCommerce registration form is displayed on the front end.
Steps to Add Fields in WooCommerce Registration Form
In this section, we will add more fields to this structure by utilizing the following actions. We will include fields like first name, last name, and mobile number.
Here are the steps you need to follow:
- Log into your WordPress site and access the Dashboard as the admin user.
- From the Dashboard menu, click on Appearance Menu > Theme Editor Menu. When the Theme Editor page is opened, look for the theme functions file where we will add the function that will add fields in the registration form.
- Add the following code to the functions.php file:
function njengah_extra_register_fields() {?>

       <p class="form-row form-row-wide">

       <label for="reg_billing_phone"><?php _e( 'Phone', 'woocommerce' ); ?></label>

       <input type="text" class="input-text" name="billing_phone" id="reg_billing_phone" value="<?php esc_attr_e( $_POST['billing_phone'] ); ?>" />

       </p>

       <p class="form-row form-row-first">

       <label for="reg_billing_first_name"><?php _e( 'First name', 'woocommerce' ); ?><span class="required">*</span></label>

       <input type="text" class="input-text" name="billing_first_name" id="reg_billing_first_name" value="<?php if ( ! empty( $_POST['billing_first_name'] ) ) esc_attr_e( $_POST['billing_first_name'] ); ?>" />

       </p>

       <p class="form-row form-row-last">

       <label for="reg_billing_last_name"><?php _e( 'Last name', 'woocommerce' ); ?><span class="required">*</span></label>

       <input type="text" class="input-text" name="billing_last_name" id="reg_billing_last_name" value="<?php if ( ! empty( $_POST['billing_last_name'] ) ) esc_attr_e( $_POST['billing_last_name'] ); ?>" />

       </p>

       <div class="clear"></div>

       <?php

 }

 add_action( 'woocommerce_register_form_start', 'njengah_extra_register_fields' );
- This is the outcome when you refresh the page:

The registration form fields are the same as the billing address.
We have included the prefix “billing_” before the field name.
Here are the valid WooCommerce form fields that can be added to the registration form and can be associated with a billing address:
- billing_first_name
- billing_last_name
- billing_company
- billing_address_1
- billing_address_2
- billing_city
- billing_postcode
- billing_country
- billing_state
- billing_email
- billing_phone
- Now that the forms have been created, we need to validate them using the following code that should be inserted in the functions.php file:
/**

* register fields Validating.

*/

function njengah_validate_extra_register_fields( $username, $email, $validation_errors ) {


      if ( isset( $_POST['billing_first_name'] ) && empty( $_POST['billing_first_name'] ) ) {


             $validation_errors->add( 'billing_first_name_error', __( '<strong>Error</strong>: First name is required!', 'woocommerce' ) );

      }

      if ( isset( $_POST['billing_last_name'] ) && empty( $_POST['billing_last_name'] ) ) {


             $validation_errors->add( 'billing_last_name_error', __( '<strong>Error</strong>: Last name is required!.', 'woocommerce' ) );


      }

         return $validation_errors;

}


add_action( 'woocommerce_register_post', 'njengah_validate_extra_register_fields', 10, 3 );
- The last step is to save these values to the database by adding the following code in the fucntions.php file:
/**

* Below code save extra fields.

*/

function njengah_save_extra_register_fields( $customer_id ) {

    if ( isset( $_POST['billing_phone'] ) ) {

                 // Phone input filed which is used in WooCommerce

                 update_user_meta( $customer_id, 'billing_phone', sanitize_text_field( $_POST['billing_phone'] ) );

          }

      if ( isset( $_POST['billing_first_name'] ) ) {

             //First name field which is by default

             update_user_meta( $customer_id, 'first_name', sanitize_text_field( $_POST['billing_first_name'] ) );

             // First name field which is used in WooCommerce

             update_user_meta( $customer_id, 'billing_first_name', sanitize_text_field( $_POST['billing_first_name'] ) );

      }

      if ( isset( $_POST['billing_last_name'] ) ) {

             // Last name field which is by default

             update_user_meta( $customer_id, 'last_name', sanitize_text_field( $_POST['billing_last_name'] ) );

             // Last name field which is used in WooCommerce

             update_user_meta( $customer_id, 'billing_last_name', sanitize_text_field( $_POST['billing_last_name'] ) );

      }


}

add_action( 'woocommerce_created_customer', 'njengah_save_extra_register_fields' );
Now the fields have been added, validated, and inserted for future use.
When you go to the billing address page in your account, you need to click on edit to go there. The fields are already populated: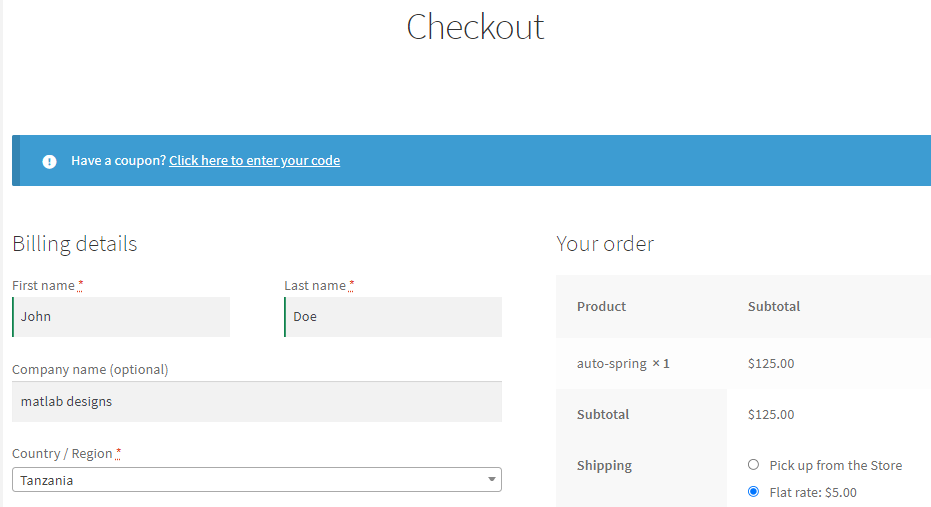
Conclusion
In this post, you have learned how to add fields in the WooCommerce registration form.
If you encounter any problems implementing this code, please contact a qualified WordPress developer.
Similar Articles
- How to Edit Billing Details WooCommerce Checkout Page
- WooCommerce Redirect After Checkout : Redirect to Custom Thank You Page
- WooCommerce Redirect After Logout [Ultimate Guide]
- How to Add Search to Shop Page In WooCommerce
- How to Change WooCommerce Checkout Error Messages
- How to Add Date Field to Checkout In WooCommerce
- How to Add Checkout Phone Number Validation WooCommerce
- 30 Best Download Plugins for WordPress File Sharing & More
- 35+ Best Free Form Plugin WordPress
- How to Change Currency Symbol In WooCommerce
- How to Set Up WooCommerce Product Price Per Kg
- How to Move WooCommerce Checkout Field
- How to Check if User is Logged In WordPress
- How to Style WooCommerce Checkout Page
- How to Remove Coupon From Checkout In WooCommerce
- How to Add Currency to WooCommerce [Custom Currency]
- How to Create Checkbox Field in WooCommerce Checkout Page
- How to Get Checkout URL In WooCommerce
- WooCommerce Mobile Checkout Optimization Quick Guide