Do you want to add a custom taxonomy to your WooCommerce products programmatically?
In this post, we will look at how you can create WooCommerce custom taxonomies using a code snippet we made specifically for this purpose.
WooCommerce, by default, comes with various fields for storing product data.
These fields include product name, long and short description, price, images, stock, weight, dimensions, and many more.
However, there is no way to store and display extra product data, such as WooCommerce custom taxonomies.
It is worth mentioning that ‘custom fields’ and ‘custom taxonomies’ are often mentioned, but many people do not know exactly the difference.
WooCommerce custom fields are used to store arbitrary, one-off information about a product. On the other hand, a custom taxonomy is used for grouping things together.
In the WordPress admin, custom fields appear in the main column of the Add/Edit Product screen.
However, custom taxonomies appear in the right-hand column under product categories and tags.
Add Custom Taxonomy To WooCommerce Products
By the end of this post, you will be able to create a custom taxonomy in your WooCommerce store.
This means that we will edit some of WooCommerce’s core files to achieve the desired result.
This means that you need to install or create a child theme. It will ensure that your changes are not lost during an update. You can also track all the changes you make easily.
Let us get right into it.
Steps to Add Custom Taxonomy To WooCommerce Products
Here are the simple steps you need to follow:
- Log into your WordPress site and access the Dashboard as the admin user.
- From the Dashboard menu, click on Appearance Menu > Theme Editor Menu. When the Theme Editor page is opened, look for the theme functions file to add the function to add a custom taxonomy to WooCommerce products.
- Add the following code to the PHP file:
// Register Custom Taxonomy
function njengah_custom_taxonomy_Item() {
$labels = array(
'name' => 'Brands',
'singular_name' => 'Brand',
'menu_name' => 'Brands',
'all_items' => 'All Brands',
'parent_item' => 'Parent Brand',
'parent_item_colon' => 'Parent Brand:',
'new_item_name' => 'New Brand Name',
'add_new_item' => 'Add New Brand',
'edit_item' => 'Edit Brand',
'update_item' => 'Update Brand',
'separate_items_with_commas' => 'Separate Brand with commas',
'search_items' => 'Search Brands',
'add_or_remove_items' => 'Add or remove Brands',
'choose_from_most_used' => 'Choose from the most used Brands',
);
$args = array(
'labels' => $labels,
'hierarchical' => true,
'public' => true,
'show_ui' => true,
'show_admin_column' => true,
'show_in_nav_menus' => true,
'show_tagcloud' => true,
);
register_taxonomy( 'item', 'product', $args );
}
add_action( 'init', 'njengah_custom_taxonomy_item', 0 );
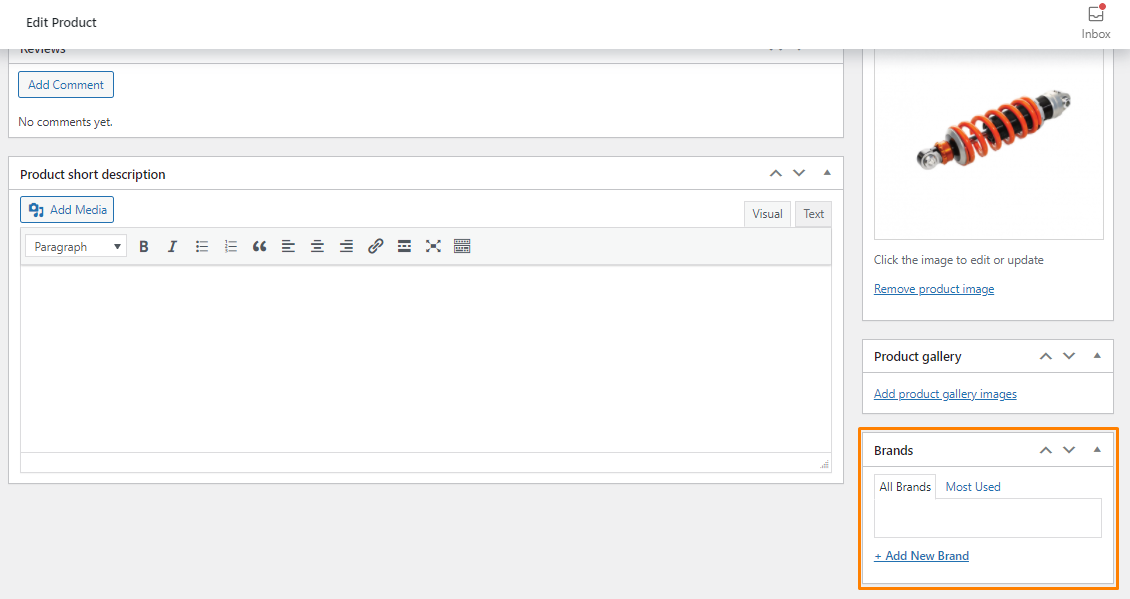
- This is the outcome:
Conclusion
In summary, we have shared a custom code snippet we created to add a custom taxonomy in WooCommerce. This is a great way to display extra product data making it easier for customers to find your products.
However, if you are unfamiliar with coding, we recommend using a plugin like WooCommerce Product Table.
This will ensure that you do not break your site. If you make any mistake, a critical error will be displayed on your site.
We hope that this post helped you to learn more about editing the Edit product page.

Joe is an experienced full-stack web developer with a decade of industry experience in the LAMP & MERN stacks, WordPress, WooCommerce, and JavaScript – (diverse portfolio). He has a passion for creating elegant and user-friendly solutions and thrives in collaborative environments. In his spare time, he enjoys exploring new tech trends, tinkering with new tools, and contributing to open-source projects. You can hire me here for your next project.
Similar Articles
- How to Add Categories to WooCommerce Products
- How to Add Custom Checkout Field to Email WooCommerce
- How to Add CAPTCHA WooCommerce Login
- What is the Best Payment Gateway for WooCommerce
- How to Add Custom Product Fields WooCommerce
- How to Integrate MailChimp With WooCommerce
- How to Upload Image On Product Page In WooCommerce
- How to Add WooCommerce Products to a Page
- How to Customize Product Category Page In WooCommerce
- How to Migrate from Shopify to WooCommerce
- How to Get Current Product ID WooCommerce
- How to Update WooCommerce Database
- How to Get Current WooCommerce Product Category
- WooCommerce Different Prices For Different Countries
- How to Add Google Analytics to WooCommerce
- How to Add Text after Price in WooCommerce » Add Price Suffix
- How to Get Current WooCommerce Shipping Zone