 Are you looking for a way to integrate MailChimp with WooCommerce? This tutorial aims to help you install this powerful marketing tool. We recommend this plugin for your WooCommerce because it offers you the ability to generate new marketing opportunities through emails.
This is a must have tool, if you want to increase revenue. This is because it allows you to track sales and create automated offers for your customers. You can also use it to send follow up emails and send custom generated product recommendations.
However, before you enjoy the benefits offered by this plugin, you have to integrate and synchronize it with your site.
How to Integrate MailChimp With WooCommerce
By the end of this post, you will be able to integrate MailChimp with WooCommerce. We will share a detailed step by step guide on how you can do it correctly.
MailChimp can be used by both big and small scale businesses around the world. This marketing tool allows you to track metrics such as open rate and clicks, lead generation campaigns, customer targeting, sales, or social advertisement.
Let us get into the steps you need to follow.
Steps to Integrate MailChimp With WooCommerce
Here are the steps you need to follow:
- Log into your WordPress site and access the Dashboard as the admin user.
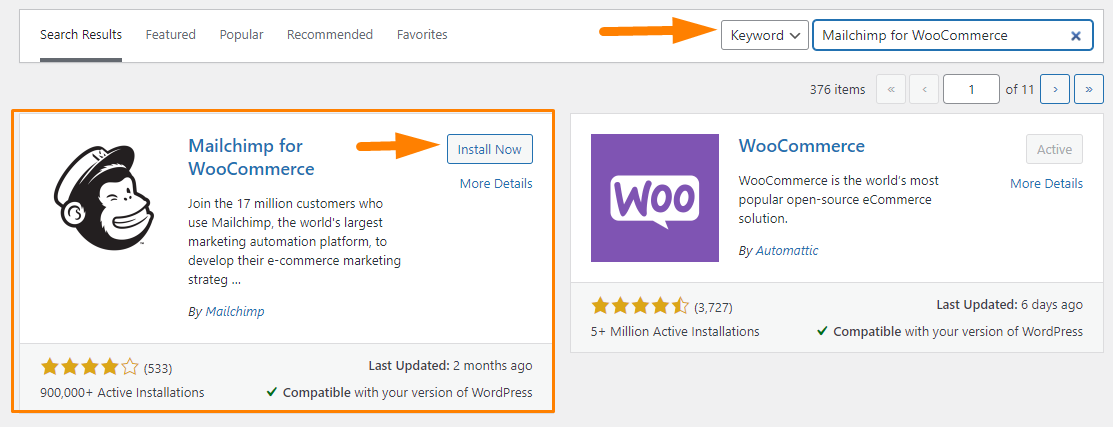
- Then, we are going to install the plugin that we have indicated earlier. To download it directly in the Admin Panel, simply navigate to Plugins > Add New. After that, you will need to do a keyword search for the plugin ‘MailChimp for WooCommerce’. You need to install and activate it as shown below:
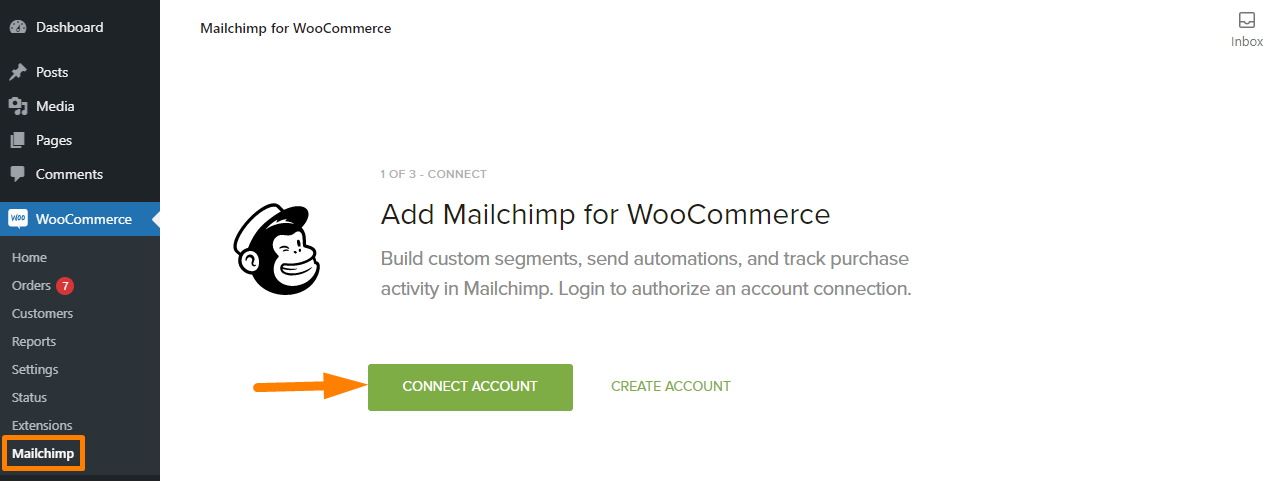
- To connect your account, navigate to WooCommerce > MailChimp.
- Click on the Connect Account.
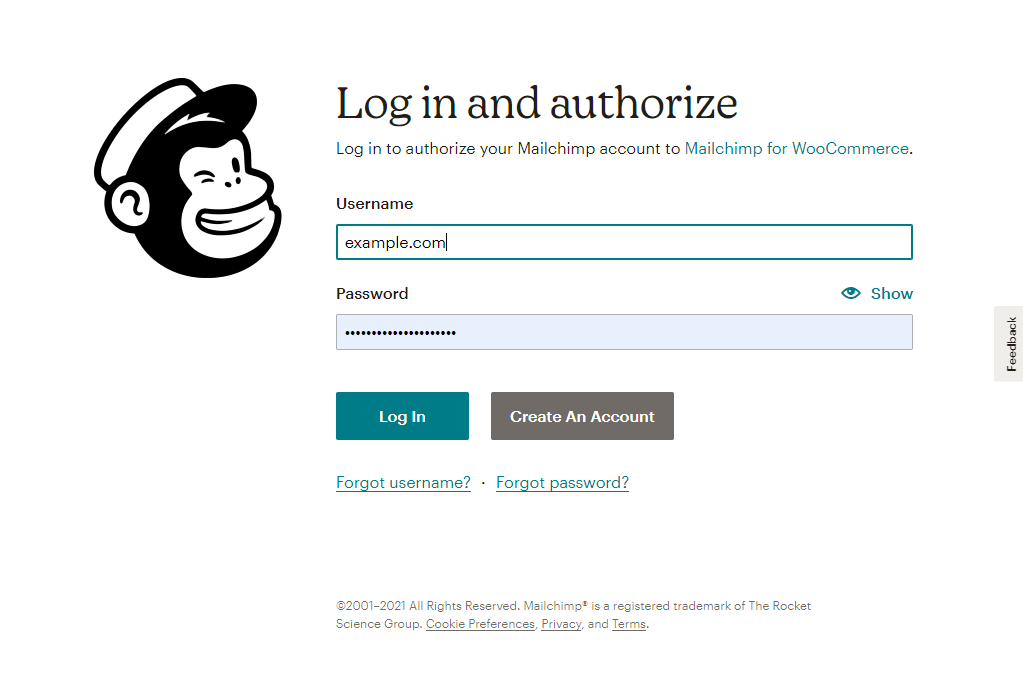
- This will open a popup where you need to enter your MailChimp credentials and click Log In.
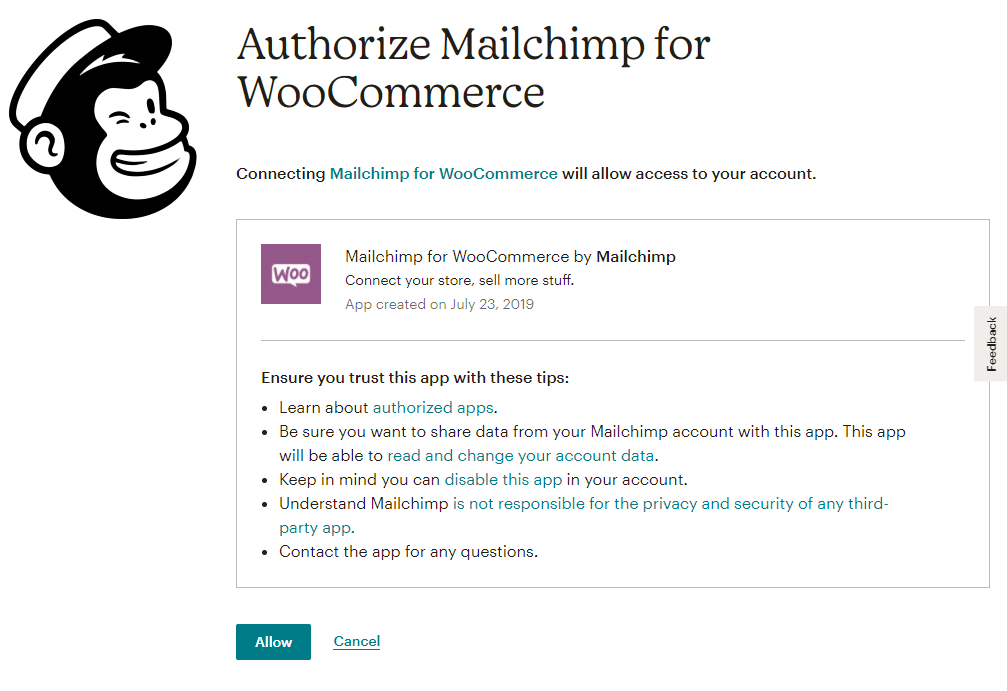
- Click Allow to authorize the integration to connect.
- Once you are logged in, you will be required to enter details about your store. You also need to choose the audience you want to sync to and the different settings you want to assign to your audience. Let the wizard be your guide.

- When you’re ready, click Start Sync to sync your store to MailChimp.
Conclusion
That’s all you need to do to sync your WooCommerce store to MailChimp. However, it is important to note that the time it takes to sync will depend on your store data. After connecting your store, you can visit the Integrations page in your account to have an overview of the details about your account.
You will be able to add and manage different eCommerce features offered by this powerful tool. If your store is not syncing, you can delete and reinstall the plugin again. You should also check the plugin requirements to avoid compatibility issues with your site.
Similar Articles
- WooCommerce Redirect After Checkout : Redirect to Custom Thank You Page
- WooCommerce Redirect After Logout [Ultimate Guide]
- 100+ Tips, Tricks & Snippets Ultimate WooCommerce Hide Guide
- How to Export Products In WooCommerce
- How to Change Storefront Theme Tagline WooCommerce
- How to Add Amazon Affiliate Products to WooCommerce
- How to Add Social Media Icons to Footer Storefront Theme
- How to Customize Product Category Page In WooCommerce
- How to Add Price to Attribute In WooCommerce
- How to Add Local Pickup to WooCommerce
- Elementor Review 2021 » Features, Pros, Cons, Pricing & Tutorial
- How to Change WooCommerce Checkout Page Title
- How to Add Product SKU In WooCommerce
- How to Add Wishlist In WooCommerce
- How to Customize WooCommerce Product Pages
- 35+ Best Free Form Plugin WordPress
- How to Set Up WooCommerce Product Price Per Kg
- How to Setup WooCommerce Storefront Mega Menu
- How to Add Disclaimer Storefront WooCommerce
- How to Backup WooCommerce Database