 Do you want to maximize revenue by using grouped products in your WooCommerce store? In today’s brief post, we will show you how to get more from every customer using a popular and effective strategy called grouped products.
By default, WooCommerce comes with a built-in feature called product grouping. Grouping is when related products are combined and displayed as a package. This saves customers the trouble of finding and purchasing them separately.
For example, you can display individual pieces of furniture and group them under one product like ‘House Essentials’. This will allow customers to add any of the grouped products to their shopping cart. This saves a lot of time because they do not have to browse for them separately.
Why Use Grouped Products in WooCommerce?
The main advantage of using grouped products is that it allows you to sell similar products without bundling them in combo packages. It also makes it very easy for customers to find the products they want. They do not have to browse across your site to find the product they like.
In addition, grouped products create strong inter-linking between your product pages. This is essential for the Search Engine Optimization of any WooCommerce store.
WooCommerce Grouped Product
By the end of this post, you will be able to implement grouped products in your online store. It is worth mentioning that you do not need any coding skills to implement this solution.
Without wasting much time, let us get right into it.
Steps to Create Grouped Products
As you will quickly find out, it is not very hard to create grouped products. The process is similar to the process of creating a single product.
Here are the simple steps you need to follow:
- Log into your WordPress site and access the Dashboard as the admin user.
- From the Dashboard menu, navigate to Products > Add product.
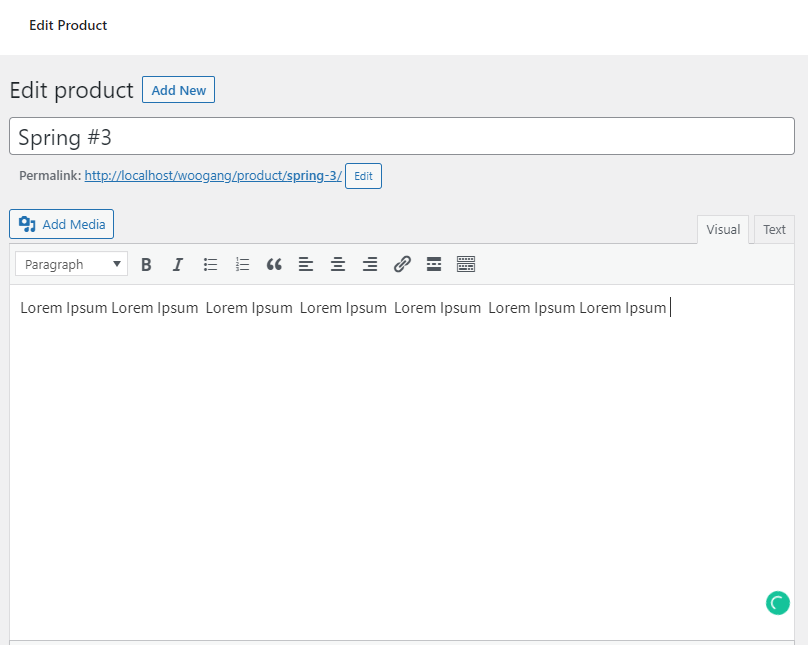
- Enter a title, description, and image for your product as well, as shown below:
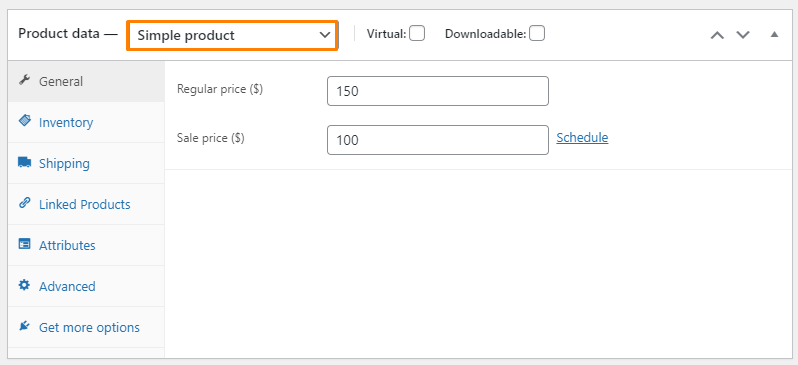
- After entering the basic information, scroll down to the ‘Product Data’ section, and select the product type as ‘Simple Product’. You can also enter the price details, taxation, and inventory.
- Repeat this process or all products that you want to add as a grouped product.
- The next step is to create the Parent product that will be used to group all your products. Navigate to Products > Add product to create the grouped product. Enter the title, description, and image the way you did for the simple products.
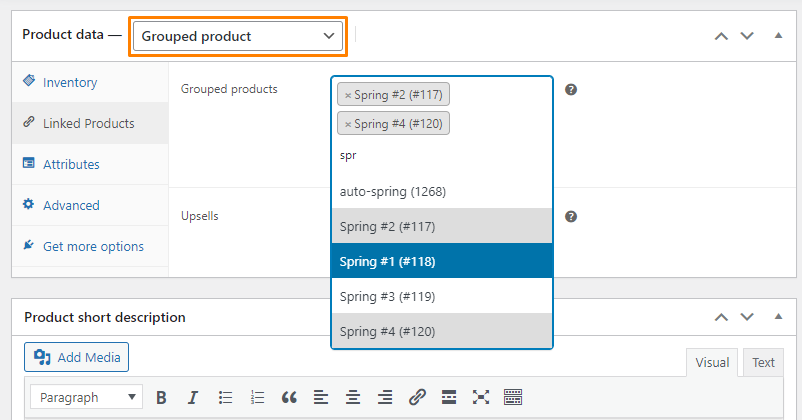
- On the Product Data panel, select the product type as ‘Grouped Product’.
- Click on the ‘Linked Products’ tab and start typing the name of the products you want to link:
- Once you have added all the products, you can click the Update button on the product page to save your changes.
Wrapping Up
In summary, we have discussed what a grouped product is and how you can add them to your WooCommerce site. This is a very efficient way to increase revenue and strong interlinking between your various product pages in your store.
If you need additional functionality, feel free to contact us. We hope that this post helped you to learn more about grouped products.
Similar Articles
- How to Customize WooCommerce Product Pages
- How to Set Up WooCommerce Role Based Payment Methods
- How to Set Number of Products Per Page WooCommerce
- How to Hide Out of Stock Products in WooCommerce
- How Many Products Can WooCommerce Handle?
- How to Add Custom Product Fields WooCommerce
- How to Add Custom Background For WooCommerce
- WooCommerce Create Custom Single Product Page
- WooCommerce Accept Terms and Conditions Checkbox On Registration Form
- How to Add Extra Options With Custom Price WooCommerce
- How to Add CAPTCHA WooCommerce Login
- WooCommerce vs Magento: Which Is the Best E-Commerce Platform?
- How to Add WooCommerce Products to a Page
- How to Add Amazon Affiliate Products to WooCommerce
- How to Add WooCommerce Shopping Cart Icon In Menu
- How to Customize WooCommerce Product Pages With Elementor Pro
- How to Set WooCommerce Different Sidebar For Each Category
- How to Update WooCommerce Database
- How to Use WooCommerce to Set Up Online Store
- How to Add Star Rating To WooCommerce Product