WooCommerce Store owners spend a lot of time and money driving traffic to your store and then converting visitors.
However, the majority of the visitors leave without making a purchase. It is worth mentioning that 69.57% of shopping carts today are abandoned.
To increase your store’s sales and improve profits, you must improve your checkout process.
Checkout page optimization is a frequently overlooked area for retailers looking for routes to increase online revenue.
In this post, you will learn a few checkout page optimization ideas to help you increase revenue and ensure your customers have a good checkout experience.
This article will help you maximize all your conversions. Some ideas involve using some code, while others can be done using a plugin.
WooCommerce Checkout Optimization
Here are the actionable tips that you can use to improve the checkout experience on your store and gain more revenue in the long run:
1. Remove Header, Sidebar, and Footer on the Checkout Page
The ultimate goal of the checkout page is to make more conversions, sales, and customers.
If this is the goal, then do not display anything that does not need to be shown. The more clickable buttons you show, the more customers will likely click and leave the checkout page.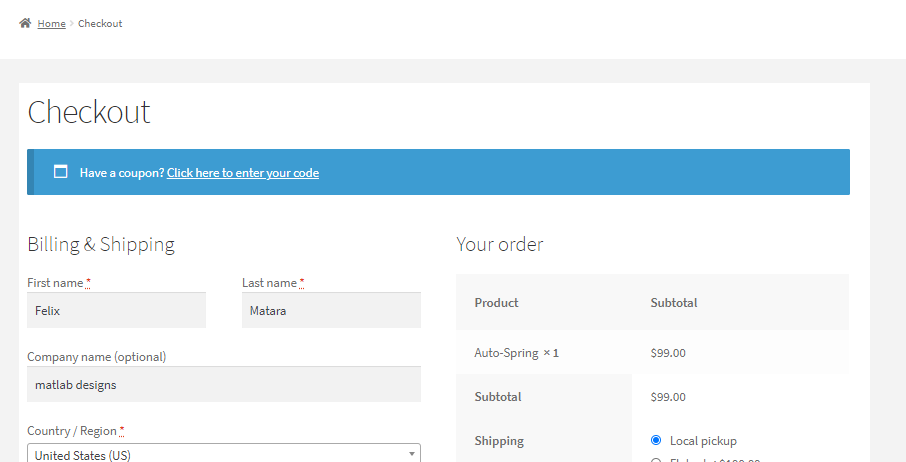
2. Hide Unnecessary Fields
Many shoppers will abandon their purchase due to multiple checkout form.
Depending on your business, some of the checkout fields might be unnecessary.
Shoppers do not like filling many forms, as they confuse them or get frustrated when they see the high amounts of fields for them to complete the potential purchase.
Therefore, you should only display fewer form fields. This will not overwhelm the visitors, and you will have better chances of converting them to customers.
I recommend having a maximum of eight checkout fields. The WooCommerce plugin has close to twenty fields in the standard checkout page.
Here are some of the fields you can remove to optimize the checkout process in your WooCommerce store:
-
Company Name
By default, the company name field is a required field that customers must fill on the checkout page.
However, if you are selling directly to customers, this field becomes irrelevant. For example, if your online store sells food to consumers, you do not need the company fields.
If you sell to both consumers and businesses, you might want to keep this field as an option field rather than deleting it. This means that the customer will have a choice when filling it out.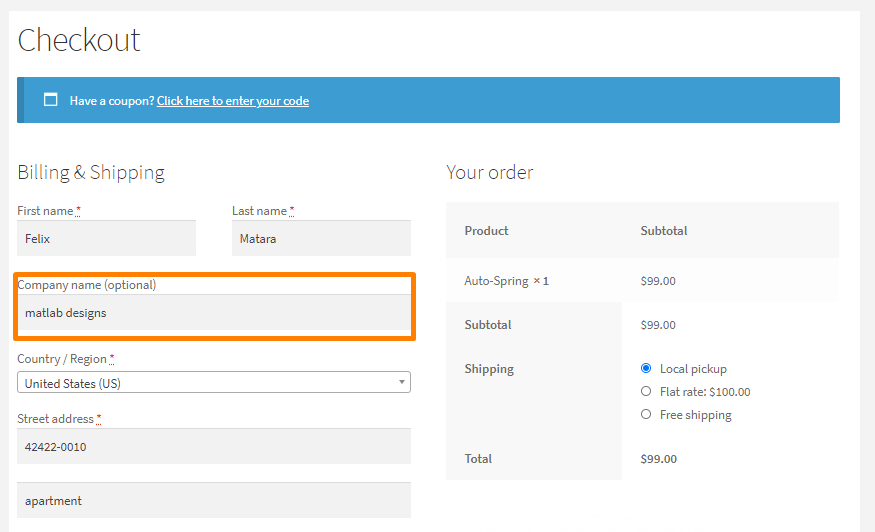
-
Phone Number Field
Most consumers who purchase products online have a major concern about the privacy of their data.
They are concerned about how marketers use their data. Therefore, there is a natural attitude of doubt and uncertainty about sharing personal information like phone numbers.
In 2018, the EU introduced GDPR, and many other regions like the United States are slowly following suit to protect consumers’ privacy.
Asking visitors for their phone numbers on the checkout page is likely to reduce conversion rates.
It increases their doubt for privacy concerns and increases their odds of abandoning the purchase. I recommend removing this field, not unless you require the phone number for order deliveries.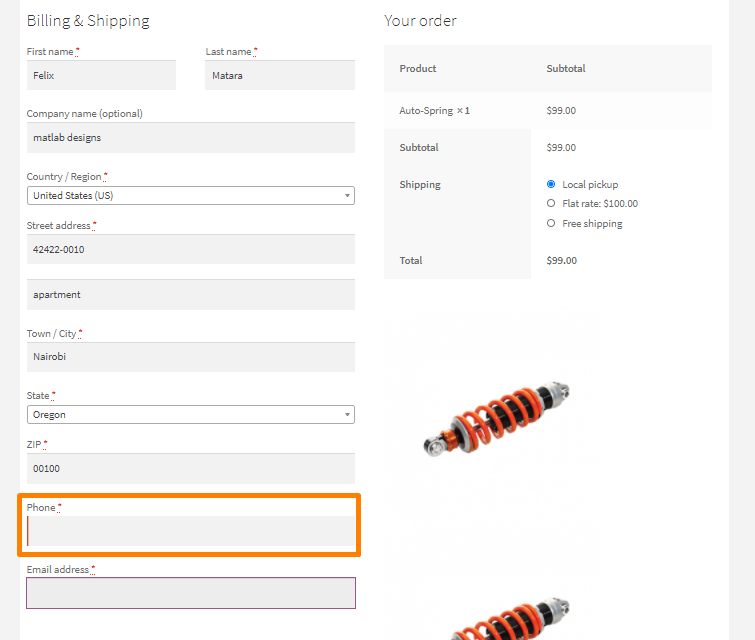
-
Second Street Address Field
The second street address field causes a lot of confusion and often halts the purchase process.
It is not a universal field, as it applies only to a minority of users. I recommend deleting this field.
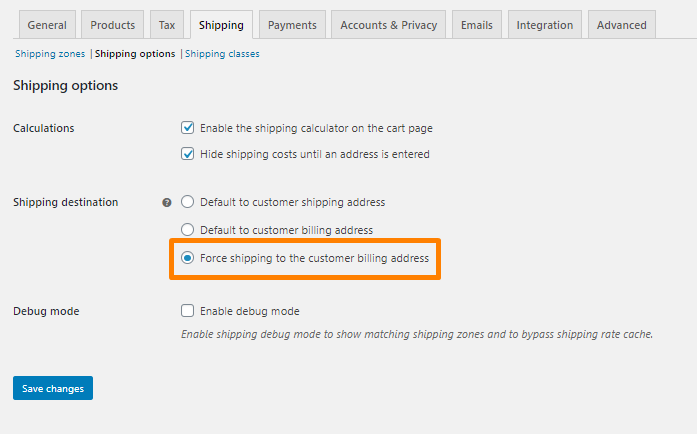
3. Use Billing Address as the Shipping Address by Default
As mentioned earlier, it would be best if you have fewer form fields so that your visitors can complete the checkout process within a short time.
The billing address is a group of fields that customers need to fill on the checkout page.
In most cases, customers in your store do not require to fill them out because most of them have the same billing and shipping address.
The main reason why most online stores ask for the billing details is to match them with credit card information. This helps to reduce fraud.
Stripe and PayPal payment gateways are already optimized. Therefore, if your store supports these payments, you do not need that additional step.
4. Coupons Should be Less Prominent
Coupons help your WooCommerce store to grow. They can attract new customers and encourage “window shoppers” to convert by giving them a discount. Additionally, the chances are that the customer will come back to your store.
However, it is important to note that coupons reduce the profit margin of your store.
If you make them prominent, users will be distracted and leave your checkout page and head off to search for promo codes in your online store.
The coupon section is displayed in a conspicuous location, and it is hard to ignore.
There are many ways you can rectify this. You can hide, rename, or move it to another location.
If you decide to move it, I recommend placing it above your required form fields. When the visitor clicks on the “Have a Coupon?” button, it expands, which is less disruptive.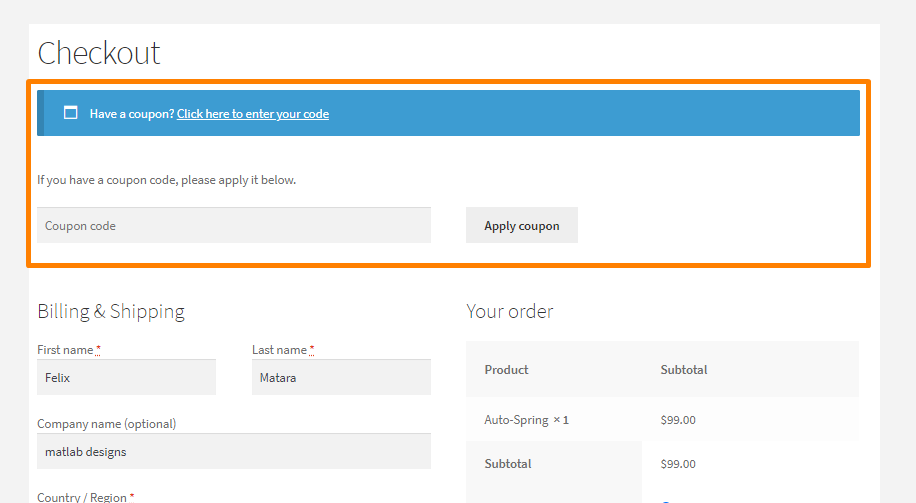
5. Change the Default Error Validation
By default, the WooCommerce checkout page displays the error messages at the top of the page.
This is frustrating to users in your store, and it slows down the checkout process.
In case of an error, the user has to search for the appropriate field and make the necessary changes.
This creates a bad checkout experience, as customers see a giant flashing red signal at the top.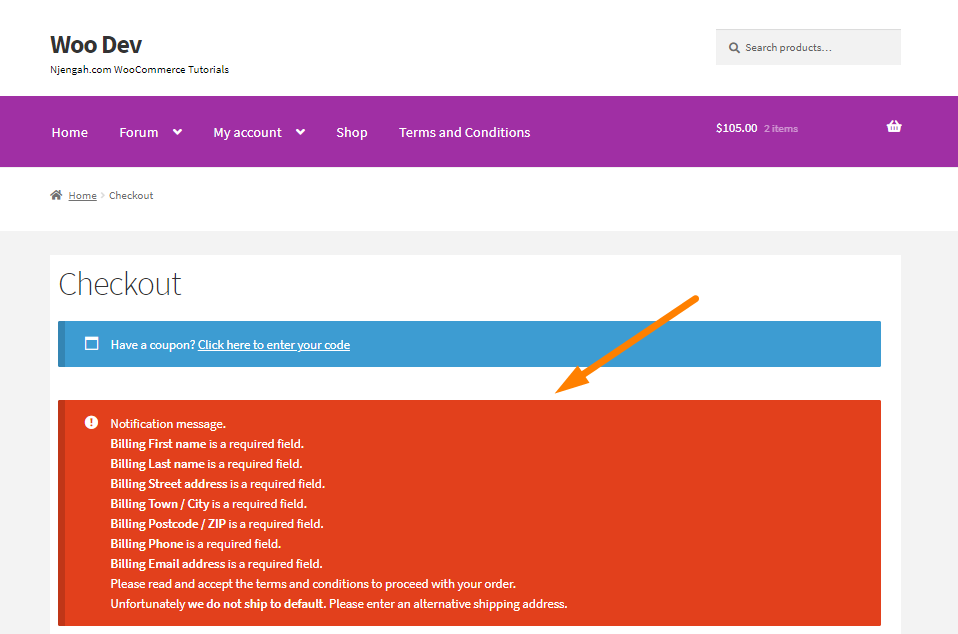
Instead, you can use inline validation. The visitor will know exactly what they need to do to proceed to the next step.
6. Remove Form Field Labels
Many online stores use labels in their form fields.
However, it is important to note that labels confuse customers in your store and make it difficult for users to fill out the field.
A recent study by UX Matters found out that the most effective method is to have no inline labels but rather display them above the input fields.
This creates an excellent first impression, as the user interface is clean. It looks clutter-free because the labels are not displayed.
Additionally, it makes for a user-friendly mobile checkout experience.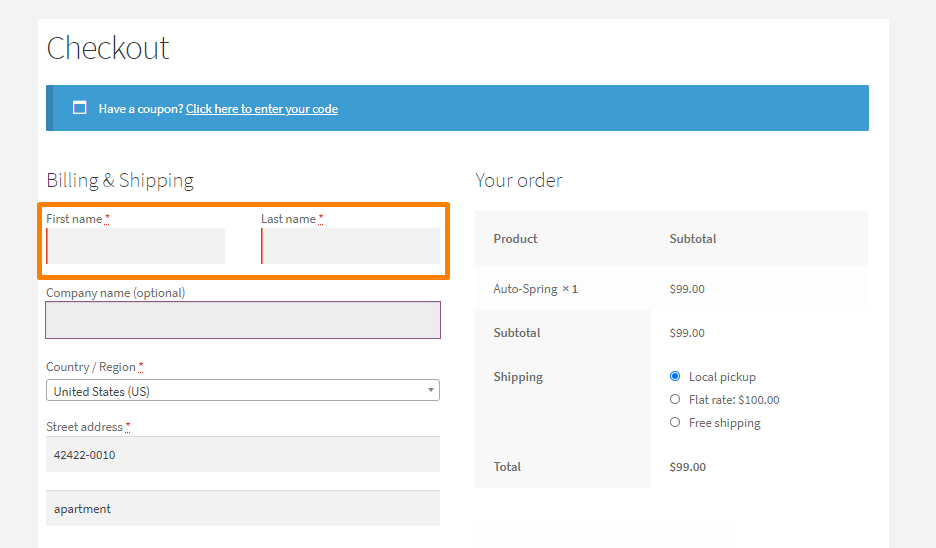
7. Use IP Address to Auto-detect the Country
If your WooCommerce store is operating in different parts of the world, your payment options, currency, and shipment options have to change depending on your customer’s location.
If you cannot ship or sell in a particular country, it would be best to tell them upfront instead of letting them add products to their cart.
Later on, they find out that your store does not ship to that location. You can auto-detect customers’ IP addresses.
The checkout page will automatically choose their country based on their IP address.
This ensures that the right information is displayed on the checkout page.
This saves a lot of time, and visitors are immediately notified if they can purchase the product.
8. Automatically Detect Addresses Based on the Zipcode/PostCode
Around 4.7% of customers cause shipping errors on the checkout page.
This might look like a small number, but this causes store owners an average of $35 to $70 for each error. This will affect the profit margin in your WooCommerce store.
However, you can introduce Zipcode/ PostalCode validation on the checkout page to reduce the risk of sending items to the wrong address and reduce your overall shipping costs.
Additionally, Zipcode/ PostalCode validation will reduce the number of form fields the visitor has to complete. It saves time and reduces cart abandonment issues.
There are many WooCommerce extensions, which help you validate the Zipcode/ PostalCode.
9. Multiple Payment Options
There are many payment options, both offline and online, that you can include on your WooCommerce checkout page.
Potential customers will abandon their cart if your store does not have enough payment options or if their card was declined.
You need to provide customers with many payment options, including traditional options like VISA and MasterCard. I recommend adding the PayPal payment gateway as it is a popular choice for many customers.
10. Add Security and Trust Seals
As mentioned earlier, customers are always concerned about their privacy. Many customers will abandon the cart if there is no trust seal or if the site is not SSL encrypted. This is because potential customers do not feel safe.
Therefore, I recommend adding trust seals and SSL encryption so that users will feel secure. This will increase your conversion rates and increase your sales.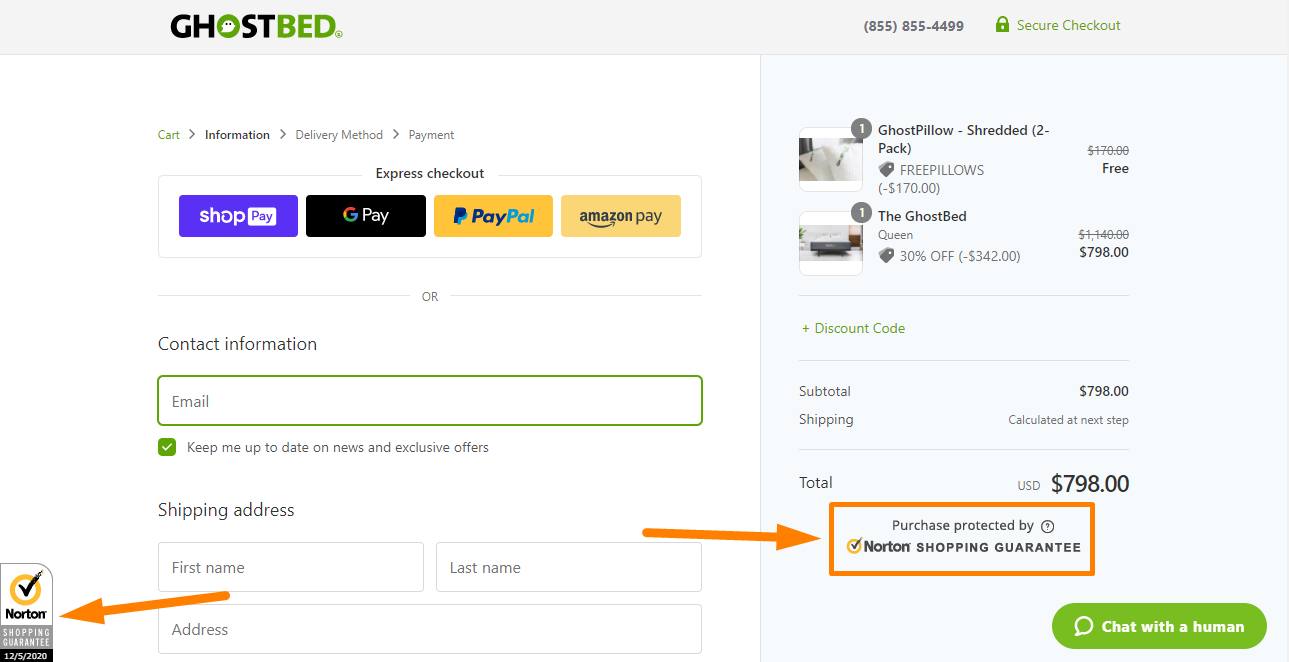
11. Assure Customers that Their Card Details are Safe
Credit card frauds continue to increase each year. Customers in your store need to be assured that they will not be a victim of fraud.
In addition to installing SSL, adding trust seals, and displaying the privacy policy, assure that it is safe to purchase from you.
Displaying the policies and trust seals on one page is very effective because the visitor sees this even before they enter their payment details.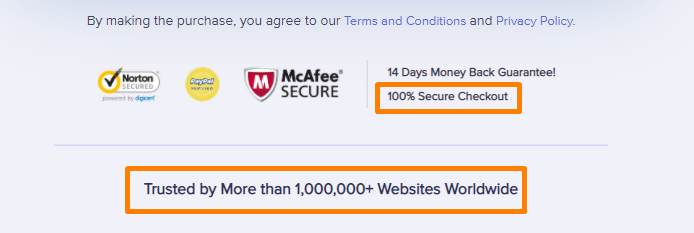
12. Highlight the Best Customer Reviews
A large percentage of visitors in your store are ‘window shoppers’ who are just price-checking.
This means that once they visit the checkout page, they will bounce. However, you can convert these visitors by displaying some reviews to social proof your products.
If you purchase any product on Amazon, you will see the number of customer reviews.
13. Send Emails to User who Abandons the Checkout
WooCommerce store owners need to invest in email marketing, which is considered the most effective marketing channel.
You can send out cart abandonment emails to visitors in your store, as they might end up purchasing the products.
This is a simple and smart solution to let customers return to your store and possibly increase your sales.
You can use a cart abandonment plugin that will help you build an email from scratch.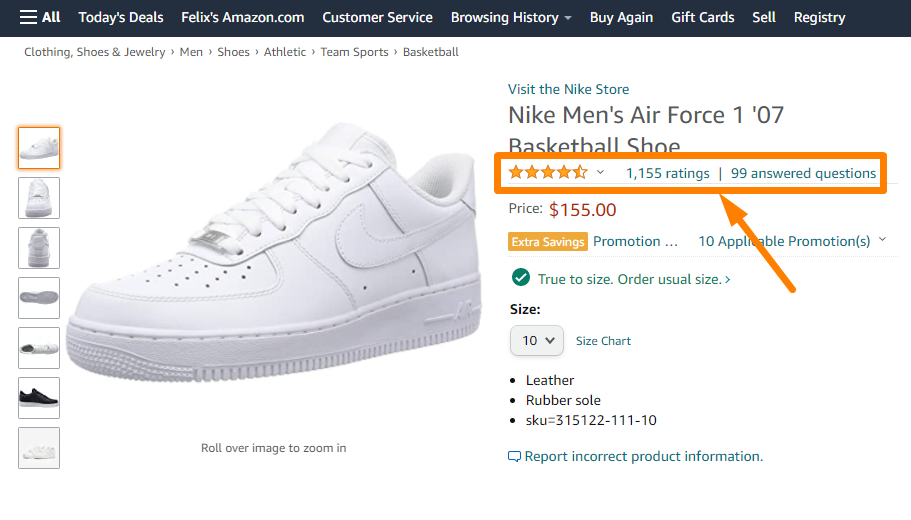
14. Add Exit Intent Popups on the Checkout Page
It is very easy to add an exit-intent popup on the checkout page using a plugin.
They are used in landing pages, blog posts, and web pages of many online stores. You can offer new visitors a discount or collect their email addresses and nurture them for future purchases.
15. Add an Order Bump
Adding order bumps on the checkout page is an optimization strategy that will maximize your average order value from one customer. You can recommend a complementary product or an add-on to something they are ready to purchase.
You should not confuse order bumps with cross-sells or upsells. Order bumps are displayed on the checkout page. The value of the order bump should be smaller than the original purchase.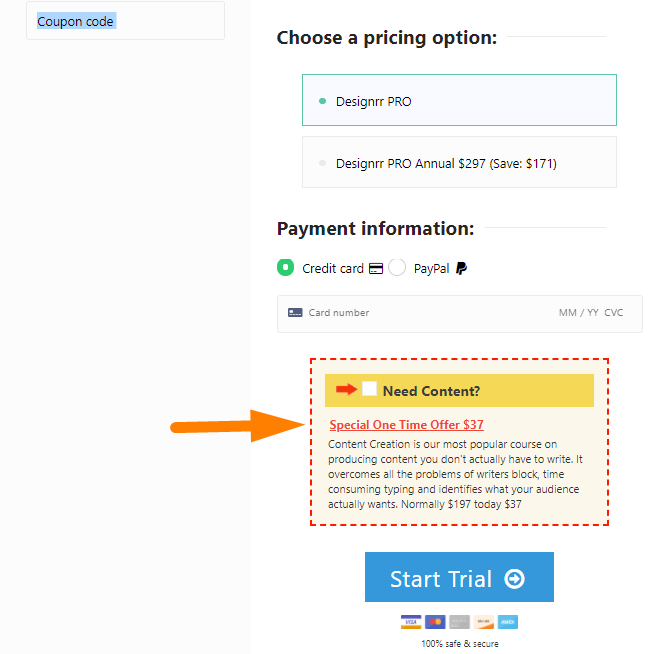
16. Multi-Step Checkout
Multi-step checkouts help your store to boost conversion rates.
It has a clean and distraction-free checkout process. Elementor has templates for multi-step checkouts, which you can use for your WooCommerce store. Here is an example of a multi-step checkout: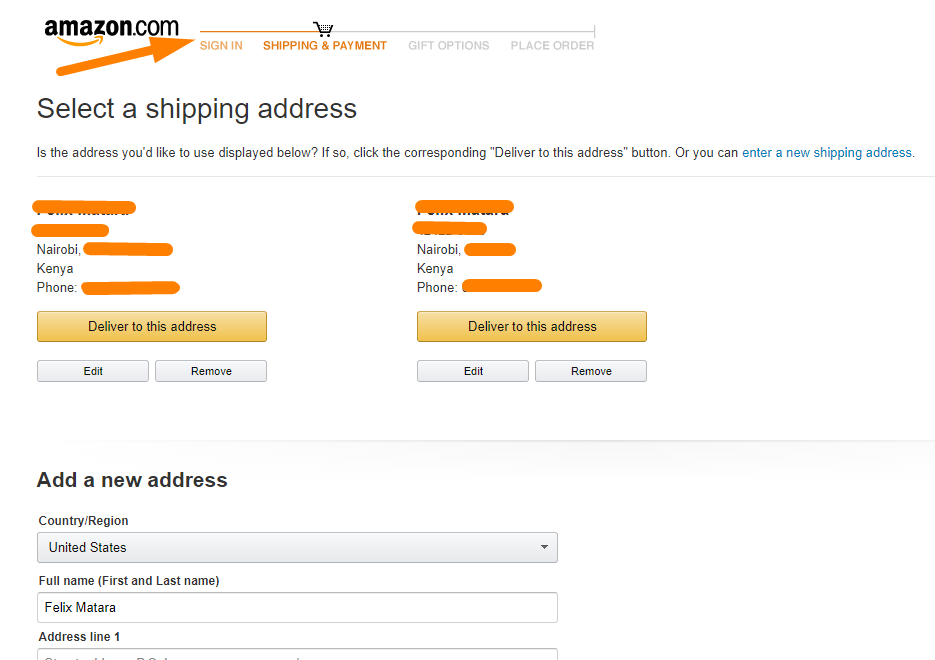
17. Display Progress Bar Indicator
The progress bar indicator assists the customer to help them know where they are in the checkout journey.
It also shows the remaining steps to go. Here is an example of a progress bar indicator: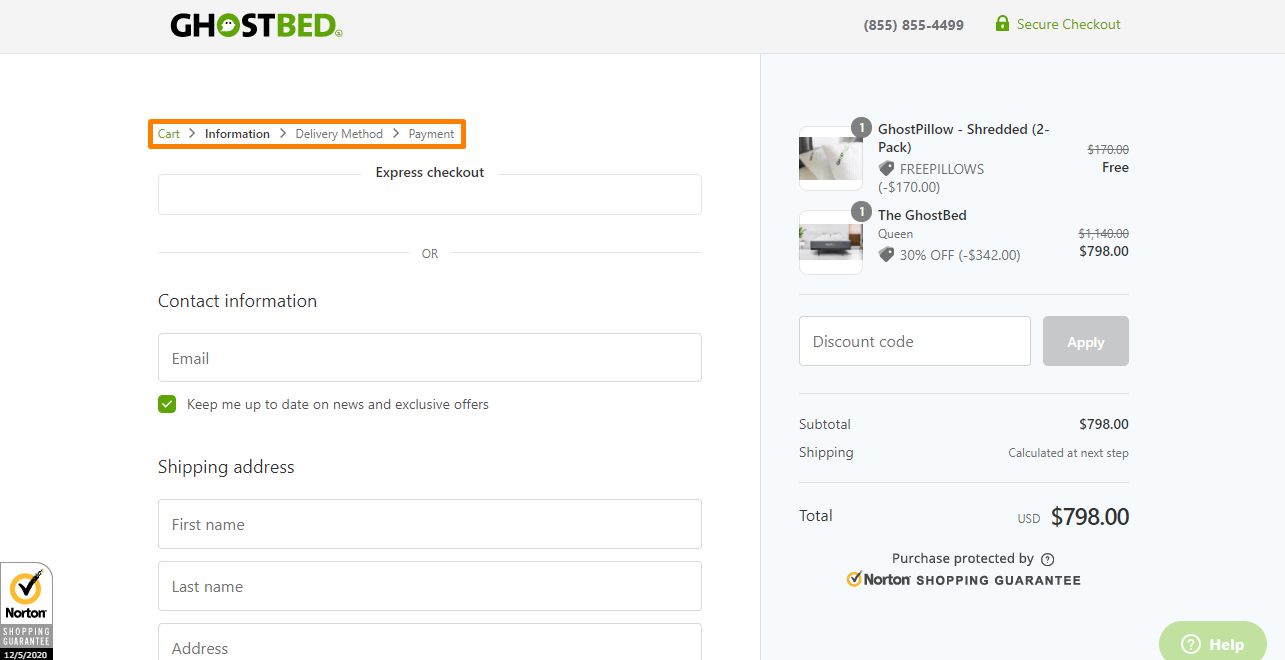
18. Enable Google Address Autocomplete
Filling the address fields can take a long time, and this can be a frustrating process.
This causes potential customers to abandon the checkout page.
You can enable Google Address Autocomplete to optimize this process. The user will type the first few characters of their address and sees a list of potential address suggestions.
Google Address Autocomplete works accurately in most parts of the world, but you can disallow certain countries.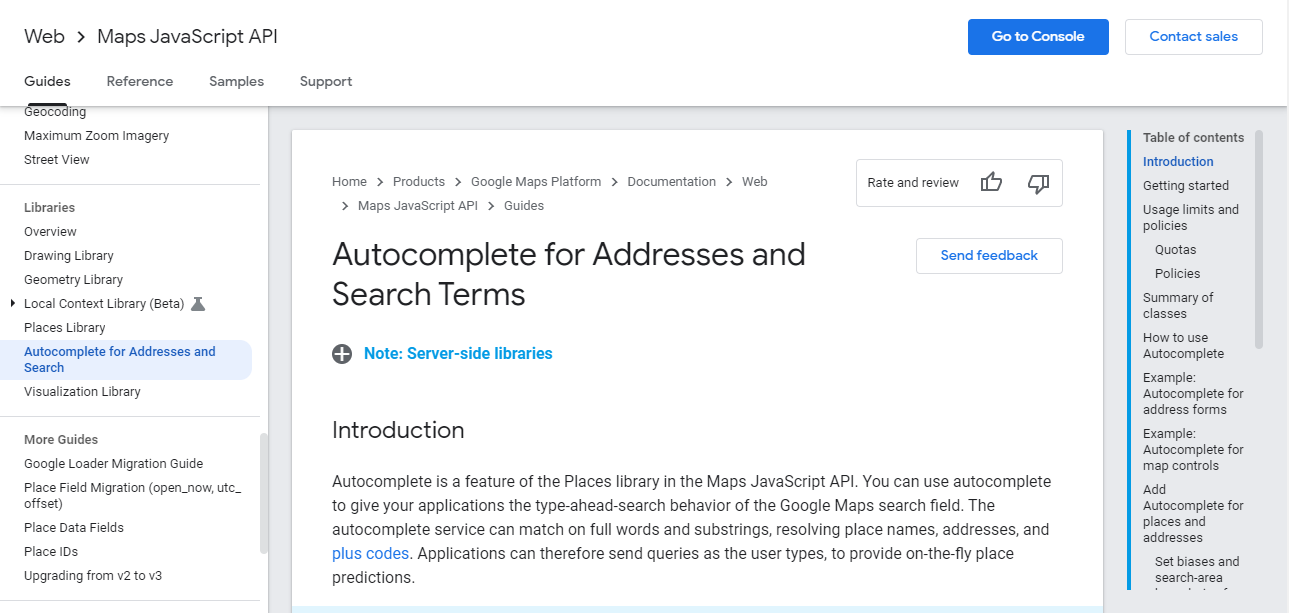
19. Offer Express Checkout Options
The top online retailers have adopted express checkout options for their stores. This means that customers can check out via Amazon Pay, Apple Pay, Google Pay, PayPal Express, and more.
This method is 60% faster and saves time during the checkout process. The customer selects their preferred Express Checkout option and logs in to make the payment: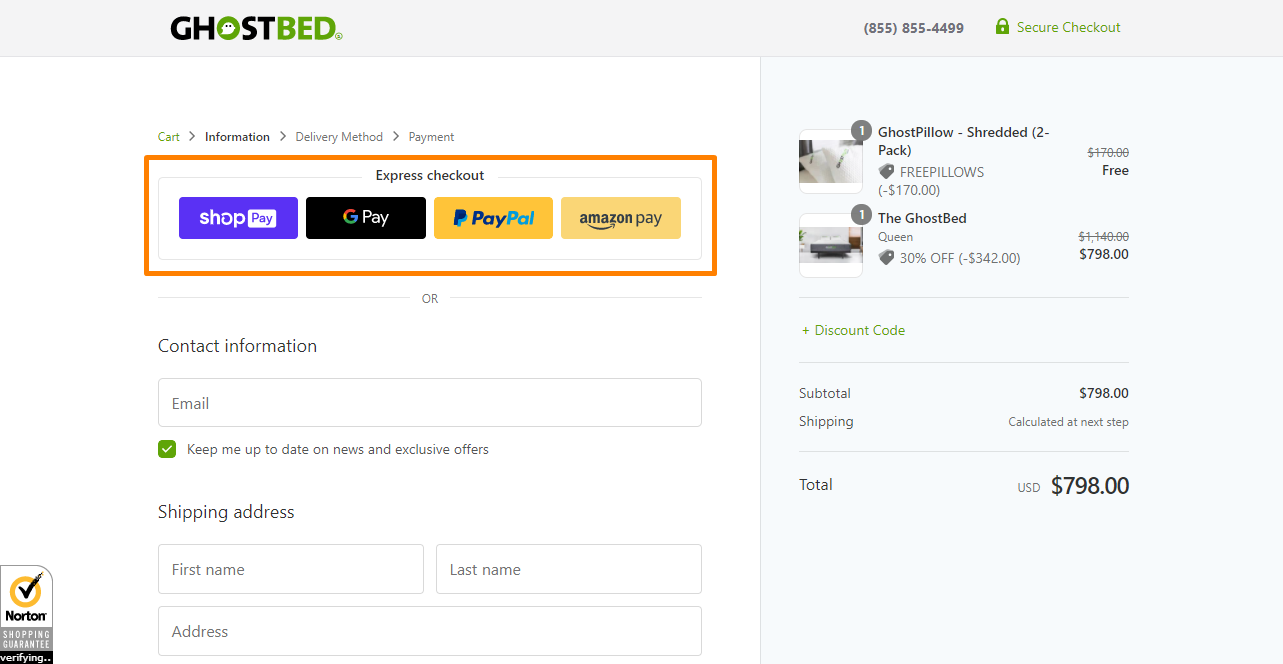
20. Show Top-Selling Countries First in the Drop-Down
It will help if you show your top-selling first in the country field. This allows visitors to pick from the mini-list without wasting time trying to find the country.
The user sees a mini list of countries at the top, and the remaining follow in alphabetical order: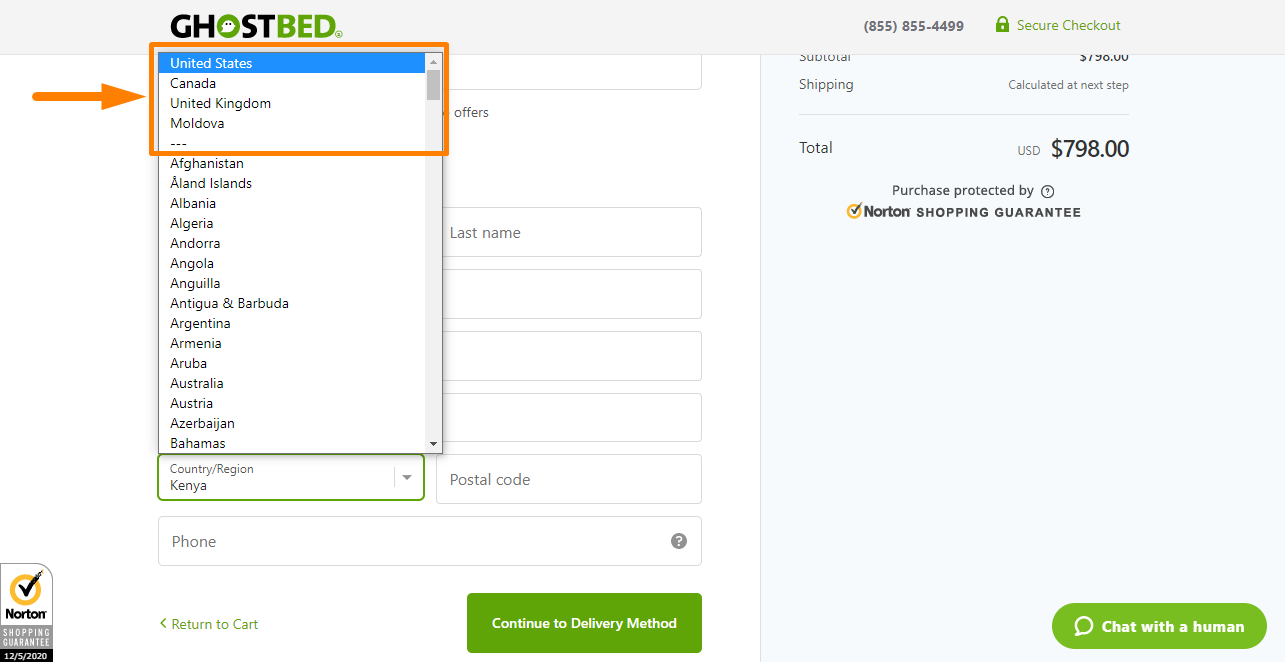
21. Let Users Adjust Quantity and Delete Item
A user has to go back to the cart page to adjust the quantity of a product or delete an item. You can append a mini cart on the checkout page. This will allow customers to change the quantity of a product or delete an item.
22. Pre-fill the Checkout Form for Returning Users
This is an interesting WooCommerce checkout page optimization hack, which prefills the checkout pages to avoid cart abandonment in your store. It saves time, as customers will only fill in the remaining details to complete the process.
Conclusion
The Checkout page of your store must inspire trust and confidence.
You should not overwhelm users by asking for too much information.
You can implement any idea on this article to boost conversion rates in your WooCommerce store. I am quite confident you will start noticing an instant rise in sales.
Similar Articles
- How to Hide Price When Out of Stock In WooCommerce
- How to Add WooCommerce Checkout Default Country
- How to Create WooCommerce Conditional Checkout Fields
- How to Set Up WooCommerce You Must be Logged in to Checkout
- WooCommerce Logout without Confirmation : How to Remove “Are you sure you want to log out?”
- How to Hide Tax On Checkout If Field Value Exists WooCommerce
- How to Enable Guest Checkout WooCommerce
- How to Simplify Checkout Free Items Storefront Theme
- WooCommerce Difference Between PayPal and PayPal Checkout
- How to Change WooCommerce Checkout Page Title
- How to Edit WooCommerce Checkout Page Template
- How to Add Date Field to Checkout In WooCommerce
- How to Remove Country Field From Checkout WooCommerce
- How to Add WooCommerce Invoice Checkout Page
- How to Hide Company Name Field WooCommerce Checkout Page
- How to Hide Price and Add to Cart for Logged Out Users WooCommerce
- How to Create Checkbox Field in WooCommerce Checkout Page
- How to Add Select Field to Checkout WooCommerce
- How to Force Secure Checkout In WooCommerce