 Customizing the checkout page is very important, as this is the page where customers will have to trust you the most. When customers are on this page, they always wonder if you can ship the package quickly, if they need your product, and if you are going to take their money.
However, WooCommerce has many solutions you can use to customize your checkout page. In this article, I will show you how you can edit the checkout page template. It is important to learn about the WooCommerce checkout page hooks, which will make your work easier.
WooCommerce Custom Templates
When it comes to WooCommerce customization, you have to use custom templates. These templates allow you to override WooCommerce default files and use custom files instead. You can learn more about creating custom templates. Additionally, you need to update outdated templates.
By default, WooCommerce comes with several front-end HTML templates as well as email templates. Editing these files directly within the plugin is a bad idea. This is because all your changes will be lost once you update the plugin. However, you can copy them to the theme:
- In your theme directory, create a new folder called woocommerce.
- Navigate to the WooCommerce plugin directory and open the templates folder. The templates folder has many subfolders with all of the different templates that WooCommerce uses. Fortunately, the template file structure and naming in WooCommerce is easy to follow.
- In your newly created woocommerce folder, copy the template file that you want to edit. Remember to keep the directory structure the same here. If the template you want to edit is within a subfolder, then remember to create that subfolder within your theme’s directory.
- Edit the file from within your woocommerce folder and save the changes.
The checkout related templates are all located on the templates/checkout/ folder:
- Cart-errors.php
- Form-billing.php
- Form-checkout.php
- Form-coupon.php
- Form-login.php
- Form-pay.php
- Form-shipping.php
- Order-receipt.php
- Payment-method.php
- Review-order.php
- Terms.php
- Thankyou.php
It is worth mentioning that all of them are for the checkout process except the thankyou.php file. This file contains the content of the page displayed after the order is placed.
These files can be loaded from within your theme instead of being loaded from WooCommerce itself. It will help you customize your checkout page.
It would be best if you were very careful when editing the template files. This is because you can break down one of these files, and customers may not be able to purchase from your store.
Therefore, you should only use this method if you know what you are doing. Alternatively, you can use plugins like Simply Show Hooks that will display the list of available hooks on any of your front pages
WooCommerce Edit Checkout Templates
If you combine the notion of hooks and custom templates, you will notice that custom templates can introduce some new hooks or remove existing ones. You can also remove hooks dynamically using the WordPress default remove_action() function.
Hooks are handy if you want to rearrange the order of elements and if you want to remove or add elements as well. However, you can also modify a default behavior or edit a string.
For example, you can add a section before the payment, by adding a custom PHP snippet in the functions.php file, within the theme folder:
add_filter( 'woocommerce_review_order_before_payment', 'njengah_my_checkout_section' );

function njengah_my_checkout_section() {

            wc_print_notice( apply_filters( 'woocommerce_checkout_my_checkout_section', __( 'Want a phone call before you buy?', 'woocommerce' ) . ' <a href="#">' . __( 'Click here, we call you back!', 'woocommerce' ) . '</a>' ), 'notice' );

}
This is the outcome: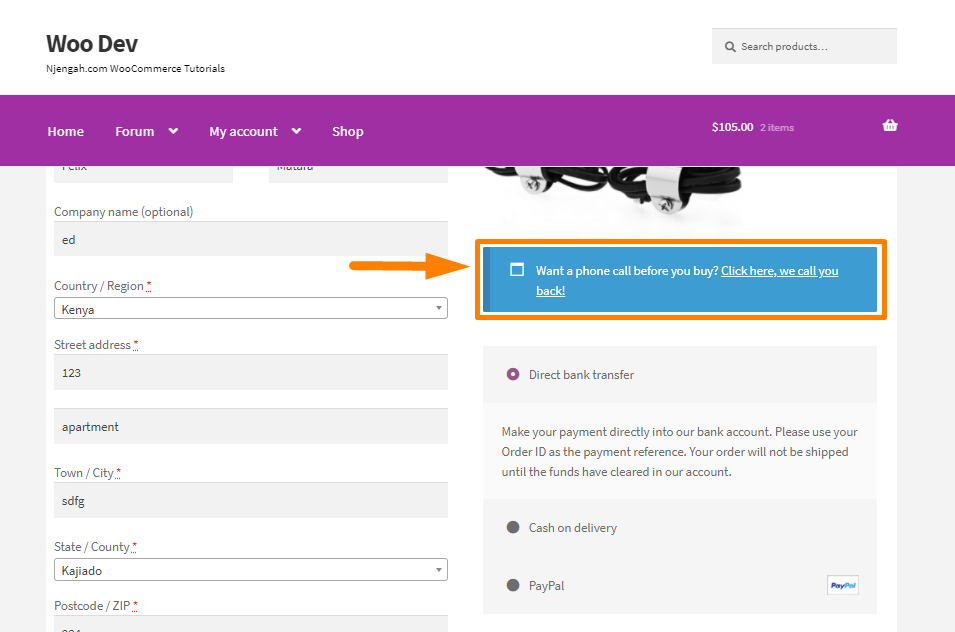
Conclusion
Now that you know what custom templates and hooks are, you can imagine a couple of scenarios and see how you can adjust the checkout page to your specific needs.
It is also worth mentioning that all HTML elements on the checkout have prefixed classes. This means that you can use custom CSS code to change colors, margins, dimensions, and many more.
If you are not familiar with editing code, I recommend hiring a qualified WordPress Developer.
Similar Articles
- How to Count Items Added to Cart WooCommerce Cart Count Code
- How to Fix WooCommerce Storefront Theme Internal 500 Server Error
- How to Add a Sidebar to WordPress » Ultimate Step by Step Guide
- How to Put WooCommerce Cart and Checkout on One Page
- How to Change WooCommerce Checkout Error Messages
- How to Add Extra Field in WooCommerce Checkout Form
- How to Hide Tax Label In WooCommerce
- How to Create Custom Widget Area in WordPress Step by Step
- 30 Best Download Plugins for WordPress File Sharing & More
- How to Add Select Field to Checkout WooCommerce
- How to Change the WooCommerce ‘Added to Cart’ Notice
- How to Set Up WooCommerce Checkout Field Placeholder
- How to Refresh Checkout Page WooCommerce
- How to Create Account at Checkout WooCommerce
- How to Hide Prices From Google In WooCommerce
- How to Add Hidden Field on WooCommerce Checkout Page
- How to Hide Shipping Methods for Certain Conditions
- How to Add WooCommerce Invoice Checkout Page
- How to Add WooCommerce Storefront Sitemap