Adding custom fields to the WooCommerce checkout page can be a difficult task.
This is because these fields might have severe implications for customers. In most cases, store owners use additional fields to collect further data about the customers.
WooCommerce Create Checkbox Field In Checkout Page
In this tutorial, I will illustrate how you can add a custom field to the checkout field. Remember that you would need to register the checkbox using a unique id woocommerce_after_order_notes. Once done, this custom field could be used after the order notes
Here are the steps that you need to follow:
- Log into your WordPress site and access the dashboard as the admin user
- From the dashboard menu, click on the Appearance Menu > Theme Editor Menu. When the theme editor page is opened, look for the theme functions file with the extension functions.php. Open this functions file to add the function to add the check box:
- Add the following code to the functions.php file:
function njengah_custom_checkbox_fields( $checkout ) {

    echo '<div class="cw_custom_class"><h3>'.__('Give Sepration Heading: ').'</h3>';

    woocommerce_form_field( 'custom_checkbox', array(

        'type'          => 'checkbox',

        'label'         => __('Agreegation Policy.'),

        'required'  => true,

    ), $checkout->get_value( 'custom_checkbox' ));

    echo '</div>';

}

add_action('woocommerce_after_order_notes', 'njengah_custom_checkbox_fields');
- The field is set to required, so if a user leaves this field empty, an error message should be generated. Since the error notification function
add_error()has been deprecated, I will usewc_add_notive():
add_action('woocommerce_checkout_process', 'njengah_custom_process_checkbox');

function njengah_custom_process_checkbox() {

global $woocommerce;

if (!$_POST['custom_checkbox'])

wc_add_notice( __( 'Notification message.' ), 'error' );

}
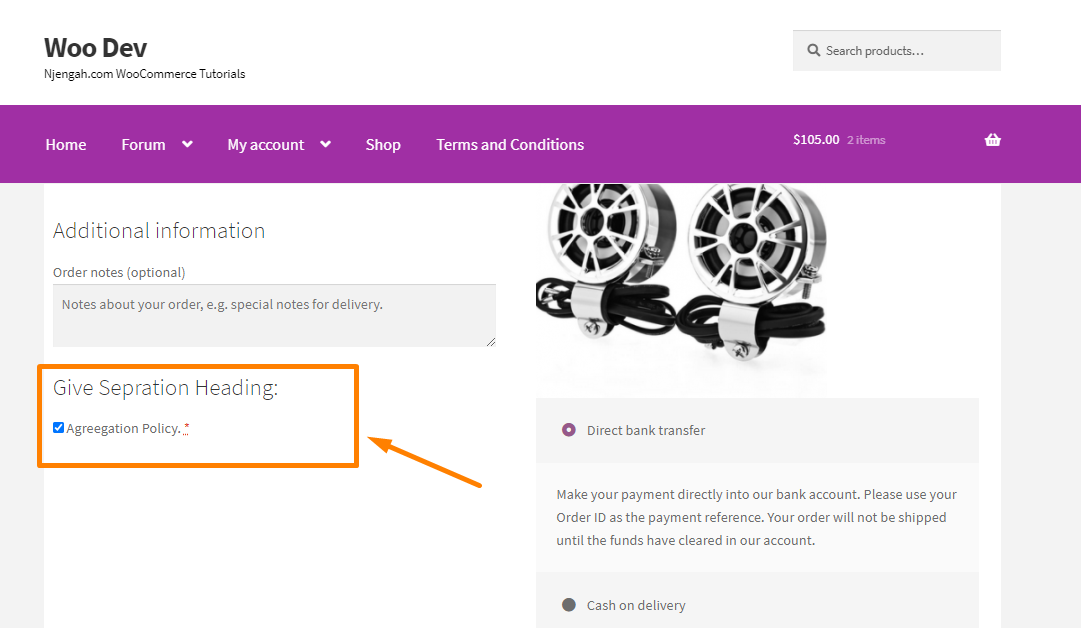
- This will add the custom checkbox to the WooCommerce checkout page:
- Remember that the information provided by the buyer through the custom field needs to be saved along with other data from the checkout page. add the following code to save the data from the checkbox:
add_action('woocommerce_checkout_update_order_meta', 'njengah_checkout_order_meta');

function njengah_checkout_order_meta( $order_id ) {

if ($_POST['custom_checkbox']) update_post_meta( $order_id, 'checkbox name', esc_attr($_POST['custom_checkbox']));

}
Conclusion
This post has highlighted the important issue of adding a custom field to the WooCommerce checkout page. I have also demonstrated how you can add a checkbox to the checkout page and then added validation and data-saving portions.
If you do not know how to implement this idea, please consider hiring a qualified WordPress developer.

Joe is an experienced full-stack web developer with a decade of industry experience in the LAMP & MERN stacks, WordPress, WooCommerce, and JavaScript – (diverse portfolio). He has a passion for creating elegant and user-friendly solutions and thrives in collaborative environments. In his spare time, he enjoys exploring new tech trends, tinkering with new tools, and contributing to open-source projects. You can hire me here for your next project.
Similar Articles
- How to Create WordPress Custom User Roles
- WooCommerce Redirect Users After Registration by Roles
- How to Hide Products Without Price in WooCommerce
- How to Redirect On Refresh WordPress Page » Detect Page Refresh PHP
- How to Remove Gravatar Storefront Blog WooCommerce
- How to Get Current Product Category Name in WooCommerce
- How to Get Registered Sidebars WordPress with Foreach Loop
- How to Remove Additional Information Checkout Page WooCommerce
- How to Add WooCommerce Checkout Email Validation
- How to Add Hidden Field on WooCommerce Checkout Page
- How to Add Select Field to Checkout WooCommerce
- How to Change WooCommerce Checkout Labels
- How to Add WooCommerce Invoice Checkout Page
- How to Hide Price If Zero In WooCommerce
- How to Put WooCommerce Cart and Checkout on One Page
- How to Set Up WooCommerce Terms and Conditions Checkout
- How to Hide WooCommerce Marketing Hub Admin Option
- How to Add WooCommerce Storefront Product Pagination
- How to Fix WordPress Admin Dashboard Is Not Displaying Properly & CSS Not Loading