 Not sure how to add new customers of your WooCommerce stores to your Mailchimp email lists?
Don’t worry! We will show you the exact steps that you need to take.
It’s super easy. You will require a third-party tool to add your WooCommerce customers to Mailchimp. More on that in the next section.
Let’s dive in.
How to Add New WooCommerce Customers to Mailchimp
To add new WooCommerce customers to Mailchimp, you need to install a third-party plugin on your WooCommerce site. While there are a handful of plugins to choose from, we prefer MailOptin because it’s really good at what it does.
The plugin is easy to use and if you get stuck somewhere there are detailed help documentation and a great support team to help you out.
It’s worth mentioning that if you are using email marketing software besides Mailchimp, you can still use MailOptin to add subscribers to that particular software. Take a look at all the software MailOptin integrates with – Sendinblue, Drip, AWeber, MailerLite, Constant Contact, ConvertKit, GetResponse, Sendy, Campaign Monitor, ActiveCampaign, Sendlane, Gist, Klaviyo, Mailster, Vertical Response, HubSpot, Mailjet, Ontraport, Moosend, Zoho CRM, MailPoet, Zoho Campaigns, Jilt, Keap/Infusionsoft, GoDaddy Email Marketing, SendFox, CleverReach, SendGrid, weMail, FluentCRM, and Facebook Custom Audience.
In the next section, we will show you how to automatically add new customers to Mailchimp whenever a product is purchased from your store.
Many of you have email lists dedicated to certain types of customers. Some email lists are built to identify customers who purchase specific products. Others record information about customers who buy from a particular category of products or products with particular tags.
So in this article, we are also going to show you how to add new customers when
- Specific products are purchased
- Products from specific categories are purchased
- Products with certain tags are purchased
Before we start, take a backup of your entire WordPress website. Installing a new plugin is known to break a website. So we recommend taking a backup of your website before proceeding.
Now, let’s begin the tutorial.
Add New Customers to Mailchimp When Any Product Is Purchased
First off, you need to install and activate MailOptin on your WooCommerce website. It’s a premium plugin and you can purchase the standard plan for an annual fee of $79 for a single site. Learn more.
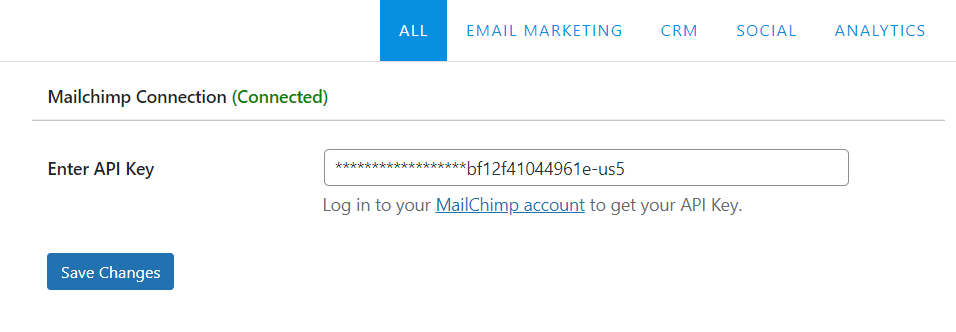
The next step is to connect MailOptin to Mailchimp. We are assuming that you already have a Mailchimp account. If not, then you need to create one right now. Then come back to your WooCommerce site and go to MailOptin > Integrations > Mailchimp Connection, enter your Mailchimp API key, and hit the Save button.
You have now connected your Mailchimp account with MailOptin.
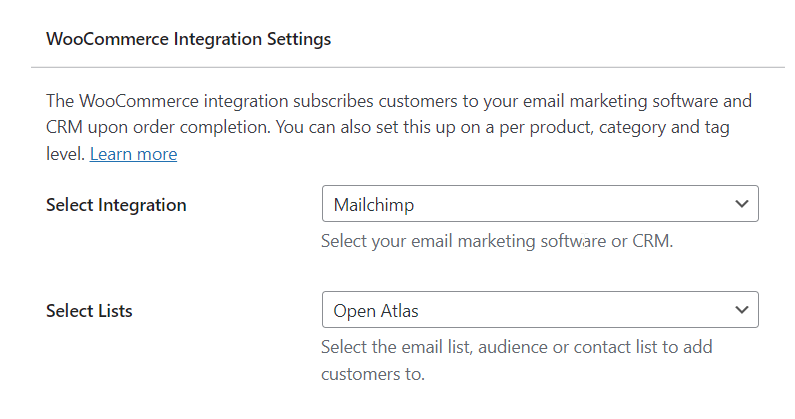
Next, you will learn how to set up MailOptin so that all new customers are added to your Mailchimp email list. What you need to do is go to MailOptin > Settings > WooCommerce Integration > Select Integration. In the Select Integration option, there is a drop-down. From the drop-down, choose Mailchimp.
Now, choose an email list from the Select Lists option.
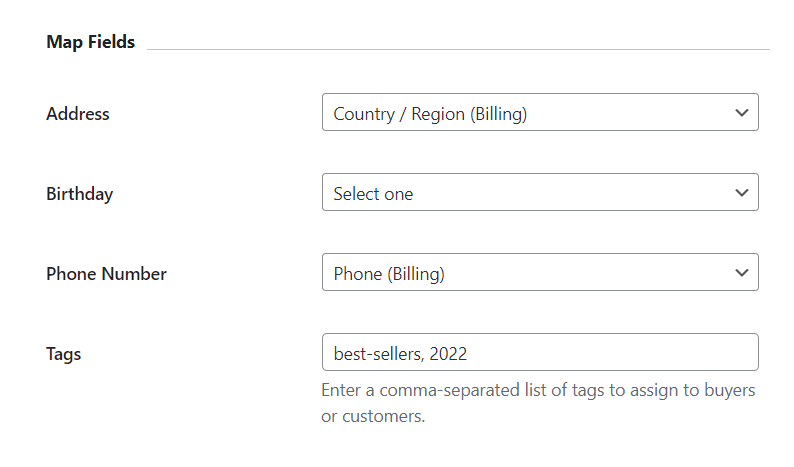
Scroll down on the same page and you should see an option to add the billing and shipping data of your customers to the email list.
When you are ready, save your new settings.
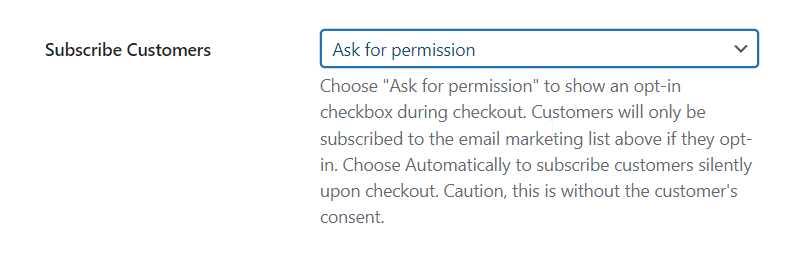
Important: Seeking permission before adding new customers to your email list is a legal requirement in most countries. MailOptin allows you to add a checkbox on the checkout page. You can enable it by going to MailOptin > WooCommerce Integration Settings > Subscribe Customers > Ask for Permission. Remember to save your settings.
That’s it, folks! Now whenever someone purchases a product from your WooCommerce store, they’ll be added to your Mailchimp email list.
PRO TIP: By adding all new customers to your email list you are strengthening your subscription base. Consider setting an automated emailing system where subscribers are notified whenever you add a new product to your WooCommere store.
Add New Customers Who Purchase Specific Products to Mailchimp
You may want to keep a track of people purchasing a specific product. You can launch email marketing campaigns targetting those people. For instance, people buying Game of Thrones books can be interested in buying Game of Thrones merchandise.
So to add new customers to Mailchimp when specific products are purchased, go to WooCommerce > Products and click on the Edit button that appears below the particular product.
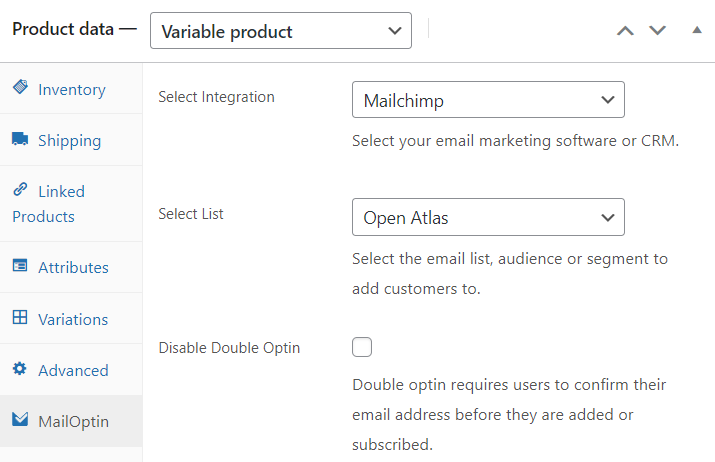
Go to Product Data > MailOptin > Select Integration. There is a dropdown menu beside the option Select Integration. Select Mailchimp. Scroll down and select the email list where you want to store the new customer. Hit the Save button.
Add New Customers to Mailchimp When They Purchase Products From Specific Categories
Want to store data of new customers who bought products from a certain category? Here’s how to store the new customers in a Mailchimp email list.
Go to WooCommerce > Products > Categories. Then click on the Edit button found below the category of your choice.
On the next page, you should see a Connect button. As soon as you click on it, a pop-up will appear.
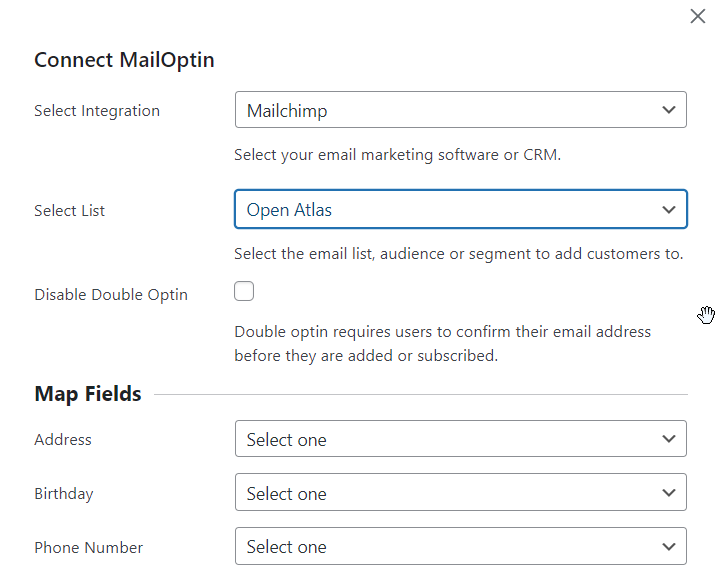
In the pop-up, you will find an option called Select Integration with a dropdown. From the dropdown select Mailchimp. In the next option, select an email list where you want to store your customers. Further down you have the option to add the billing and shipping data of your customers to the email list.
When you are ready, save your settings.
Add New Customers Who Purchase Products With Certain Tags to Mailchimp
The steps you need to take to add new customers who purchase a product with a specific tag are nearly identical to how you add new customers who buy products from a specific category.
Go to WooCommerce > Products > Tags. Then click on the Edit button found right below the tag of your choice.
On the next page, you should see a Connect button. As soon as you click on it and a pop-up will appear.
In the pop-up, you will find an option called Select Integration with a dropdown. From the dropdown select Mailchimp. In the next option, select an email list where you want to store your customers. Further down you have the option to add the billing and shipping data of your customers to the email list.
When you are ready, save your settings.
That’s it, folks. With that, we have come to the end of this guide.
Final Thoughts
Adding new customers to your WooCommerce store to your Mailchimp email list is super easy. All you need to do is install a 3rd party plugin called MailOptin and follow the instructions that we have covered in this article. Using the plugin is super easy and if you get stuck somewhere, just reach out to the support team.
Give MailOptin a try.

Joe is an experienced full-stack web developer with a decade of industry experience in the LAMP & MERN stacks, WordPress, WooCommerce, and JavaScript – (diverse portfolio). He has a passion for creating elegant and user-friendly solutions and thrives in collaborative environments. In his spare time, he enjoys exploring new tech trends, tinkering with new tools, and contributing to open-source projects. You can hire me here for your next project.
Similar Articles
- How to Add WooCommerce Storefront Banner
- How to Create Checkbox Field in WooCommerce Checkout Page
- How to Add WooCommerce Invoice Checkout Page
- WooCommerce Mobile Checkout Optimization Quick Guide
- WooCommerce Redirect After Checkout: Redirect to Custom Thank You Page
- WooCommerce Checkout Optimization Quick Guide
- How to Add Local Pickup to WooCommerce
- How to Upload Image On Product Page In WooCommerce
- How to Set Up WooCommerce Subscribe or Unsubscribe To Our Newsletter
- How Can Customer Cancel Order WooCommerce
- How to Set Up WooCommerce You Must be Logged in to Checkout