 Do you want to set up shipping classes in WooCommerce? Then read on, as the main aim of this brief tutorial is to help you create shipping classes and how you can add products to the newly creates shipping class.
A great way to keep your customers happy is by offering multiple shipping options. This will help you reduce cart abandonment rates in your store.
Fortunately, WooCommerce allows you to create a variety of shipping options for your customers. This built-in shipping setup integrates smoothly with any WordPress site that has a WooCommerce compatible theme.
The first thing you do is set up your shipping zones to define the specific areas where you ship goods. The next step is to add standard shipping methods and the different rate options within zones. The last step is to assign a WooCommerce shipping class to the products in your store.
How To Set Up Shipping Classes in WooCommerce
In today’s post, we will be looking at how you can create an assign WooCommerce shipping classes. For example, some products might have the same shipping amount. Using shipping classes is the best way to group similar products for shipping. For example, if you sell large bulky items, you need to put them in their own shipping class with a unique shipping cost.
Grouping similar products together in this way allows you to define specific shipping costs for items.
Let us look at how you can achieve this.
Steps to Set Up Shipping Classes in WooCommerce
Here are the simple steps you need to follow:
- Log into your WordPress site and access the Dashboard as the admin user.
- From the Dashboard menu, go to WooCommerce > Settings > Shipping > Shipping Classes.
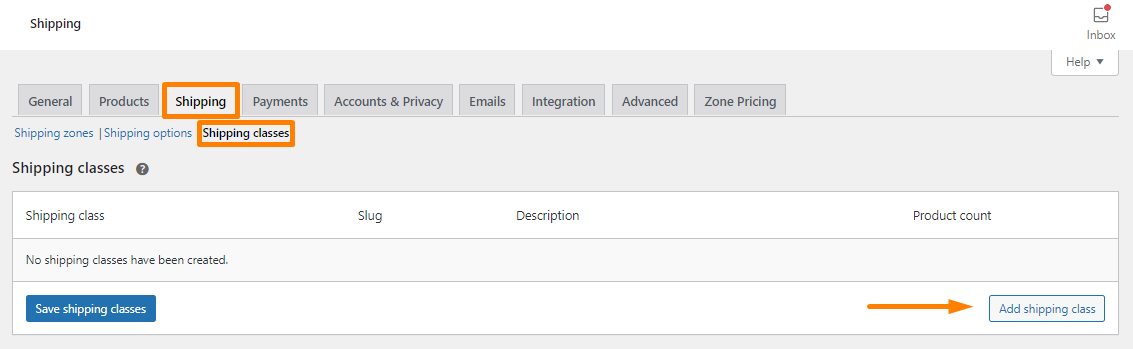
- At the bottom corner, select Add shipping class.
- The next step is to enter the name of your shipping class. You can leave the slug field blank as it fills automatically, and you can add a small description for notes.
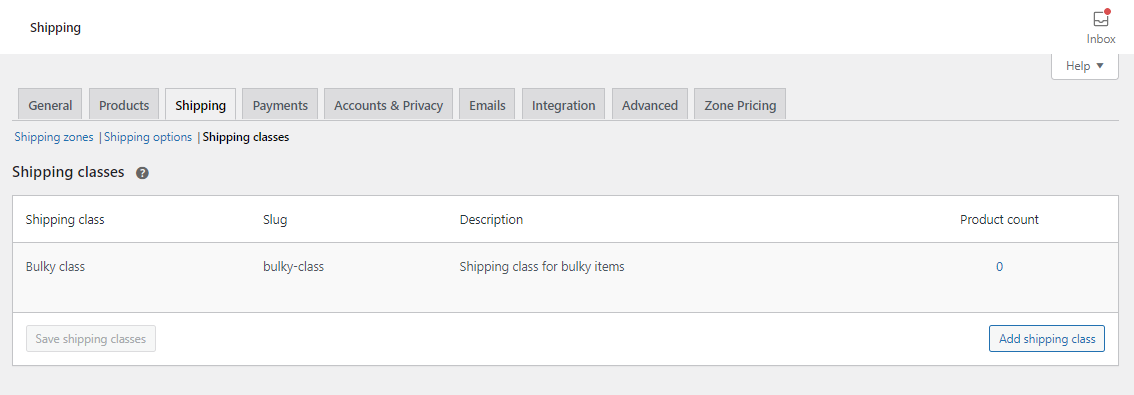
- Click on save shipping class.
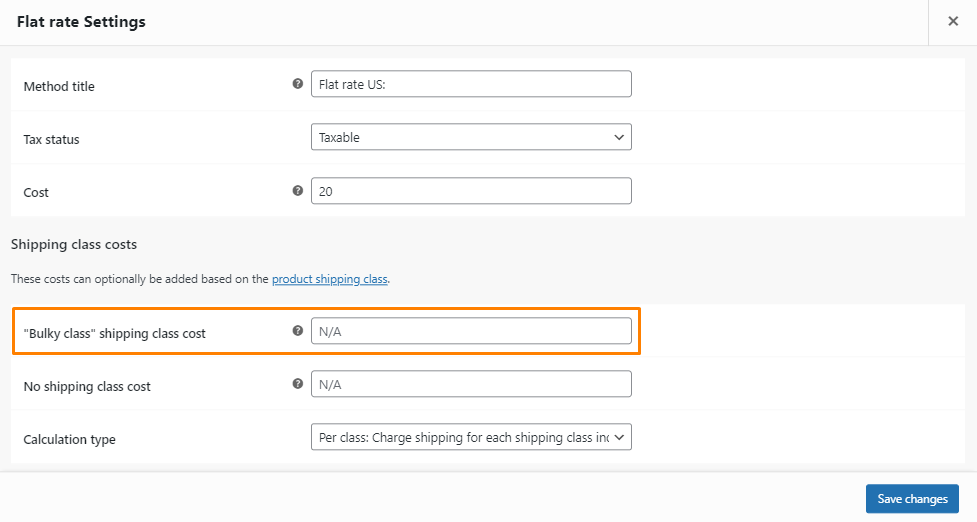
- To add the shipping class cost, go back to the Shipping zones and edit the flat rate settings. You will see a section where you can add the shipping class cost:
- The next step is to assign the newly created shipping class to an existing product in your store. To do this, go to Products and click on Edit to open the product settings page.
- Scroll down to the Product data section, and click on the shipping tab.
- Click on the shipping class drop down and assign the product to the shipping class you created.

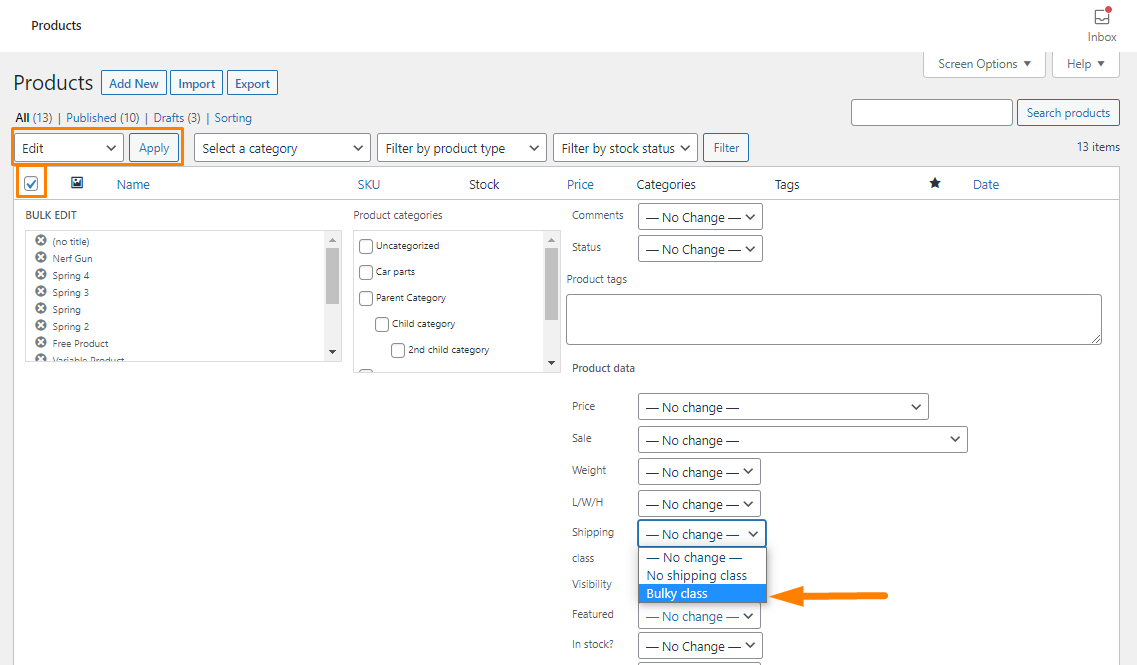
- If you have many products, this can be very tiring, but you can add them in bulk. To do this, select all of the products you would like to add to the shipping class and select edit under Bulk actions.
- Select your shipping class from the drop-down list and click Update. All of the products you selected will be assigned to that shipping class.
Wrapping Up
In today’s tutorial, we have shown you how to create a shipping class and assign it to any product in your store. As you have seen, it is very easy to set up shipping classes because you do not need any coding skills. WooCommerce comes with this convenient feature, and you do not need a plugin to achieve this.
We hope that this post helped you to learn more about shipping classes.
Similar Articles
- WooCommerce Accept Terms and Conditions Checkbox On Registration Form
- WooCommerce vs Magento: Which Is the Best E-Commerce Platform?
- How to Add Social Login In WooCommerce Social Login
- How to Add Google Analytics to WooCommerce
- How to Set Number of Products Per Page WooCommerce
- How to Add Active Navigation Class Based on URL
- How Many Products Can WooCommerce Handle?
- How to Change WooCommerce Checkout Page Title
- How to Add WooCommerce Custom Checkout Message
- WordPress Database: Complete Guide from Novice to Expert
- How to Access WooCommerce Database
- 100+ Best Free WordPress Plugins By Popularity, Ratings & Users
- How to Create WooCommerce Payment Gateway
- What is the Best Payment Gateway for WooCommerce
- Styling WordPress Menu Items Separately WordPress Menu CSS Classes
- How to Add Star Rating To WooCommerce Product
- 30+Best WordPress Membership Plugins Collection
- How to Migrate from Shopify to WooCommerce
- How to Connect Printful To WooCommerce