 Are you looking for a quick way to add social login in WooCommerce?
This brief tutorial aims to offer a quick solution for you. It is important to offer online shoppers the best user experience especially if you run a membership or eCommerce website.
The success of your site will depend heavily on user registration.
We recommend that you leverage social logins to offer a great user experience on your registration, login, and checkout pages, and many pages on your site.
This is because social login allows your customers to register and log in to your site using their existing social media accounts like Facebook, Twitter, and Instagram.
Users are registered with a single click and subsequently log in to your online store.
This modern method saves time as compared to the old-fashioned method that involves creating a new username and password.
It is worth mentioning that users do not like creating new accounts on websites. This is why it is important to include social logins to avoid cart abandonment. It is a seamless means of registering on your website.
How to Add Social Login in WooCommerce
Adding social logins to your WooCommerce store will provide you with many benefits. This is why we are going to share a simple way to add social logins by using a plugin.
We’ve gone to great lengths to find the best plugin for this job. It is called the Super Socializer. This social login plugin has the most 5-star reviews over at WordPress.org as we speak.
Let us get right into it.
Steps to Add Social Login in WooCommerce
In this section, we will use the Super Socializer plugin.
It allows you to add social login buttons to the WordPress login page, registration page, comments, and WooCommerce checkout page.
It is very easy to use, as you only need to use widgets and shortcodes.
It supports social login from 10 social networks, allowing you to sync the user’s basic social profile data with the respective WordPress profile.
Here are the steps you need to follow:
- Log into your WordPress site and access the Dashboard as the admin user.
- To download it directly in the Admin Panel, simply navigate to Plugins > Add New.
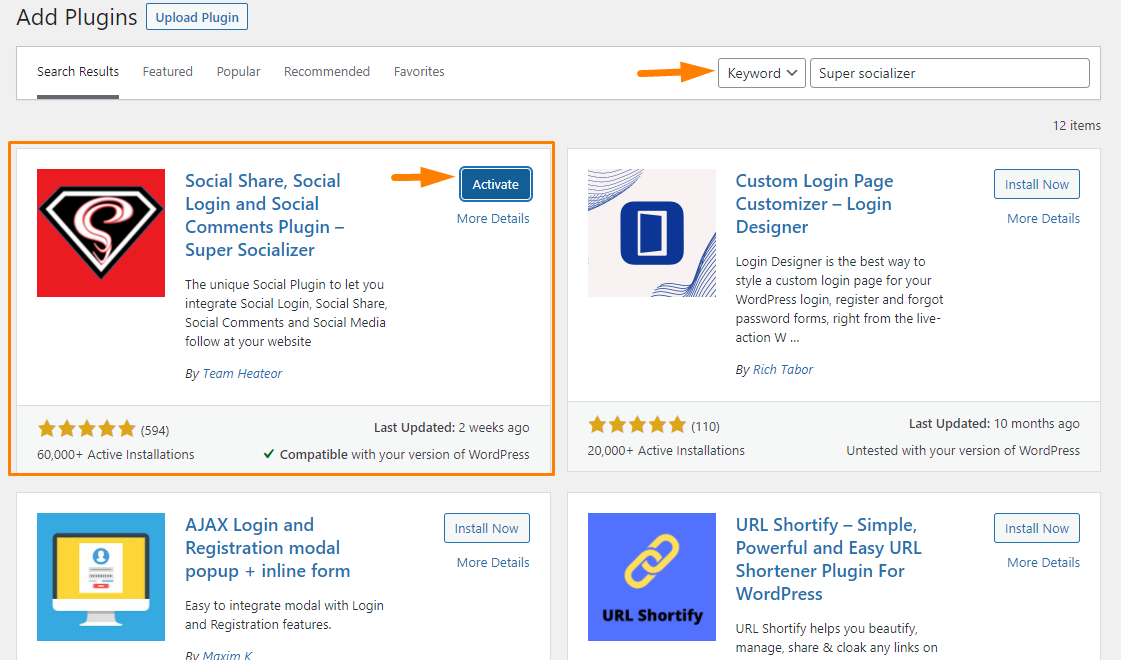
- After that, you will need to do a keyword search for the plugin ‘Super Social’. You need to install and activate it as shown below:
- From the WordPress admin panel, navigate to Super Socializer > Social Login to access options like social commenting, social login, social sharing, and like buttons. Social Login enables visitors to log in using their social network accounts including Facebook, Twitter, LinkedIn, and many more. Enable Social login.
- The next step is to get the API for each provider you choose we will share the WooCommerce login via Facebook. You can check out how you can get the respective API keys for Twitter, Google Plus, and LinkedIn.
- Get your Application ID from Facebook by logging into your Facebook account, going to the developer’s section, and registering your account.
- Once the registration process is complete, select the option that describes what you do best.

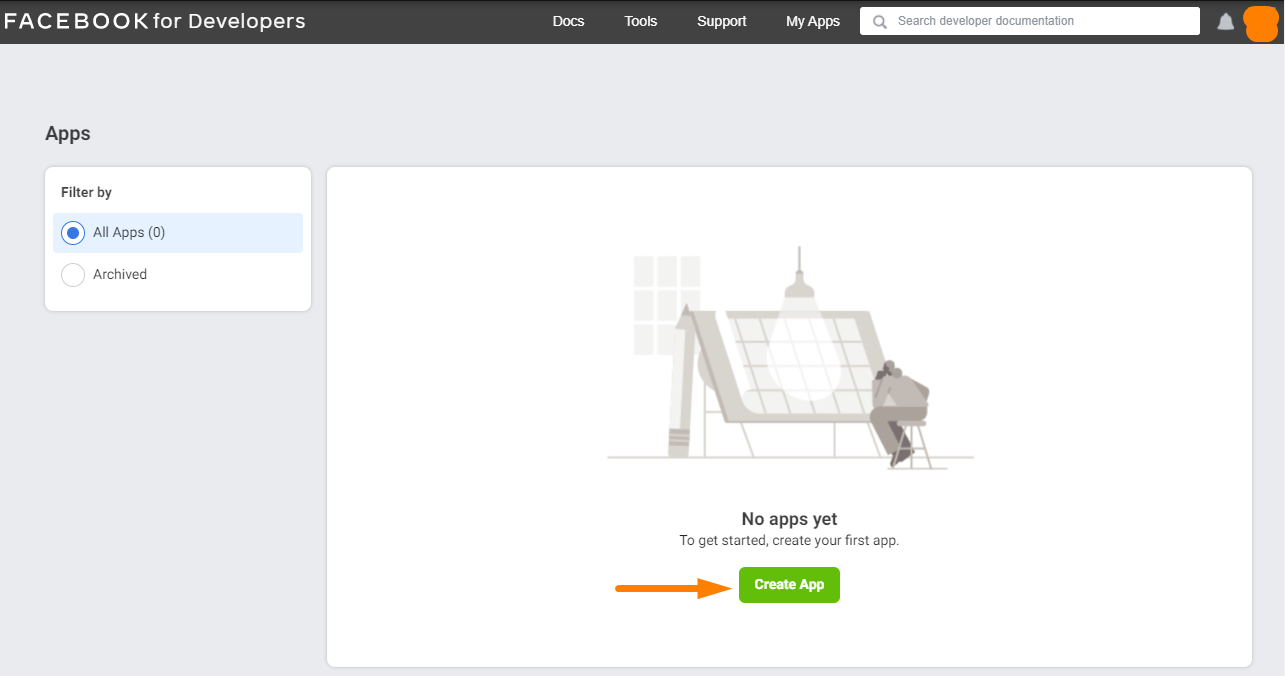
- After that, you will be redirected to a dashboard where you need to create your app, as shown below:
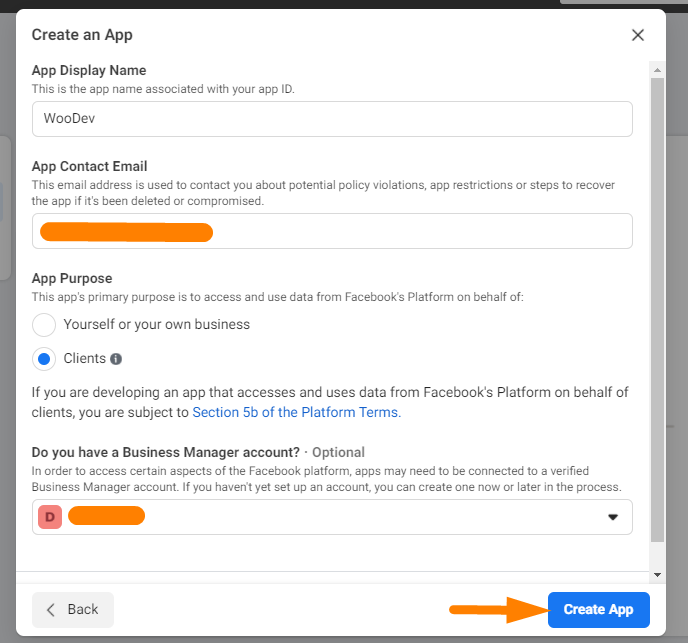
- Fill in the app details such as the app name, and email address.
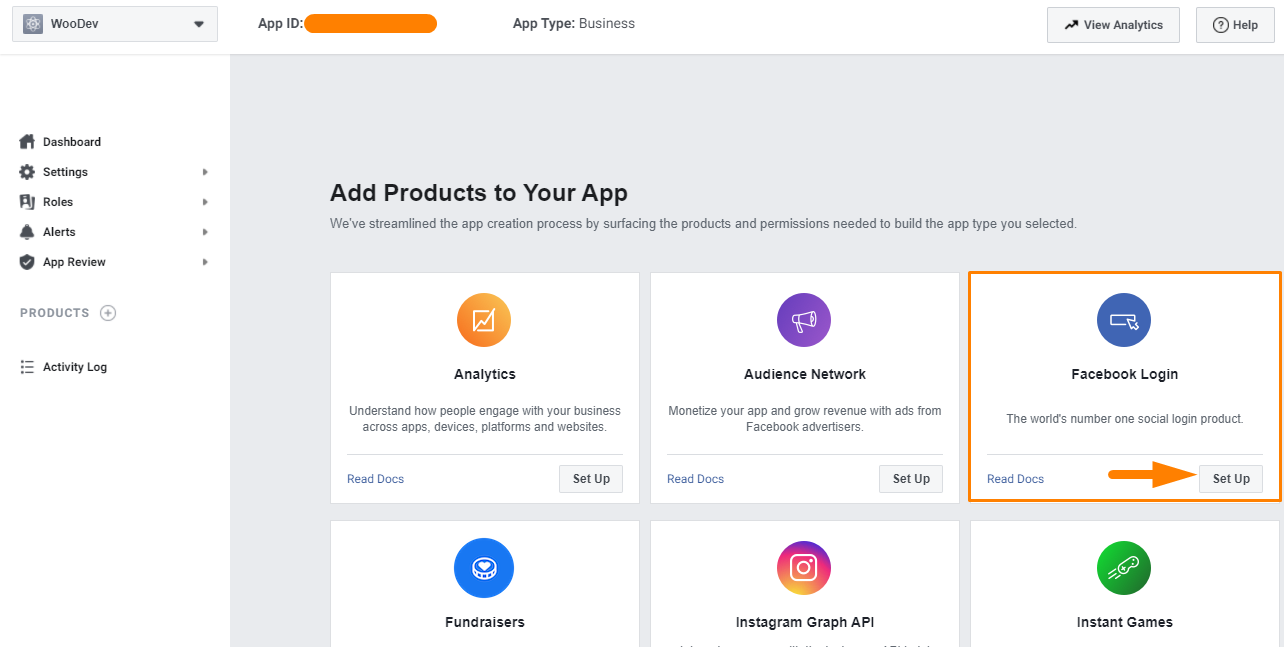
- Once the process is complete, you will be redirected to a new dashboard, where you can add products to your app. You need to go to the Facebook Login section and click the Set Up.
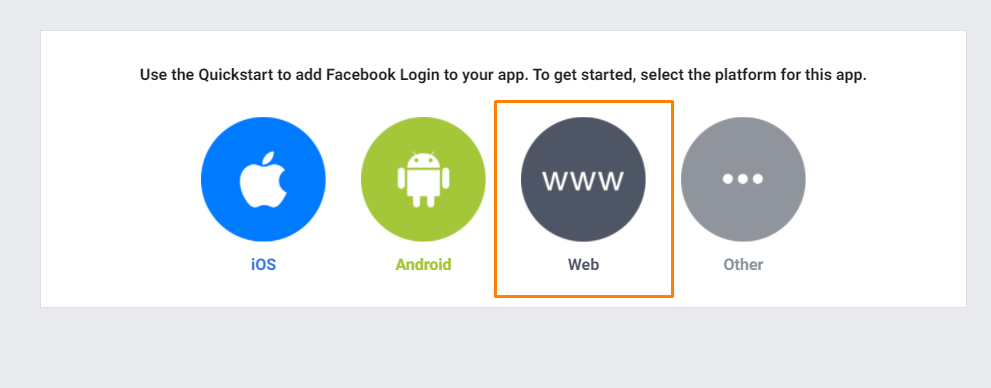
- Select the Web.
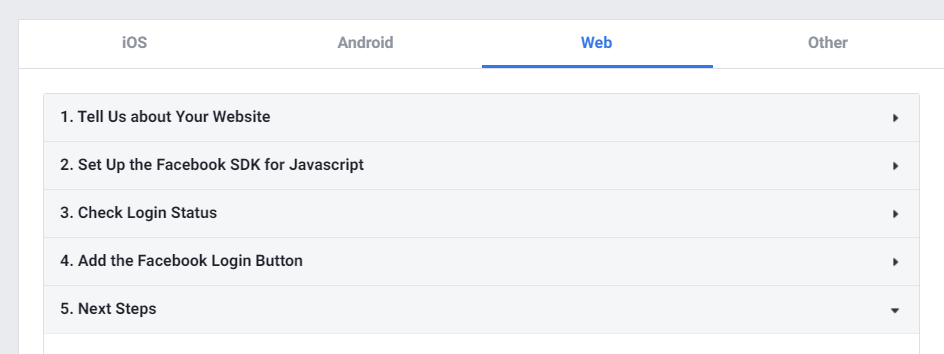
- The next step is to fill out the following information:
- To make your application live, navigate to the App Review section and switch the button to button to Yes.
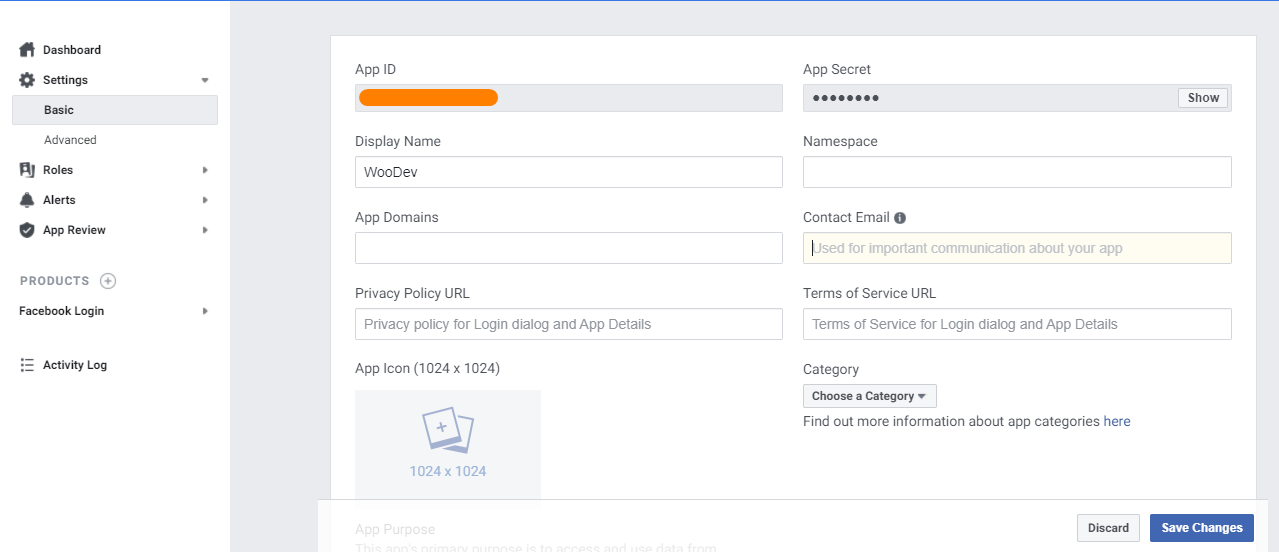
- Navigate to Settings > Basic to get the App ID and the App Secret Key.
- Go back to the “WordPress Admin Panel” and navigate to Super Socializer > Social Login to paste the information copied in the previous steps in the relevant fields.
- Once you are done, click on Save Changes.
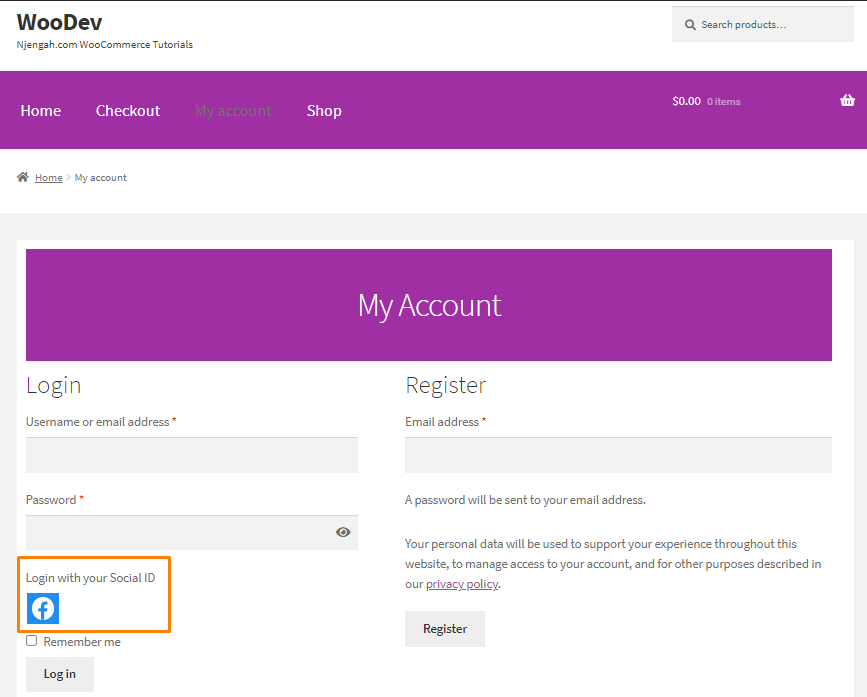
- Now, visit your WooCommerce store and click the Login option. This is the outcome:
Conclusion
By now, you should be able to simplify the entire signup and login processes for the users. You should take advantage of this method to get verified user data and access to social media profiles that you can use to nurture leads.

Joe is an experienced full-stack web developer with a decade of industry experience in the LAMP & MERN stacks, WordPress, WooCommerce, and JavaScript – (diverse portfolio). He has a passion for creating elegant and user-friendly solutions and thrives in collaborative environments. In his spare time, he enjoys exploring new tech trends, tinkering with new tools, and contributing to open-source projects. You can hire me here for your next project.
Similar Articles
- How to Set Up WooCommerce You Must be Logged in to Checkout
- How to Redirect to Cart after Login in WooCommerce
- 30 Best WordPress Security Plugins to Protect Your Site
- How to Redirect Users after Successful Login in WordPress without Using a Plugin
- How to Access WordPress Admin Dashboard or Login to your WordPress Dashboard
- How to Set up WooCommerce Storefront Footer Widgets
- How to Add Search to Shop Page In WooCommerce
- How to Add Social Media Icons to Footer Storefront Theme
- Getting Started With Vue Storefront [ Beginner Guide ]
- How to Add a Trust or Secure Logo on WooCommerce Checkout Page
- 30+ Best Instagram Plugins to Grow Your Traffic & Social Connections
- 52+ Best WordPress Social Media Plugins to Increase Your Website Traffic
- 30+ Best WooCommerce Plugins for Your Store (Most are FREE)
- How to Edit Sidebar In WordPress
- How to Create WooCommerce Login Logout Shortcode
- How to Clear Cart on Logout In WooCommerce
- How to Deactivate Jetpack Mobile Theme
- How to Create WooCommerce After Login Redirect to Homepage
- 100+ Tips, Tricks & Snippets Ultimate WooCommerce Hide Guide
- WooCommerce Redirect After Logout [Ultimate Guide]
- WooCommerce Redirect After Checkout: Redirect to Custom Thank You Page