 Do you want to move WooCommerce coupon field on the checkout page? Many store owners think it is hard to move the coupon code field to the payment details section. WooCommerce, by default, displays this field near the top of the checkout page. However, if a customer is not logged in, this field would be located under the legal notice.
WooCommerce Coupon Field
In this brief tutorial, you will learn how to move the coupon code field to a new location without disturbing the template elements. To achieve this, I need to unhook the coupon form from its current location. This can be done with a single line of code.
Here are the steps you need to follow:
- Log into your WordPress site and access the dashboard as the admin user
- From the dashboard menu, click on the Appearance Menu > Theme Editor Menu. When the theme editor page is opened, look for the theme functions file with the extension functions.php. Open this functions file to add the function to unhook the coupon form from its current location.
- Add the following line of code to the functions.php file:
remove_action( 'woocommerce_before_checkout_form', 'woocommerce_checkout_coupon_form');
- This snippet will remove the coupon field from the checkout form.
- The next step is to add it back to the template at the desired location. For illustration purposes, I will add it below the checkout form. However, you need to note that the coupon field could not be nested inside the checkout form because it might affect the Place Order button. Add the following code in the functions.php file:
add_action( 'woocommerce_after_checkout_form', 'woocommerce_checkout_coupon_form' );
- This is the outcome:
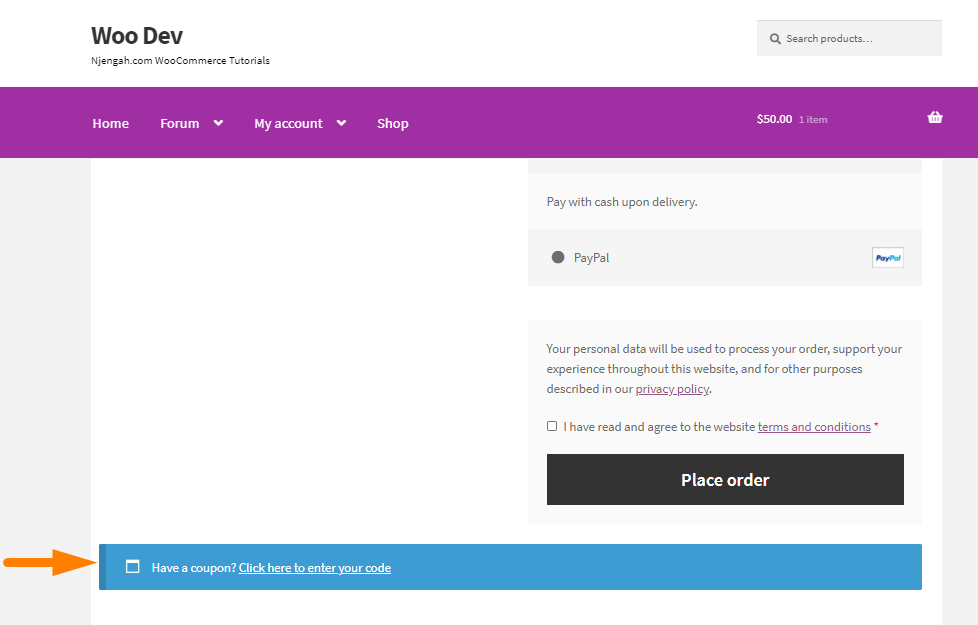
Move WooCommerce Coupon Field
You can see that the coupon field is at the desired location from the screenshot above but not in the right position. I will use the jQuery UI Dialog library to help me with the dialog functionality to move this field. Add the following code in the functions.php file:
function njengah_scripts() {

wp_enqueue_script('jquery-ui-dialog');

}

add_action('wp_enqueue_scripts', 'njengah_scripts');
The next step is to create an instance of jQuery Model Dialog that contains all the coupon code content. Position the model dialog so that it anchors to an HTML element inside the checkout form. In this case, I will use the existing WooCommerce filters or actions to position the HTML element at your desired location within the checkout form.
Add the following code in the functions.php file:
function njengah_show_coupon_js() {

wc_enqueue_js('$("a.showcoupon").parent().hide();');

wc_enqueue_js('dialog = $("form.checkout_coupon").dialog({

autoOpen: false,

width: 500,

minHeight: 0,

modal: false,

appendTo: "#coupon-anchor",

position: { my: "left", at: "left", of: "#coupon-anchor"},

draggable: false,

resizable: false,

dialogClass: "coupon-special",

closeText: "Close",

buttons: {}});');

wc_enqueue_js('$("#show-coupon-form").click( function() {

if (dialog.dialog("isOpen")) {

$(".checkout_coupon").hide();

dialog.dialog( "close" );

} else {

$(".checkout_coupon").show();

dialog.dialog( "open" );

}

return false;});');

}

add_action('woocommerce_before_checkout_form', 'njengah_show_coupon_js');
To show the coupon field in the form, add the “Click here to enter your code link”. This code will add the link between the customer details and order details sections. To check other locations for this link, you could look into other WooCommerce actions and filters on the checkout page. Alternatively, you can override the default WooCommerce checkout page template and locate the link at your desired location.
function njengah_show_coupon() {

global $woocommerce;

if ($woocommerce->cart->needs_payment()) {

echo '<p style="padding-bottom: 5px;"> Have a coupon? <a href="#" id="show-coupon-form">Click here to enter your coupon code</a>.</p><div id="coupon-anchor"></div>';

}

}

add_action('woocommerce_checkout_after_customer_details', 'njengah_show_coupon');
This is the outcome: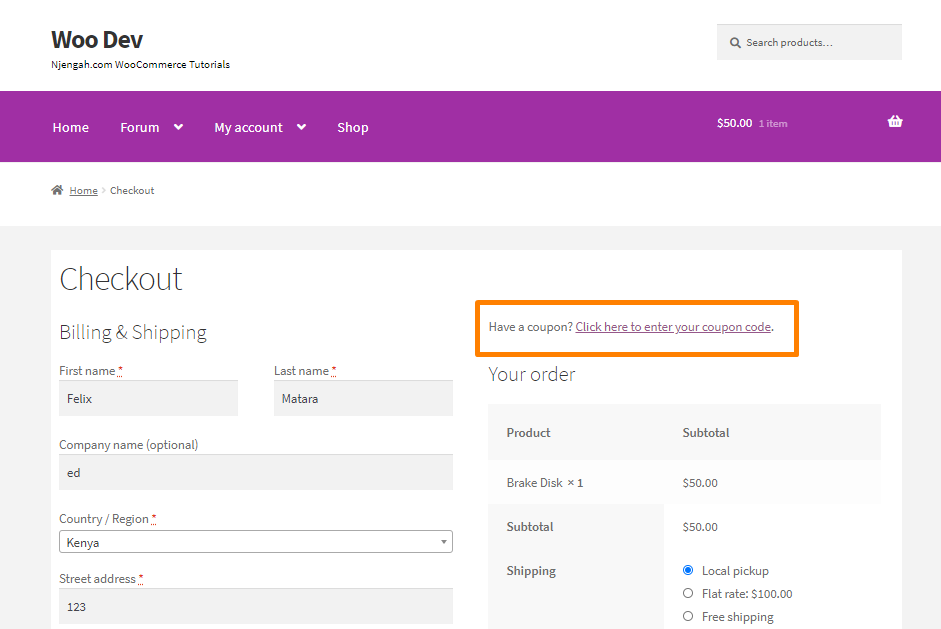
Conclusion
In summary, you have learned to move the coupon field from the default location to the bottom of the checkout page. You can learn more about WooCommerce Checkout hooks to add this field to your desired location. In many instances, you could find a filter or action to situate the link. Alternatively, you can override the default template for locating the link. If you are not familiar with editing code, please consider contacting a qualified WordPress developer.
Similar Articles
- How to Hide Quantity In Stock In WooCommerce
- How to Change WooCommerce Checkout Labels
- How to Set Up WooCommerce Checkout Field Placeholder
- How to Force Secure Checkout In WooCommerce
- How to Hide SKU, Category, Tags Meta Product Page WooCommerce
- How to Hide Product Description Heading WooCommerce
- How to Create WooCommerce Conditional Checkout Fields
- How to Edit Required WooCommerce Checkout Fields
- How to Edit WooCommerce Checkout Page Template
- How to Add WooCommerce Checkout Default Country
- How to Add WooCommerce VAT Number Checkout Page
- How to Add Hidden Field on WooCommerce Checkout Page
- How to Create Checkbox Field in WooCommerce Checkout Page
- How to Hide Shipping Rates if Free Shipping Available WooCommerce
- How to Create Account at Checkout WooCommerce
- How to Change WooCommerce Checkout Error Messages
- How to Add WooCommerce Invoice Checkout Page
- How to Hide Update Cart Button WooCommerce Cart Page
- How to Move Primary Menu Storefront WooCommerce