 Are you looking for a way to display product variations in WooCommerce? In today’s buying guide, we will briefly discuss the uses of product variations. In addition, we will show you how to set them up.
It is important to note that some products have more than one attribute used during checkout. For example, t-shirts can be sold in different sizes and colors.
By default, WooCommerce allows you to sell multiple variations for a single product. This allows you to easily display all of the available options you have in your store. It makes sense to display them on the product page so that the customer can select the choice they want.
Understanding WooCommerce Product Variations
Product variations come about when a single item comes in a variety of options like color, size, or scent. It is worth mentioning that each variation will need its own Stock Keeping Unit number. This will help you to differentiate it from others.
Product variants are displayed on the single product page. They have a selector to minimize confusion. This means that the customer can see all of the available options once they are on the single product page.
There are some common product variations, such as clothing sizes. On the other hand, you can add product variations to help you appeal to different shoppers’ personal tastes. You can keep the price the same for each variation or change it depending on the type of product you have.
There are many ways to implement product variations on your WooCommerce store. Of course, you can use plugins, but WooCommerce comes with this feature.
How to Display Product Variations in WooCommerce
It is very easy to display WooCommerce product variations. Here are the simple steps you need to follow:
- Log into your WordPress site and access the Dashboard as the admin user.
- From the Dashboard menu, click on Products > Add New to get started.
- After that, enter the item’s title and description.
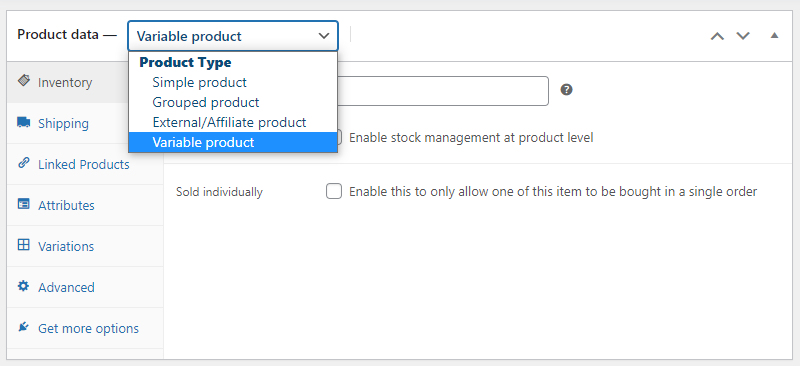
- Scroll down to the Product data section to select the product type. From the drop-down menu, select Variable Product as shown below.
- The next step is to add the product attributes by clicking on the Attributes tab. Select the type of WooCommerce product variation you want.
- Click on the Add button to apply the attribute you have chosen:
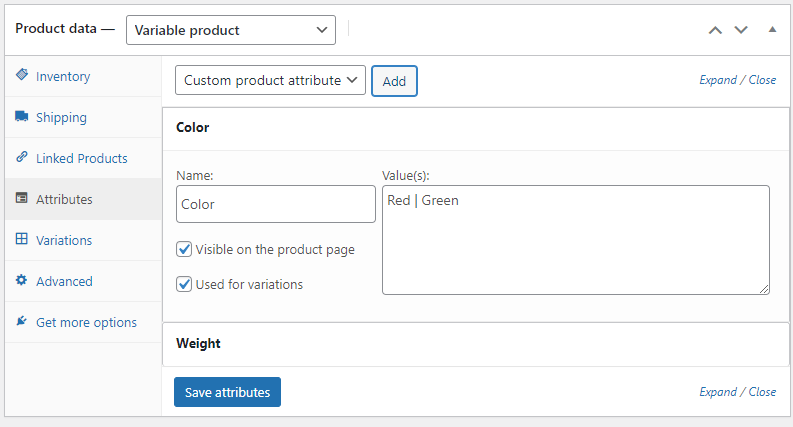
- Enable both the Visible on the product page and Used for variations options. After that, you can list your attribute values. Then, repeat the same process for any other product with multiple attributes. Remember always to save the changes you make.
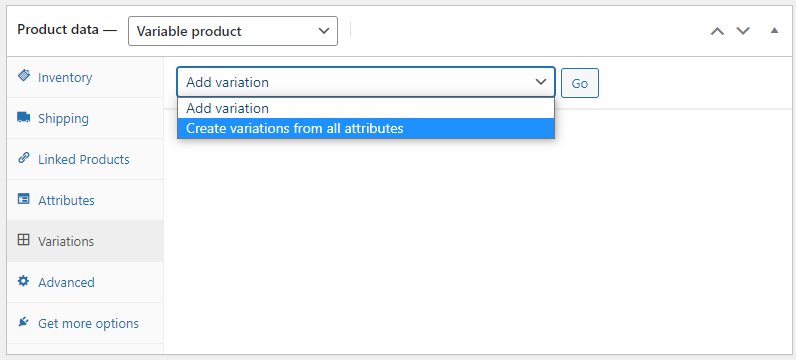
- Go to the Variations tab, and you will see a drop-down menu with two options. The second option (Create variations from all attributes) will automatically generate WooCommerce product variations from the attribute you specified earlier.
- After that, fill out all the product variation information, including SKU, price, stock status, and shipping details.
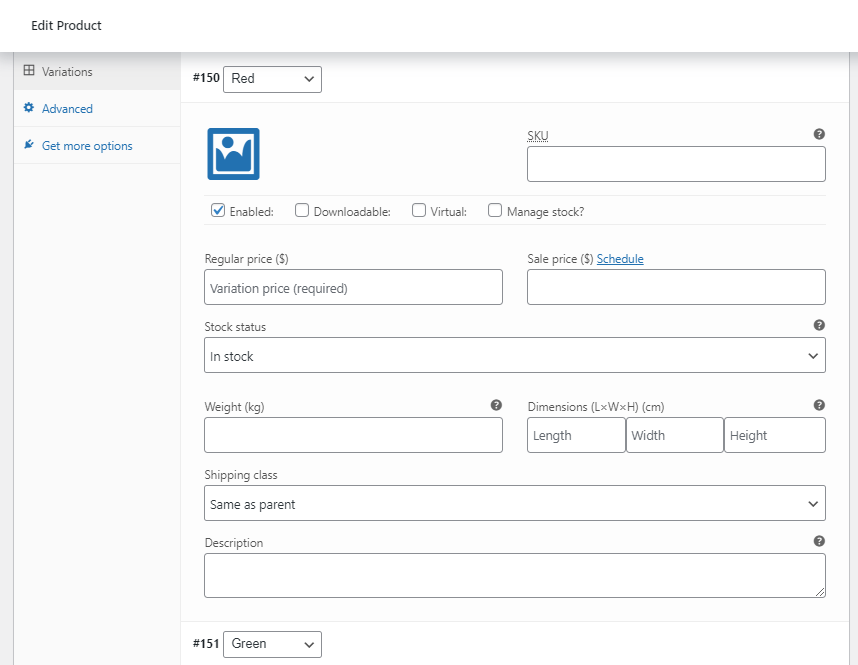
- Once you are done entering all the relevant information, you can save all your changes and preview the item.
Wrapping up
In today’s brief post, you have seen how it is very easy to display product variations. You do not need any coding skills to implement this solution. However, it is important to check the variation selector(s) to ensure that all the options are there.
If you have followed all the steps correctly, you are ready to start selling the product variations.
Similar Articles
- How to Get Current WooCommerce Product Category
- How to Hide Product Description Heading WooCommerce
- How to Add Amazon Affiliate Products to WooCommerce
- WooCommerce Image Placeholder Guide
- Move Price WooCommerce Storefront Hooks
- How to Add Video In Product Image WooCommerce
- What is the Best Payment Gateway for WooCommerce
- How to Change Add to Cart Button to Read More WooCommerce
- How to Hide Product Gallery In WooCommerce
- How To Display Product Attributes In WooCommerce
- How to Add WooCommerce Products to a Page
- How to Add Text after Price in WooCommerce » Add Price Suffix
- How to Customize Product Category Page In WooCommerce
- How to Add Extra Text to Price WooCommerce
- How to Get Current Product WooCommerce
- How to Remove Product Image Placeholder In WooCommerce
- How to Set Up WooCommerce Product Price Per Kg