 If you are looking for quick way to remove product image placeholder in WooCommerce, this is a quick guide to help you get rid of the product image placeholder in the single product page. This image placeholder is placed by a default WooCommerce function and we can override this function using a filter hook as I will illustrate shortly.
WooCommerce Remove Product Image Placeholder
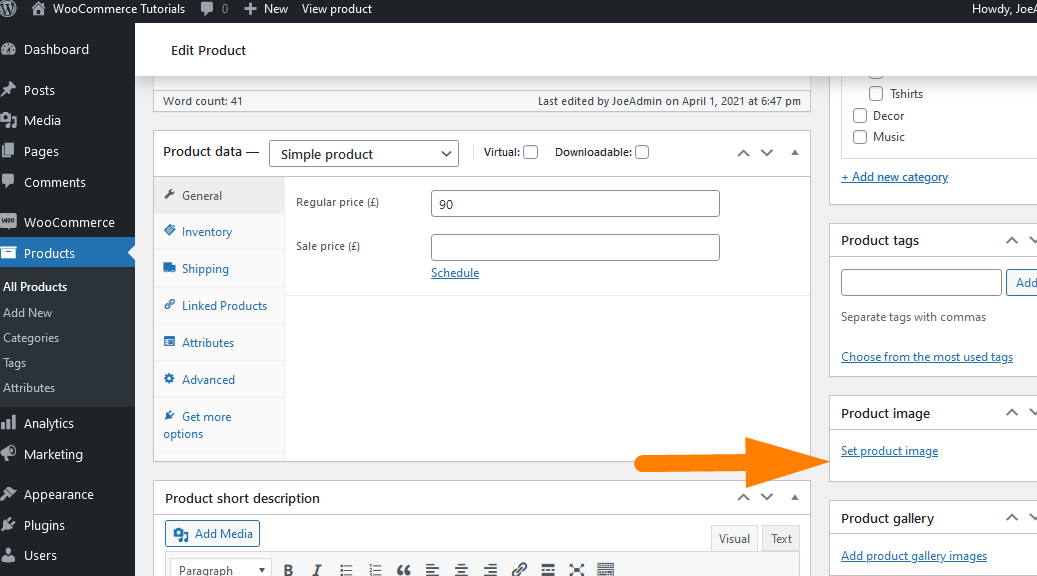
Ideally the WooCommerce image placeholder is added to the product page when you do not add the featured image on the product post as you publish the product.
In the back end if you do now add the image as shown on the screenshot below.
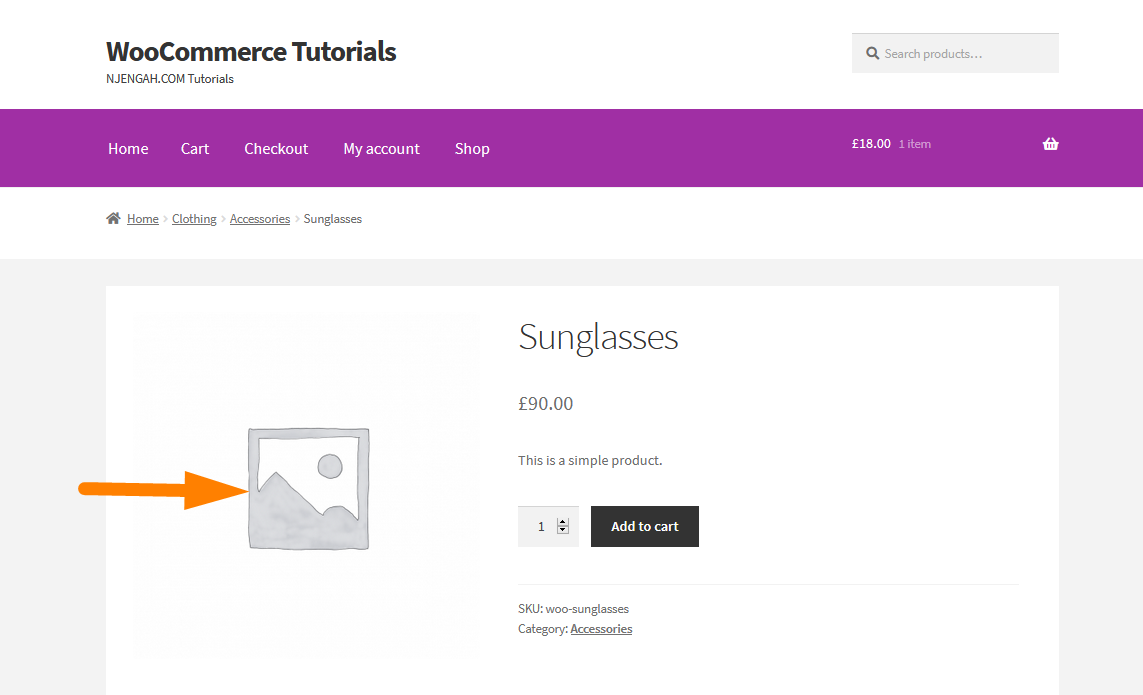
This will result in the placement of the WooCommerce image placeholder in the place of the image when the content is published on the front end as shown in the screenshot below:
WooCommerce Remove Product Image Placeholder
To remove product image placeholder in the WooCommerce product page, follow the following steps :
- Access your child theme functions.php file and ensure you create backup of this file. If you do not have a child theme its a good idea to start by learning how to create child theme in WooCommerce Storefront theme.
- Add the following code snippet to the child theme functions.php file to remove product image placeholder.
remove_action( ‘woocommerce_before_single_product_summary’, ‘woocommerce_show_product_images’, 20 );
[/php]
You will also need to remove the sales badge on image placeholder as well using the following code snippet:
[php] // Remove sale badge from product image placeholderremove_action( ‘woocommerce_before_single_product_summary’, ‘woocommerce_show_product_sale_flash’, 10 );
[/php]
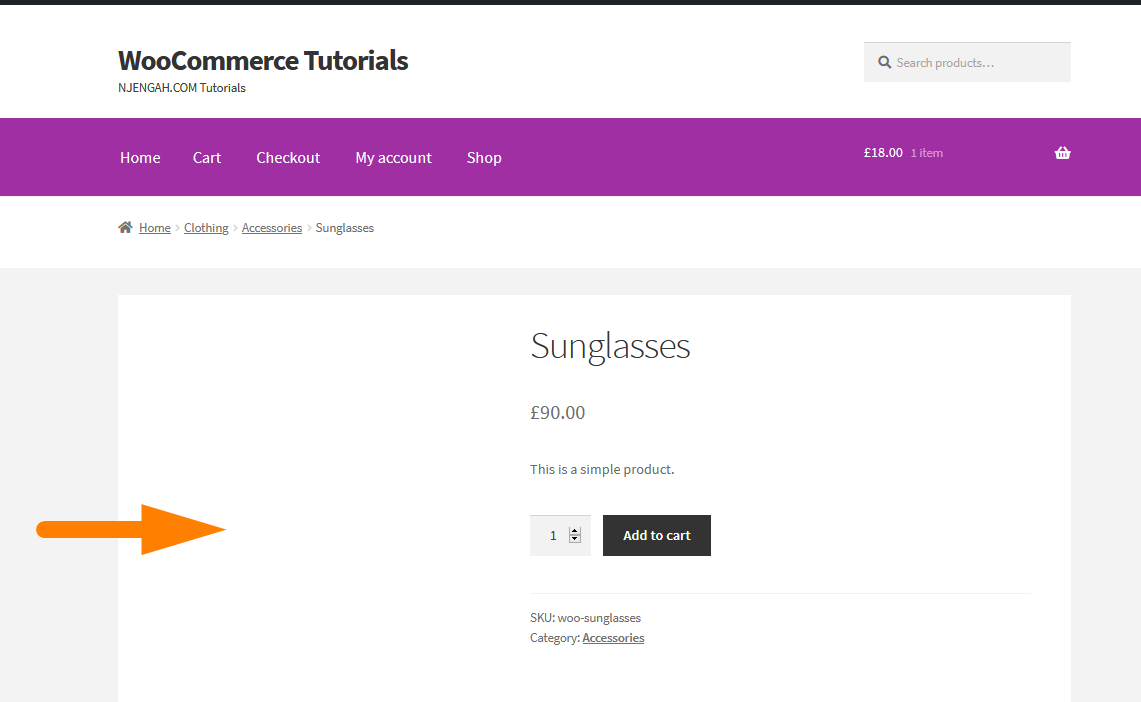
As you can see on the image below these two code snippets will help you to remove single product page image placeholder.
Conclusion
In this quick tutorial, we have outlined the best way to remove product image placeholder from the single product page. I hope this quick solution is useful for your needs and you can now remove the image placeholder. In the next tutorial, I will share with you how you can change the WooCommerce image placeholder to your custom image placeholder. If you need more help from WooCommerce developer or WooCommerce expert, feel free to get in touch with me.

Joe is an experienced full-stack web developer with a decade of industry experience in the LAMP & MERN stacks, WordPress, WooCommerce, and JavaScript – (diverse portfolio). He has a passion for creating elegant and user-friendly solutions and thrives in collaborative environments. In his spare time, he enjoys exploring new tech trends, tinkering with new tools, and contributing to open-source projects. You can hire me here for your next project.
Similar Articles
- WooCommerce Redirect After Checkout : Redirect to Custom Thank You Page
- 100+ Tips, Tricks & Snippets Ultimate WooCommerce Hide Guide
- How to Edit Billing Details WooCommerce Checkout Page
- WooCommerce Redirect After Logout [Ultimate Guide]
- How to Hide WooCommerce Marketing Hub Admin Option
- How to Get Order ID on Checkout Page WooCommerce
- How to Create WooCommerce Add to Cart Button by Product Id
- How to Remove Zoom Effect on WooCommerce Product Image
- How to Clear Cart on Logout In WooCommerce
- How to Set WooCommerce Storefront Thumbnail Sizes
- 35+ Best Image Optimization Plugins for WordPress Loading Speed Optimization
- WooCommerce Checkout Optimization Quick Guide
- WooCommerce Mobile Checkout Optimization Quick Guide
- How to Hide Prices From Google In WooCommerce
- How to Get Product Description & Display WooCommerce
- How to Resize WooCommerce Product Images
- How to Add Product to Cart Programmatically in WooCommerce
- How to use do_shortcode in WordPress (PHP)
- How to Add Storefront Theme Header Background Image
- How to Turn off Next Product Tabs In WooCommerce Storefront
Comments are closed.