 Are you looking for a way to add an WooCommerce image placeholder that fits your brand? It is important to use high quality product images in your store. This is because these images help customers understand more about the products you sell in your store.
They also encourage them to purchase the product if you have uploaded different image angles. This applies mostly to physical products.
However, if you are selling services or digital products, you might not need the product image.
On the other hand, you might want to list a product in the store before a product image is available for an upcoming product. This is why you need a placeholder image.
WooCommerce Image Placeholder
By default, WooCommerce uses the WordPress Featured Image as the main image on product pages. This featured image does not have a professional look and feel.
It is a simple grey box, which can look out of place on a site.
In this brief tutorial, we will show you how to change the image placeholder. You can use any image, but we recommend using the one that is consistent with your site branding.
Let us see how you can achieve this.
Steps to Change WooCommerce Image Placeholder
Before we start, it is important to note that you should use an image that is 450px by 450px square. It should match the aesthetic of your site.
If you have a big image, we recommend using an image resizing tool to resize your image. You can create a substitute image of the same dimensions or use the dimensions required by your theme.
After you have created your image, here are the simple steps you need to follow:
- Log into your WordPress site and access the Dashboard as the admin user.
- From the Dashboard menu, click on Media > Add New.
- The next step is to drag and drop the new image onto the page. It will be uploaded to your site, as shown below:

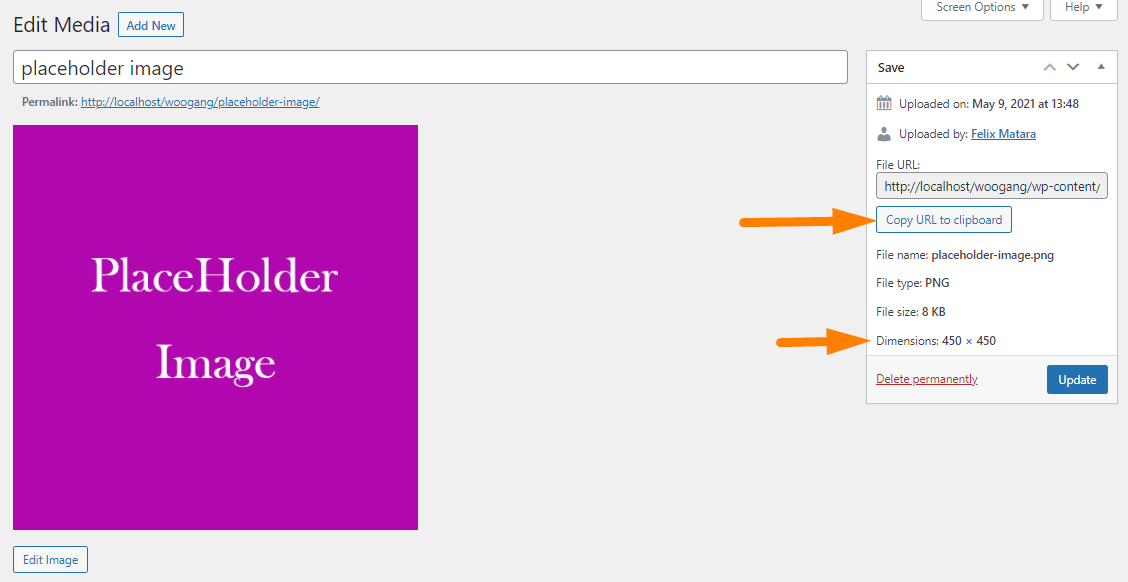
- After uploading the image, press the Edit link to see image details. Copy the File URL field, which we will use in the next step:
- From the Dashboard menu, click on Appearance Menu > Theme Editor Menu. When the Theme Editor page is opened, look for the theme functions file where we will add the function that points to the URL of the placeholder image.
- Add the following code to the php file:
add_filter( ‘woocommerce_placeholder_img_src’, ‘njengah_custom_woocommerce_placeholder’, 10 );
/**
* Function to return new placeholder image URL.
*/
function njengah_custom_woocommerce_placeholder( $image_url ) {
$image_url = ‘ http://localhost/woogang/wp-content/uploads/2021/05/placeholder-image.png’; // change this to the URL to your custom placeholder
return $image_url;
}
[/php]
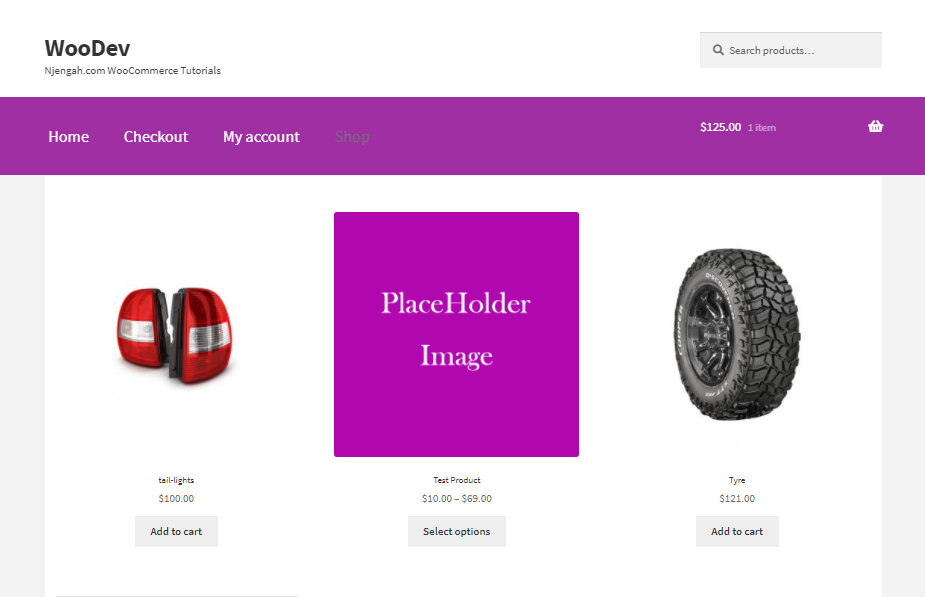
- This is the outcome:
Conclusion
In this post, you have seen how it is very easy to change the placeholder image in your WooCommerce store. By default, WooCommerce uses the default WordPress image placeholder, which might not have a professional look and feel.
If you are not familiar with handling code, you can use a plugin to change this image. Using a custom placeholder image will improve the look and feel of your store.
Similar Articles
- WooCommerce Redirect After Checkout : Redirect to Custom Thank You Page
- 100+ Tips, Tricks & Snippets Ultimate WooCommerce Hide Guide
- How to Hide SKU, Category, Tags Meta Product Page WooCommerce
- How to Hide Price If Zero In WooCommerce
- How to Import Products WooCommerce
- How to Hide Weight of Product in WooCommerce
- How to Fix – Warning: An Existing WordPress Network was Detected
- How to Resize WooCommerce Product Images
- How to Hide Featured Image on Single Product Page
- How to Export Products In WooCommerce
- How to Add Product SKU In WooCommerce
- How to Set Up WooCommerce Product Price Per Kg
- How to Set Up WooCommerce You Must be Logged in to Checkout
- How to Customize WooCommerce Product Pages
- How to Add Search to Shop Page In WooCommerce
- How to Hide Read More and Add to Cart Button WooCommerce
- How to Remove, Rename and Add Storefront Sorting Options
- How to Add WooCommerce Invoice Checkout Page
- How to Hide Product Image on Cart Page WooCommerce
- How to Force Secure Checkout In WooCommerce