 WooCommerce, by default, allows you to sell digital and physical goods. However, if you sell physical products in your store, you need to understand its available shipping method. Additionally, it would be best if you learned how to configure them to suit your needs.
WooCommerce Storefront Shipping
This brief tutorial will teach you all the basics and built-in shipping methods to table rate shipping. Moreover, I will show you the most flexible way to manage shipping costs. I will also highlight some of the WooCommerce shipping extensions that you can use. These extensions can be used if you would prefer to calculate real-time shipping costs based on carrier and location.
However, you need to have the WooCommerce plugin and the Storefront theme installed and activated.
How to Add Shipping Methods
To add shipping methods, you need to log into your WordPress site and access the Dashboard as the admin user.
From the Dashboard menu, click on WooCommerce > Settings. After that, click on the Shipping tab, as shown below: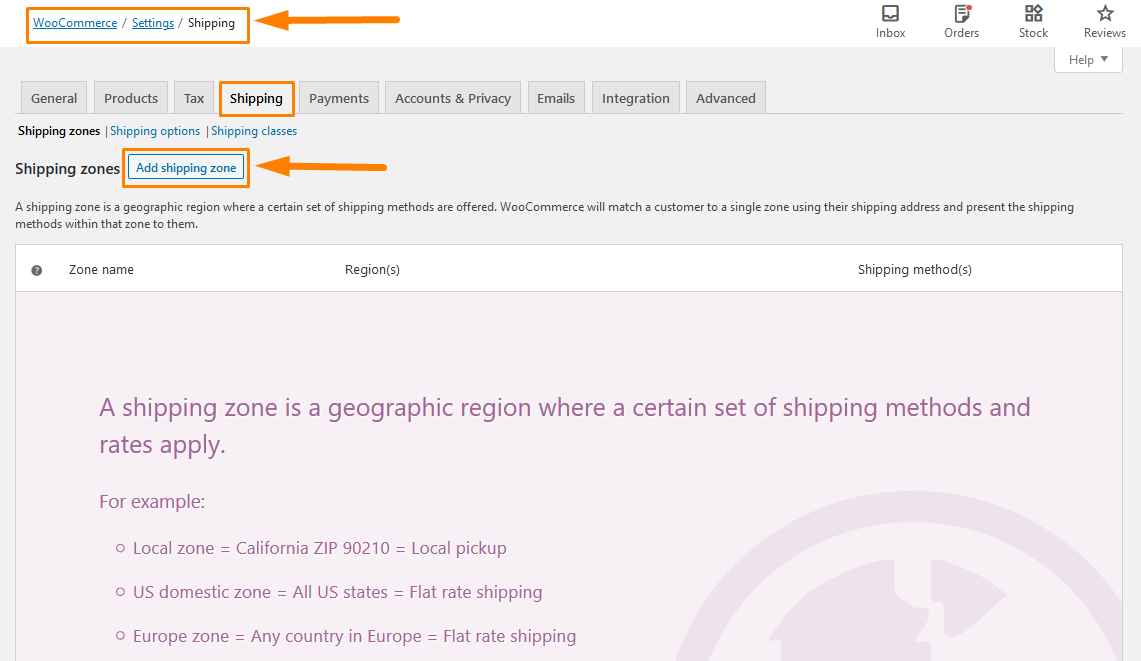
Click on the Add shipping zone. Here you will add your preferred shipping zone details. Shipping zones are groups of locations to which you want to ship the products. It allows you to easily group continents, countries, states/provinces, and even postal codes.
Additionally, you can set up different shipping methods for each zone. This means that customers in your store will only see the shipping options available based on address or geolocation.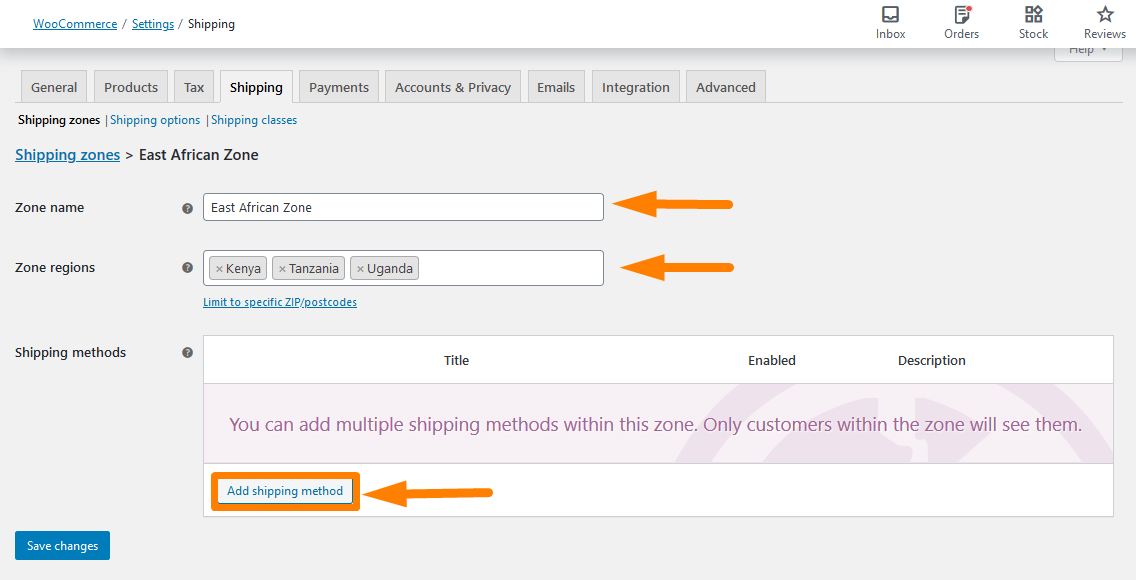
Click on the Add shipping method button to add one of the built-in WooCommerce shipping methods.
Shipping Methods in WooCommerce
These shipping methods are available by default in WooCommerce: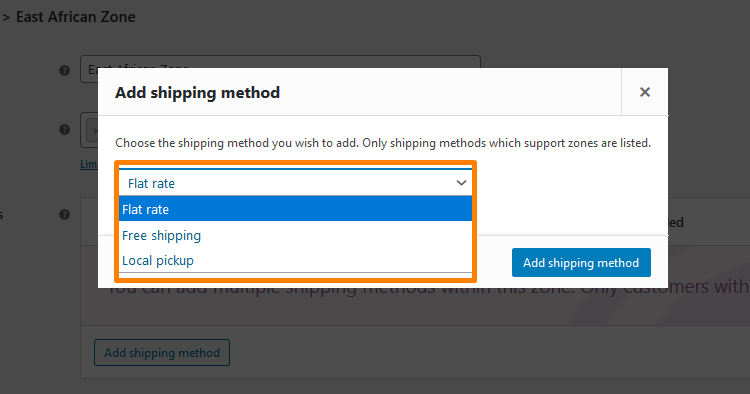
From the screenshot, you can see that WooCommerce offers you three types of shipping methods. However, you can extend the list of options with plugins. Stick to the end, and I will highlight this topic later on.
1. Flat Rate
This shipping method is one of the most popular and is used in many WooCommerce stores. This shipping method allows you to offer the same shipping price for everything your customer buys. This is the configuration screen of the flat rate shipping method: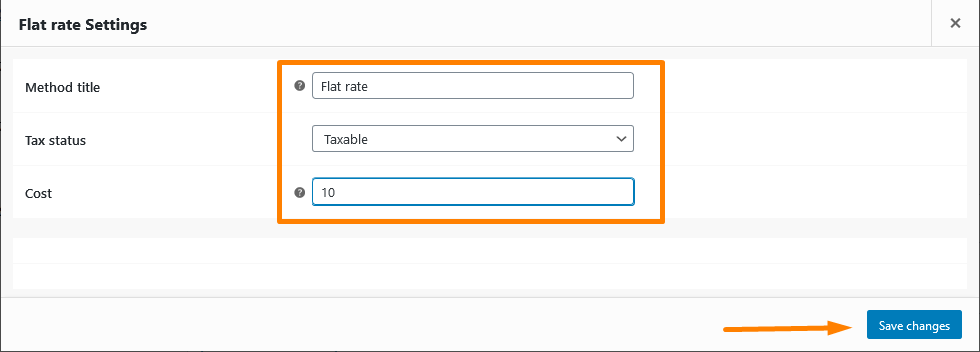
- Method tile. This is the shipping method’s name and is shown on the cart page and at the checkout. You can change it to any name you prefer.
- Tax status. You can choose either Taxable or None. If you set it as none, it means that the shipping cost non-taxable.
- Cost. This section allows you to give a few features. You can add an amount, but you should not provide a currency symbol here. However, there is more of what WooCommerce offers you in this section.
The quantity price of Flat Rate shipping method
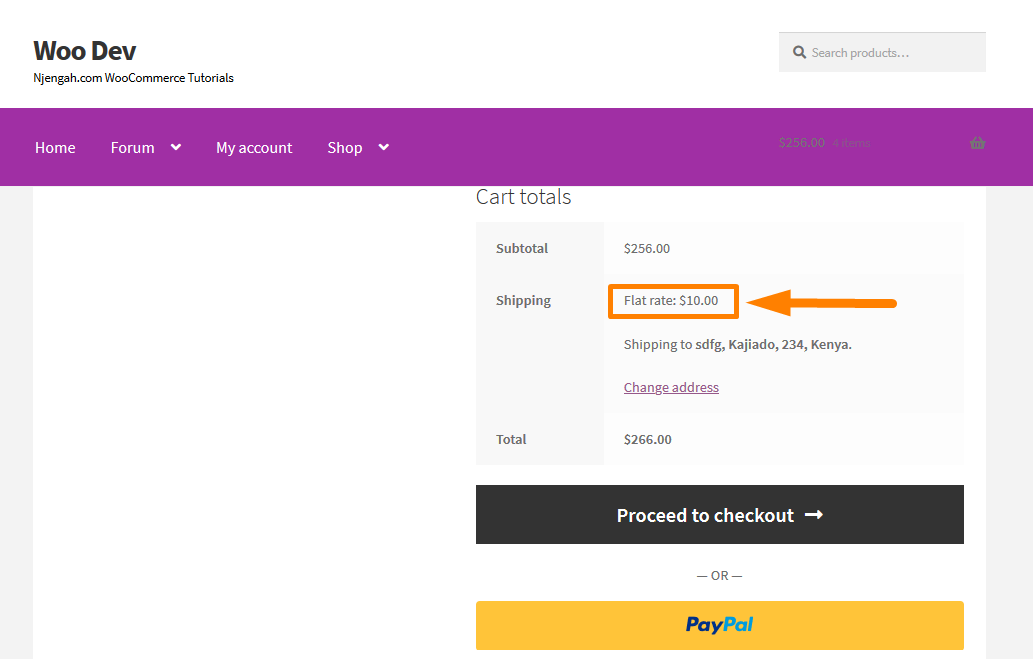
The Cost section allows you to set the quantity price. For example, you can insert 2*[qty] in the Cost option. This means that every item in the cart is charged $2 for shipping. Here is the result you would see for the formula: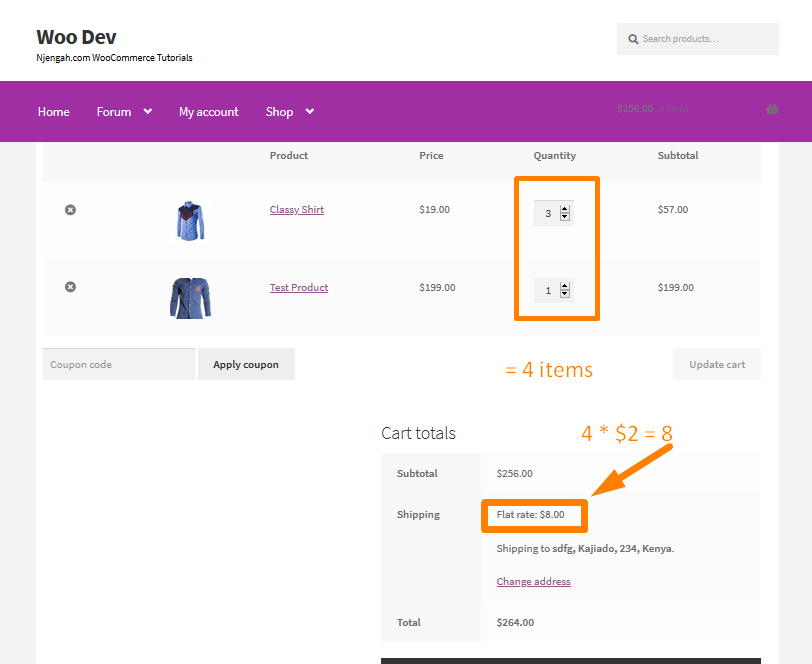
The fee price of Flat rate shipping method
You can also add a fee price. This means that the shipping cost equals the defined percentage of the cart subtotal. For example, you can add the formula [fee percent=”18″]. This means that the shipping cost equals 20% of the subtotal in the cart: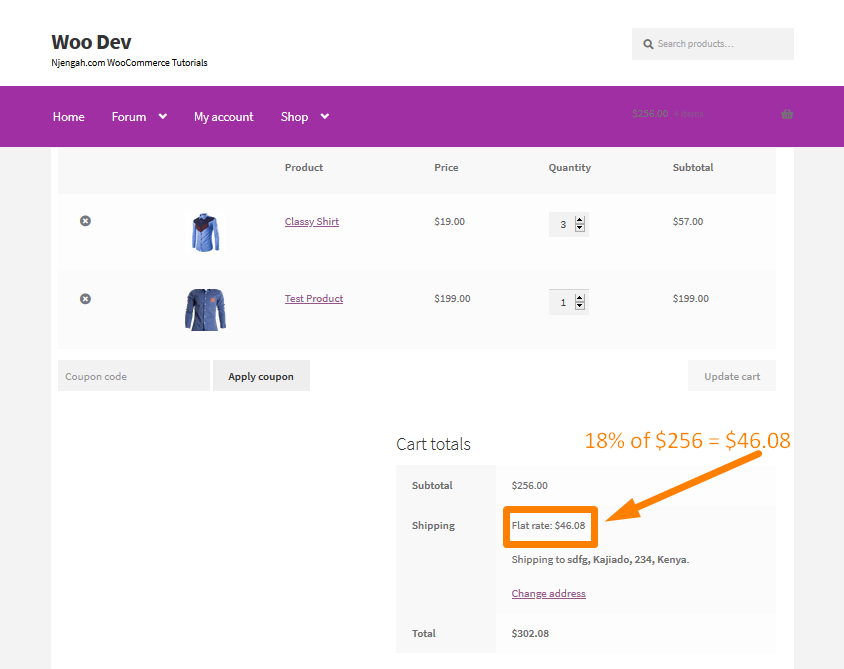
Moreover, you have the option to make the shipping cost the same as the cart subtotal (100% fee) by using the [cost] formula: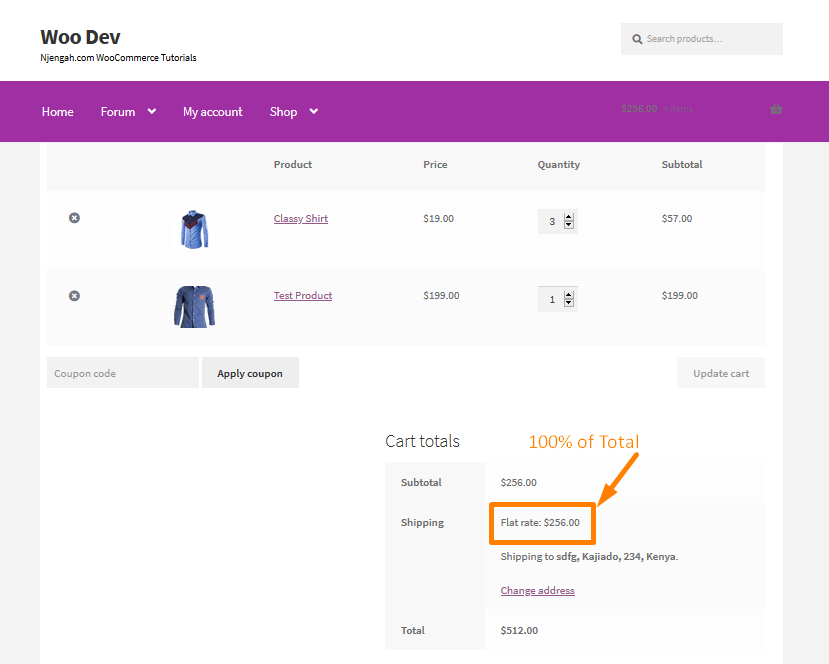
2. Free Shipping
This shipping method seems to be the simplest of the WooCommerce shipping methods. However, it is not. If you want to offer simple free shipping with no other terms, you could use a Flat rate set to 0. This shipping method offers some additional abilities.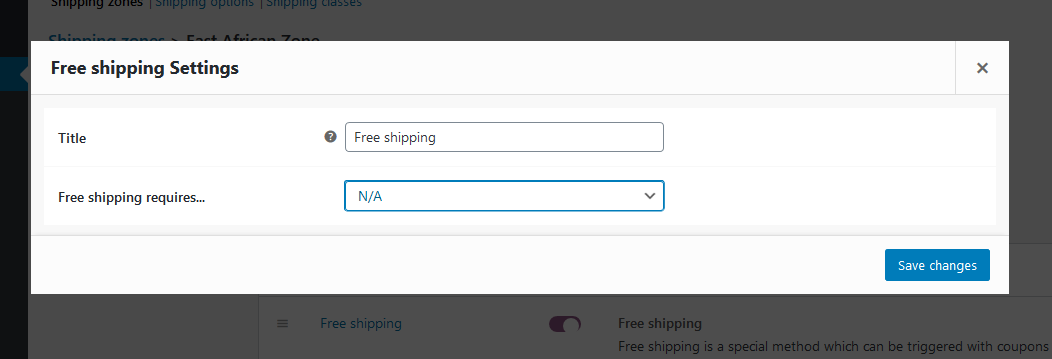
Like in the flat rate shipping method, the title in the free shipping title appears in the cart.
However, there are some new options here:
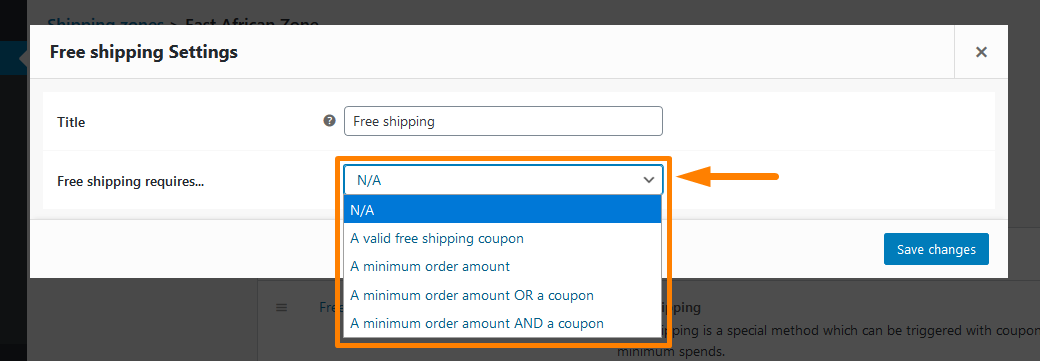
This means that the free shipping option will not be shown in the cart if the conditions you choose here are not meet. Moreover, you can set minimum order amounts, such as free shipping for orders above $200.
Additionally, you can require a coupon for free shipping. Generating coupons for marketing purposes is easy in WooCommerce.
In your Dashboard, go to WooCommerce > Coupons > Add new and mark the Allow free shipping checkbox:
I highly recommend that you use coupons in your store. It would be best if you considered them because they can increase sales in your WooCommerce store.
3. Local Pickup
This shipping method is the simplest as you insert the price, and that is all. If you use this method, taxes will apply regardless of customer address.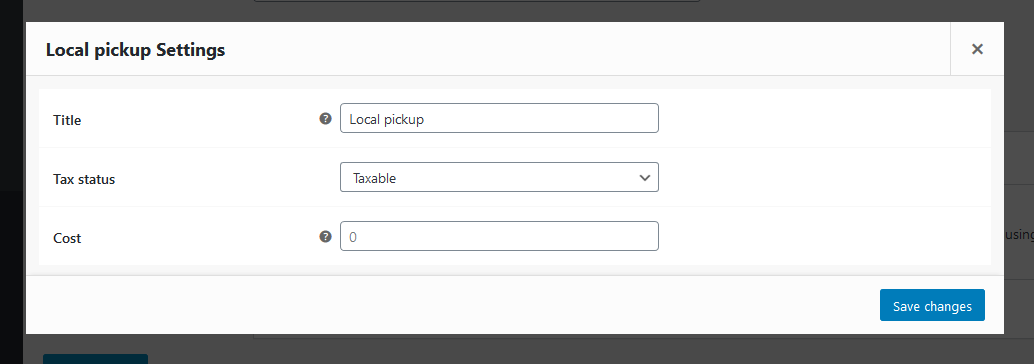
These are the three shipping methods that you can use in your WooCommerce store. Now that you have understood them, you can use WooCommerce shipping extensions.
WooCommerce Shipping Extensions
WooCommerce offers you many shipping extensions that you can use.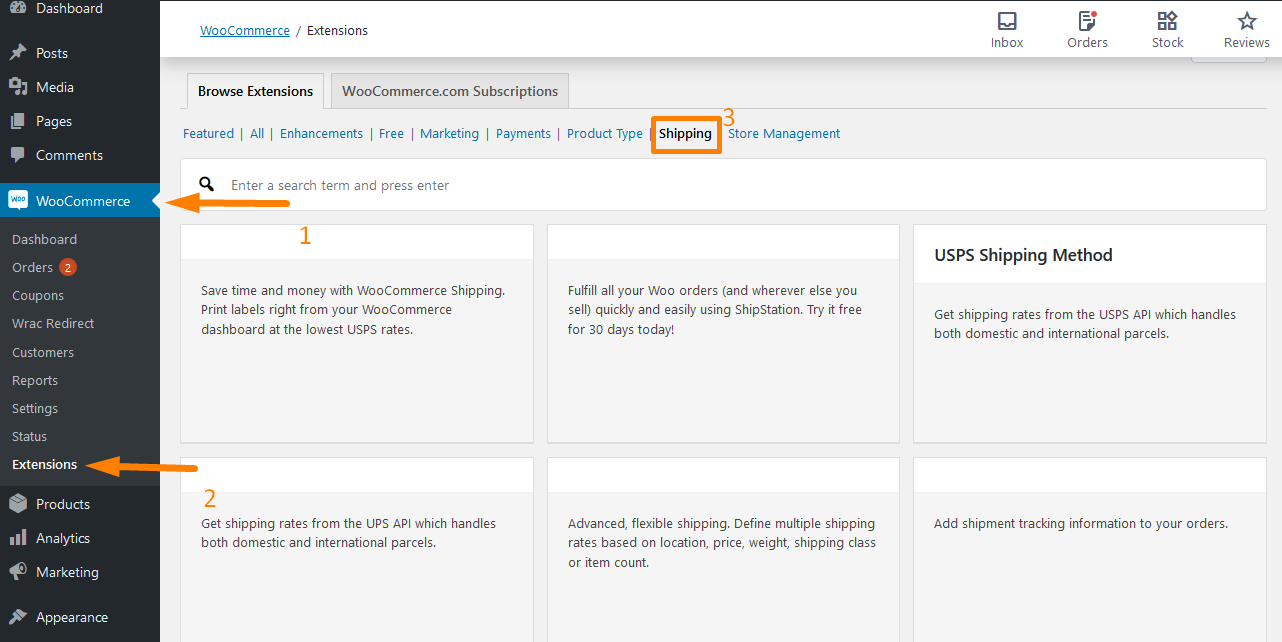
WooCommerce shipping extensions allow you to connect you with carriers worldwide, like FedEx and the Royal Mail. These extensions include:
- Shipment Tracking
- WooCommerce Print Invoices and Packing Lists
- Postcode/Address Validation
- Shipping Multiple Addresses
- WooCommerce Advanced Shipping Packages
- Local Pickup Plus
- Per Product Shipping
Wrapping Up
In this post, I have shown you how you can configure shipping methods in your WooCommerce. I have shown you how you can create shipping zones in your WooCommerce store. However, you need to add the shipping method as well.
WooCommerce, by default, has three shipping methods. They are flat rate, free shipping, and local pickup. I have discussed them in detail. However, it would be best to remember that the more products you have, the trickier shipping can get.
In the last section, I highlighted some of the shipping extensions you can use in your store. I highly recommend that you take some time when choosing the shipping methods. If you rush this process, you may pay for shipping out-of-pocket, or you could turn off customers because your shipping costs are higher than necessary.
Similar Articles
- How to Remove Page Title WooCommerce Storefront Theme
- WooCommerce Logout without Confirmation : How to Remove “Are you sure you want to log out?”
- How to Change WooCommerce Storefront Featured Image Size
- How to Remove Header WooCommerce Storefront Theme
- How to Change WooCommerce Storefront Logo Size
- How to Add Storefront Theme Header Background Image
- How to Remove Footer Storefront Theme WooCommerce
- How to Reorder Categories Shop Page WooCommerce Storefront Theme
- How to Remove Related Products WooCommerce Storefront Theme
- How to Change Storefront Theme Tagline WooCommerce
- How to Set Up Homepage in WooCommerce Storefront
- How to Get Payment Methods in WooCommerce » Code Example
- How to Add Custom Shipping Method in WooCommerce