![]() Are you looking for a way to install Facebook Pixel on WooCommerce? By the end of this post, you will be able to install Facebook pixel, as we will explain all the necessary steps you need to follow.
Are you looking for a way to install Facebook Pixel on WooCommerce? By the end of this post, you will be able to install Facebook pixel, as we will explain all the necessary steps you need to follow.
If you have been running an online store for a while, you must have come across the term WooCommerce Facebook Pixel.
If you have not come across it, have you ever wondered how an ad about a product you’re interested in pops up on your Facebook timeline? This is not a coincidence. This is probably Facebook pixel at work.
Facebook Pixel is a useful tool for monitoring your Facebook advertising campaign’s performance. This tool allows you to track your website visitors on any page.
It is essentially, a line of code you add to your website. It can retarget as well as track conversions through the ads you run on the platform.
How to Install Facebook Pixel on WooCommerce
It is important to install Facebook pixel on WooCommerce so that you can obtain in-depth user data through Audience Insights.
If you are looking for a way to optimize ads to reach people who are more likely to convert, then this is the best choice for you.
Let us see how you can achieve this.
Steps to Install Facebook Pixel on WooCommerce
Before you proceed, it is important to mention that for you to install Facebook pixel on WooCommerce, you need to go to your Facebook business account. This allows you to manage your ads and generate pixels.
Here are the steps you need to follow:
- Log into your Facebook Business Manager and log in to your account.
- Click on Pixels under the Measure and Report section in the Facebook Ads panel, as shown below:
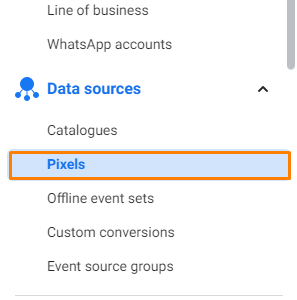
- This will open the Facebook Pixel page, where you need to click on the Create a Pixel button. It is important to note that you can only create one Facebook Pixel per account.
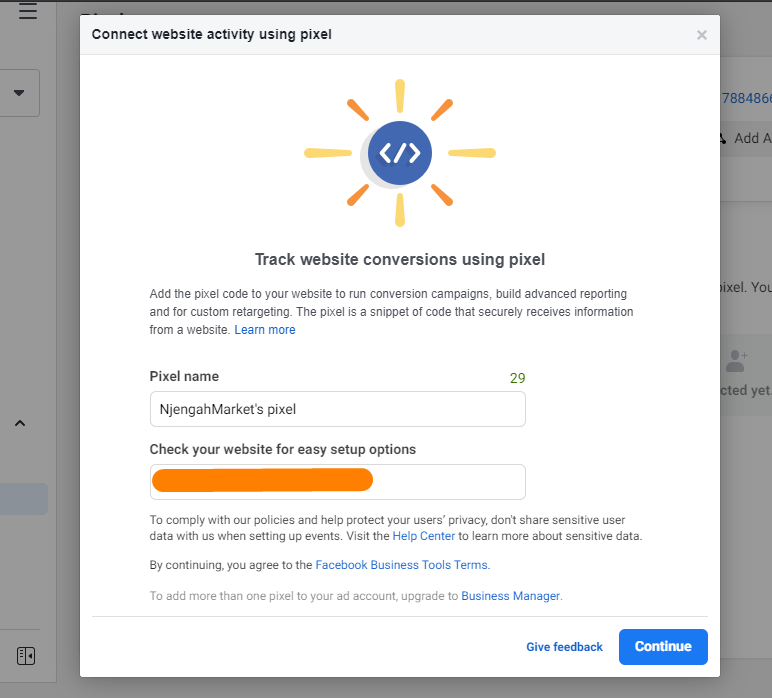
- This will launch a popup, where you need to enter the Pixel Name and your Website URL.
- Click on the Create button:
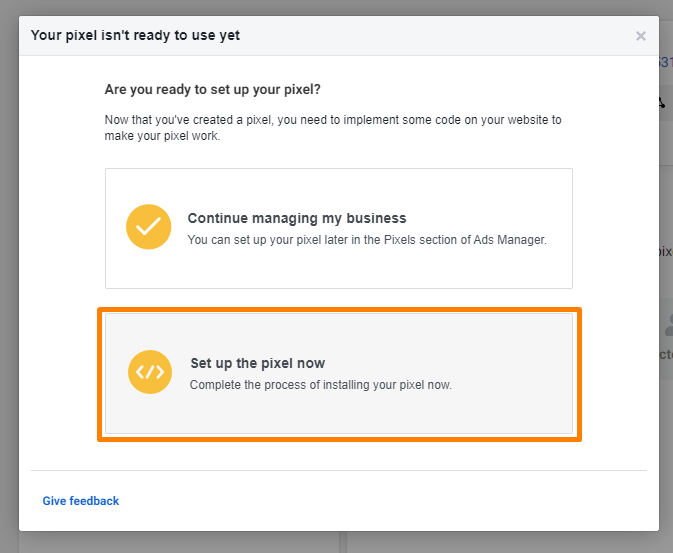
- Click on ‘Set up the pixel now’:
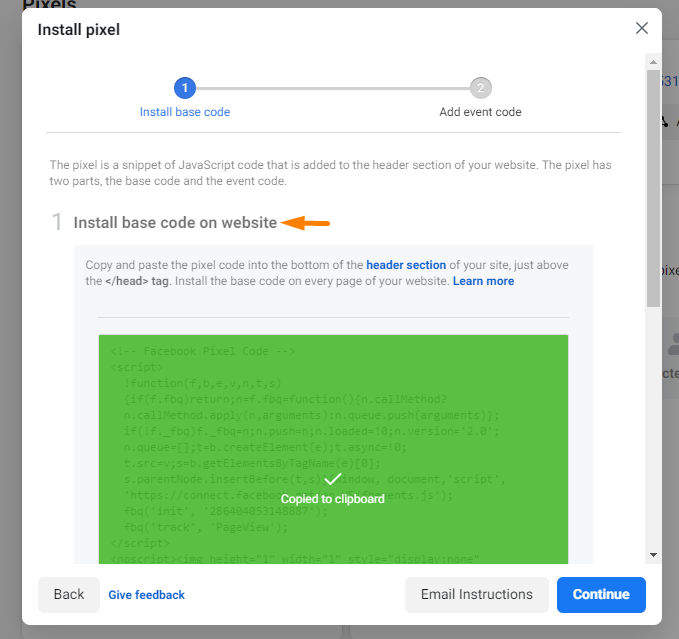
- To install the code, you need to insert the code in your web pages or your entire website. There are three options to do this. You can Connect a Partner Platform, Manually Install Pixel Code Yourself, or Email Instruction to a Developer. We are going to manually set it up:

- Copy the URL and paste it above the </head> tag of the header section:
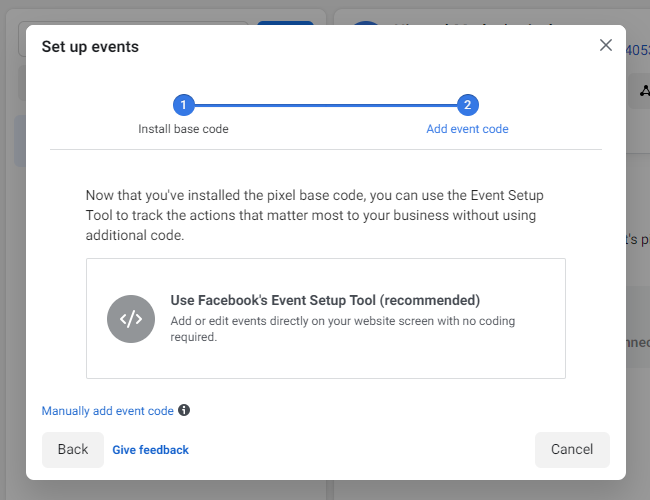
- After placing the code, you need to use the Event Setup Tool to track the actions to add the website URL:
Conclusion
By now, you should be able to install Facebook pixel to your WooCommerce store. If you are not comfortable with handling code, we recommend that you connect a partner platform or email the instructions to a developer.
It is important to set up Facebook pixel, as it provides you a great opportunity to multiply your online store’s sales.
We hope that this tutorial helped you to set it up correctly.
Similar Articles
- WooCommerce Redirect After Checkout : Redirect to Custom Thank You Page
- 100+ Tips, Tricks & Snippets Ultimate WooCommerce Hide Guide
- WooCommerce Redirect After Logout [Ultimate Guide]
- How to Set Up WooCommerce Buy One Get One
- How to Change Coupon Code Placeholder WooCommerce
- How to Add Wishlist In WooCommerce
- How to Customize WooCommerce Product Pages
- How to use do_shortcode in WordPress (PHP)
- 30+ Best WordPress Anti-Spam Plugins for Total Spam Control
- How to Create Number Pagination in WordPress Without Using Plugin
- How to Add Google Analytics to WooCommerce
- How to Translate WooCommerce Checkout Page
- How to Add Product to Cart Programmatically in WooCommerce
- How to Change Cart Subtotal WooCommerce
- How to Set Up Free Shipping with Minimum Spend In WooCommerce
- How to Add Fields in WooCommerce Registration Form
- How to Add Search to Shop Page In WooCommerce