 WooCommerce has more than 5 million active installations over at the WordPress repository.
WooCommerce is an incredibly popular eCommerce solution for WordPress. Most people are building their online stores with WooCommerce, mainly because of its flexibility and ease of customization.
WooCommerce has many extensions, which cover almost every feature or functionality you may need.
However, some of them cost money, but they still get the job done. You can easily do some customization by yourself using actions.
Storefront Product Page Tabs Colors
In this tutorial, I am going to change the color of the product page tabs. Moreover, I will use it to add and edit the WooCommerce Product Tabs.
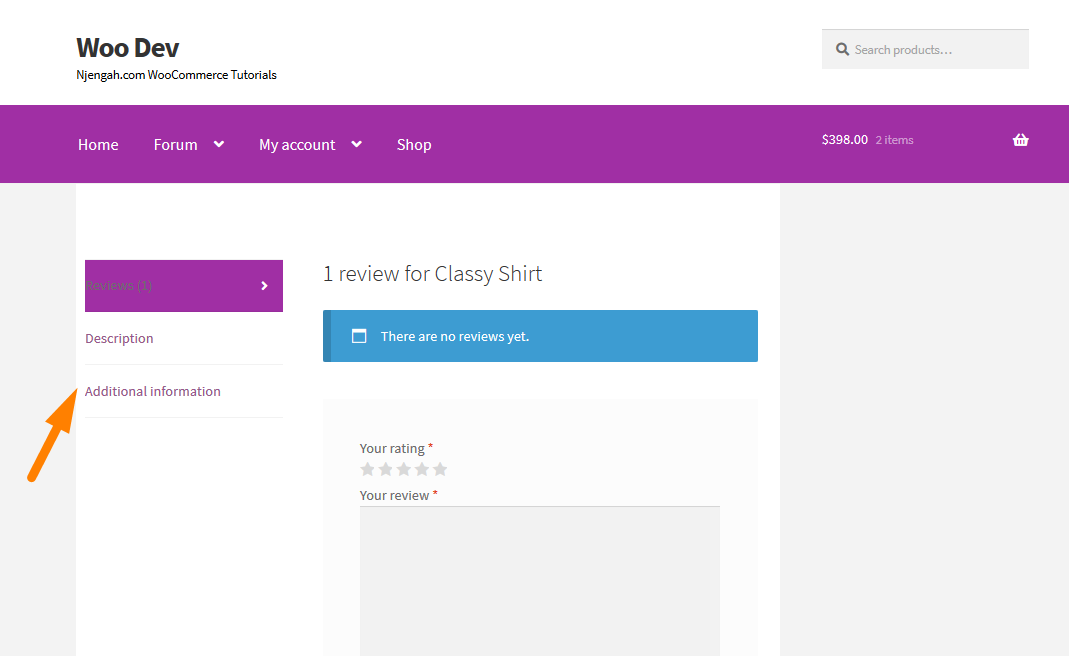
If you are familiar with WooCommerce, you know that WooCommerce supports three tabs. These tabs are:
- Description
- Additional Information
- Reviews
This is how the Storefront theme displays them: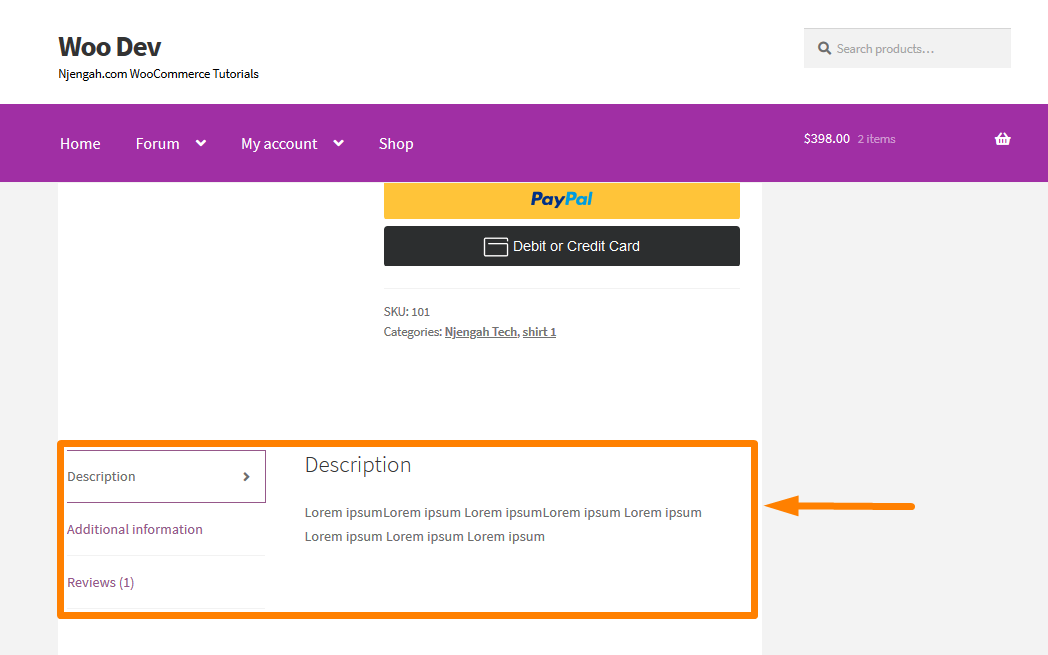
Steps to Change the Color of the WooCommerce Product Page Tabs
Here are the steps that you need to follow:
- Log into your WordPress site and access the Dashboard as the admin user.
- From the Dashboard menu, click on Appearance Menu > Customize.
- Navigate down to Additional CSS in the left sidebar that appears.
- Add the CSS rule.
.woocommerce div.product .woocommerce-tabs ul.tabs li.active

{

background-color:#a02fa4 !important;

color: white !important;

}
- This will be the outcome:
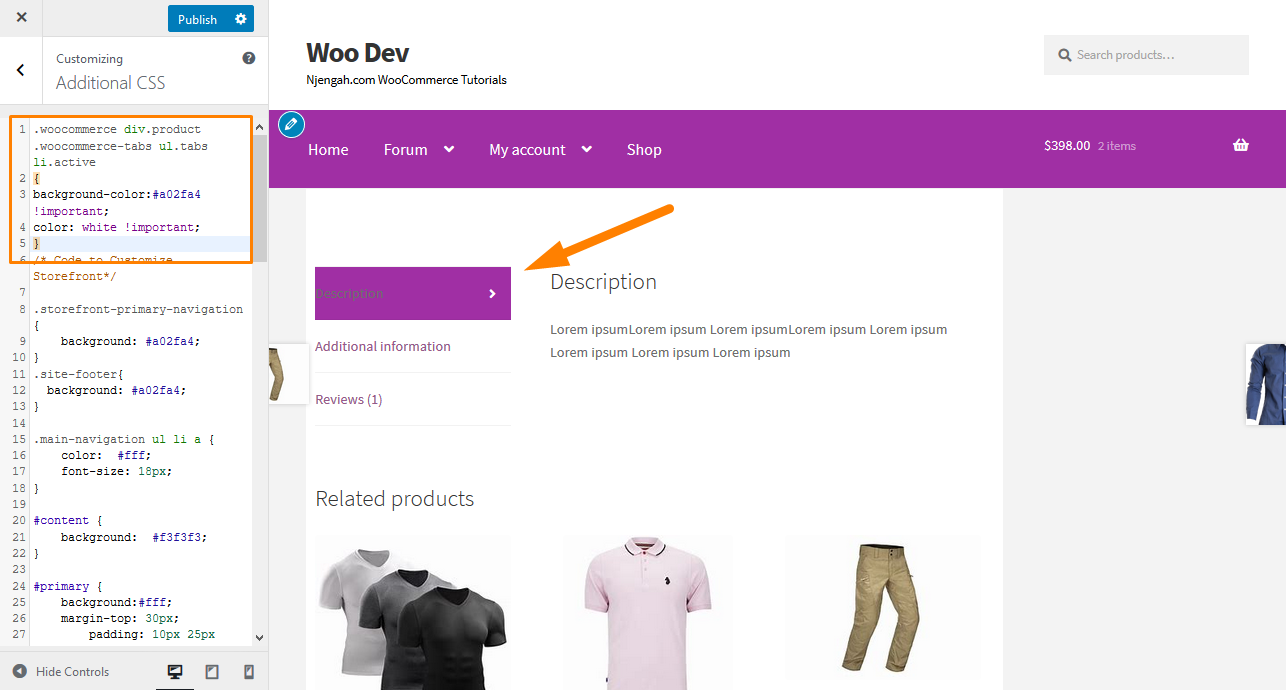
This code changes the color of the tab that is active.
Additionally, I am going to share a few snippets to customize this section.
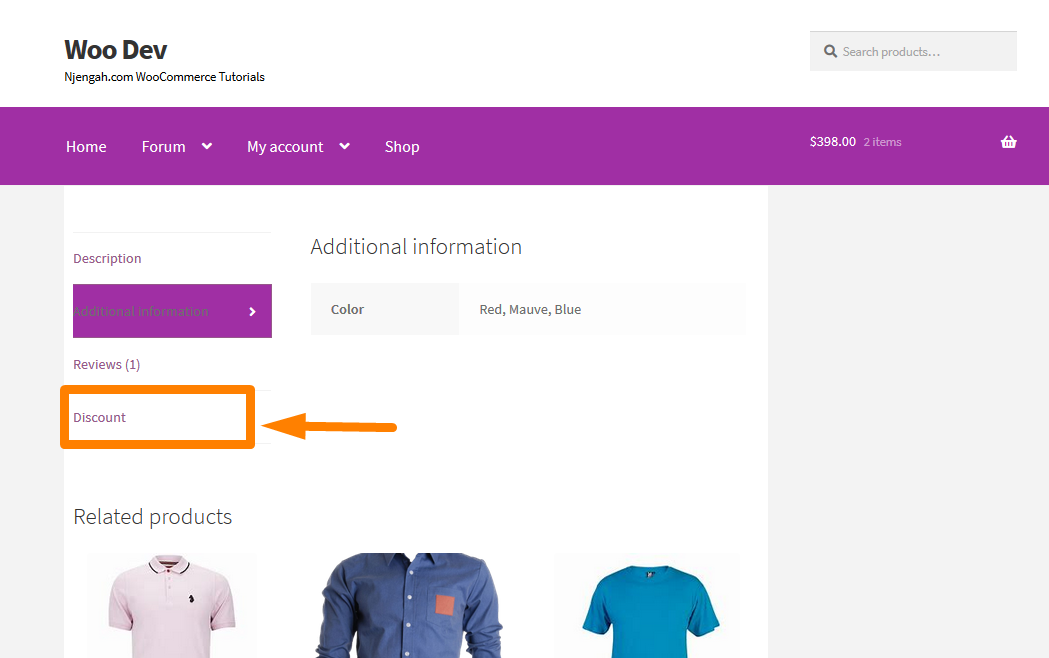
Steps to Add a Custom WooCommerce Storefront Product Tabs
- Log into your WordPress site and access the Dashboard as the admin user.
- From the Dashboard menu, click on Appearance Menu > Theme Editor Menu. When the Theme Editor page is opened, look for the theme functions file to add the function to add a custom WooCommerce product tab.
- Add the following code to the functions.php file:
add_filter( 'woocommerce_product_tabs', 'njengah_new_product_tab' );

function njengah_new_product_tab( $tabs ) {

// Add the new tab

$tabs['test_tab'] = array(

'title'       => __( 'Discount', 'text-domain' ),

'priority'    => 50,

'callback'    => 'njengah_new_product_tab_content'

);

return $tabs;

}


function njengah_new_product_tab_content() {

// The new tab content

echo 'Discount';

echo 'Here\'s your new discount product tab.';

}
- This will be the outcome:
Steps to Remove WooCommerce Storefront Product Tabs
- Log into your WordPress site and access the Dashboard as the admin user.
- From the Dashboard menu, click on Appearance Menu > Theme Editor Menu. When the Theme Editor page is opened, look for the theme functions file to add the function to remove WooCommerce Storefront product tabs.
- Add the following code to the functions.php file:
add_filter( 'woocommerce_product_tabs', 'njengah_remove_product_tabs', 98 );

function njengah_remove_product_tabs( $tabs ) {

unset( $tabs['description'] );             // Remove the description tab

unset( $tabs['reviews'] );                 // Remove the reviews tab

unset( $tabs['additional_information'] );  // Remove the additional information tab

unset( $tabs['test_tab'] );                // Remove the discount tab

return $tabs;

}
- This will be the outcome:
Steps to Renaming WooCommerce Storefront Product Tabs
- Log into your WordPress site and access the Dashboard as the admin user.
- From the Dashboard menu, click on Appearance Menu > Theme Editor Menu. When the Theme Editor page is opened, look for the theme functions file to add the function to rename WooCommerce Storefront product tabs.
- Add the following code to the functions.php file:
add_filter( 'woocommerce_product_tabs', 'njengah_rename_tabs', 98 );

function njengah_rename_tabs( $tabs ) {

$tabs['description']['title']               = __( 'More Information', 'text-domain' );       // Rename the description tab

$tabs['reviews']['title']                   = __( 'Ratings', 'text-domain' );               // Rename the reviews tab

$tabs['additional_information']['title']    = __( 'Product Data', 'text-domain' );         // Rename the additional information tab

$tabs['test_tab']['title']                  = __( 'Commission', 'text-domain' );          // Rename the discount tab

return $tabs;

}
- This will be the outcome:

Steps to Re-order WooCommerce Product Tabs
- Log into your WordPress site and access the Dashboard as the admin user.
- From the Dashboard menu, click on Appearance Menu > Theme Editor Menu. When the Theme Editor page is opened, look for the theme functions file to add the function to re-order WooCommerce product tabs.
- Add the following code to the functions.php file:
add_filter( 'woocommerce_product_tabs', 'njengah_reorder_tabs', 98 );

function njengah_reorder_tabs( $tabs ) {

$tabs['reviews']['priority']                = 5;      // Reviews first

$tabs['description']['priority']            = 15;   // Description third

$tabs['additional_information']['priority'] = 20;  // Additional information fourth

return $tabs;

}
- This will be the outcome:
Conclusion
This post has shared how to change the color of the active product tabs on the single product page.
Additionally, I have shared some code snippets that you can use to customize this section. I have illustrated how you can add or remove product tabs. Moreover, I have demonstrated how to rename and re-order WooCommerce Storefront product tabs.

Joe is an experienced full-stack web developer with a decade of industry experience in the LAMP & MERN stacks, WordPress, WooCommerce, and JavaScript – (diverse portfolio). He has a passion for creating elegant and user-friendly solutions and thrives in collaborative environments. In his spare time, he enjoys exploring new tech trends, tinkering with new tools, and contributing to open-source projects. You can hire me here for your next project.
Similar Articles
- How to Remove Search Box Storefront Theme
- How to Add Submenu to Custom Post Type Menu in WordPress
- How to Hide Tags In Storefront Theme WooCommerce
- Hide or Remove the Quantity Field from WooCommerce Product Page
- How to Sell Digital Products With WooCommerce
- How to Add Custom Order Status in WooCommerce
- How to Hide Add to Cart Button in WooCommerce
- How to Change Button Color Storefront Theme
- How to Change Font Size WooCommerce Storefront Theme
- How to Hide Mobile Footer From Storefront WooCommerce
- How to Hide Category WooCommerce Storefront Theme
- How to Change Storefront Number of Products Per Row
- How to Turn off Next Product Tabs In WooCommerce Storefront
- How to Remove Related Products WooCommerce Storefront Theme
- How to Add Categories to WooCommerce Products
- How to Remove Cart from Storefront Theme Header
- How to Rename Order Status Messages in WooCommerce
- How to Change Products per Page WooCommerce Storefront Theme
- How to Put WooCommerce Cart and Checkout on One Page
- How to Hide All Products From Shop Page in WooCommerce