 Do you want customers in your store to name their price? If you allow customers to pay their own price, you will encourage them to come back to your store again. It may also benefit you because customers might even pay more than the retail price.
However, if you allow customers to pay their own price, some may pay a very small amount. This is why you need to set some conditions for this to work well.
You have to set the maximum and minimum price.
WooCommerce Name Your Own Price
WooCommerce does not have a built-in solution to achieve this. This means that we will have to use a plugin.
In this post, we will share how you can easily allow customers to name their own price based on conditions like minimum and maximum price.
Let us have a look at how you can achieve this.
Steps to Allow Customers to Pay Their Price Using a Plugin
In this section, you will see how it is very easy to allow customers to pay their own price. We will be using the Product Open Pricing (Name Your Price) for WooCommerce plugin.
It is free and helps you to allow customers to name their price. It has more than 7,000 active installations and is regularly updated.
However, it is important to note that the free version of this plugin allows enabling open pricing for only one product at a time. You need to upgrade to the premium version to enable this option on multiple products.
Here are the simple steps you have to follow:
- Log into your WordPress site and access the Dashboard as the admin user.
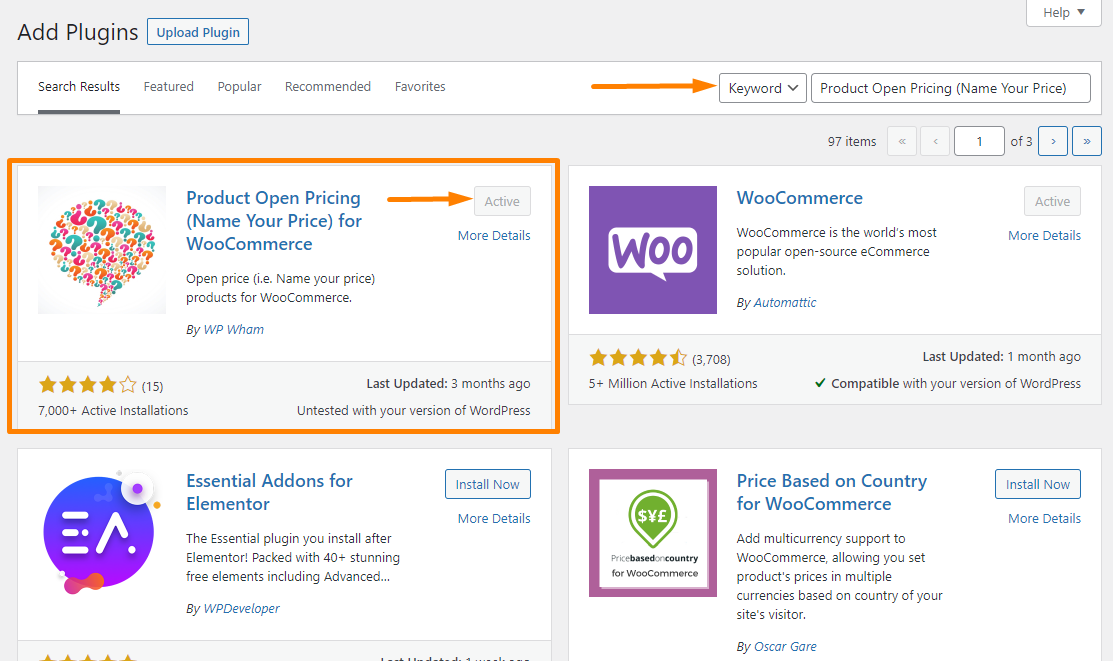
- Then, we are going to install the plugin that we have indicated earlier. To download it directly in the Admin Panel, simply navigate to Plugins > Add New. After that, you will need to do a keyword search for the plugin ‘Product Open Pricing (Name Your Price) for WooCommerce’. You need to install and activate it as shown below:
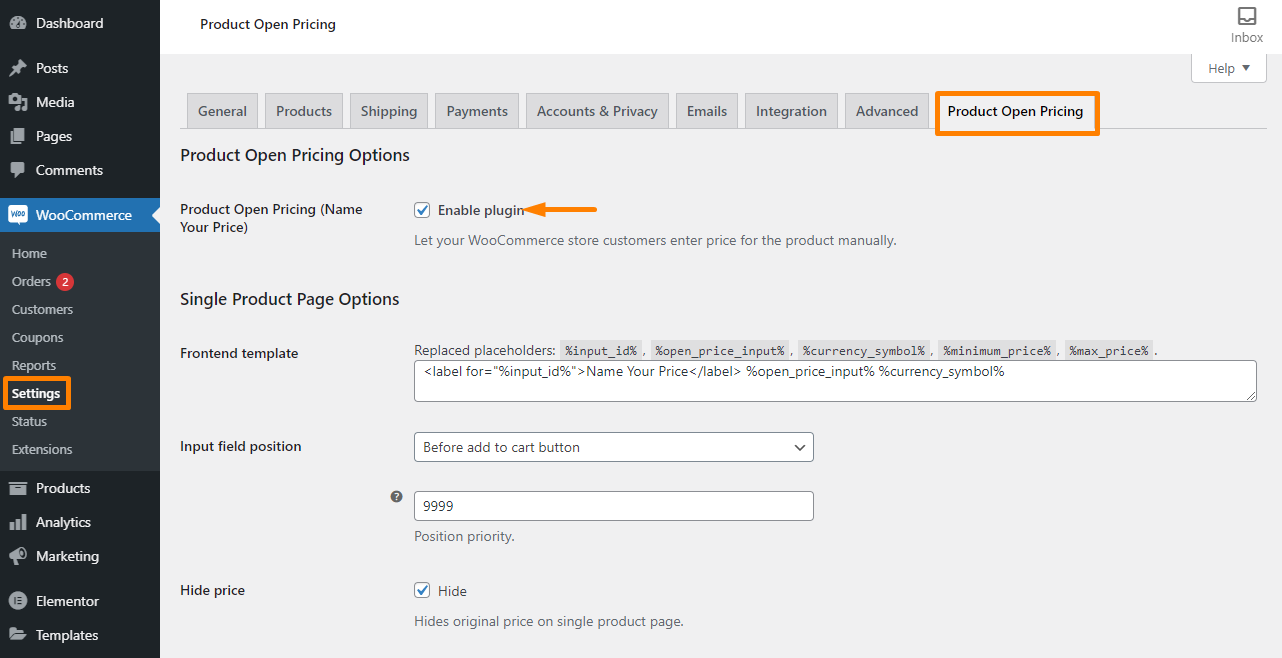
- Go to the plugin’s settings to configure the options included like the default price, maximum price, and minimum price. You can access the settings by going to WooCommerce > Settings > Product Open Pricing. Here you can find options for a single product, category page, message, admin, and advanced. You can also reset your section settings here:
- After that, open the product that you want customers to name their price. As mentioned earlier, the free version allows you to use this feature on one product. You can open the product settings by going to Products > All Products and click on your product to open the settings.
- Once the product settings are open, scroll down to the Product Open Pricing Here you are required to add the default, maximum, and minimum price:
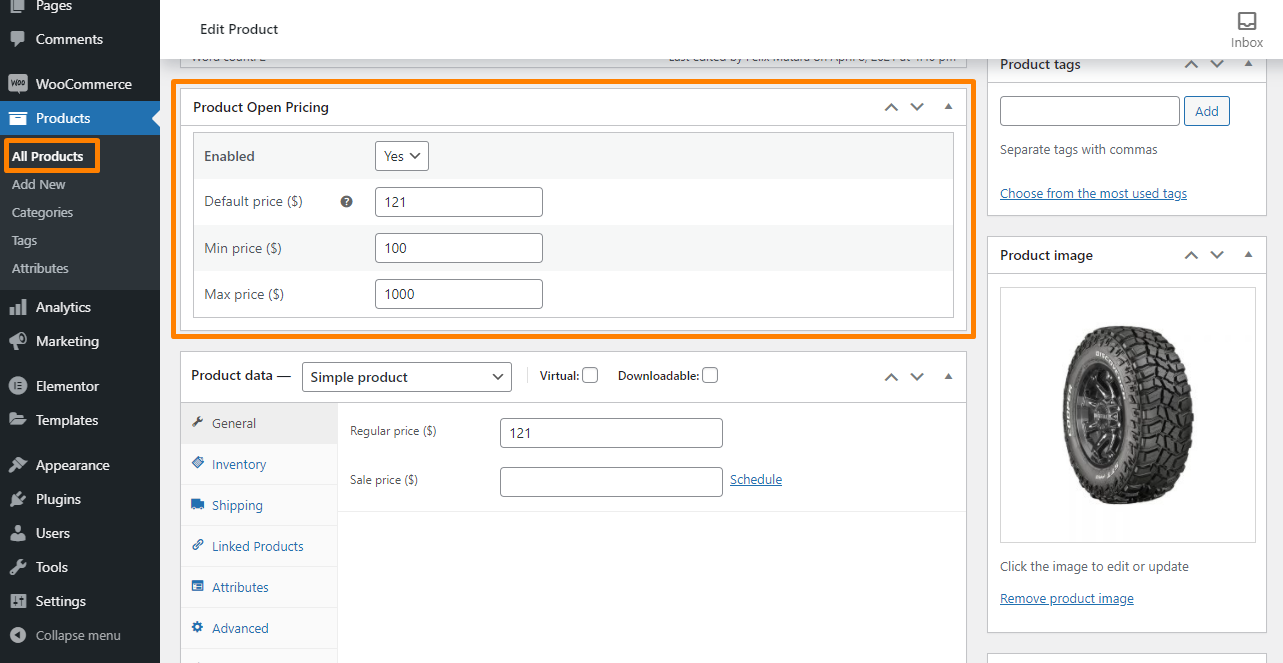
- Once you are done, click on Update to save your changes.
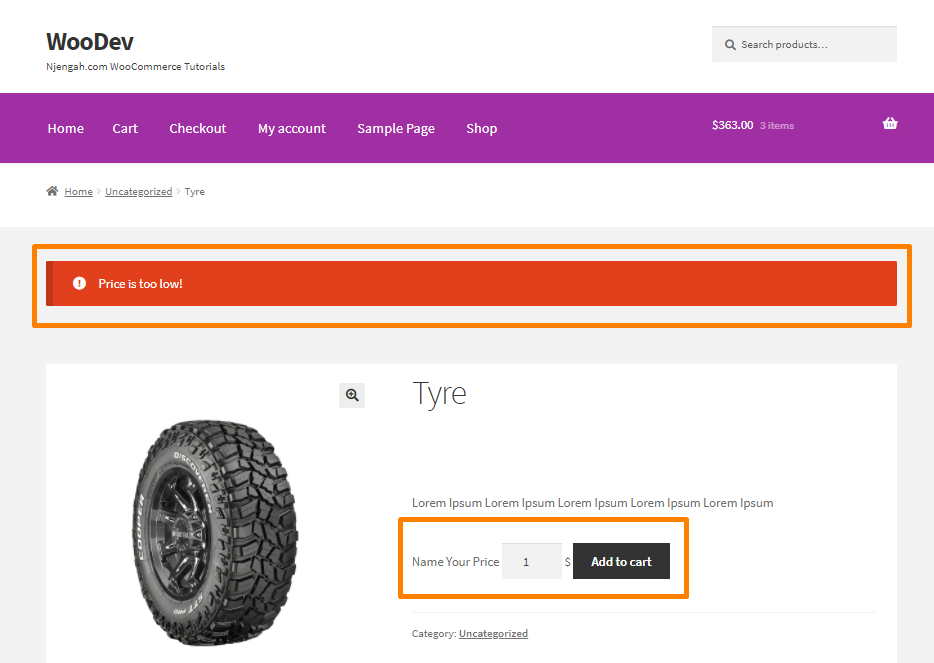
- If a customer wants to pay a price that is below or above the set price, an error will be displayed. This is the outcome in the front end:
Conclusion
You have seen how it is very easy to allow customers to name their price using a plugin. We recommend using a premium plugin if you want to use it on multiple products.
Remember to configure the settings based on your requirements. If you need a custom solution for this, please consider contacting a qualified WordPress developer.
Similar Articles
- How to Edit Billing Details WooCommerce Checkout Page
- How to Change Quantity In Checkout WooCommerce
- How to Hide Admin Bar for WooCommerce Customers or By User Roles
- How to Add Submenu to Custom Post Type Menu in WordPress
- How to Use WooCommerce Product Attributes Step by Step [Complete Guide]
- How to Create Custom Order Received Page WooCommerce
- How to Add New Tab WooCommerce Product Page
- How to Add Custom WooCommerce Payment Icons Checkout Page
- How to Hide WooCommerce Product Count
- How to Hide Order Status In WooCommerce
- How to Hide Product Gallery In WooCommerce
- How to Hide Trailing Zeros WooCommerce
- How to Hide & Rename Addresses Tab My Account Page WooCommerce
- How to Hide Price If Zero In WooCommerce
- How to Change WooCommerce Thank You Page
- How to Remove or Rename Sale Badge WooCommerce Storefront
- How to Fix Billing Postcode is Not a Valid Postcode / ZIP
- How to Change Storefront Theme Product Page Tabs Colors
- How to Add Currency to WooCommerce [Custom Currency]
- How to Hide Dashboard on the My Account Page WooCommerce