 Do you want to add a custom order status in WooCommerce? In today’s post, we will illustrate how you can add WooCommerce custom order status actions.
The main aim of this guide is to help you modify order details. You will be able to add information to orders, export order data externally, and run any action that requires order details.
It is important to note that you need some coding skills to implement this solution. We have created a custom code snippet to create a custom order status. We will share how you can implement the solution in your WooCommerce store.
WooCommerce Custom Order Status
By default, WooCommerce comes with the following order status:
- Payment Pending
- Processing
- On Hold
- Completed
- Canceled
- Refunded
- Failed
This is how they are displayed: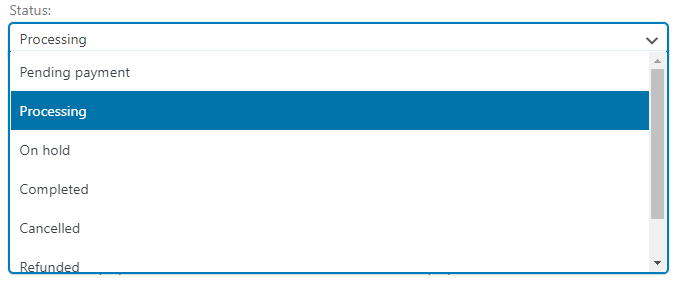
As you have seen, WooCommerce can support partial and automatic refunds. In addition, order statuses are now saved as a custom post status. This is the same just like draft, scheduled, or published posts.
Let us walk you through the process of adding a custom post status. Read on, as we will also share how the code snippet works.
Addition of WooCommerce Custom Order Status
If your store needs a customized order status such as Shipment arrival, here are the steps you need to follow:
- Log in to your WordPress dashboard as admin.
- From the dashboard, navigate to Appearance > Theme Editor. Select the functions file to add the function to add a custom WooCommerce order status.
- Add the following code in the funtions.php file:
register_post_status( ‘wc-arrival-shipment’, array(
‘label’ => ‘Shipment Arrival’,
‘public’ => true,
‘show_in_admin_status_list’ => true,
‘show_in_admin_all_list’ => true,
‘exclude_from_search’ => false,
‘label_count’ => _n_noop( ‘Shipment Arrival <span class="count">(%s)</span>’, ‘Shipment Arrival <span class="count">(%s)</span>’ )
) );
}
add_action( ‘init’, ‘register_shipment_arrival_order_status’ );
function add_awaiting_shipment_to_order_statuses( $order_statuses ) {
$new_order_statuses = array();
foreach ( $order_statuses as $key => $status ) {
$new_order_statuses[ $key ] = $status;
if ( ‘wc-processing’ === $key ) {
$new_order_statuses[‘wc-arrival-shipment’] = ‘Shipment Arrival’;
}
}
return $new_order_statuses;
}
add_filter( ‘wc_order_statuses’, ‘add_awaiting_shipment_to_order_statuses’ );
[/php]
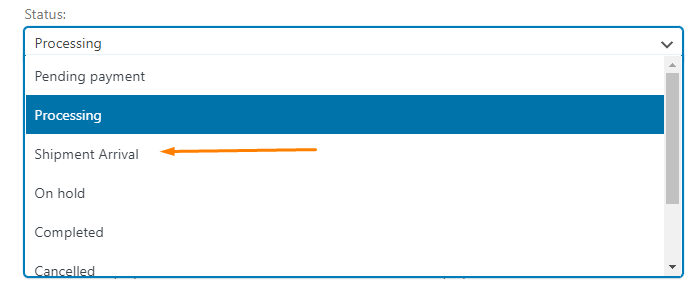
- We have used the register_post_status() function to add the post status. This is the outcome:
How The Code Works
The array contains the data that defines the custom post status. We have used the add_awaiting_shipment_to_order_statuses() function to add the new custom post status to the list of the available order statuses in the WooCommerce Orders and Edit Orders pages.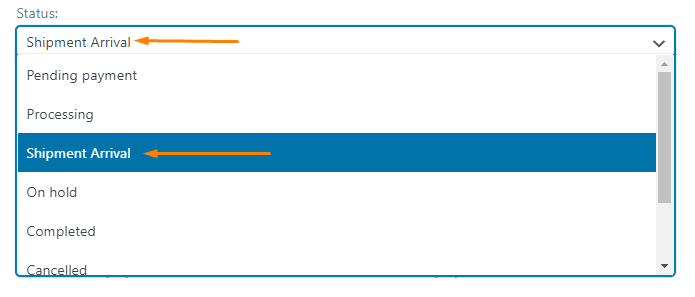
Once the status has been added, you can use it on the pages.
In addition, the foreach loop goes through a list of the available order status until we find the status we want. We have inserted the Shipment Arrival after Processing order status.
Conclusion
In summary, we have discussed how you can add a custom order status in WooCommerce. If you are not comfortable with editing code, we recommend contacting a qualified WordPress Developer.
It is also advisable to install a child theme, to ensure your changes are not lost during an update. Now, you can go ahead to test the new order status in your WooCommerce store.
We hope that this post helped you to add a custom order status in WooCommerce.
Similar Articles
- How to Send Email on Status Change In WooCommerce
- How to Add Custom Taxonomy To WooCommerce Products
- How to Add Custom Meta Box To WooCommerce Product
- How to Make WordPress Site Look Good
- How to Remove or Disable autop In WordPress Posts & Custom Post Types
- How to Rename Order Status Messages in WooCommerce
- How to Create WooCommerce Lost Password Shortcode
- How to Get Product Image src WooCommerce
- How to Remove or Disable Reviews In WooCommerce
- How to Create Page In WordPress Programmatically
- How to Use WooCommerce Save Order Hook
- Custom WooCommerce Development Guide [Store Owners]
- How to Make Phone Number Required WooCommerce
- How to Have Multiple Authors on WordPress
- How to Get Current User Role in WordPress & Display Roles
- How to Insert Default Content to WordPress Post Editor Dynamically
- How to Auto Approve Orders in WooCommerce
- How to Add Buy Now Button WooCommerce Without Plugin
- How to Create Product Programmatically WooCommerce