 The appearance of your store heavily depends on the theme that you will choose. A great theme is characterized by providing great control to the store owner in terms of how products will appear and user access. You can use the WooCommerce Storefront Theme. It is free and offers you a plethora of customization options through child themes.
This theme has a responsive design that will work on any device. Here are some of the amazing features that you will get from downloading this theme:
- Elegant design.
- Responsive layout.
- SEO friendly markup.
- Custom page templates.
- Free.
- GPL licensed.
- Translation ready for other languages.
However, for you to use this theme, you need to know how to install and configure this theme. Nevertheless, here is a detailed guide on how to install and configure the WooCommerce Storefront Theme.
How to Install and Configure the WooCommerce Storefront Theme
It is very easy to download the Storefront Theme. Downloading the Storefront theme is just like installing any other plugin for your WordPress site. Here are the steps you need to follow:
- First, you need to go to Appearance > Themes and then Add New.
- Then head over to the search field, type ‘storefront’.
- After that, click on the install button.
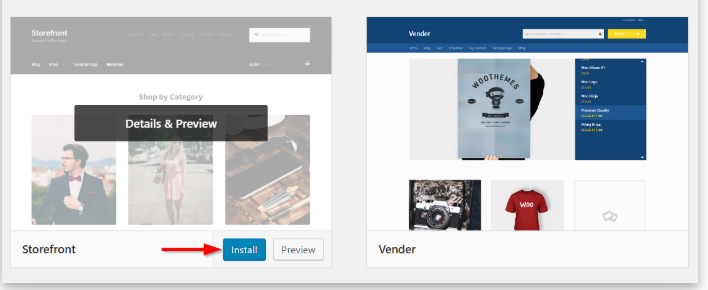
- After installing the theme, you can activate the theme using the Activate
Additionally, to download the Storefront theme manually:
- With your preferred browser, visit wordpress.org to download the latest version of Storefront.
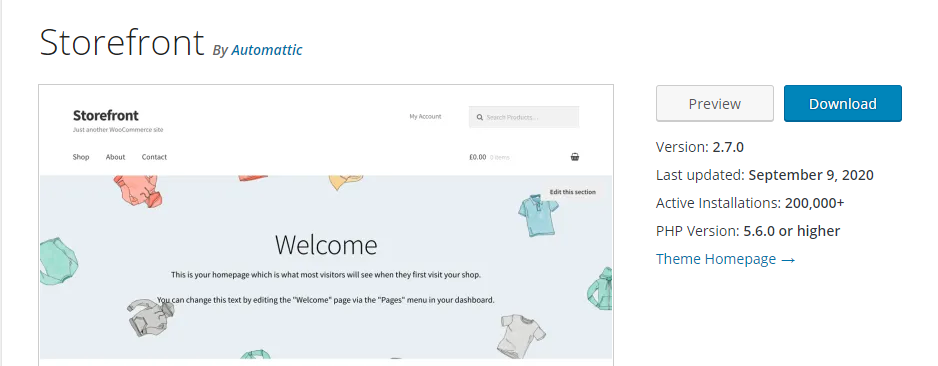
- After downloading it, you can then upload the extracted folder to the themes directory on your server via FTP.
- After that, you need to activate the theme by navigating to the WordPress Dashboard, then go to Appearance, then Themes.
Page Templates
The Storefront theme automatically creates two additional page templates, in addition to the default WooCommerce pages. They are Homepage and Full width, which are discussed in detail below:
Homepage Template.
The Homepage template offers you a great way to display all your products, giving you an overview of products and product categories. Visitors of your store will first land on this page when entering your store. The homepage appearance matters a lot because visitors can be converted to buyers if it is appealing.
Setting it up is a breeze as you just have to:
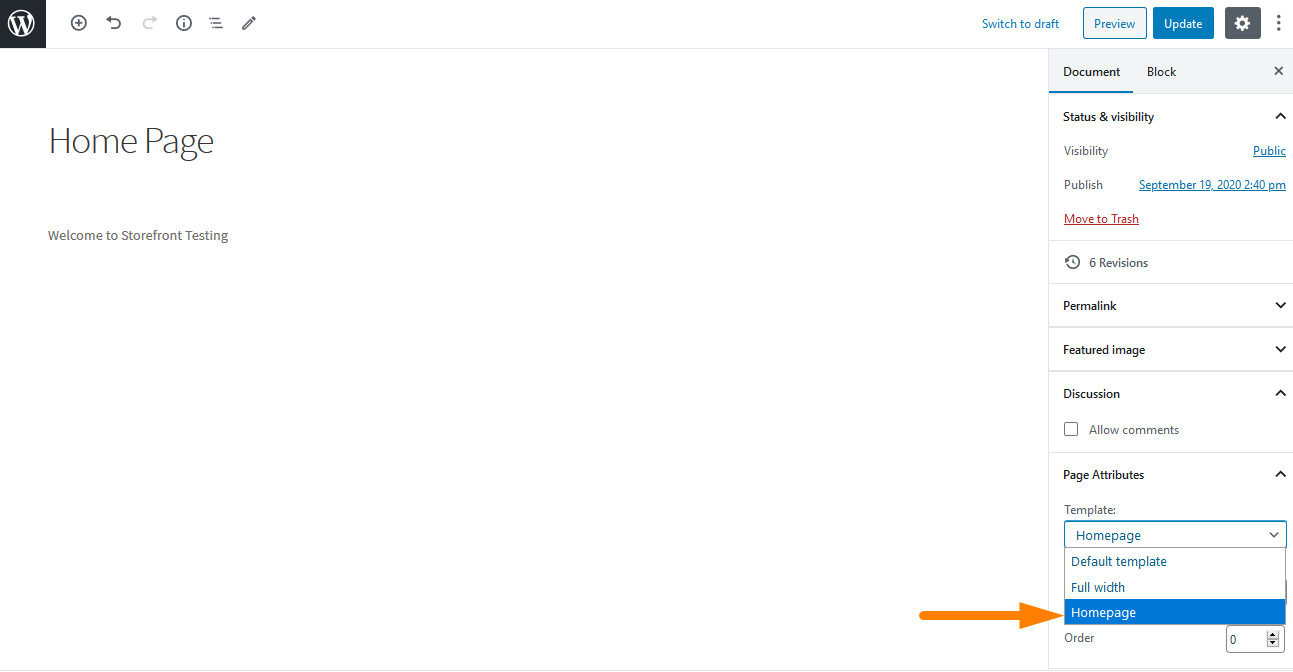
- Log in to the admin panel of your site as an administrator.
- Create a new page and add some content to display.
- Then, you will have to select the ‘Homepage’ from the templates drop-down in the Page Attributes meta box as shown below:
- After publishing this page, you can set it as a homepage by navigating to the Settings then Reading.
- You will then check ‘A static page’ and then select the created homepage from the ‘Home page’ dropdown.
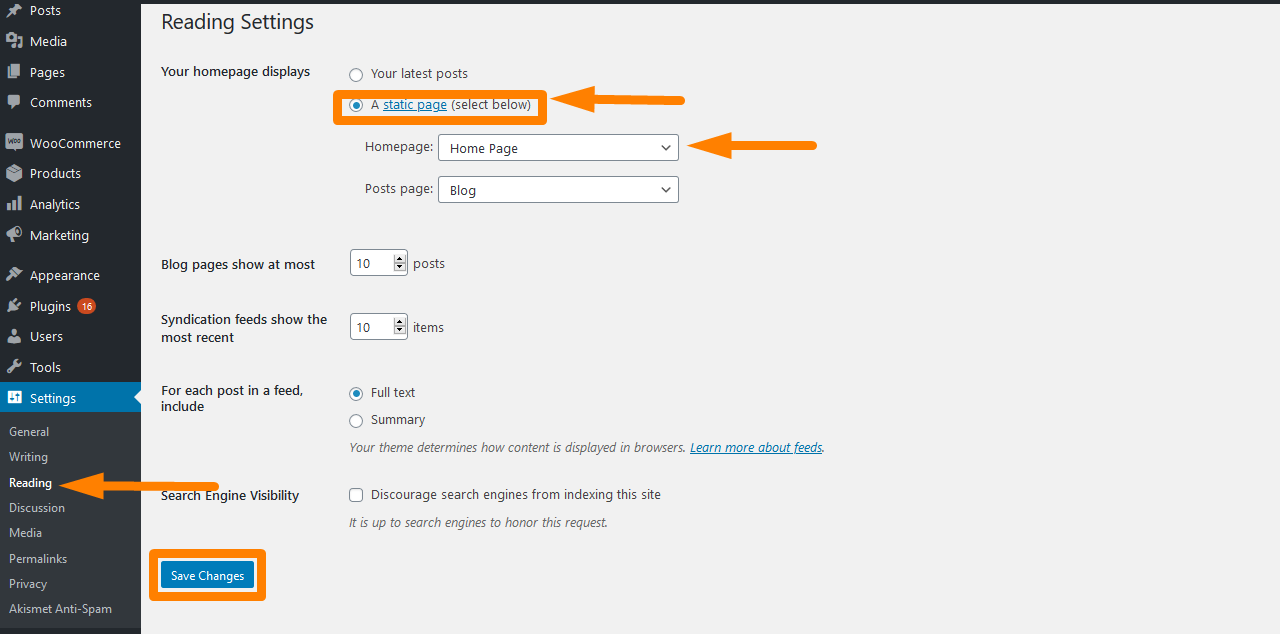
- After you save the changes, they will automatically be reflected on the front-end.
Once the configuration is done, your Homepage should have multiple sections as shown below:
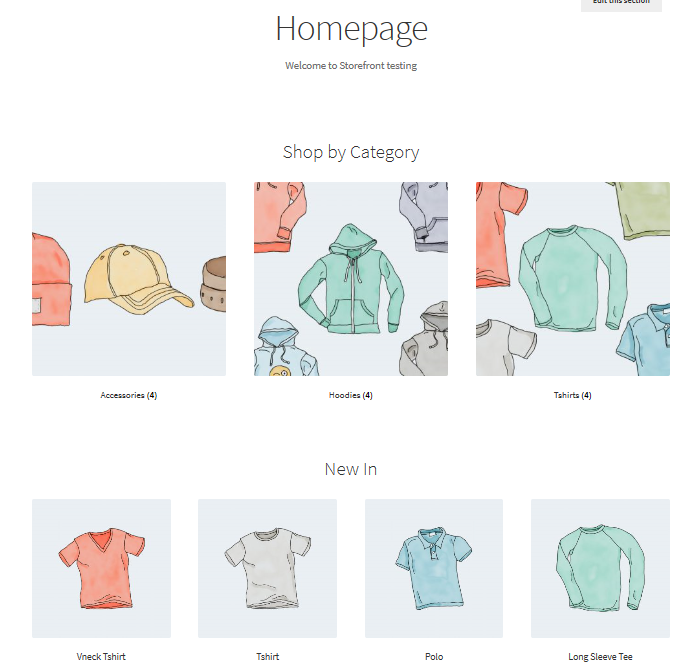
On the homepage, different clusters are displayed such as recommended products, fan favorites, products on sale, and best sellers. The way that these elements display is the same as the order in the back-end.
Additionally, you can use the drag and drop feature to make modifications by clicking on products then, categories.
Full Width on cart and checkout
The second template is the full width that spans through the entire page without sidebars, which is a recommended option for your cart and checkout pages. This can be done by going to the cart and checkout pages and select ‘Full Width’ from the drop-down on the Page Attributes section as shown below: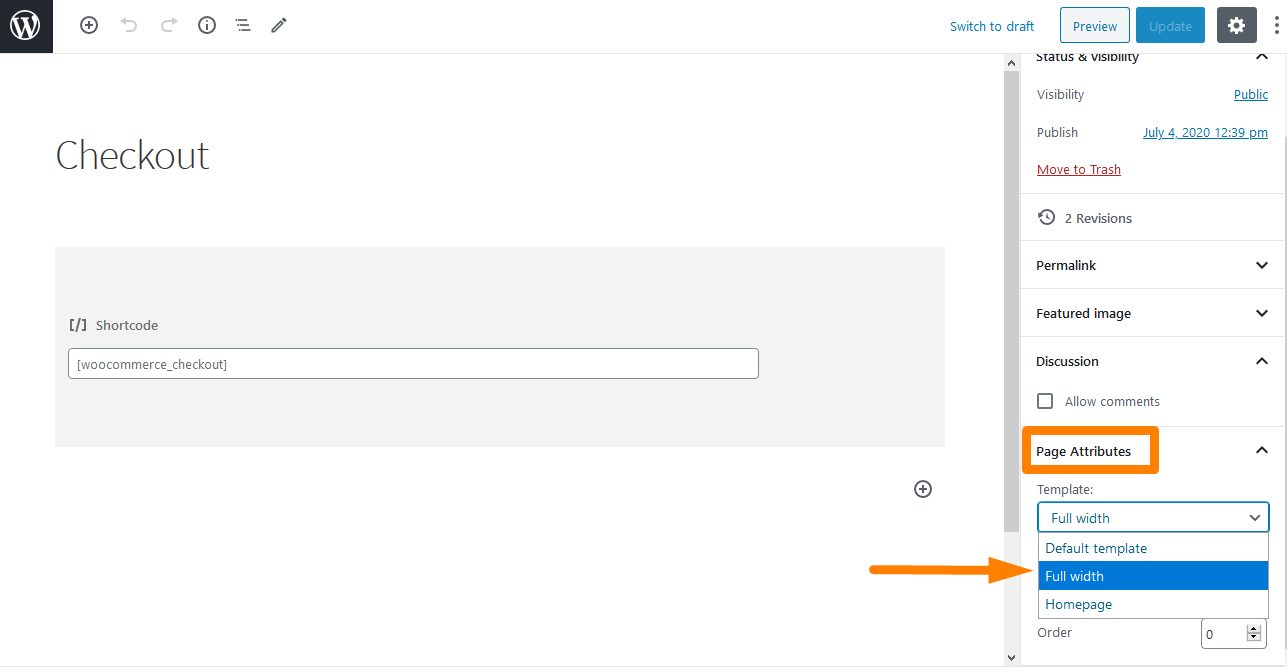
1. Configuring menus
The storefront has a default organization of menu locations that are primary and secondary. The primary menu is displayed just below the site logo. WooCommerce displays all your pages as a ‘primary menu’ if you have not set a specific primary menu.
The secondary menu is just beside the logo, next to the search box. However, this secondary menu will only appear if you assign a menu.

2. Creating a new menu and adding pages
This can be done by:
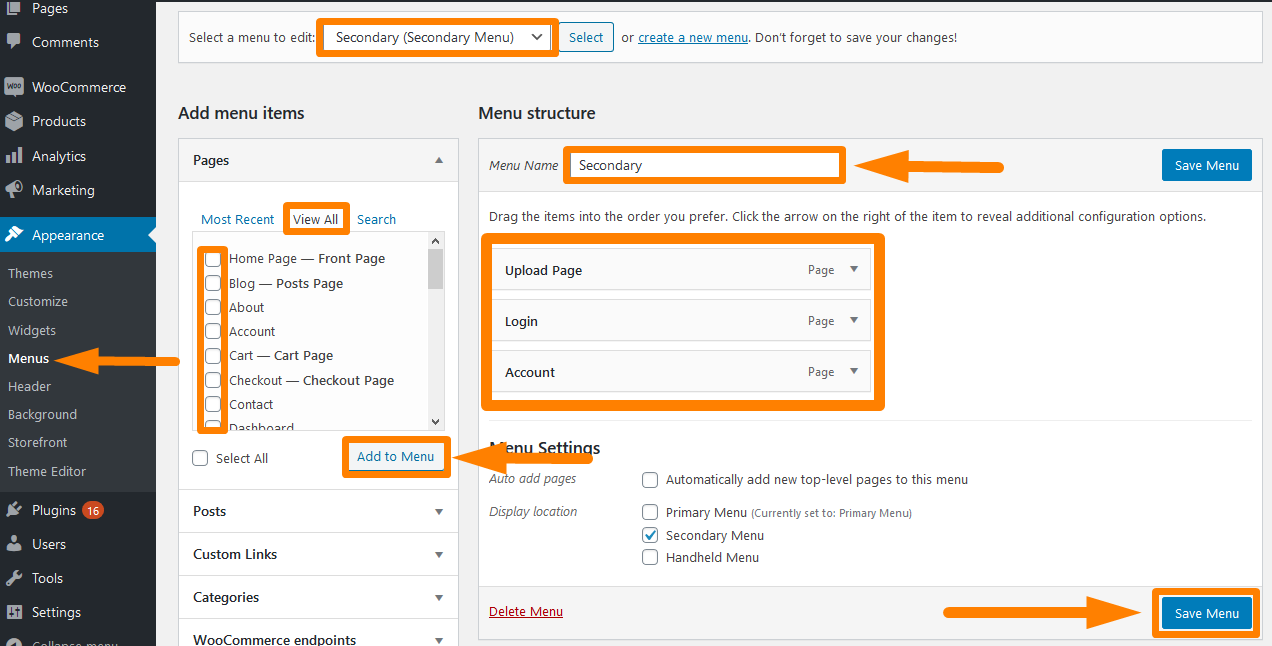
- Navigating to Appearance > Menus in the admin panel.
- On the left side, you will see a title called ‘pages’. Click on the View All button to get a list of all the pages that you have published.
- Tick the pages you want then click Add to Menu. It is very easy to customize the menu order by simply dragging and dropping the pages. Remember to save the changes.
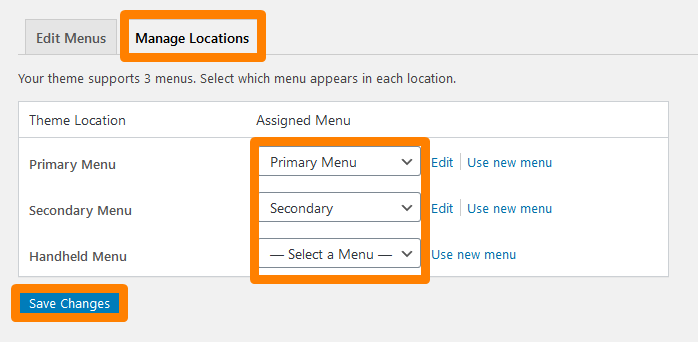
3. Assigning the Menu
Creating a menu is not enough. You need to assign the menu to the location where you want it to display. To do this:
- Navigate to Appearance > Menus > Menu Settings.
- Select the menu that you want to assign. By default, this theme supports 3 menus.
- Remember to save the changes that you make.
To see the Outcome refresh the home page and you should see the menu created.
4. Placing Widgets
The Storefront Theme gives you three different areas for placing widgets on your website. Header widgets can be placed above the content, just below the header of your site. Sidebar widgets are placed on the side based on the layout that you choose. Additionally, you can place footer widgets based on your choice of the four widgets available.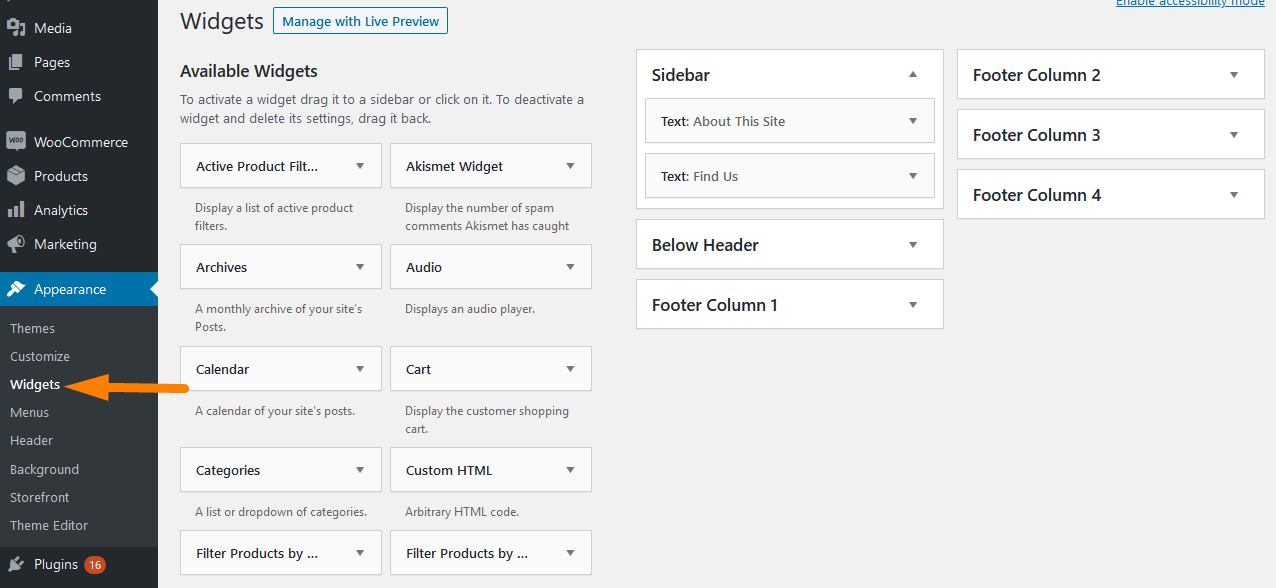
- Sidebar – Left or the right of the main site content,
- Below Header – Just below the site header and above the content.
- Footer Column 1 – Footer Area
- Footer Column 2 – Footer Area
- Footer Column 3 – Footer Area
- Footer Column 4 – Footer Area
Conclusion
That concludes the brief guide on how to install and configure the WooCommerce Storefront theme. I have shown you how you can install the theme just like installing any other plugin for your WordPress site. Additionally, I have shown you some easy steps to install it manually.
Moreover, I have shown you how you can add the Homepage template and the Full-width template. The Homepage template offers you a great way to display all your products, giving you an overview of products and product categories. On the other hand, the Full-width template spans through the entire page without sidebars, which is a recommended option for your cart and checkout pages.
When setting up your Storefront theme, it is also important to know how to configure menus. This is because visitors on your site will be able to navigate through your entire site without any problems. I have also highlighted how you can create menus and assign them to a location. Additionally, I have also shown you how you can place widgets in three different areas on your website.
Similar Articles
- 80+ Tricks to Customize Storefront WooCommerce Theme : The Ultimate Storefront Theme Customization Guide
- How to Add Content Below Featured Product Title Storefront
- Remove Category from Product Page WooCommerce In 2 Easy Options
- How to Move Description Under Image in WooCommerce
- How to Change Out Of Stock Text in WooCommerce
- Hide or Remove the Quantity Field from WooCommerce Product Page
- How to Rename Order Status Messages in WooCommerce
Comments are closed.