WooCommerce, just like WordPress, has a lot of great actions and filters.
For you to understand this tutorial well, you need to learn more about WooCommerce checkout hooks.
When working with filters, you can only change the functions.php file.
However, I recommend that you add them to your child theme’s functions.php file so that your changes are not lost during an update.
Sorting Fields within a Group
It is worth mentioning that fields are separated into four groups:
Billing – Billing Address
| Name | Priority |
| billing_first_name | 10 |
| billing_last_name | 20 |
| billing_company | 30 |
| billing_country | 40 |
| billing_address_1 | 50 |
| billing_address_2 | 60 |
| billing_city | 70 |
| billing_state | 80 |
| billing_postcode | 90 |
| billing_phone | 100 |
| billing_email | 110 |
Shipping – Shipping Address
| Name | Priority |
| shipping_first_name | 10 |
| shipping_last_name | 20 |
| shipping_company | 30 |
| shipping_country | 40 |
| shipping_address_1 | 50 |
| shipping_address_2 | 60 |
| shipping_city | 70 |
| shipping_state | 80 |
| shipping_postcode | 90 |
- account – Account Login (account_password)
- order – Additional information (order_comments)
In this tutorial, you will learn how to move the checkout field on the WooCommerce checkout page.
Each group contains fields and you can easily reorder them with a special priority parameter.
WooCommerce Reorder Checkout Fields
For the first illustration, I would like to make the email field the first one to display.
You can achieve this by adding the following custom PHP code at the bottom of the functions.php file:
add_filter( 'woocommerce_checkout_fields', 'njengah_email_first' );

function njengah_email_first( $checkout_fields ) {

            $checkout_fields['billing']['billing_email']['priority'] = 4;

            return $checkout_fields;

}
This is the outcome: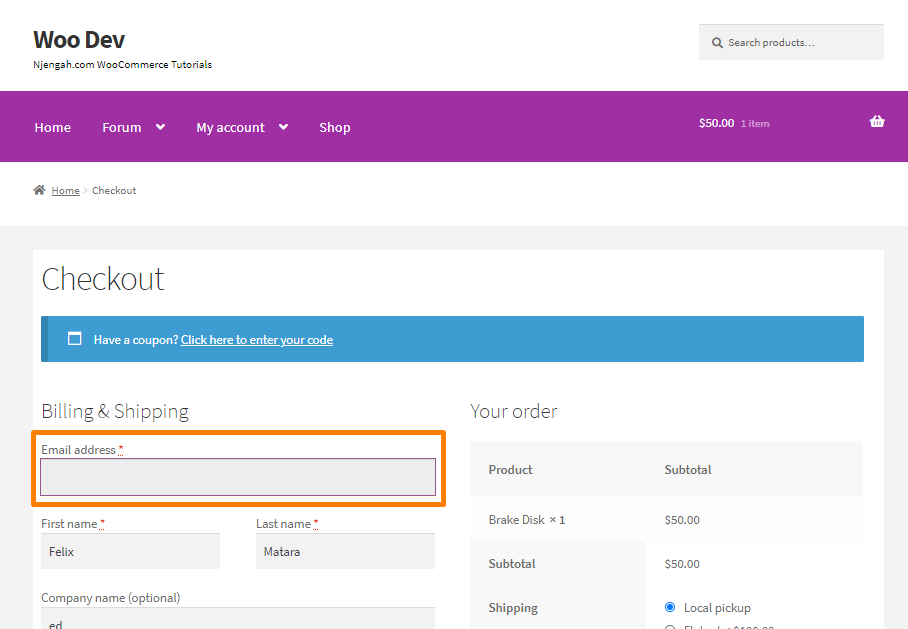
In the code snippet above, I set the priority to 4 because each field has its priority, as highlighted above. According to the table, to make the email field display first, I have to use a value of less than 10.
Additionally, there is a hook called woocommerce_default_address_fields, which allows you to change the order for both billing and shipping fields simultaneously. For the example above, the code will look like this:
add_filter( 'woocommerce_default_address_fields', 'njengah_email_first' );

function njengah_email_first( $address_fields ) {

// as you can see, no needs to specify a field group anymore

$address_fields['email']['priority'] = 4;

return $address_fields;

}
Moving a Field to Another Field Group
You might want to move a field to another group. However, this might not work in all situations. For example, you cannot move the billing country field under Order Notes.
For this example, I will move the email field to the Additional Information group. To achieve this, add the following custom code at the bottom of the functions.php file:
add_filter( 'woocommerce_checkout_fields', 'njengah_billing_email_another_group' );

function njengah_billing_email_another_group( $checkout_fields ){

// 1. We assign a field array to another group here

$checkout_fields['order']['billing_email'] = $checkout_fields['billing']['billing_email'];

// 2. Remove a field from a previous location

unset( $checkout_fields['billing']['billing_email'] );

return $checkout_fields;

}
This is the outcome: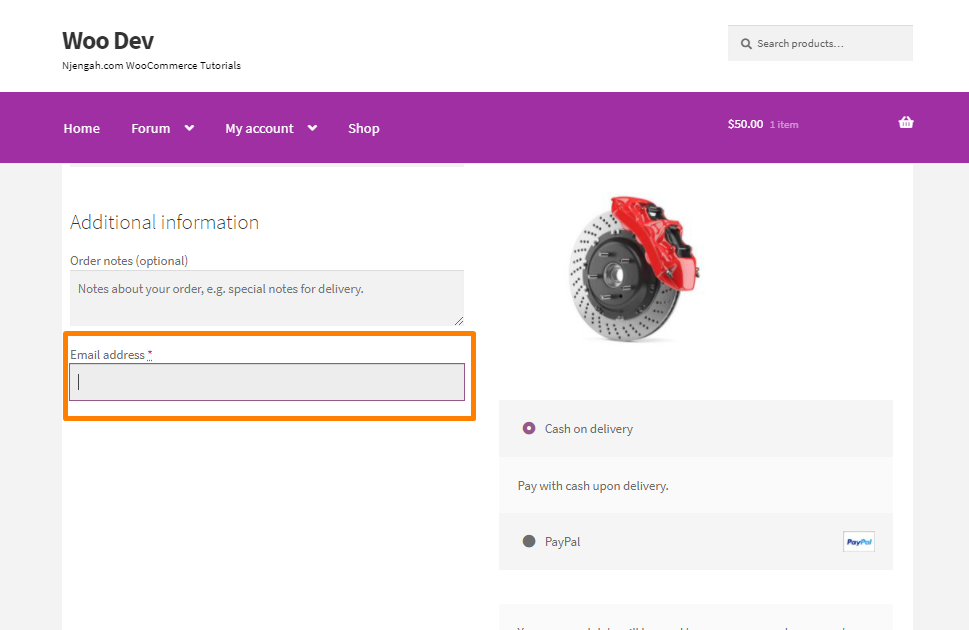
Conclusion
In summary, you have learned how to reorder checkout fields. Additionally, you have seen how to move a checkout field to another field group. If you are not familiar with handling code, you should consider using a plugin. Alternatively, you can hire a WordPress developer.

Joe is an experienced full-stack web developer with a decade of industry experience in the LAMP & MERN stacks, WordPress, WooCommerce, and JavaScript – (diverse portfolio). He has a passion for creating elegant and user-friendly solutions and thrives in collaborative environments. In his spare time, he enjoys exploring new tech trends, tinkering with new tools, and contributing to open-source projects. You can hire me here for your next project.
Similar Articles
- How to Fix WooCommerce Storefront Theme Internal 500 Server Error
- How to Add WooCommerce Storefront Product Pagination
- How to Check if a User is Logged In in WordPress
- How to Put WooCommerce Cart and Checkout on One Page
- How to Set Up WooCommerce Terms and Conditions Checkout
- How to Hide Product Description Heading WooCommerce
- How to Add Text Before the Price in WooCommerce » Add Text Before Price
- How to Change WooCommerce Checkout Error Messages
- How to Simplify Checkout Free Items Storefront Theme
- How to Edit Required WooCommerce Checkout Fields
- How to Create WooCommerce Conditional Checkout Fields
- How to Add WooCommerce VAT Number Checkout Page
- How to Move Primary Menu Storefront WooCommerce
- How to Create Checkbox Field in WooCommerce Checkout Page
- How to Add a Sidebar to WordPress » Ultimate Step-by-Step Guide
- How to Redirect User If Not Logged in WordPress » Page Redirect
- How to Hide Any Tab My Account Page WooCommerce
- How to Hide SKU, Category, Tags Meta Product Page WooCommerce
- How to Redirect a WordPress Page Without Plugins?