 Do you need to set up delivery time slots for your online store? This post aims to provide you with the best solution to this problem.
Allowing customers to add their delivery date details allows you to keep up with customer demand for more convenient delivery. One way of doing this is by creating delivery time slots to allow your customers to select a specific date for delivery.
Offering specific delivery time slots for customers can help to reduce non-deliveries. This allows you to save money on delivery costs, manage your schedule, and optimize delivery times.
However, WooCommerce does not have a built-in solution for adding delivery slot selection on the checkout page. Yes, many plugins can solve this problem, but they end up bloating your site.
WooCommerce Customer Delivery Date Selection
In today’s tutorial, we will share a custom code snippet to add a customer delivery-date selection feature. Of course, this means that you need to have some coding skills to implement this solution. But we will try to walk you through each step.
Before you proceed, it is important to note that we will be modifying some of WooCommerce’s core files. Therefore, we recommend installing or creating a child theme. This will ensure that your changes are not lost during an update.
With that in mind, let us look at how you can add delivery or collection time slots in the WooCommerce checkout page.
Steps to Add Customer Delivery Date Selection on the WooCommerce Checkout Page
Here are the simple steps you need to follow:
- Log into your WordPress site and access the Dashboard as the admin user.
- From the Dashboard menu, click on Appearance Menu > Theme Editor Menu. When the Theme Editor page is opened, look for the theme functions file to add the function to add customer delivery date selection on the WooCommerce checkout page.
- Add the following code to the php file:
// Register main datepicker jQuery plugin script
add_action( ‘wp_enqueue_scripts’, ‘njengah_date_picker’ );
function njengah_date_picker() {
// Only on front-end and checkout page
if( is_admin() || ! is_checkout() ) return;
// Load the datepicker jQuery-ui plugin script
wp_enqueue_script( ‘jquery-ui-datepicker’ );
}
// Call datepicker functionality in your custom text field
add_action(‘woocommerce_after_order_notes’, ‘njengah_custom_checkout_field’, 10, 1);
function njengah_custom_checkout_field( $checkout ) {
date_default_timezone_set(‘America/Los_Angeles’);
$mydateoptions = array(” => __(‘Select PickupDate’, ‘woocommerce’ ));
echo ‘<div id=”my_custom_checkout_field”>
<h3>’.__(‘Delivery Info’).'</h3>’;
// YOUR SCRIPT HERE BELOW
echo ‘
<script>
jQuery(function($){
$(“#datepicker”).datepicker();
});
</script>’;
woocommerce_form_field( ‘order_pickup_date’, array(
‘type’ => ‘text’,
‘class’ => array(‘my-field-class form-row-wide’),
‘id’ => ‘datepicker’,
‘required’ => true,
‘label’ => __(‘Delivery Date’),
‘placeholder’ => __(‘Select Date’),
‘options’ => $mydateoptions
),$checkout->get_value( ‘order_pickup_date’ ));
echo ‘</div>’;
}
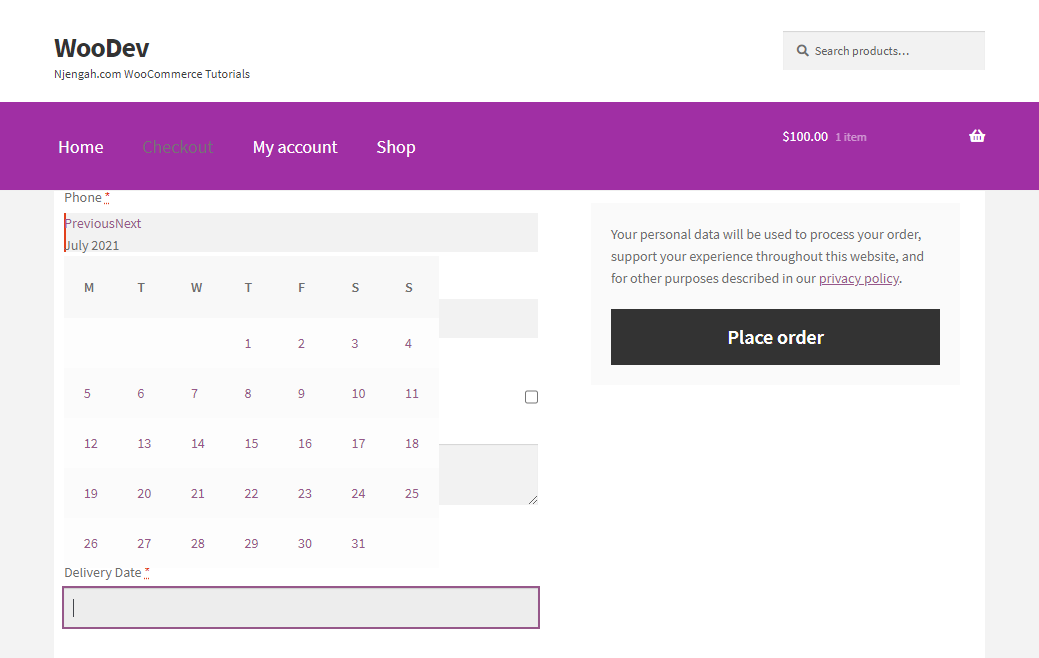
- This is the outcome:
Wrapping Up
In summary, we have shared a custom code snippet to add delivery timeslots on the checkout page. This will help you manage all the deliveries efficiently.
If you need additional functionality, we recommend using a plugin. Alternatively, you can contact us to create a custom solution for you.
We hope this article helped you learn how to set up delivery time slots in WooCommerce easily.
Similar Articles
- How to Add WooCommerce Shipping Calculator on Cart Page
- How to Upload Image On Product Page In WooCommerce
- How to Create WooCommerce Payment Gateway
- How to Add New Column On WooCommerce Orders Page
- How to Get Current Product WooCommerce
- How to Set Up WooCommerce Cart and Checkout on the Same Page
- How to Get Product Brand Name in WooCommerce
- How to Change Coupon Code Placeholder WooCommerce
- How to Get WooCommerce Current Order ID from URL
- How to Set Up WooCommerce Upload File on Checkout
- How to Change WooCommerce Checkout Field Placeholder Text
- How to Translate WooCommerce Checkout Page
- How to Attach PDF Invoice to Email WooCommerce
- What is the Best Payment Gateway for WooCommerce
- How to Add Social Login In WooCommerce Social Login
- How to Duplicate a Product in WooCommerce
- How to Change Shipping Label WooCommerce
- How to Add Custom Product Fields WooCommerce