 If you are familiar with WooCommerce, you know that one of the most important steps in the store is the purchase process. Therefore, you need to customize the checkout page and optimize it to increase conversion rates. This is because customers will have a good shopping experience and they will come back to your store again.
Style WooCommerce Checkout Page Using CSS
One of the easiest ways to customize your WooCommerce store’s checkout page is by editing the CSS style. However, this does not imply rebuilding the entire checkout page from scratch. Even a couple of small changes can help you optimize the checkout page.
For example, if you edit the colors, fonts, margins, or borders, you will see some significant improvement in conversion rates. There is no concrete solution that works for all online stores. Therefore, you need to test different styles but adjusting a few things to help you increase your revenue
In this post, I will share how you can change the checkout page style using CSS. Additionally, I will share how to apply extensive CSS scripts to the checkout page.
Steps to Change the Style of the Checkout Page
Here are the steps that you need to follow:
- Log into your WordPress site and access the dashboard as the admin user
- From the dashboard menu, click on the Appearance Menu > Theme Editor Menu. When the theme editor page is opened, look for the theme functions file with the extension functions.php. Open this functions file to add the function to edit the background of the checkout page.
- Add the following code to the functions.php file:
add_action('wp_head','njengah_checkout_style');
function njengah_checkout_style(){
if(is_checkout()==true){
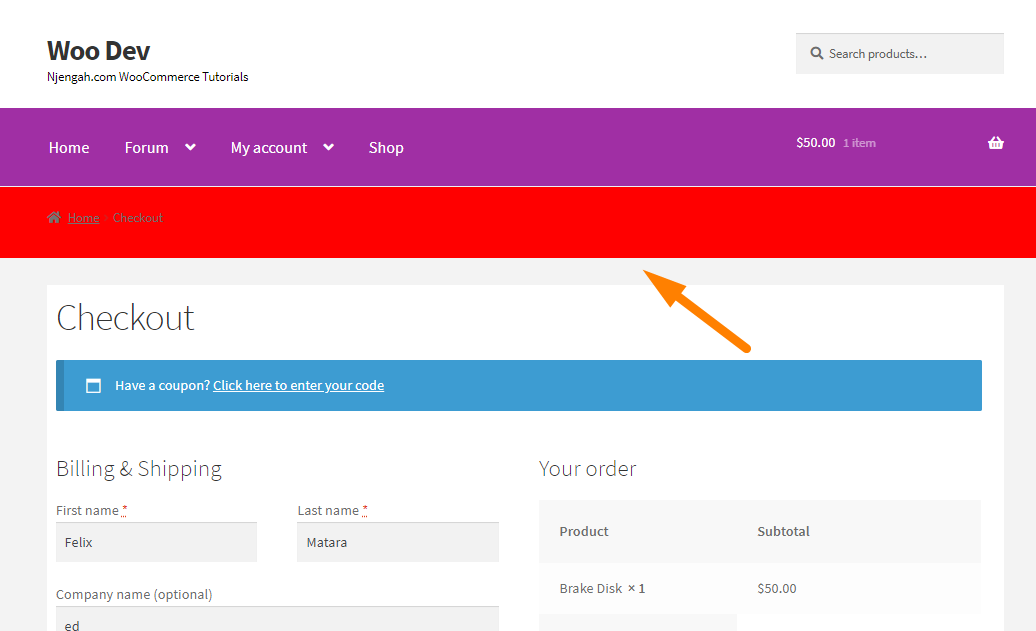
echo '<style> body{background: red!important;}<style>';
}
}
- You can take this script as a base and add your own CSS rules inside the HTML tag to give your site a perfect look and feel. This is a quick hack to apply CSS to the checkout page. It is very helpful when you want to add small pieces of CSS.
- This is the outcome:
Alternatively, if you want more extensive style scripts, you should enqueue the CSS style the WordPress way, using the wp_enqueue_style() native WP hook as follows:
add_action( 'wp_enqueue_scripts', 'njengah_enqueue_css' );

function njengah_enqueue_css(){

wp_enqueue_style(  'checkout_style',

get_stylesheet_directory_uri() . '/checkout-style.css'

);

}
This solution allows you to have all your custom CSS in a separate file (checkout-style.css in this example), which will be stored in your child theme folder at the same level as the main style.css file. I recommend that you play around to add or edit any other aspects of your checkout.
Conclusion
Editing the checkout page can make a great difference and help you take your WooCommerce store to the next level. Even the small changes can make a big difference, as you will increase conversion rates and boost sales. Remember to update the functions.php file so that your changes are saved.
If you don’t have coding skills but want an easy yet reliable solution, using a checkout customizer plugin is your best choice. Alternatively, if you are comfortable with editing code, you can do it programmatically.
Similar Articles
- How to Move Primary Menu Storefront WooCommerce
- How to Refresh Checkout Page WooCommerce
- How to Remove Bullets from Unordered List in WordPress
- WooCommerce Storefront CSS Complete Customization Guide
- How to Hide Company Name Field WooCommerce Checkout Page
- How to Move WooCommerce Coupon Field Checkout Page
- How to Add Checkout WooCommerce Geolocation Feature
- How to Setup WooCommerce Storefront Blog
- How to Add WooCommerce Custom Checkout Message
- How to Remove Country Field From Checkout WooCommerce
- How to Create Checkbox Field in WooCommerce Checkout Page
- How to Add Checkout Phone Number Validation WooCommerce
- How to Add Date Field to Checkout In WooCommerce
- How to Temporarily Disable Checkout In WooCommerce
- How to Hide WooCommerce Marketing Hub Admin Option
- How to Hide Quantity In Stock In WooCommerce
- How to Add WooCommerce VAT Number Checkout Page
- How to Remove Footer Storefront Theme WooCommerce
- How to Edit WooCommerce Checkout Page Template