 With more than 200,000 active installations, the Storefront theme seamlessly integrates with WooCommerce. WooCommerce has proven itself to be a great tool to set up an eCommerce store with minimum investment. Moreover, they both provide great flexibility for store owners to modify the store’s look and functionality at will.
WooCommerce Storefront Theme Customization Using Customizer
The Storefront theme has excellent options to enhance your store visually. If you are a WordPress developer, there is no limit to the customization of your online store.
However, this is not the case for the not so tech-savvy. If that is the case, you can use the WooCommerce Customizer. It is part of WordPress > Customize and makes it possible to select options that apply site-wide for Store Notice, Product Catalog, and Product Images without touching any code.
How to find the WooCommerce Customizer
From the WordPress menu dashboard, go to Appearance > Customize. This will open the Customize menu. Select WooCommerce.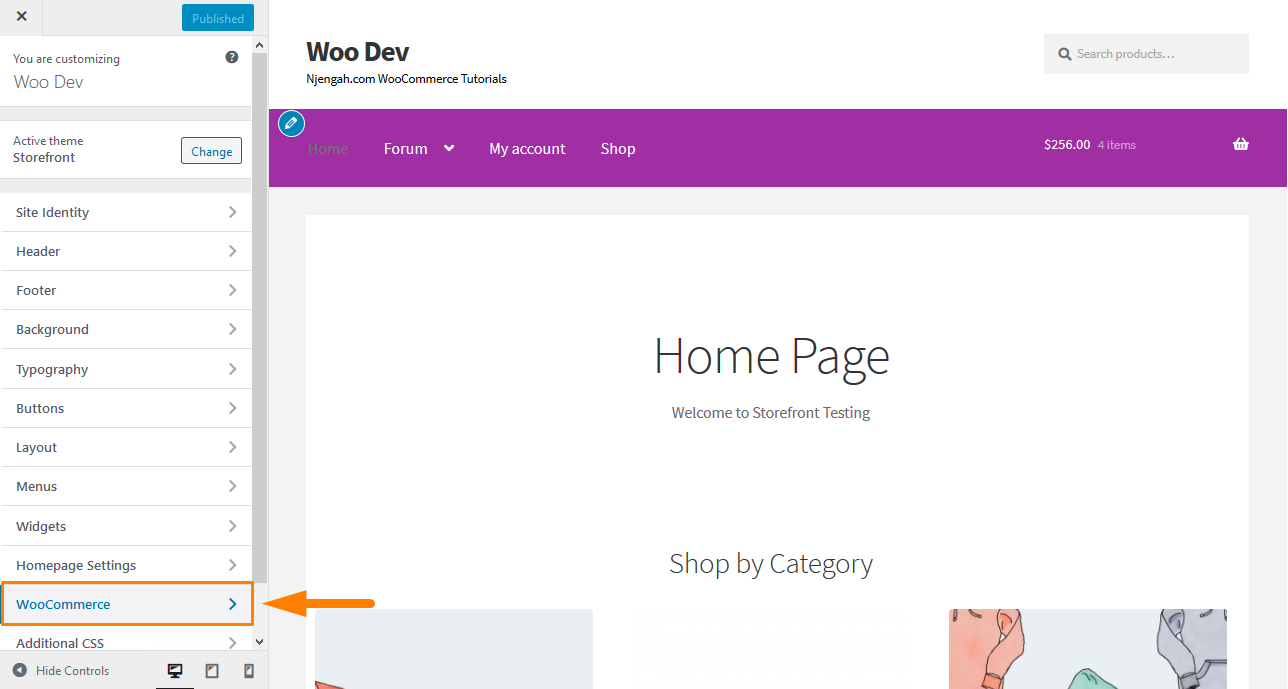
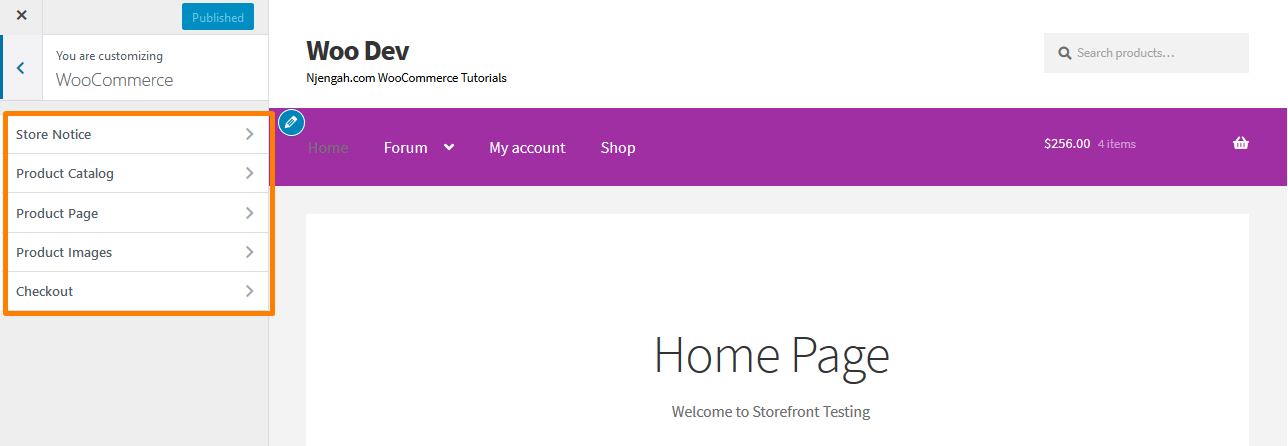
In this section, there are five options:
- Store Notice
- Product Catalog
- Product Page
- Product Images
- Checkout
Store Notice
This section allows you to enter a site-wide message shown to everyone visiting your store. This message can be informational or promotional. An example of an informative notice is a note telling customers of shipping delays due to weather conditions. An example of a promotional notice is a note advertising an event, a bundle, a sale, or free shipping.
However, you need to ensure that you enable the store notice, as shown in the picture. If you untick the box for Enable store notice, it will stop displaying to visitors.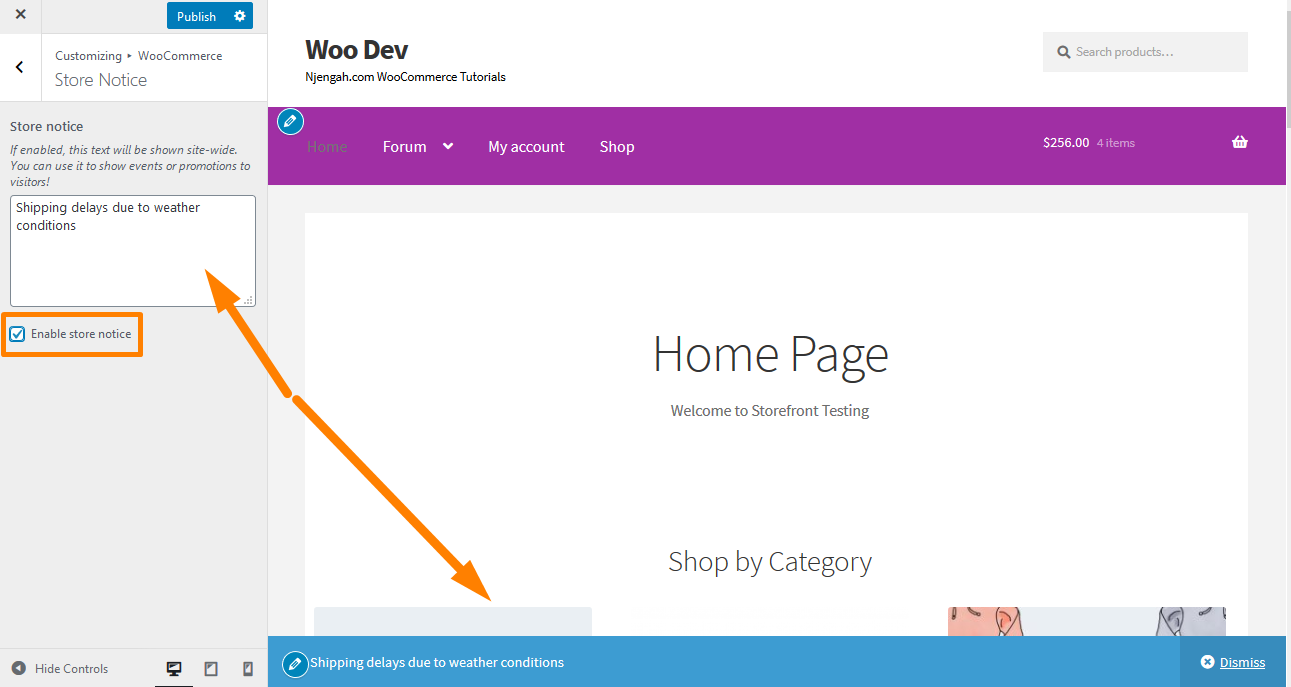
If you are satisfied with the changes, click on Publish.
Additionally, you can schedule a store notice using the Schedule option. This option helps run promotions for a limited time or end a discount at midnight on a specific date.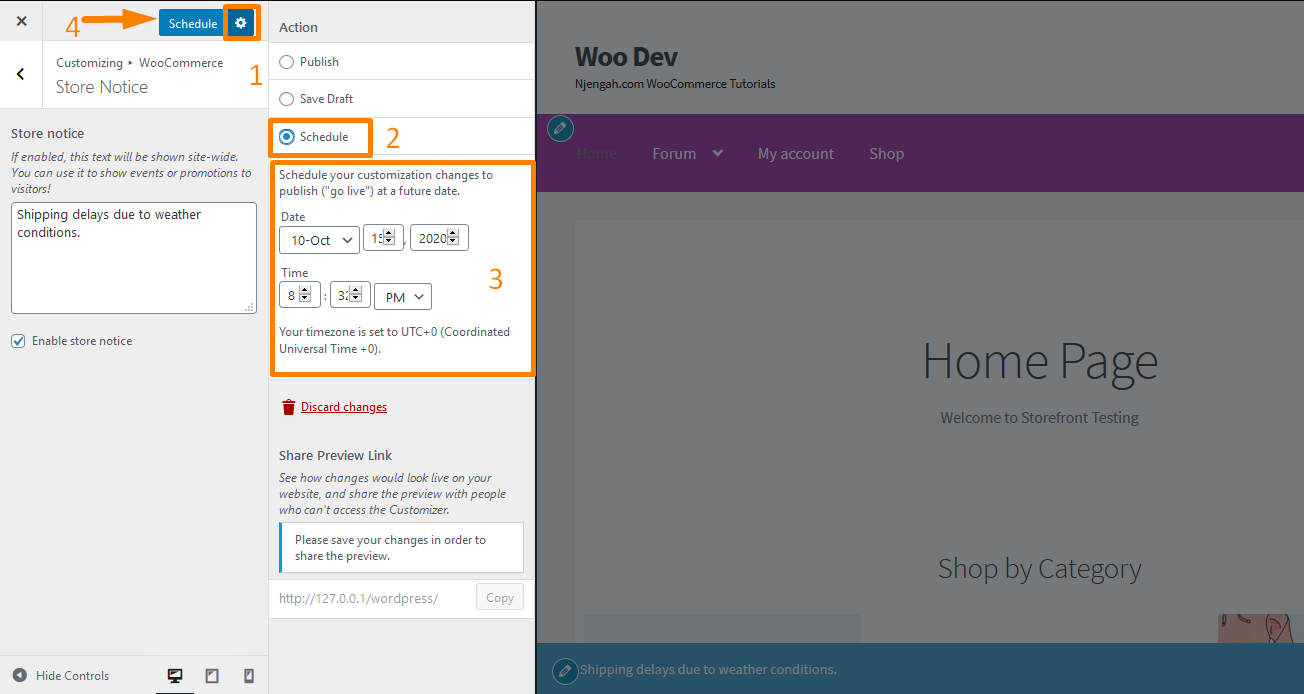
However, it is important to note that removing the notice does not automatically stop the promotion from running. This means that you have to disable sale discounts, coupon codes, or limited time offers.
Product Catalog
This section allows you to choose:
- What to display on the Shop page
- What to display on Category pages
- How to sort products in a Category
- How many products to show in a single row
- How many rows of products to display on a page
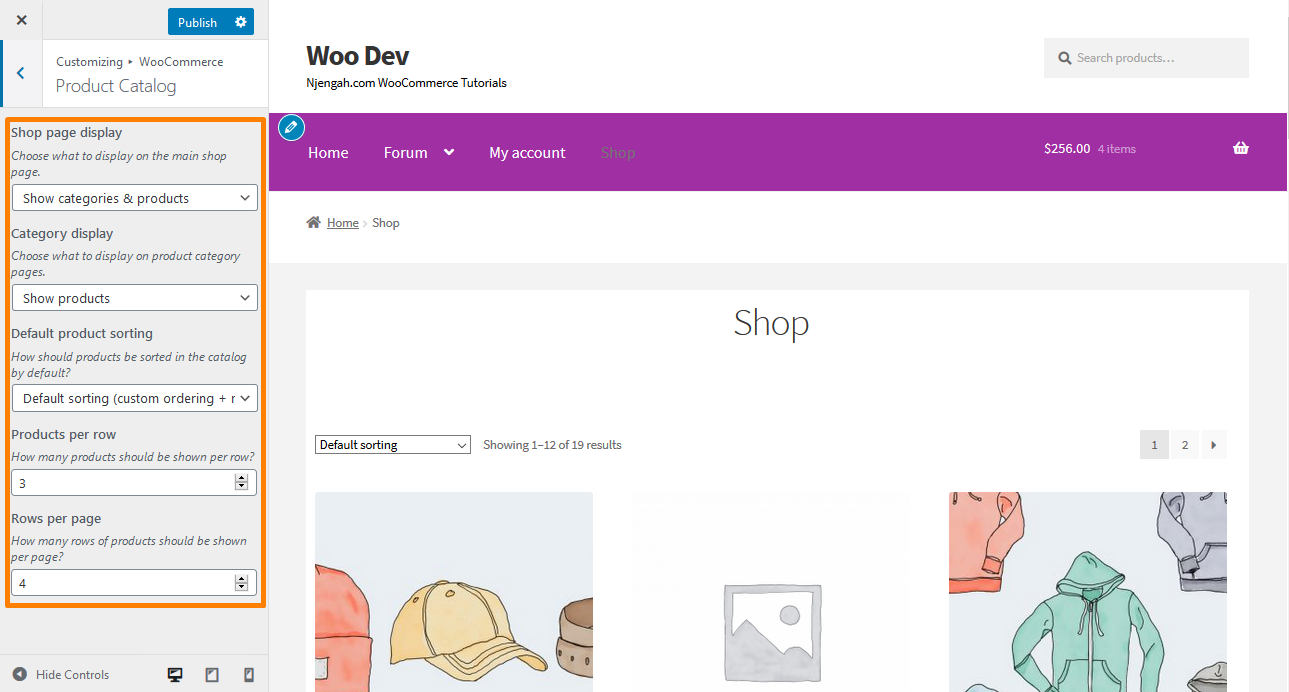
The Shop page display option allows you to display Products, Categories, or both. However, I highly recommend that you select one for a clean look.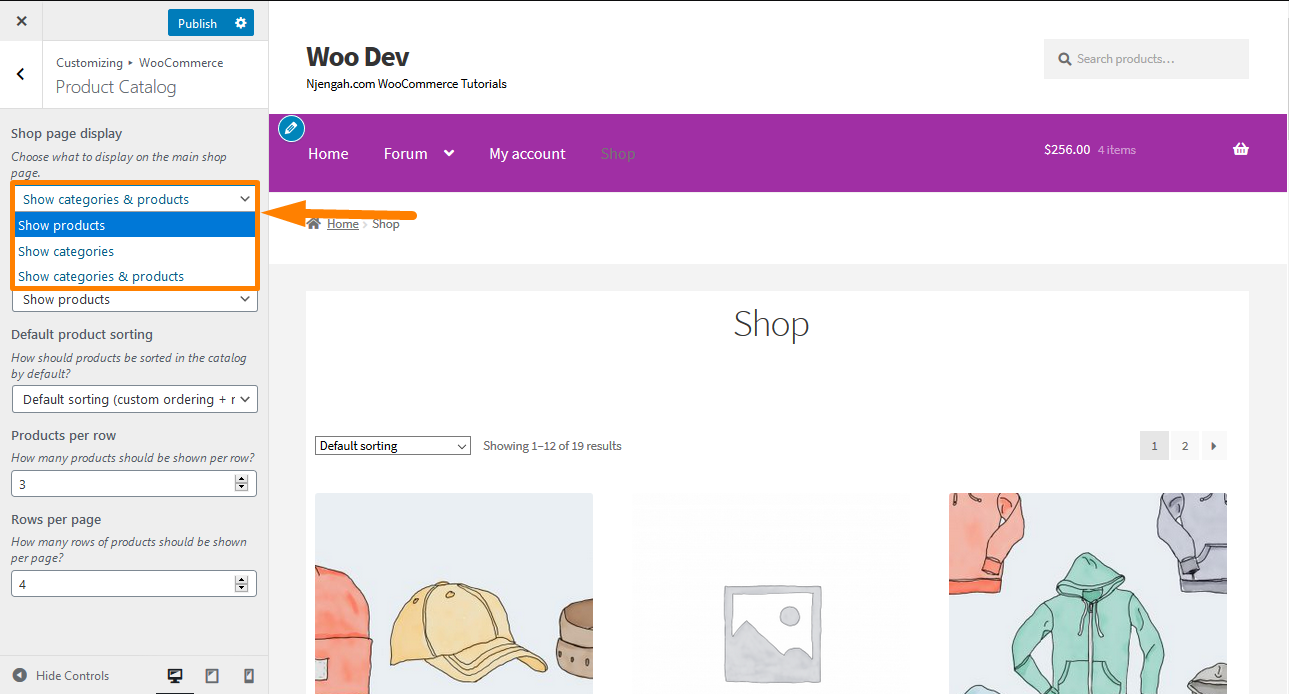
The Category display option can display Products or Subcategories within a Category, or both. Selecting one is recommended.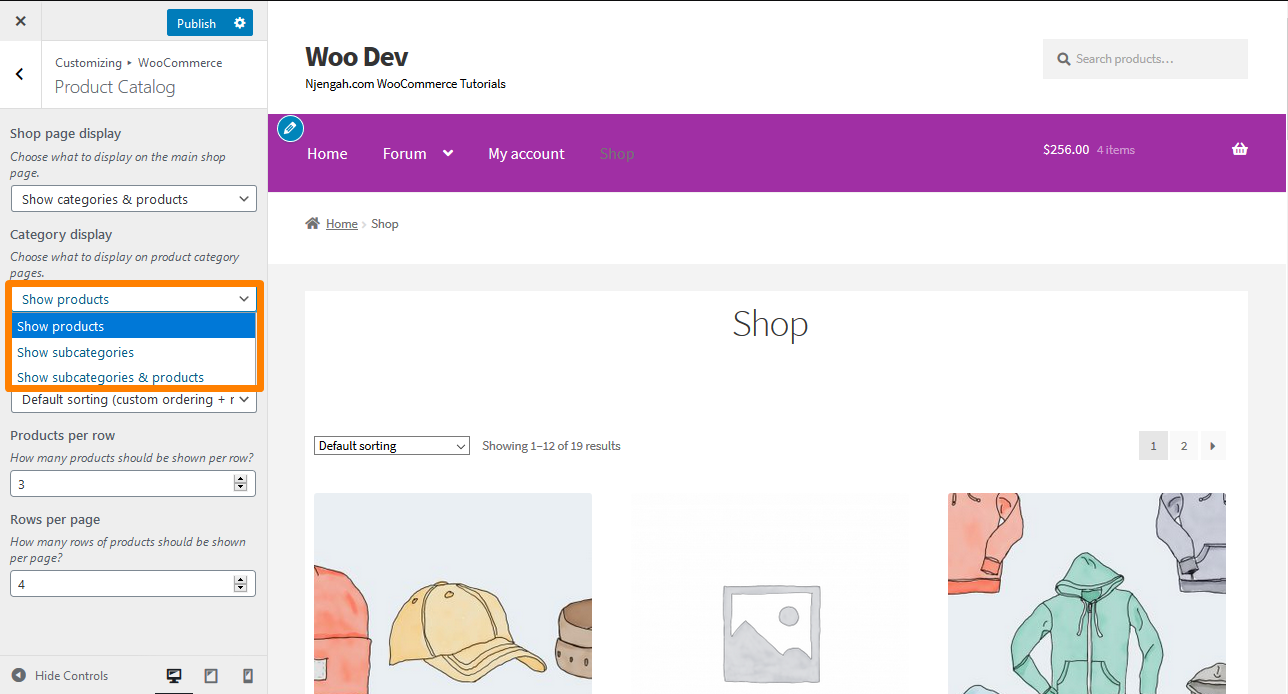
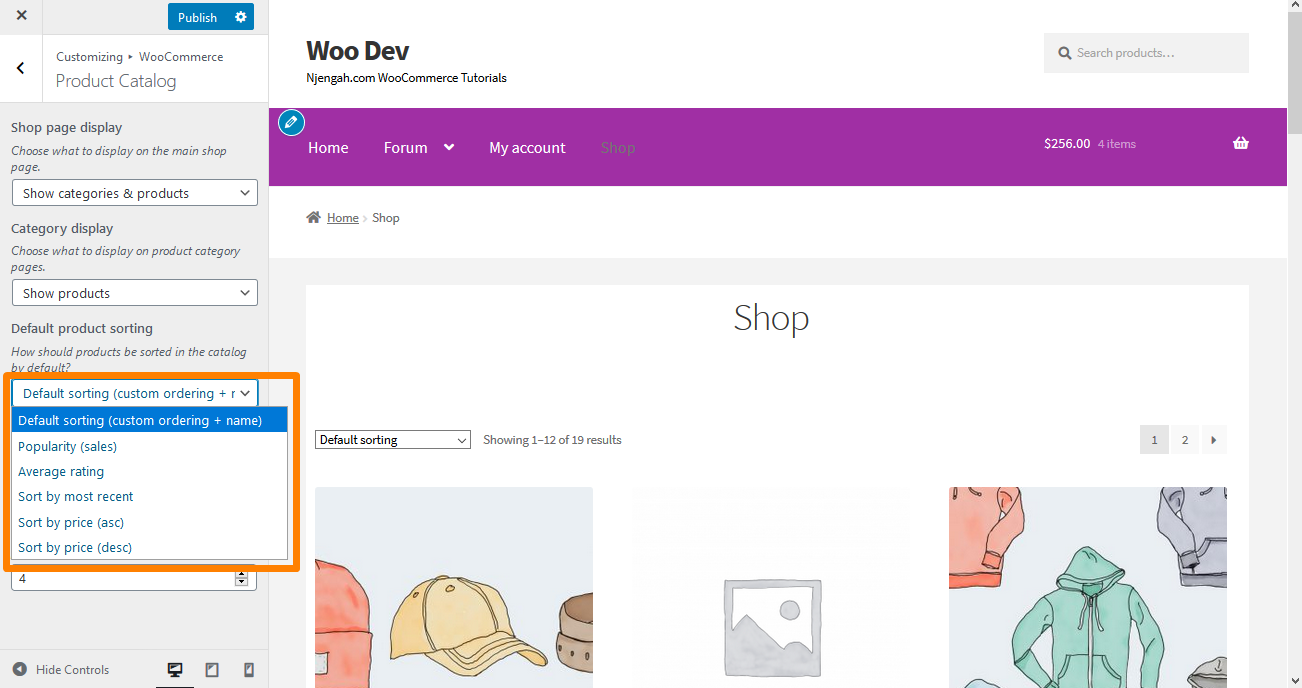
The Default product sorting option allows you to have control over which products are displayed. It influences how products are viewed by default on Shop and Category pages.
- Default sorting (custom ordering + name) – display products alphabetically by name.
- Sort by Popularity (sales) – display products according to amounts sold.
- Sort by Average rating – display products based on average review ratings.
- Sort by most recent – display products in the order they were added to the store.
- Sort by price (asc or desc) – sort product by the price either lowest to highest (asc) or highest to lowest (desc).
The Product per row option allows you to choose the number of items that appear in a single row on the Shop and Category pages. On the other hand, the Rows per page option allows you to choose the number of rows that appear on Shop and Category pages. However, it would be best to be sensitive to the size of product images and the space left on a computer/laptop, tablet, or mobile device.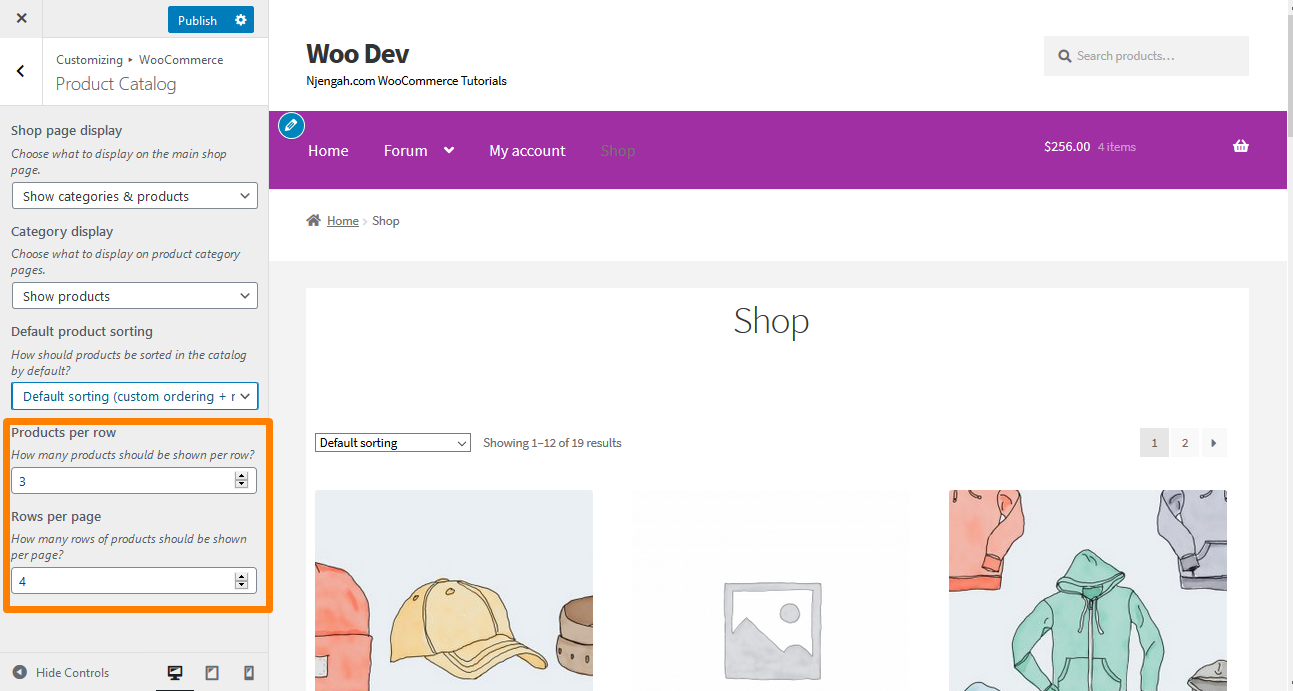
Product Page
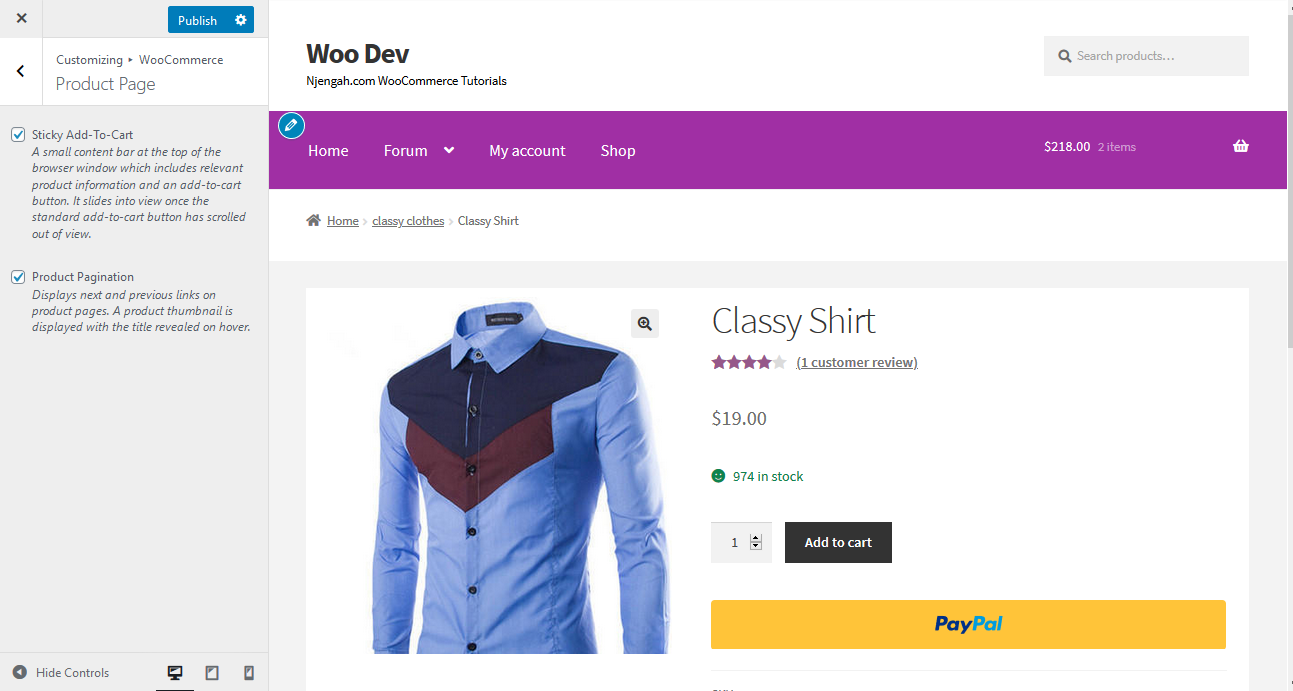 This section has two features:
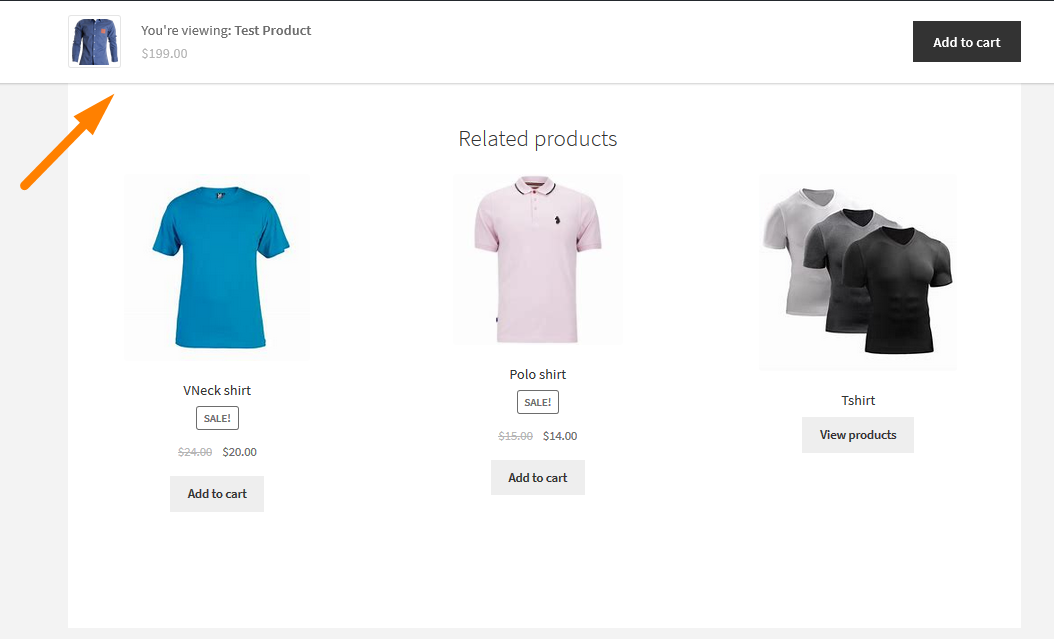
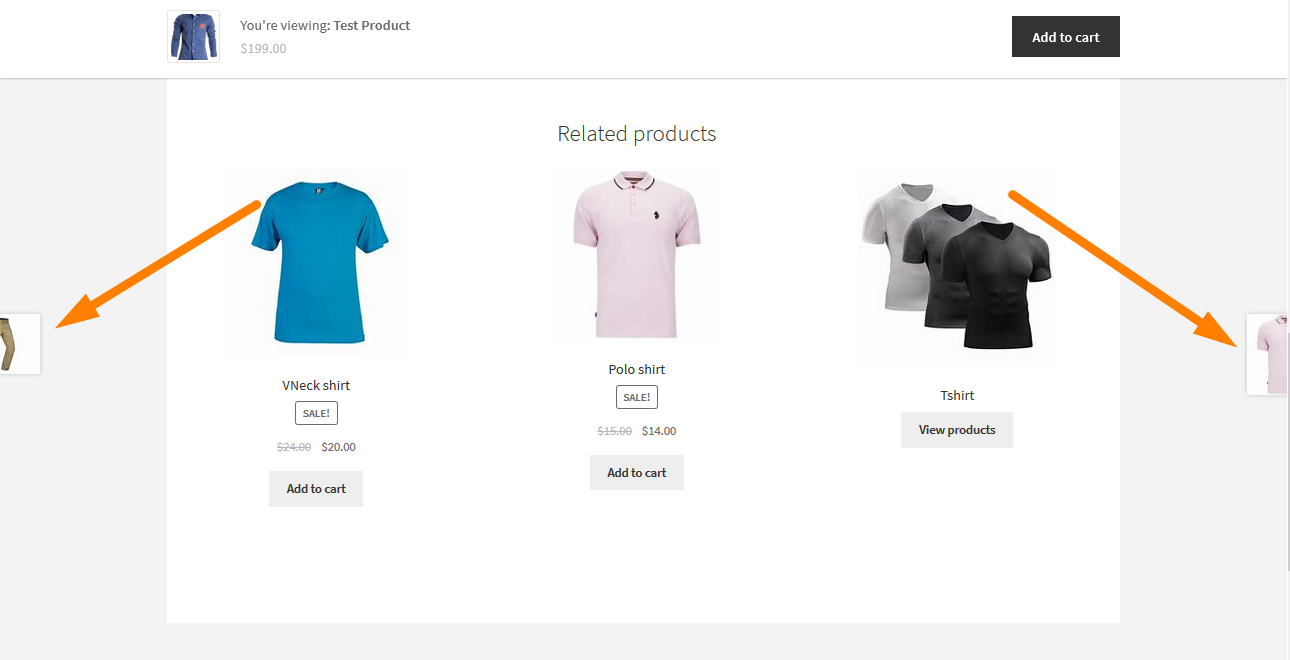
- Sticky Add-to-Cart – It is a content bar at the top of the browser window. This bar includes relevant product information and an add-to-cart button.
- Product Pagination – It displays the next and previous links on product pages.
Product Images
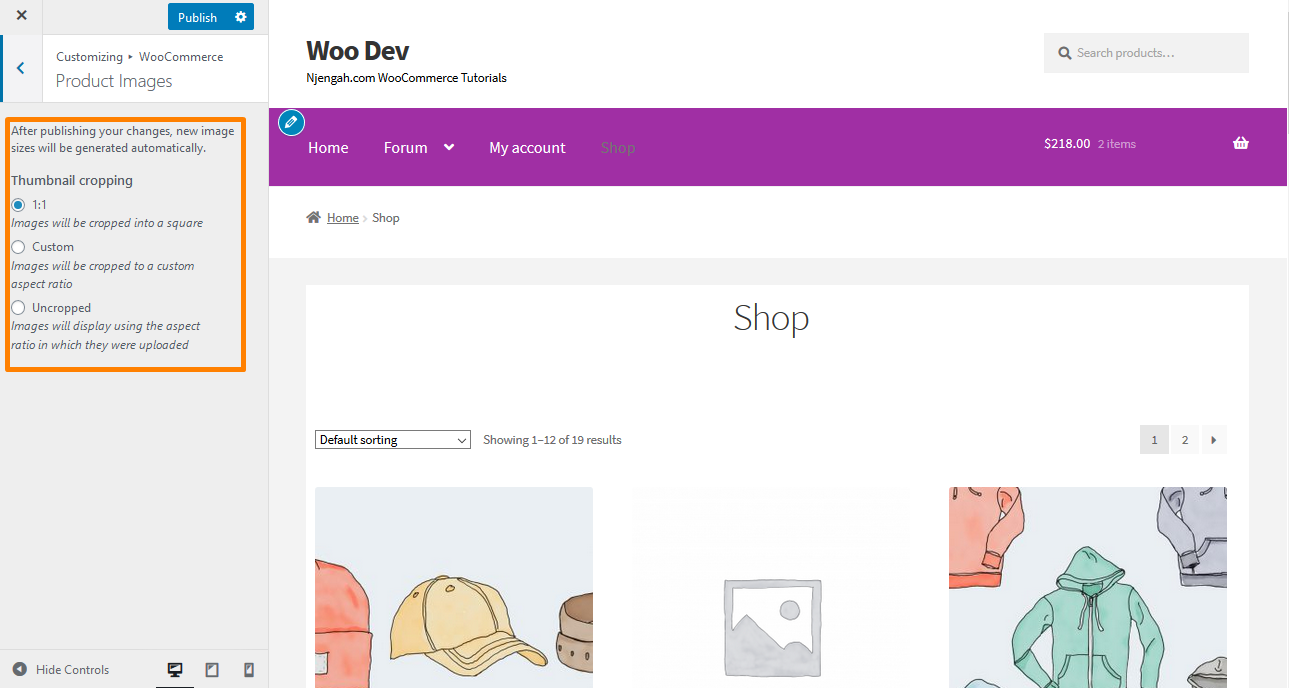 This section allows you to select how Catalog and Thumbnail images are sized and cropped. Additionally, you can resize the Catalog and Thumbnail images site-wide on your store when a published change is made.
The image types supported by this option are:
- Catalog images
- Thumbnail images
- Single product images
Checkout
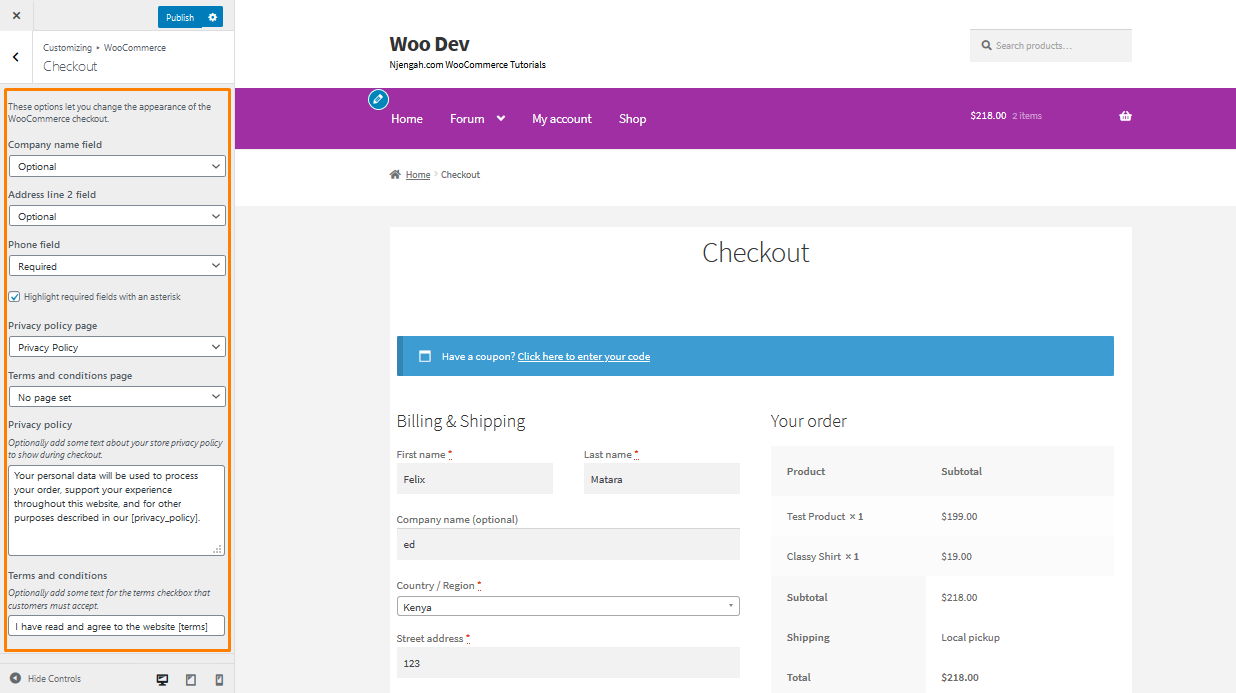 This section allows you to set whether certain fields are required or optional depending on the data you wish to collect. Moreover, you can choose to highlight the required fields with an asterisk, which is the default.
Additionally, I highly recommend that you create Privacy Policy and Terms and Conditions pages. The “privacy policy” link opens the page in a new window, while the “terms and conditions” link opens a box on the page showing the contents of the terms and conditions page.
Conclusion
In this post, I have highlighted the options found in the WooCommerce Customizer. If you are a WordPress beginner, you will not have a hard time viewing the changes you make in real-time. However, it would be best if you remembered that your design matters. Additionally, it will influence the user experience on your WooCommerce store.
Similar Articles
- WooCommerce Storefront Show all Categories on Homepage
- How to Display Category Name in WordPress Using a Practical Example
- How Add Text Before the Price in WooCommerce » Add Text Before Price
- How to Resize WooCommerce Product Images
- How to Hide Add to Cart Button in WooCommerce
- How to Add Text after Price in WooCommerce » Add Price Suffix
- WooCommerce Storefront Theme Homepage Customization [Ultimate Guide]
- How to Create My Account Page In WooCommerce
- How to Display All Products Purchased by User – Purchase History
- How to Set WooCommerce Storefront Thumbnail Sizes
- WooCommerce Storefront Theme Review
- How to Hide Out of Stock Variations in WooCommerce
- How to Adjust WooCommerce Storefront Height of Header
- How to Add Product After Storefront Setup [Beginner Guide]
- How to Change Products per Page WooCommerce Storefront Theme
- What is WooCommerce Storefront Theme ? [Answered]
- How to Hide Best Sellers WooCommerce Storefront Frontpage
- How to Add Woocommerce Custom Text Field on Product Page