 Do you want to redirect customers to a custom thank you page? When customers complete their orders in WooCommerce, they are redirected to the Order Received page. This page has an incredibly important role to play. In this post, I show you how to set up WooCommerce redirect after checkout, step by step and customize the order received page.
However, the page doesn’t really deliver. You may want to redirect them to a custom Thank You page.
Customizing the thank you page creates a unique shopping experience for your customers. This is why it is important to have a beautifully designed thank you page that is customized for your specific product.
It also goes a long way to making your store unique when compared to your competitors. You can also include after-sale service and manage support details on this page.
This is essential if you want your online store to generate more sales and increase traffic!
By the end of this brief tutorial, you will be able to redirect customers to a custom page programmatically. We will also share some code snippets for creating a new thank you page and overwriting the existing page.
The main aim of this tutorial is to help developers understand how it is very easy to customize pages using code snippets or by overwriting WooCommerce templates.
What Do You Need to Redirect Users to a Custom Thank You Page?
Before you proceed, you should also create a child theme. This will ensure your changes are not lost during an update.
It is important to note that we will be using custom PHP code snippets in this tutorial. We have explained all the steps you need to follow, which will make the work easier for you.
This tutorial also assumes that you have a working WordPress installation, and WooCommerce is added on top of that.
Let us see how you can achieve this.
1. Redirecting Customers to a Custom Thank You Page
In this section, we will use a custom PHP code snippet to redirect users to a welcome page after they have completed their purchase.
Welcome pages are great ways to upsell a product, include referrals, or educate customers about your product. You can also include discounts or coupons on this page to entice new and loyal customers.
a) Steps to Redirect Customers After Checkout in WooCommerce
Here the steps you need to follow to redirect users to a custom page:
- Log into your WordPress site and access the Dashboard as the admin user.
- From the Dashboard menu, click on Appearance Menu > Theme Editor Menu. When the Theme Editor page is opened, look for the theme functions file where we will add the function that will redirect customers after checkout.
- Add the following code to the php file:
add_action( 'woocommerce_thankyou', 'njengah_redirectcustom');

function njengah_redirectcustom( $order_id ){

$order = wc_get_order( $order_id );

$url = 'https://yoursite.com/custom-url';

if ( ! $order->has_status( 'failed' ) ) {

wp_safe_redirect( $url );

exit;

}

}
- This is the outcome:
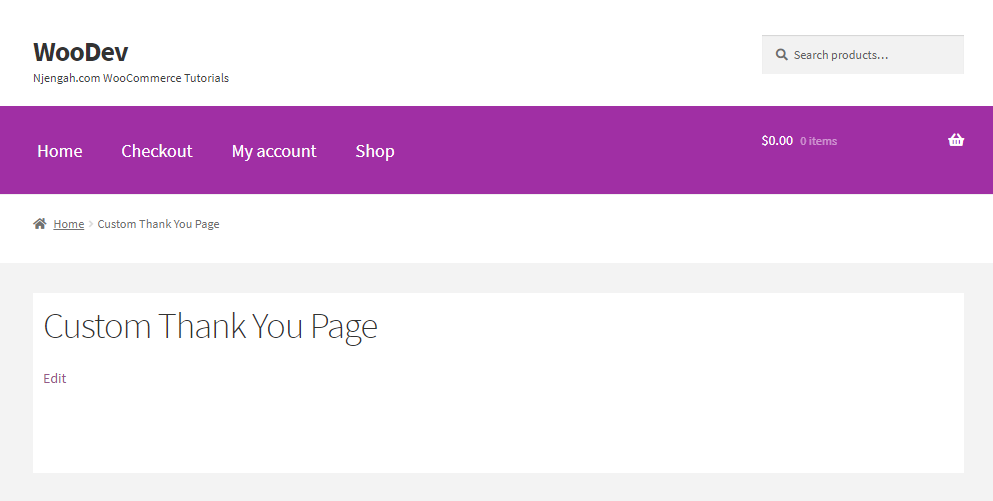
How the Code Works
The code snippet redirects the customer to a custom page after the user has completed a purchase.
It checks if the user has completed their purchase, and redirects them to the URL. Remember to replace the URL of the appropriate page for this code to work.
Your custom page should be beautifully designed to improve the user experience on your site.
b) Overwriting WooCommerce Templates to Set Up a WooCommerce Thank You Page
You can easily set up a custom thank you page by overwriting WooCommerce templates. You need to use the template redirect hook and a callback function with the redirect URL.
Here are the simple steps you need to follow:
- The first thing is to check if the user is on the checkout page, order page, or order received page before we create the custom redirect page. We will use the template_redirect() function. After that, add the template_redirect action hook as shown below:
- The next step is to create the callback function you referenced in the template redirect hook above. However, it is important to note that the name in the call-back function and the hook should match.
- To add the page where you want the user to be redirected after successful checkout, we need to use the wp_redirect() function in the callback function. We recommend adding an exit after the wp_redirect function. This will help to avoid redirect problems.
- To insert the code, click on Appearance Menu > Theme Editor Menu. When the Theme Editor page is opened, look for the theme functions file where we will add the function.
- Save the changes or update your theme functions.php or the plugin file.
That’s all you need to do. You have now successfully created the redirect to your preferred page after a user completes their purchase.
2. Customizing the WooCommerce Thank You Page with Filters
Instead of creating a custom thank you page, you can customize the existing page. To achieve this, we will be filter and action hooks.
Action hooks allow you to insert custom code at various points. Filter hooks on the other hand allow you to manipulate and return a variable, which it passes.
In this section, we will use filters to change the title, personalize the title, and change the text before order information.
We will also show you how you can collect additional information from your customers by creating a survey form. We will also show you how you can send and process an AJAX request for the form.
a) Changing the Thank You Page Title
WooCommerce provides the function is_order_received_page() in includes/wc-conditional-functions.php file. We will use this function to change the page title
Here are the steps you need to follow:
- Log into your WordPress site and access the Dashboard as the admin user.
- From the Dashboard menu, click on Appearance Menu > Theme Editor Menu. When the Theme Editor page is opened, look for the theme functions file where we will add the function that will change the title of the thank you page.
- Add the following code to the php file:
add_filter( 'woocommerce_endpoint_order-received_title', 'njengah_thank_you_title' );
function njengah_thank_you_title( $old_title ){
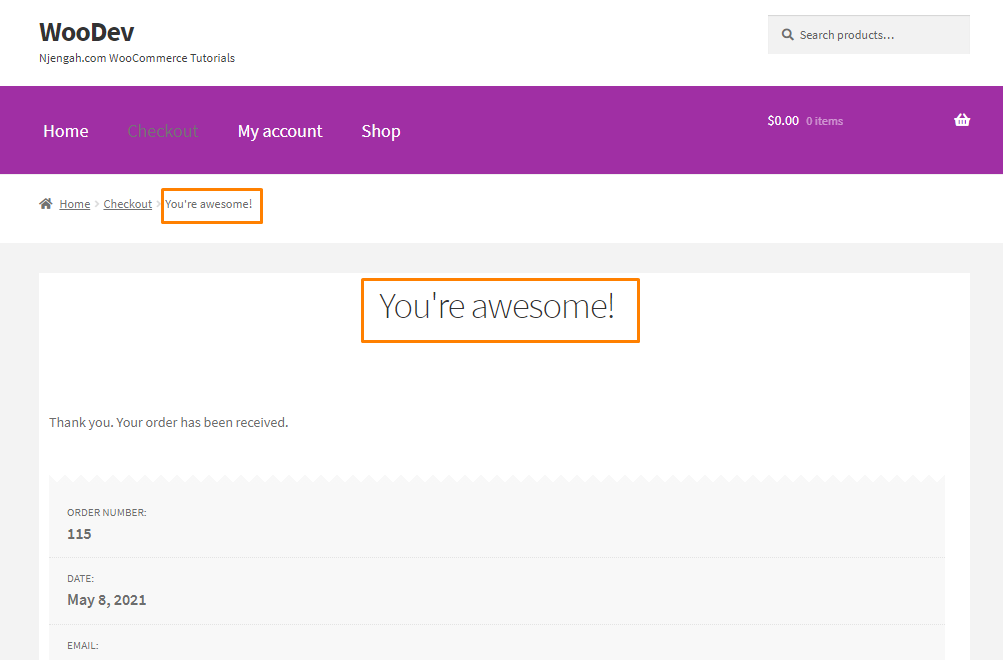
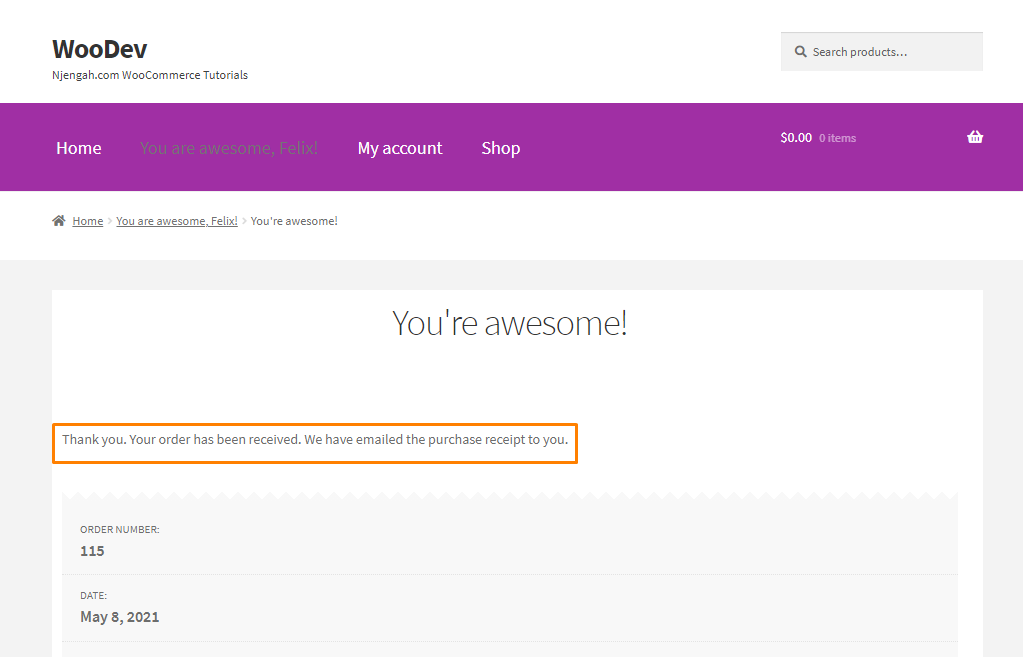
return 'You\'re awesome!';
}
- This is the outcome:
b) Personalize the Title
You can enhance the ‘Thank You’ page title. You can add details like the customer’s name or anything else.
To achieve this, here are the steps you need to follow:
- Log into your WordPress site and access the Dashboard as the admin user.
- From the Dashboard menu, click on Appearance Menu > Theme Editor Menu. When the Theme Editor page is opened, look for the theme functions file where we will add the function that will personalize the title of the thank you page.
- Add the following code to the php file:
add_filter( 'woocommerce_endpoint_order-received_title', 'njengah_personalize_order_received_title', 10, 2 );
function njengah_personalize_order_received_title( $title, $id ) {
if ( is_order_received_page() && get_the_ID() === $id ) {
global $wp;
// Get the order. Line 9 to 17 are present in order_received() in includes/shortcodes/class-wc-shortcode-checkout.php file
$order_id  = apply_filters( 'woocommerce_thankyou_order_id', absint( $wp->query_vars['order-received'] ) );
$order_key = apply_filters( 'woocommerce_thankyou_order_key', empty( $_GET['key'] ) ? '' : wc_clean( $_GET['key'] ) );
if ( $order_id > 0 ) {
$order = wc_get_order( $order_id );
if ( $order->get_order_key() != $order_key ) {
$order = false;
}
}
if ( isset ( $order ) ) {
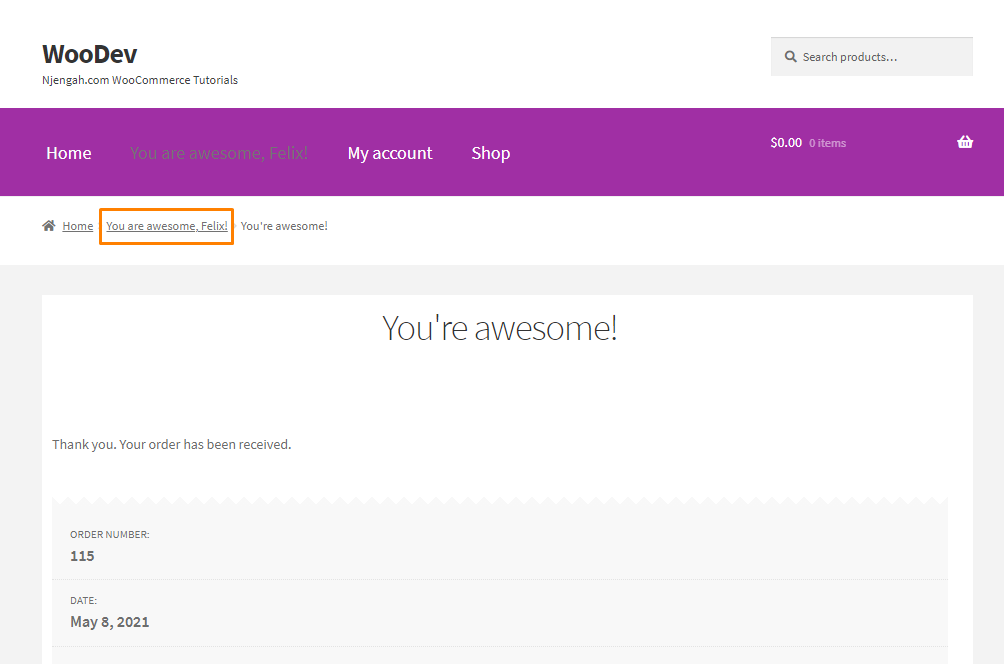
//$title = sprintf( "You are awesome, %s!", esc_html( $order->billing_first_name ) ); // use this for WooCommerce versions older then v2.7
$title = sprintf( "You are awesome, %s!", esc_html( $order->get_billing_first_name() ) );
}
}
return $title;
}
- This is the outcome:
c) Changing the Text Before Order Information
By default, the text before the order information is the “Thank you. Your order has been received.” text is displayed on the thank you page. It comes from the file templates/checkout/thankyou.php.
There are filters available in WooCommerce that allow you to change this text: woocommerce_thankyou_order_received_text.
To change it, here are the steps you need to follow:
- Log into your WordPress site and access the Dashboard as the admin user.
- From the Dashboard menu, click on Appearance Menu > Theme Editor Menu. When the Theme Editor page is opened, look for the theme functions file where we will add the function that will personalize the title of the thank you page.
- Add the following code to the php file:
add_filter('woocommerce_thankyou_order_received_text', 'njengah_change_order_received_text', 10, 2 );

function njengah_change_order_received_text( $str, $order ) {

$new_str = $str . ' We have emailed the purchase receipt to you.';

return $new_str;

}
- Remember that you can add your own text here. This is the outcome:
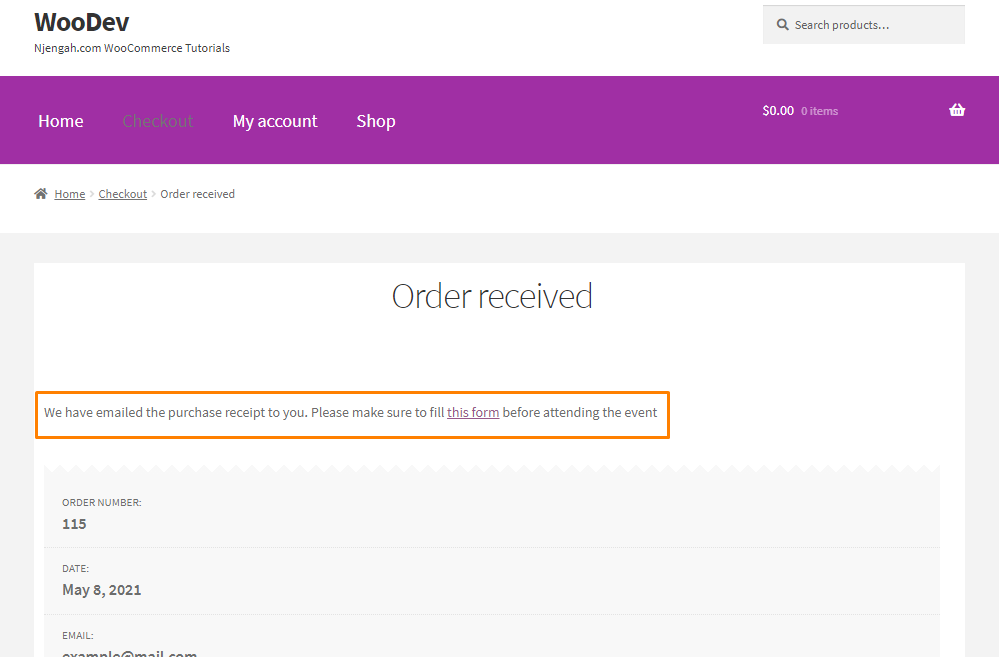
- Alternatively, if you want the customer to download a form, this is when the instructions can be added. You can provide them with a custom link where they can download their product. To do achieve this, add the following code in the functions.php file:
add_filter('woocommerce_thankyou_order_received_text', 'njengah_change_order_received_text', 10, 2 );

function njengah_change_order_received_text( $str, $order ) {

$new_str = 'We have emailed the purchase receipt to you. Please make sure to fill <a href="http://example.com/some-form.pdf">this form</a> before attending the event';

return $new_str;

}
- This is the outcome:
3. Collect Additional Details
It is possible to collect additional information from the user. For example, you can ask them to rate your user experience.
If you want to achieve this, you need to create a form. You also need to send and process an AJAX request for it to be registered in the back end.
Let us have a look at the steps you need to follow:
- Log into your WordPress site and access the Dashboard as the admin user.
- From the Dashboard menu, click on Appearance Menu > Theme Editor Menu. When the Theme Editor page is opened, look for the theme functions file/
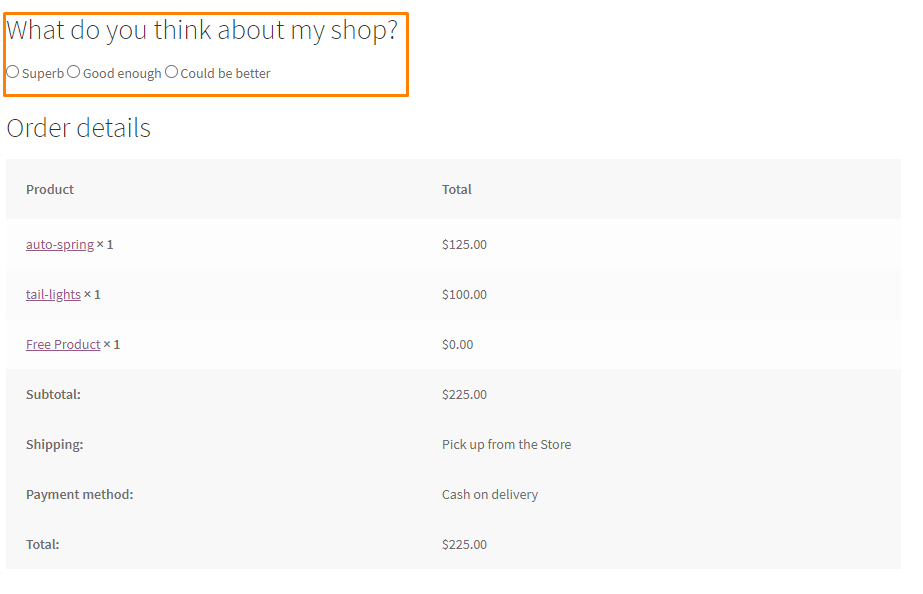
3. First of all, we have to add a form. If you want it to appear just after the title, you need to use the woocommerce_thankyou_order_received_text hook.
- Add the following code snippet to add a survey form:
add_action( 'woocommerce_thankyou', 'njengah_poll_form', 4 );
function njengah_poll_form( $order_id ) {
echo '<h2>What do you think about my shop?</h2>;
<form id="thankyou_form">
<label><input type="radio" name="like" value="superb"> Superb</label>
<label><input type="radio" name="like" value="good enough"> Good enough</label>
<label><input type="radio" name="like" value="could be better"> Could be better</label>;
<input type="hidden" name="action" value="collect_feedback" />
<input type="hidden" name="order_id" value="' . $order_id . '" />
' . wp_nonce_field( 'thankyou'.$order_id, 'thankyou_nonce', true, false ) . '
</form>';
}
- The next step is to send the AJAX request. To do this, add the following code to the same file:
add_action( 'wp_footer', 'njengah_send_thankyou_ajax' );

function njengah_send_thankyou_ajax(){

// exit if we are not on the Thank You page

if( !is_wc_endpoint_url( 'order-received' ) ) return;

echo "<script>

jQuery( function( $ ) {

$('input[type=radio][name=like]').change(function() {

$.ajax({

url: '" . admin_url('admin-ajax.php') . "',

type: 'POST',

data: $('#thankyou_form').serialize(),

beforeSend : function( xhr ){

$('#thankyou_form').html('Thank you! You feedback has been send!');

},

success : function( data ){

console.log( data );

}

});

});

});

</script>";

}
- This is the outcome:
- After that, we need to process the AJAX request by adding the following code to the same file:
add_action( 'wp_ajax_collect_feedback', 'njengah_thankyou_ajax' ); // wp_ajax_{ACTION}
add_action( 'wp_ajax_nopriv_collect_feedback', 'njengah_thankyou_ajax' );
function njengah_thankyou_ajax(){
// security check
check_ajax_referer( 'thankyou'.$_POST['order_id'], 'thankyou_nonce' );
if( $order = wc_get_order( $_POST['order_id'] ) ) {
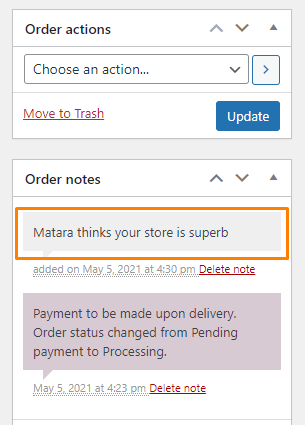
$note = $order->get_formatted_billing_full_name() . ' thinks that the shop is ' . $_POST['like'] . '.';
$order->add_order_note( $note, 0, true );
}
die();
}
- This is the outcome in the back end:
Conclusion
By now, you should be able to redirect customers to a custom page after checkout. We have also shared how you can overwrite the template to add different elements on the thank you page.
You need to be very creative when editing this page to strengthen your retention rate.
However, you should always be careful when editing the functions.php file. If you make a mistake, an error will be displayed.
You can also use a page builder plugin to customize your thank you page. You should keep it relevant, perhaps including a video of the store owner recommending a product.
This will engage your customers and they will be motivated to purchase more products from your store.
We hope that this tutorial helped to solve your problem.

Joe is an experienced full-stack web developer with a decade of industry experience in the LAMP & MERN stacks, WordPress, WooCommerce, and JavaScript – (diverse portfolio). He has a passion for creating elegant and user-friendly solutions and thrives in collaborative environments. In his spare time, he enjoys exploring new tech trends, tinkering with new tools, and contributing to open-source projects. You can hire me here for your next project.
Similar Articles
- WooCommerce Redirect After Checkout: Redirect to Custom Thank You Page
- 100+ Tips, Tricks & Snippets Ultimate WooCommerce Hide Guide
- How to Add Product Image WooCommerce Checkout Page
- WooCommerce Image Placeholder Guide
- How to Hide the Weight of Product in WooCommerce
- How to Hide Tags In Storefront Theme WooCommerce
- How to Change Coupon Code Placeholder WooCommerce
- How to Remove, Rename and Add Storefront Sorting Options
- How to Hide Product SKU In WooCommerce
- How to Hide Category From Shop Page WooCommerce
- How to Hide Price If Zero In WooCommerce
- How to Hide Trailing Zeros WooCommerce
- How to Hide & Rename Addresses Tab My Account Page WooCommerce
- How to Hide WooCommerce Product Count
- How to Add WooCommerce Custom Checkout Message
- How to Export Products In WooCommerce
- How to Set Up WooCommerce Maximum or Minimum Order Quantity
- How to Hide SKU, Category, Tags Meta Product Page WooCommerce
- How to Select All Except Last Child In CSS » CSS Not Last Child Example
- How to Customize Storefront Checkout Page