 In most eCommerce sites, the most popular methods of payment are PayPal and Stripe. People trust these payment gateways. In the past, PayPal used to be one of the only easy solutions for eCommerce sites, but that is no longer the case. There are many gateways available that you can include on your site like Square, but Stripe provides lower transaction fees. What stood out for me about Stripe is that it is very popular in the developer community for its flexible API.
WooCommerce Stripe Integration
In this brief tutorial, you are going to learn about the basics of Stripe, and most importantly, you will learn how to integrate this powerful payment gateway into your WooCommerce store.
A side note for WooCommerce beginners is that Stripe can be a great affordable solution that you can implement on your store to accept online payments.
What is Stripe?
Stripe is one of the fastest-growing payment gateways that can handle recurring payments. The unique feature that stands out about this payment gateway is that you can be able to process refunds automatically.
Many people trust this plugin as it is used by big-name brands all over the world like Facebook, Shopify, and IndieGoGo just to name a few. If you are a developer, you have interacted with this payment gateway in most web hosting websites.
Two brothers, John and Patrick Collison, founded this payment gateway method back in 2010. However, it was launched to the public in 2011 and has received funding from many organizations. It has even be recognized by Forbes, where it was ranks position 4 in the Forbes Cloud 100 list way back in 2016.
What stands out about this payment method is the simplicity along with its popular Stripe API is what has set them apart from competitors. Additionally, it has a fee structure that is very easy to understand as it has a flat rate of 2.9% + 30¢ for businesses doing under $1 million a year. Moreover, Stripe allows you to charge credit cards from your site for free without any extra payments. The PayPal payment gateway charges you $30/month plus their transaction fees. This would be a great payment gateway option, which you need to include in your WooCommerce store.
Additionally, Stripe does not have any fees for refunds or authorizing cards. PayPal charges fees for refunds or authorizing cards, but it gets cheaper with a larger volume of transactions. Stripe reduces the number of fraudulent transactions, powered by a machine learning product called Radar.
Now that you have known all the basics of Stripe, it is important to note that SSL is required on your Stripe checkout pages to communicate payment data securely. There are many web hosts, which offer free SSL certificates. It is also worth mentioning that Google flags sites that are insecure so you need this. Moreover, you need to sign up for a free Stripe account.
Steps to Integrate Stripe With WooCommerce
WooCommerce powers many online stores all over the World. This brief learning post assumes that you already have WooCommerce up and running. There are many tutorials on how to install it in your WordPress Site.
For this tutorial, we will be using the free WooCommerce Stripe Payment Gateway plugin.

I chose this plugin because it has many positive reviews and has more than 700,000 active installations, with a 4.7 out of 5-star rating in the WordPress Community. It has a quality code that has been tested and is updated frequently to remove any bugs. Moreover, it is actively developed by the people who are active supporters of the WooCommerce ecosystem.
Additionally, it can be downloaded here using this link https://downloads.wordpress.org/plugin/woocommerce-gateway-stripe.4.5.0.zip. It is available at www.wordpress.org. To add this functionality, just follow these simple steps:
- Log into your WordPress site and access the Dashboard as the admin user.
- Then, we are going to install the plugin that we have indicated earlier. If you have downloaded it using the link above, simply navigate to Plugins > Add New. After that, click on Upload Plugin and then Browse for the downloaded file as shown below:

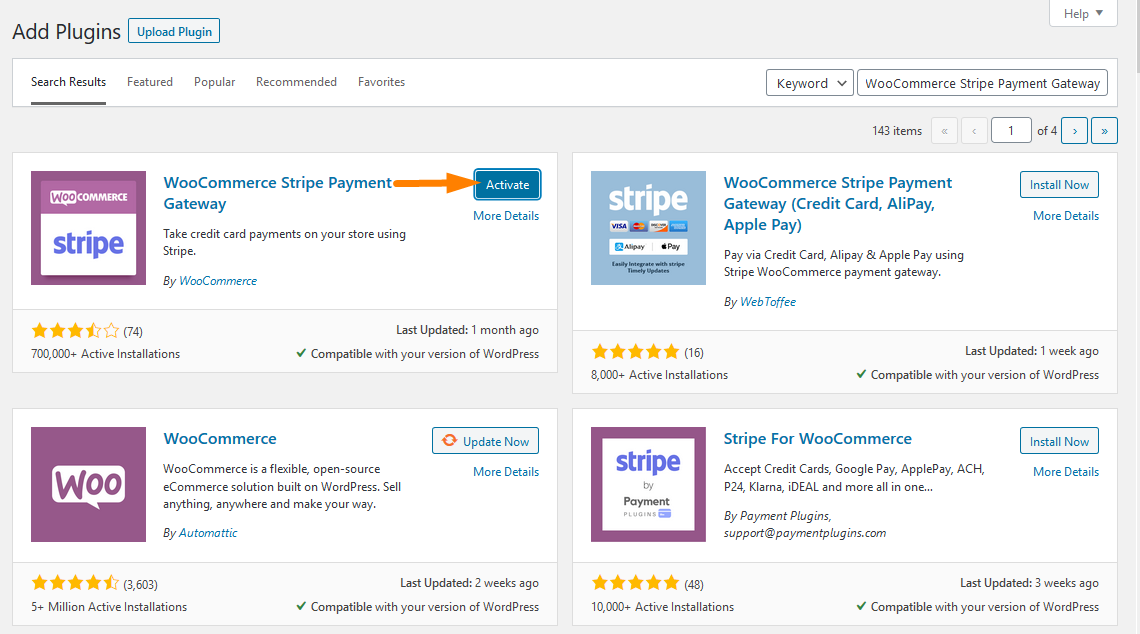
- To download it directly in the Admin Panel, simply navigate to Plugins > Add New. After that, you will need to do a keyword search for the plugin ‘WooCommerce Stripe Payment Gateway plugin’. You need to install and activate it as shown below:
- After activating the plugin, navigate to the Dashboard and click on WooCommerce > Settings and click on the Payment Tab and enable the as shown below:
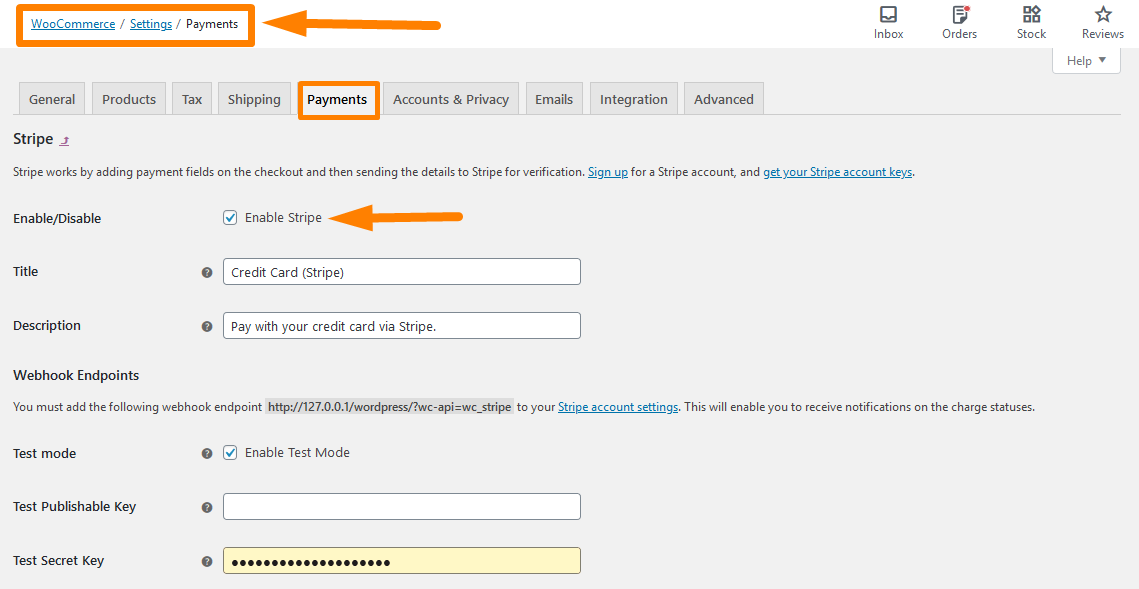
- After you enable Stripe, input your Stripe API keys, which you can grab from your Stripe account dashboard. Additionally, you can choose whether to enable Stripe Checkout that shows a pay button and modal credit card form on checkout instead of the classic credit card fields and remember to save the changes.
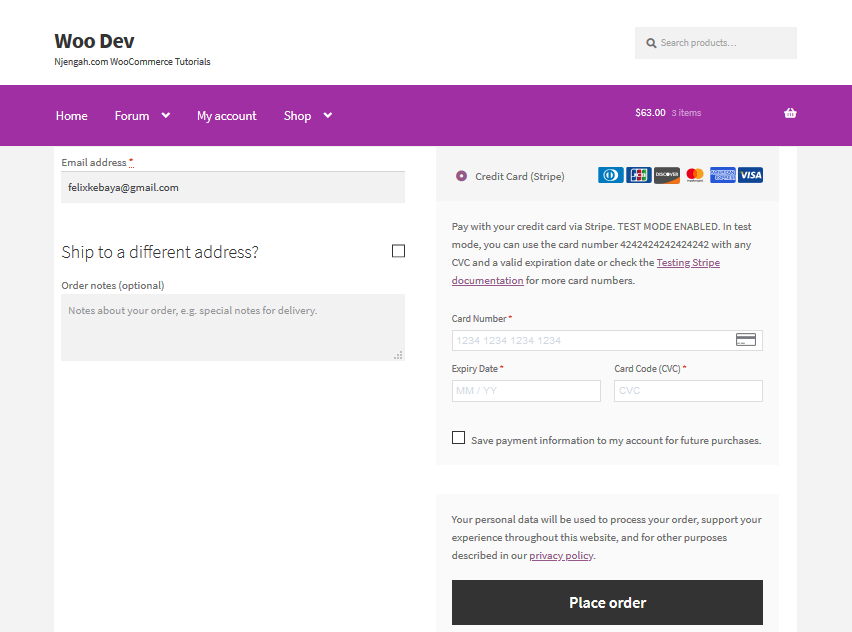
- Then head over to the checkout page to check the outcome as shown below:
Conclusion
It is just as simple as that. The checkout pages should now be able to accept credit cards with Stripe. In this short tutorial, you have learned how to integrate Stripe with WooCommerce using the free WooCommerce Stripe Payment Gateway plugin. However, for this to work you need to create a Stripe account to get the activation keys. Additionally, you need to have SSL for secure payments.
Similar Articles
- How to Remove Default Product Sorting WooCommerce
- How to Add GTIN Numbers On Products In WooCommerce
- How to Change Add to Cart Button Text In WooCommerce Shop Page
- How to Change PayPal Icon On WooCommerce Checkout Page
- How to Add Custom WooCommerce Payment Icons Checkout Page
- How to Change WooCommerce Payment Gateway Icons
Comments are closed.