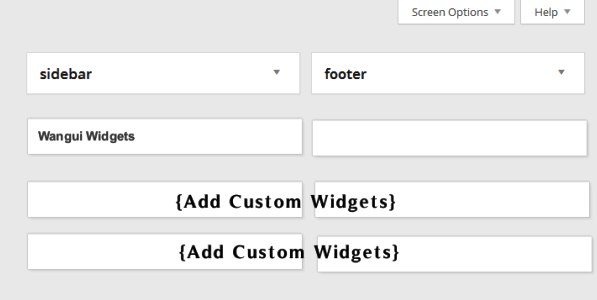
 When customizing WordPress themes or creating custom WordPress themes from scratch, you will find the use of custom widget is useful for enhancing your WordPress theme functions. If a client asks you to add a new area in their WordPress site header, adding a widget on the header may be one to achieve this and help your client get better control of what to display on the header. Previously clients have come to me asking me for customization to existing WordPress sites.
In most cases adding custom widget areas in the theme makes it easier for the user to drag and drop their widget of choice, it also makes the website more robust and of course user-friendly to your users. In this tutorial, I will show to add a custom widget area in your theme anywhere in three simple steps.
Why Create Custom Widget Area?

There are many reasons for creating custom widget areas in your theme but the most obvious is to extend your theme functionality to other areas of your site.
You can add a custom widget area in the header, sidebar, posts, pages, and footer. The following are examples of functionality that can be extended to other parts of the site by creating a custom widget area:
- Adding a menu in your theme header
- Adding an Ad in the header
- Adding widget in posts and pages
- Adding footer widgets in themes coded without the widget
These are some goals that you can achieve by creating a custom widget area in different parts of your theme.
Creating a Custom Widget Area in the WordPress Theme
To create this custom widget area you will have to edit two theme files, you will edit the function.php and the file where you want the widget to appear. The following are the steps:
Step 1: Backup Your WordPress Theme
Before you edit any WordPress theme files it is always advisable to ensure you have a copy of your theme files in their original form. This will help you to restore your theme back to your original forms should anything go wrong. Having a backup for your theme cannot be overemphasized it is very important.
Step 2: Enabling or Registering Your Custom Widget area in functions.php
When you have backed up your WordPress theme it is time for you to edit the functions.php file for you to enable your custom widget area.
The following code should be added to your functions.php file replacing the Name and ID of the widgets to those of your choice. In this case, I called it Wangui Widgets and gave it the ID of wangui-widgets. You can also add a custom description for your widgets in my case I added ‘Place Your Widgets Here’
if (function_exists('register_sidebar')) {

     register_sidebar(array(

      'name' => 'Wangui Widgets',

      'id'   => 'wangui-widgets',

      'description'   => 'Place Your Widgets Here',

      'before_widget' => '<div id="one">',

      'after_widget'  => '</div>',

      'before_title'  => '<h2>',

      'after_title'   => '</h2>'

     ));

    }
Where in the functions file should I place this code?
This is another question that might be asked; you should scroll down your functions.php files and look for similar functions codes that have been used to register widgets and add the block of code there.
Alternatively, you should place the code just before the closing tags for the file. In most cases, you don’t have to worry if you have a backup copy of your functions.php file.
Possible Mistakes
There are a number of mistakes that can occur when you are editing your functions.php file especially if you are not good in PHP. You are likely to get parse errors when you don’t close the tags correctly or place the code in the wrong place.
Should you get such an error to replace the code with the backup copy and start all over again, else you can see the error line and try to correct that …(parse error….blah blah ….line XXXX) try to follow the location and correct by closing the tags properly.
Step 3: Call Your Widget in the Template Files
After you have successfully enabled a custom widget area in your functions.php file you should now open the file where you want the widget to appear. If you want it to be in the header you should open header.php for the footer open footer.php for post open single.php and any other template file like comments, page, and sidebar.
In that file you should use the following code to call the widget you registered, please note the name of the widget is still the same in the code below:
<?php if ( !function_exists('dynamic_sidebar') || !dynamic_sidebar('Wangui Widgets') ) : ?> <?php endif; ?>
To create different widget areas or more than one widget area you have to register them in your functions.php file and use the code above to call them anywhere in the WordPress header, footer and in the loop.
You can now go to the widget panel on your dashboard and drag and drop your widget of choice in the custom widget area you created to test and see it working. You can add ad space in the header, footer widget, widget in post and pages or any widget as you wish.
The beauty of this method is the fact that it helps to reduce the bulk of plugins on your website which can either fail or get outdated since you have to rely on third-party providers.

Joe is an experienced full-stack web developer with a decade of industry experience in the LAMP & MERN stacks, WordPress, WooCommerce, and JavaScript – (diverse portfolio). He has a passion for creating elegant and user-friendly solutions and thrives in collaborative environments. In his spare time, he enjoys exploring new tech trends, tinkering with new tools, and contributing to open-source projects. You can hire me here for your next project.
Conclusion
You should try to add custom widget areas anywhere in your WordPress themes for you to tweak themes and create custom themes from scratch for your clients. A custom WordPress widget area allows users to place a widget in the area by drag and drop. It will simplify you every day to day running of multiple clients’ sites.
These custom widget areas are also useful when creating a site for a client who has little programming skills; you just have to teach them how to place the widgets in their areas. If you cannot follow this tutorial or implement it properly please do not hesitate to let me know. Thank you.

Comments are closed.