 Are you looking for a way to add a custom WordPress customizer setting in the WooCommerce section? In today’s tutorial, we will provide you with a simple solution to this problem. We will be using a custom-made code snippet we created specifically for this purpose.
It is important to note that WooCommerce adds its own WordPress customizer section called “WooCommerce”. In this section, you can manage some settings like the checkout fields, product images, store notice, and many more.
However, you might want to add your own settings that you want to be applied to your online store. For example, you might want to include toggle options or type input values.
WooCommerce does not have built-in functionality to do this. Many plugins offer you this functionality, but they end up bloating your site. Therefore, we recommend using code snippets to modify WooCommerce’s core files, as this will not affect the loading speed of your site.
This is why we decided to create this tutorial to help you out.
WooCommerce Add a WordPress Customizer Setting
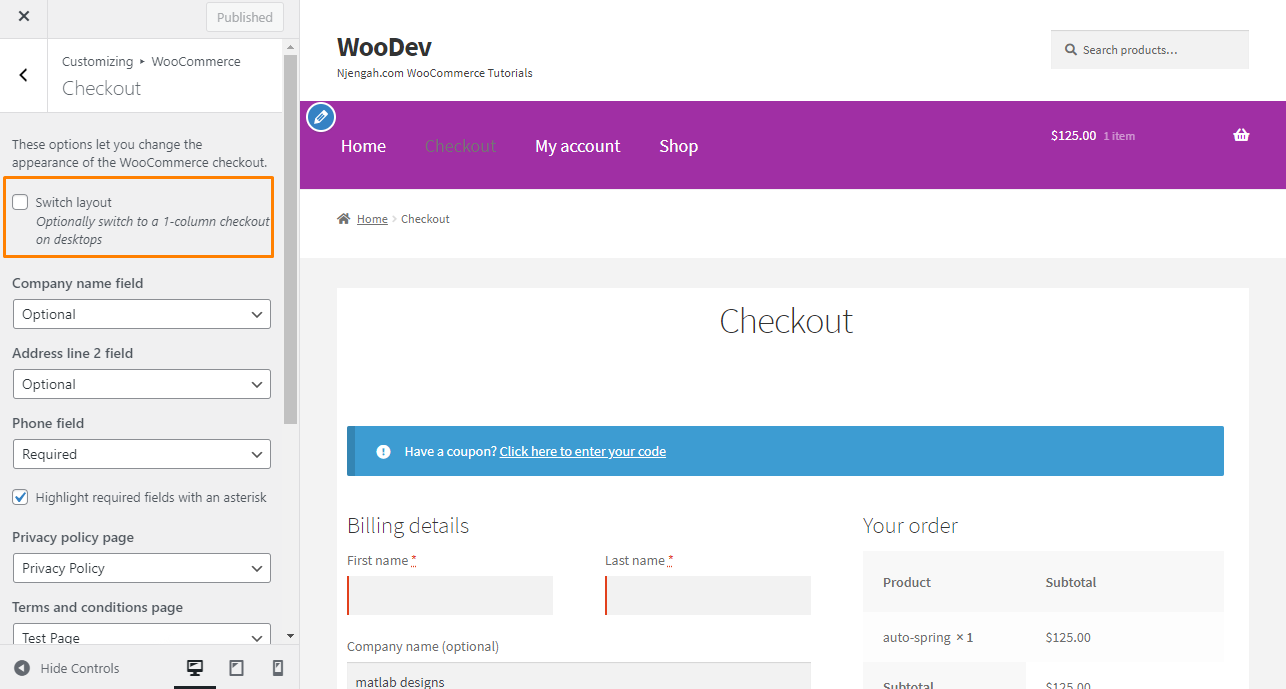
In today’s post, we will share how you can easily add a WordPress customizer setting in the WooCommerce section. For illustration purposes, we will add a checkout page setting, which will switch between 2 columns checkout layout and a 1 column checkout layout.
This means that the billing section will be followed by the order review, which is the normal behavior for mobile phones.
Before you proceed, we recommend installing or creating a child theme. This will ensure that your changes are not lost during an update.
Let us get right into it.
Steps to Add a WordPress Customizer Setting
Here are the simple steps you need to follow:
- Log into your WordPress site and access the Dashboard as the admin user.
- From the Dashboard menu, click on Appearance Menu > Theme Editor Menu. When the Theme Editor page is opened, look for the theme functions file to add the function to add a WordPress Customizer setting in the WooCommerce section.
- Add the following code to the functions.php file:
add_action( ‘customize_register’, ‘njengah_woocommerce_wordpress_customizer_css_option’ );
function njengah_woocommerce_wordpress_customizer_css_option( $wp_customize ) {
$wp_customize->add_setting( ‘woocommerce_checkout_switch_col_layout’, array(
‘default’ => ‘no’,
‘type’ => ‘option’,
‘capability’ => ‘manage_woocommerce’,
‘sanitize_callback’ => ‘wc_bool_to_string’,
‘sanitize_js_callback’ => ‘wc_string_to_bool’,
));
$wp_customize->add_control( ‘woocommerce_checkout_switch_col_layout’, array(
‘label’ => ‘Switch layout’,
‘description’ => ‘Optionally switch to a 1-column checkout on desktops’,
‘section’ => ‘woocommerce_checkout’,
‘settings’ => ‘woocommerce_checkout_switch_col_layout’,
‘type’ => ‘checkbox’,
));
}
add_action( ‘wp_head’, ‘njengah_switch_checkout_cols_css’ );
function njengah_switch_checkout_cols_css() {
if ( true === wc_string_to_bool( get_option( ‘woocommerce_checkout_switch_col_layout’, ‘yes’ ) ) ) {
?>
<style type=”text/css”>
.woocommerce-checkout form .col2-set, .woocommerce-checkout form #order_review, .woocommerce-checkout form #order_review_heading {
width: 100%;
float: none;
clear: none;
padding-left: 0;
padding-right: 0;
}
</style>
<?php
}
}
Wrapping Up
In summary, we have looked at how you can add a custom WordPress customizer setting in the WooCommerce section. It is worth mentioning that you can modify this code to add any functionality you want.
If you are not familiar with handling code, we recommend contacting a qualified WordPress developer. This will ensure that your changes are not lost during an update.
If you need any custom solution for your WooCommerce store, feel free to contact us.
Similar Articles
- WooCommerce Different Prices For Different Countries
- WordPress Convert Post To WooCommerce Product
- How to Get Current WooCommerce Shipping Zone
- How to Add Custom Attribute in WooCommerce
- How to Set WooCommerce Different Sidebar For Each Category
- How to Hide WooCommerce Marketing Hub Admin Option
- How to Add WooCommerce Products to a Page
- How To Edit WooCommerce Checkout Page
- How to Change Coupon Code Placeholder WooCommerce
- How to Translate WooCommerce Checkout Page
- WooCommerce Extra Charges To WooCommerce Checkout
- How to Add CAPTCHA WooCommerce Login
- How to Use WooCommerce to Set Up Online Store
- How to Set Up WooCommerce Buy One Get One
- How to Add WooCommerce Shopping Cart Icon In Menu
- WooCommerce vs Magento: Which Is the Best E-Commerce Platform?
- How to Add WooCommerce Registration Email Verification
- Remove Hash # from WordPress URLs with Simple Trick

