 If you are familiar with WooCommerce, then you know that it is a great option to start an online store. The shopping cart feature stands out compared to other online store platforms. However, it lacks some quite basic functionalities that come out of the box in almost any other eCommerce software, for example a product image on checkout page.
If you view the checkout page you will see that the order review table shows the product title, inventory, and price, but does not display the image for each product. If you are a WooCommerce store owner, you must know that the default checkout page is not that much optimized.
Optimize WooCommerce Checkout Customer Experience
This, therefore, implies that WooCommerce checkout page needs a lot of customization to make it more conversion friendly and increase your conversions.
If you are customizing your customers user experience on WooCommerce checkout, you may also want to checkout this article on how to create WooCommerce redirect after checkout and possibly use this plugin – WooCommerce redirect after checkout plugin to enhance the customer checkout experience.
Default WooCommerce Checkout Page
This is the default look of the Checkout page: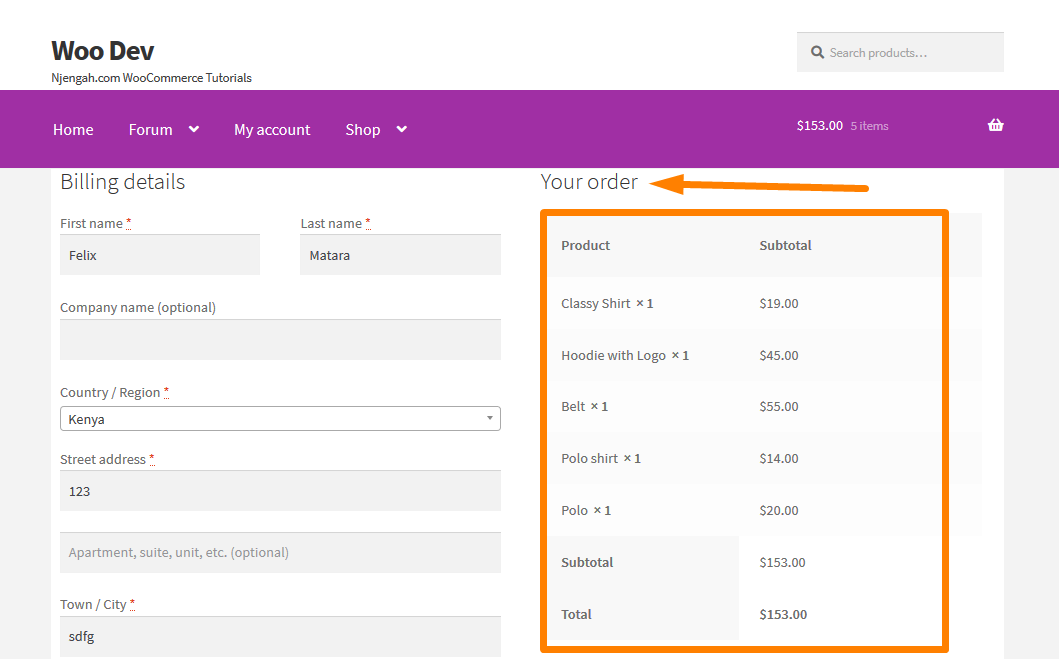
This is where I come in; I will give you an expert solution, which will help you to increase the conversion of the checkout page.
This brief tutorial will show you how to add product image on the checkout page without overriding templates. Some solutions help you to override the template, but this can create conflict with a theme. It can be easily done using a filter.
Steps to Add Product Images on the Checkout Page of your WooCommerce Store.
Here are the steps that you need to follow:
- Log into your WordPress site and access the Dashboard as the admin user.
- From the Dashboard menu, click on Appearance Menu > Theme Editor Menu. When the Theme Editor page is opened, look for the theme functions file where we will add the function that will Show Product Image at Checkout Page.
- Add the following code to the php file:
/**
 * @snippet    WooCommerce Show Product Image @ Checkout Page
*/

add_filter( 'woocommerce_cart_item_name', 'ts_product_image_on_checkout', 10, 3 );

function ts_product_image_on_checkout( $name, $cart_item, $cart_item_key ) {

    /* Return if not checkout page */
    if ( ! is_checkout() ) {
        return $name;
    }

    /* Get product object */
    $_product = apply_filters( 'woocommerce_cart_item_product', $cart_item['data'], $cart_item, $cart_item_key );

    /* Get product thumbnail */
    $thumbnail = $_product->get_image();

    /* Add wrapper to image and add some css */
    $image = '<div class="ts-product-image" style="width: 52px; height: 45px; display: inline-block; padding-right: 7px; vertical-align: middle;">'
                . $thumbnail .
            '</div>';

    /* Prepend image to name and return it */
    return $image . $name;

}
- To see the outcome of this code you need to refresh the checkout page and you should see this:
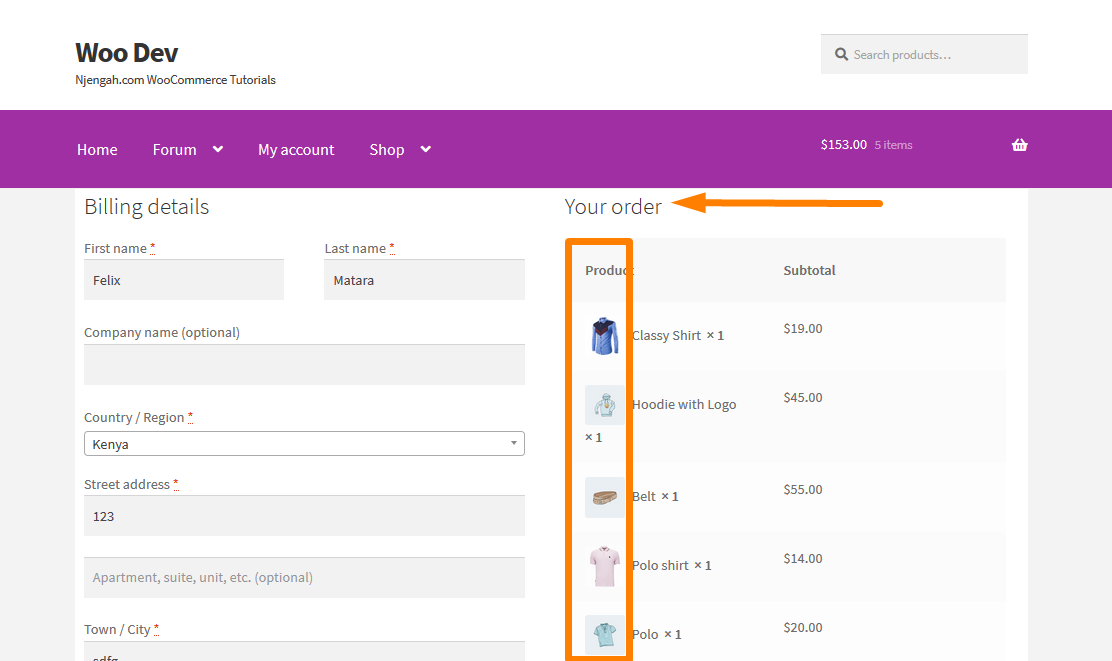
You should now be able to see all the product images as shown above.
Additionally, you may opt to add the images to the order-pay page after users have placed the order. This is the default of the Order Pay Page: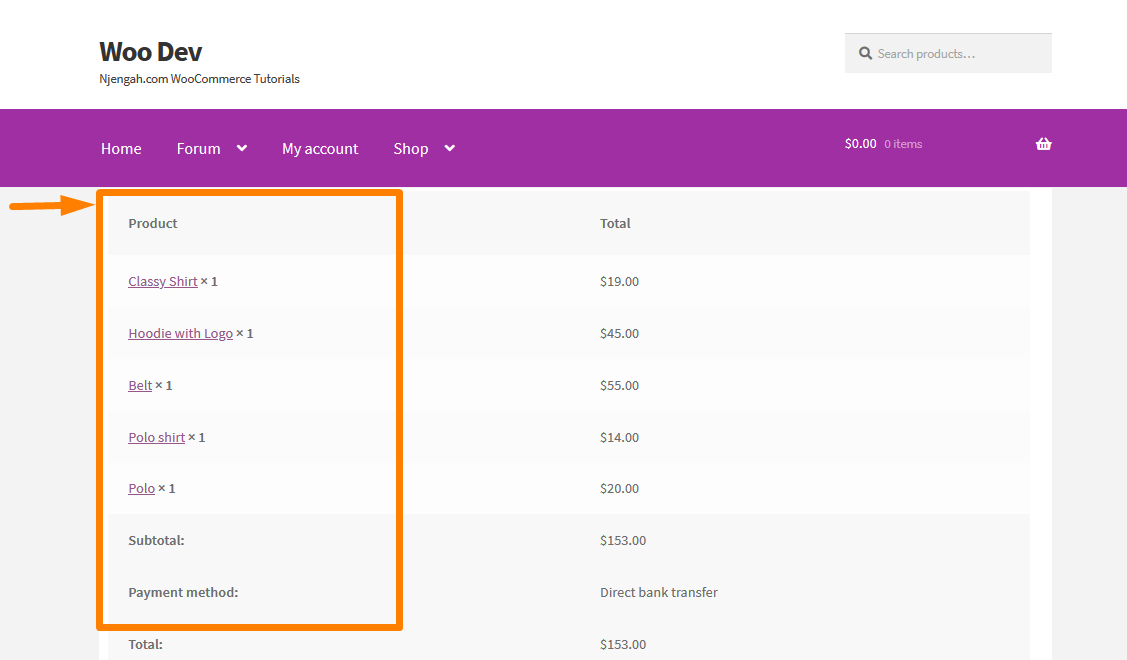
This can be done to optimize the page and users can see an image of what they have purchased, besides the short description. It is very simple to do this and you simply need to follow these steps.
Steps to Add Product Images on the Order Pay Page of your WooCommerce Store.
- Log into your WordPress site and access the Dashboard as the admin user.
- From the Dashboard menu, click on Appearance Menu > Theme Editor Menu. When the Theme Editor page is opened, look for the theme functions file where we will add the function that will Show Product Image at Order Pay Page.
- Add the following code to the php file:
/**
* @snippet       WooCommerce Show Product Image @ Order-Pay Page
*/

add_filter( 'woocommerce_order_item_name', 'ts_product_image_on_order_pay', 10, 3 );

function ts_product_image_on_order_pay( $name, $item, $extra ) {

/* Return if not checkout page */

if ( ! is_checkout() ) {

return $name;

}

$product_id = $item->get_product_id();

/* Get product object */

$_product = wc_get_product( $product_id );

/* Get product thumbnail */

$thumbnail = $_product->get_image();

/* Add wrapper to image and add some css */

$image = '<div class="ts-product-image" style="width: 52px; height: 45px; display: inline-block; padding-right: 7px; vertical-align: middle;">'

. $thumbnail .

'</div>';

/* Prepend image to name and return it */

return $image . $name;

}
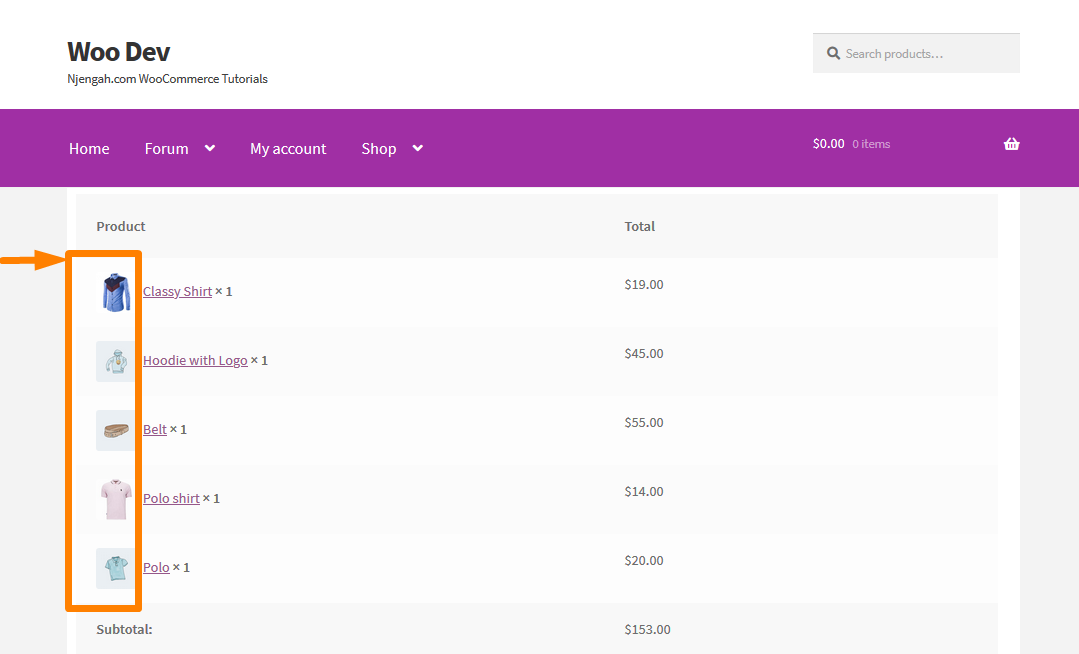
- To see the outcome of this code you need to refresh the Order Pay page and you should see this:
Conclusion
In this post, I have highlighted two areas where you can add the product image, which is the Order Pay page and the Checkout page. I do not recommend overriding the theme, as this can create conflict with a theme. It is advisable to use a filter to do this as shown in the simple steps above.
Similar Articles
- 23 Best WooCommerce Plugins for Checkout Page Customization
- How to Set Featured Products In WooCommerce
- How to Add Custom WooCommerce Payment Icons Checkout Page
- How to Display WooCommerce Products By Category
- How to Change PayPal Icon On WooCommerce Checkout Page
- How to Remove Has Been Added to Your Cart Message WooCommerce
- WooCommerce Redirect after Checkout : How to Automatically Redirect to a Custom Page After Checkout
- How to Remove Default Product Sorting WooCommerce
- How to Resize WooCommerce Product Images
- How to Add GTIN Numbers On Products In WooCommerce
- How to Hide All Products From Shop Page in WooCommerce
- How to Sort WooCommerce Categories for Better User Experience
- How to Sell Digital Products With WooCommerce
- How to Hide the WooCommerce Coupon Code Field
- How to Hide PayPal Icon on WooCommerce Checkout Page
- How to Remove the Billing Details from WooCommerce Checkout
- How to Skip Cart and Redirect to Checkout Page WooCommerce
- How to Change Checkout Button Text in WooCommerce [Place Order]
- How to Check If Plugin is Active In WordPress [ 3 WAYS ]
- How to Add Remove Icon to WooCommerce Checkout Page
Comments are closed.