 Do you want to add a new column on the WooCommerce order page? By default, WooCommerce provides you with an order page. This page contains all the details of the orders made by customers in your store.
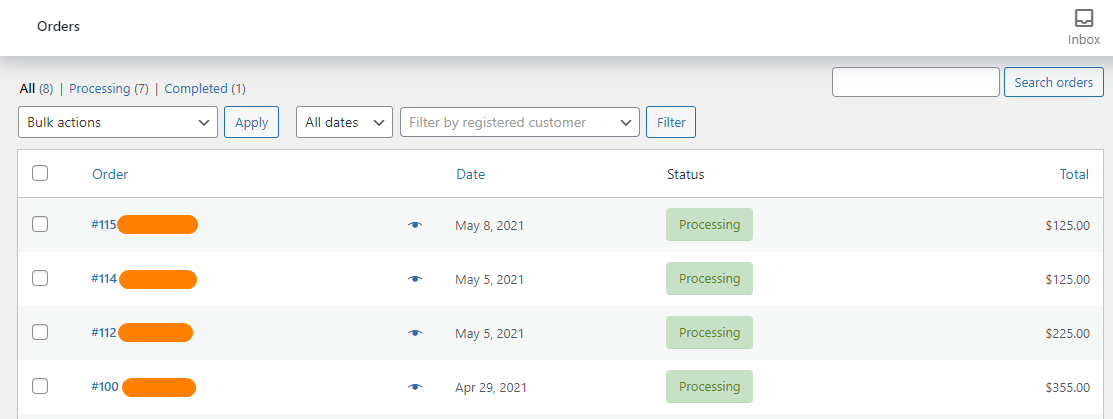
Four columns are displayed on this page. Let us look at each of them. You can skip this section if you know these columns.
Columns on WooCommerce Orders Page
The first column is the status column. It shows you the status of the orders that have been placed by the customers on your WooCommerce store.
It could be either Pending Payment, Processing, On hold, Completed, Cancelled, Refunded, or Failed. The order statuses are denoted by a different icon.
The order column displays the order number, customer name, and email address. The date column displays when the order was made.
The last column is the totals column.
In this post, we will show you how you can add a new column to this page.
Let us see how you can achieve this.
Steps to Add a New Column to the Orders Page
This is how the orders page is displayed on the back end:
Here are the simple steps that you need to follow:
- Log into your WordPress site and access the Dashboard as the admin user.
- From the Dashboard menu, click on Appearance Menu > Theme Editor Menu. When the Theme Editor page is opened, look for the theme functions file where we will add the function that will add a new column on the orders page.
- Add the following code to the php file:
function MY_COLUMNS_FUNCTION( $columns ) {
$new_columns = ( is_array( $columns ) ) ? $columns : array();
unset( $new_columns[ ‘order_actions’ ] );
//edit this for your column(s)
//all of your columns will be added before the actions column
$new_columns[‘MY_COLUMN_ID_1’] = ‘MY_COLUMN_1_TITLE’;
$new_columns[‘MY_COLUMN_ID_2’] = ‘MY_COLUMN_2_TITLE’;
//stop editing
$new_columns[ ‘order_actions’ ] = $columns[ ‘order_actions’ ];
return $new_columns;
}
[/php]
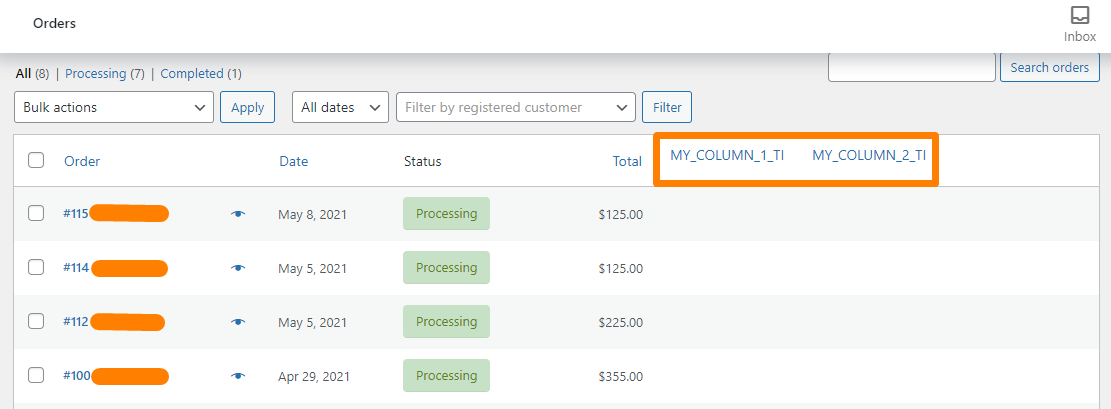
- This is the outcome:

- The next step is to make the new columns sortable. Sorting the new column items means being able to arrange the items that will be displayed on those new columns. To do this, add the following code in the same file:
function MY_COLUMNS_SORT_FUNCTION( $columns )
{
$custom = array(
‘MY_COLUMN_ID_1’ => ‘MY_COLUMN_1_POST_META_ID’,
‘MY_COLUMN_ID_2’ => ‘MY_COLUMN_2_POST_META_ID’
);
return wp_parse_args( $custom, $columns );
}
[/php]
- The last step is to look at how to make those created new columns have custom fields. The custom fields will allow the admin to add additional information to an order. To achieve this, add the following code to the same file:
function MY_COLUMNS_VALUES_FUNCTION( $column ) {
global $post;
$data = get_post_meta( $post->ID );
//start editing, I was saving my fields for the orders as custom post meta
//if you did the same, follow this code
if ( $column == ‘MY_COLUMN_ID_1’ ) {
echo ( isset( $data[ ‘MY_COLUMN_1_POST_META_ID’ ] ) ? $data[ ‘MY_COLUMN_1_POST_META_ID’ ] : ” );
}
if ( $column == ‘MY_COLUMN_ID_2’ ) {
echo ( isset( $data[ ‘MY_COLUMN_2_POST_META_ID’ ] ) ? $data[ ‘MY_COLUMN_2_POST_META_ID’ ] : ” );
}
}
[/php]
- This is the outcome:
Conclusion
In this brief tutorial, we have shared how you can create a new column on the orders page. We recommend that you create a child theme so that your changes are not lost during an update.
You should also be careful when editing the functions.php file. If you make any mistake, a critical error will be displayed on your site.
Similar Articles
- WooCommerce Redirect After Checkout : Redirect to Custom Thank You Page
- 100+ Tips, Tricks & Snippets Ultimate WooCommerce Hide Guide
- How to Set Up WooCommerce Upload File on Checkout
- How to Change Coupon Code Placeholder WooCommerce
- How to Create Custom Order Received Page WooCommerce
- How to Import Products WooCommerce
- How to Attach PDF Invoice to Email WooCommerce
- How to Auto Approve Orders in WooCommerce
- Styling Specific HTML Table, Row, Columns and Cells
- How to Move Primary Menu Storefront WooCommerce
- How to Style WooCommerce Checkout Page
- How to Add Search to Shop Page In WooCommerce
- How to Customize WooCommerce Product Pages
- How to Select All Except Last Child In CSS » CSS Not Last Child Example
- How to Export Products In WooCommerce
- How to Create Custom Widget Area in WordPress Step by Step
- How to Change Text in WooCommerce Email
- How to Fix WooCommerce Storefront Theme Internal 500 Server Error
- How Get Product ID on Checkout Page Or Order Page In WooCommerce
- How to Add Google Analytics to WooCommerce