 Are you searching for a way to add custom fonts to your WordPress theme? In today’s brief tutorial, we will share the steps you need to follow to add a custom theme using Google fonts.
It is important to note that custom fonts allow you to use a beautiful combination of different fonts on your website. This helps to improve the typography and user experience.
In addition, custom fonts improve the typography and user experience. They improve readability and helps to increase the time users spend on your site.
Before we proceed, it is important to note that if you load too many fonts, they will slow down your website. In this post, we will show you how to load fonts on your website properly. We will be using Google fonts because it is the largest, free, and most commonly used font library available today.
How To Add Custom Fonts To WordPress
Let us get right into it.
Summary Steps
- Steps to Add Google Fonts in WordPress
- How to Apply the Fonts on the Contents
Steps to Add Google Fonts in WordPress
As mentioned earlier, we will be using Google fonts because it has a wide selection. You can choose a particular font from the Google Fonts directory, all you need to do is copy a piece of code and Google will host the font for your website.
The fonts are released as open-source and can be used for any commercial or non-commercial project for free. In addition, it has some analytics to show the most popular fonts by usage across the web.
Here are the simple steps you need to follow:
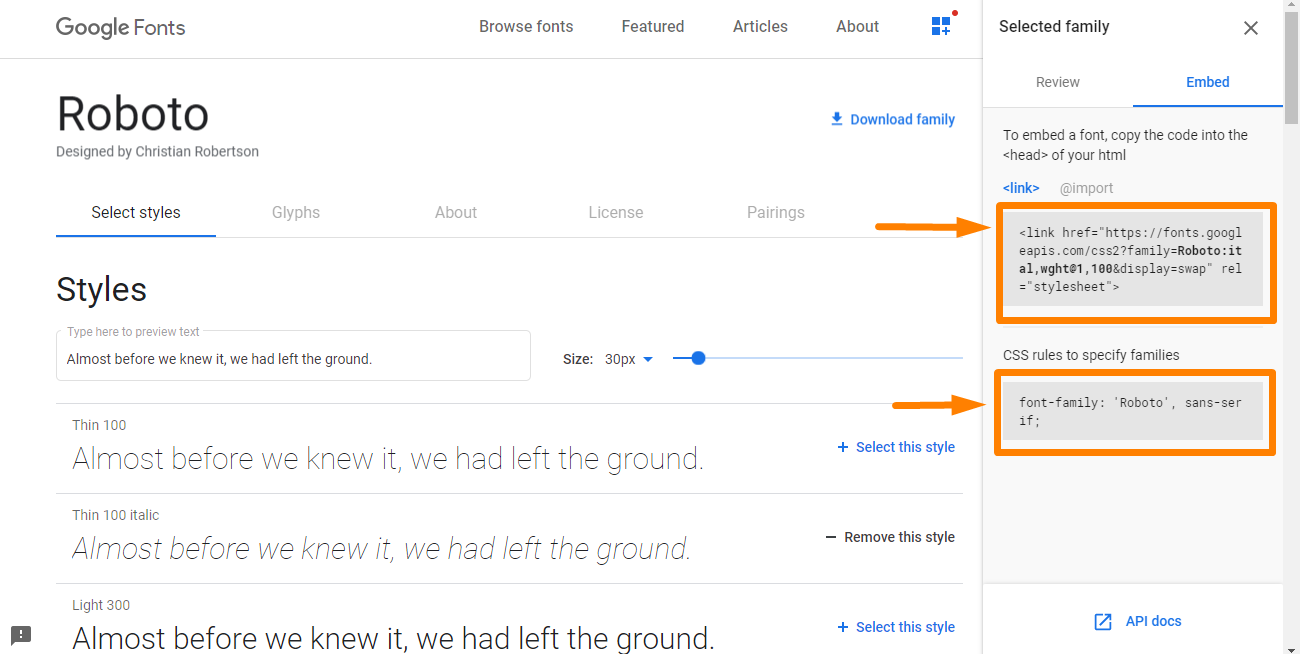
- The first step is to choose the font that you want to embed and select the standard code and copy. You will need to switch to the ‘Embed’ tab in the sidebar to copy the embed code.
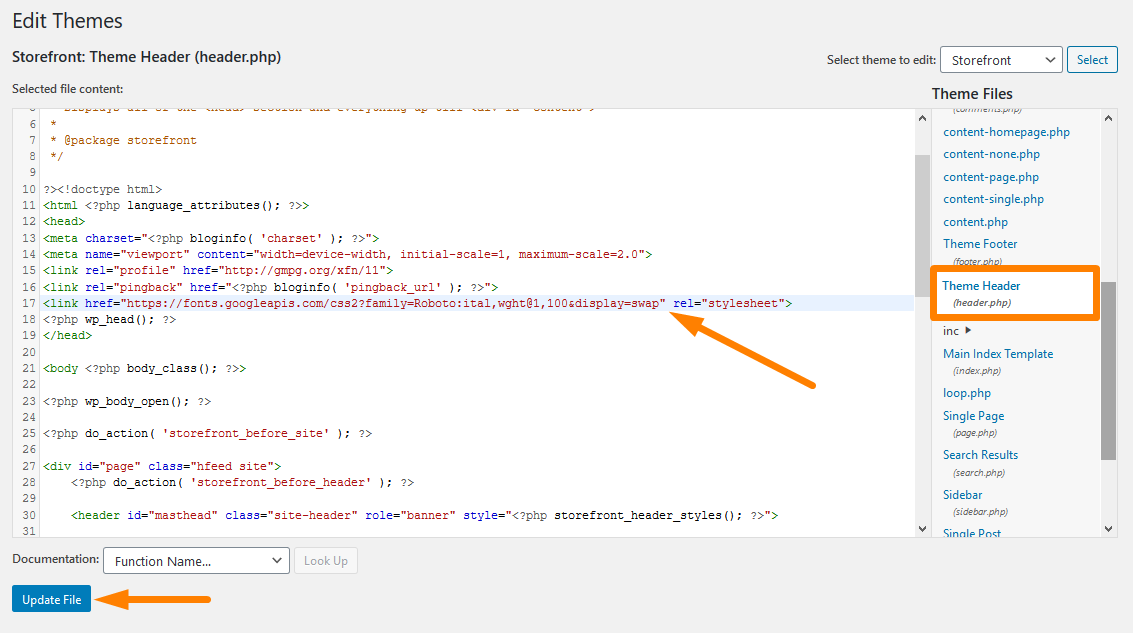
- Once you have copied the code, you can simply edit your theme’s php file and paste the code before the <body> tag. To access this file, navigate to Appearance > Theme Editor and select the theme header file, as shown below:
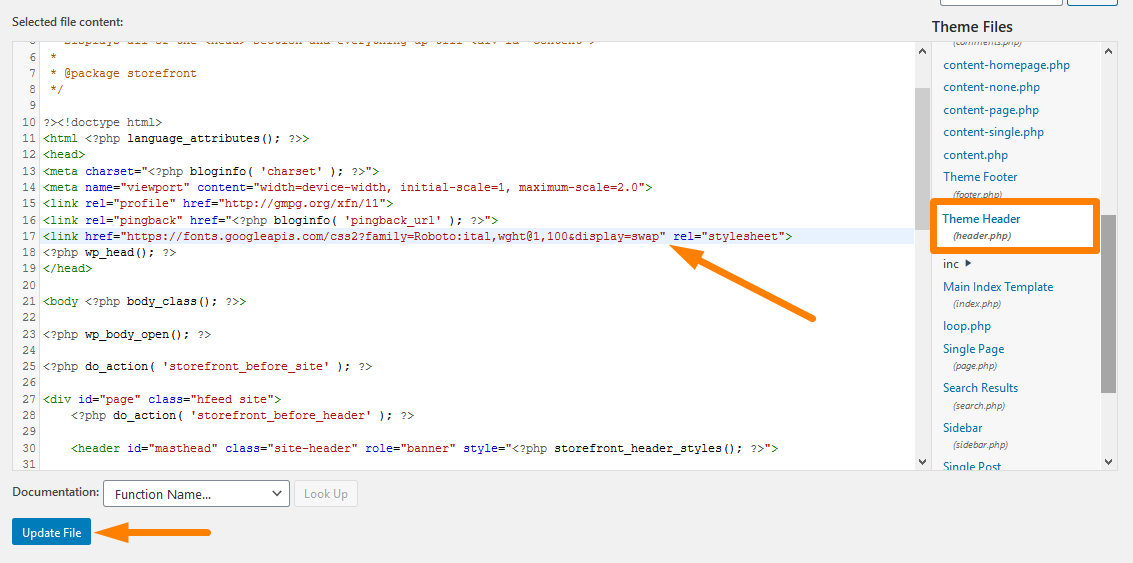
- Once you are done, update the file to save your changes. Your WordPress site is now capable of using the fonts you have selected.
How to Apply the Fonts on the Contents
The final step is to add the font to your CSS for the fonts to be live on your site. You need to add the code below, to replace the default font in Storefront with ‘Open Sans’. All you need to do is replace the font name with the font that you added in the previous section and then paste the code to your child theme’s styles.css.
[php]h1, h2, h3, h4, h5, h6, body, button, input, textarea {
font-family: ‘Open Sans’, sans-serif;
}
[/php]
However, if you want to use a different set of fonts for your headers, use the code below instead. Remember to replace the font name with the fonts that you added.
[php] body, button, input, textarea {font-family: ‘Open Sans’, sans-serif;
}
h1, h2, h3, h4, h5, h6 {
font-family: ‘Slabo 27px’, serif;
}
[/php]
Here is an illustration: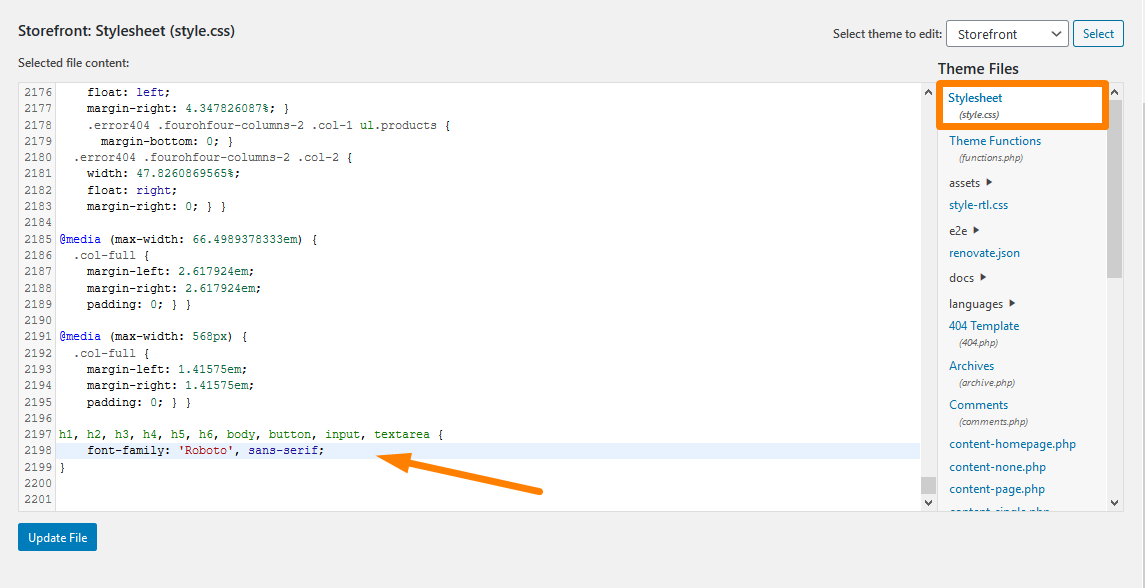
However, you should note that the above codes might not work if you are using a child theme that uses a more specific selector.
This is the site before adding the font:
Here is the Outcome: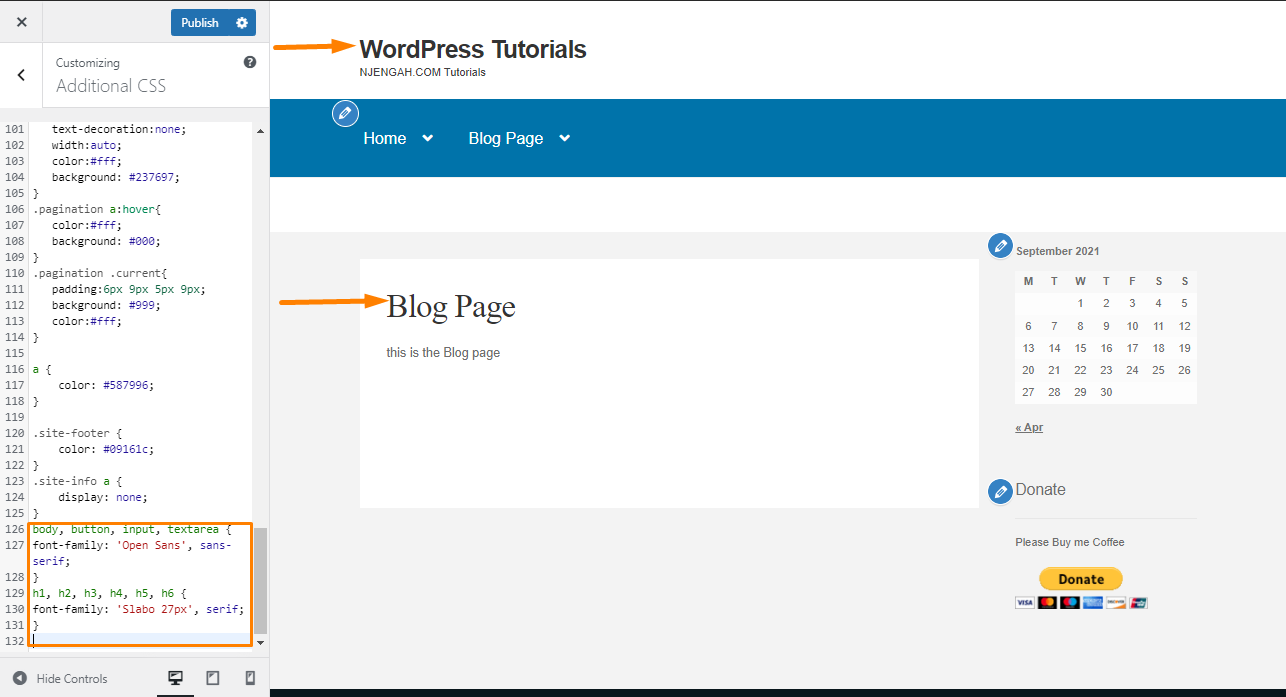
Wrapping Up
In this tutorial, we have shared how you can manually add a custom Google font to your WordPress website. We recommend using Google fonts because they are released as open-source and can be used for any commercial or non-commercial project for free. However, the choice is yours on the type of font that you want to use for your site.